
Subscribe to Our Youtube Channel
Related Manuals for Hawking HPS1P


Summary of Contents for Hawking HPS1P
- Page 2 The HPS1P has a 10/100Mbps auto-sensing port, allowing you to attach it to a 10Base-T or 100Base-TX network without the need for a dedicated PC print server. The HPS1P also supports multiple servers and multiple protocols, providing you with the capability to print from anywhere, from any computer and from any application.
- Page 4 You must use the power adapter shipped along with the print server. Do NOT use any other power adapter from other sources. Please note that your HPS1P hardware is automatically set to a factory default IP address of 192.168.1.250...
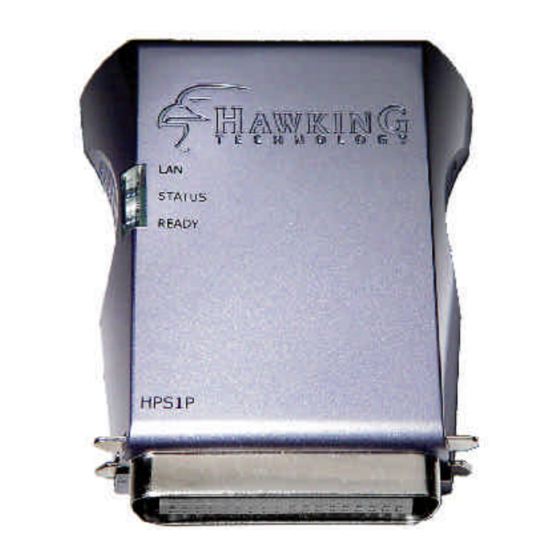
- Page 5 This light will illuminate and flash when the HPS1P detects printer data transmissions over the network. Please note that the Reset button is located on the back of the HPS1P. Hold this button down for more then 5 seconds to reset the print server into factory default mode.
- Page 6 WINDOWS 95/98/ME/NT/2000/XP POWER ON: After you have correctly connected your print server to your PC, router, and printer, please power on all units. Before the installation, please verify that your network protocols (TCP/IP, IPX and/or NetBEUI) and printer drivers are installed on your PC. If they are not installed, please consult your operating system’s and/or printer’s manual(s) for instructions on how to do so.
- Page 7 2. The Hawking Installation Windows manager will pop up on your screen as follows: 3. Click on “Setup Wizard” and the Setup program will proceed to install the Print Server Utility program package.
- Page 8 4. Click “Next” to start the installation of the Print Server Utilities software and Easy Installation Wizard. Click “Next,” to specify the destination folder where the HPS1P utility files will be installed.
- Page 9 Click “Next,” and select the components you wish to install. It is highly recommended to install all provided software utilities and drivers. Click “Next,” to specify the program folder where the program icons will be added.
- Page 10 Click “Next” to start the utility file installation. The “Print Server Utilities” program will finish installing. After this installation is complete, please click on “Finish” to bring up the Easy Setup Wizard.
- Page 11 Once the Setup Wizard is activated, it will make sure you have the necessary components to proceed with installation. Please make sure you have connected your print server to your network via an Ethernet connection, powered up your printer and print server, and have connected the print server to your printer.
- Page 12 10. The “Print Server List” screen will list all available Hawking Technology print servers that the Wizard finds on your Network. Please choose the print server you wish to configure and press “Next.” You may always hit the “Refresh” button to refresh the print server list.
- Page 13 12. Once you have entered your login and password for the selected print server, the “General Settings” page will appear. The General settings windows will allow you to edit the...
- Page 14 following: Print Server Name : Name you wish to give to your print server to make it recognizable. SMB Group Name: The Windows group name you wish to associate your print server with. Please click in the SMB Group Name box for more information. Printer Port and Printer List: Each available printer port and the attached printer to that port will be displayed on this page.
- Page 15 If a DHCP server is present on your network and you would like to use its automatic settings, please select the DHCP option. If there is no DHCP server present, or you are unsure of your DHCP configuration settings, please select the MANUAL IP option.
- Page 16 Summary of Settings Changes This page displays a summary of configuration changes that are going to be saved to the print server. Please press “Save” to reboot the print server and save all modified settings.
- Page 17 15. The next screen allows you to attach your printer to your print server. The “Printer Port Setup” page displays each port’s printer model if detected. If no printers are dis played, please make sure your printer is turned on and connected to the print server.
- Page 18 16. The “Install Printer” pop up window will guide you in installing your printer driver and binding it to your print server. This window gives you two selection options. You may install a new printer driver to your system or you may select your printer driver from the existing list of printer drivers currently on your system.
- Page 19 Once your printer is properly bound to the print server, you will see checkmark by the installed printer indicating a successful installation. Once you have bound your printer to the print server, you may press the “Finish” button to proceed.
- Page 20 17. The final configuration screen will allow you to print a test page using the newly installed print server. Please highlight the appropriate printer and press the “Print Test” button to verify that your print server is properly configured. There may be a short delay the first time you print to the print server. If there is a problem printing the test page, please remove and replace your printer’s power and make sure your Windows printer driver is “online”...
-
Page 21: Mac Os X Installation
Windows compatible software. Give your print server a recognizable IP address that corresponds to your network. For this example, we will use 192.168.1.250 which is the default IP address for the Hawking print server line. Mac Only Environment If you are installing your print server in a “Mac only”... - Page 22 3) Select 'IP Printing' from the upper pop-down (If you have Mac os 10.3, make sure select LPD/LPR). 4) Enter your print server’s IP address: 192.168.1.250 (or whatever your print server is set to) in the 'Printer Address' field. 5) De-select 'Use default queue on server' 6) Enter 'lpt1' as 'Queue Name' if your print server is using the first port.
-
Page 23: Ipp Printing
The IPP (Internet Printing Protocol) provides you with a convenient method for remote printing jobs via the TCP/IP protocol. The HPS1P 10/100M Parallel Print Server can support IPP printing capabilities. It is not necessary to modify any of the print server’s internal settings to use the IPP printing features. - Page 24 To do this, select the “Network Printer” setting as shown in the screen below and click “Next.” Select “Connect to a printer on the Internet or on a home or office network ” and enter the URL of your HPS1P print server. The URL format will be “http://IP:631/LPT_PORT”.
- Page 25 (lpt1) of the IP address 192.168.2.1. After entering the URL of the print server, click “Next ” and complete the remaining configuration settings to access the shared network printer. For advanced configuration options, please refer to your HPS1P manual which is located on the HPS1P Installation CD-ROM.
Need help?
Do you have a question about the HPS1P and is the answer not in the manual?
Questions and answers