
Related Manuals for Loop Telecom AM3440 series

Summary of Contents for Loop Telecom AM3440 series
- Page 1 Loop-AM3440 series TDMoE Card User’s Manual LOOP TELECOMMUNICATION INTERNATIONAL, INC. 8F, NO. 8, HSIN ANN RD. SCIENCE-BASED INDUSTRIAL PARK HSINCHU, TAIWAN Tel: +886-3-578-7696 Fax: +886-3-578-7695...
- Page 2 © 2011 Loop Telecommunication International, Inc. All rights reserved. Version 6 5 AUG 2011...
-
Page 3: Table Of Contents
Table of Content PRODUCTION DESCRIPTION ...................... 1 1.1. Description........................1 1.2. TDMoEthernet ─ Theory of Operation ................. 1 1.2.1. Clock Recovery..................... 2 1.2.2. Bundles ......................... 2 1.3. Application ........................3 1.4. Specifications........................ 5 INSTALLATION..........................7 2.1. Mechanical Installation ....................7 OPERATION ........................... - Page 4 SYSTEM SETUP .......................... 27 7.1. Loopback Setup......................27 7.2. System Setup ......................28 7.2.1. Miscellaneous Setup................... 28 7.2.2. Qos Setup ......................29 7.2.2.1. Class of Service ..................29 7.2.2.1.1. Priority Mode Setup................ 29 7.2.2.1.2. Fixed Priority Setup................ 30 7.2.2.1.3. Vlan CoS Priority Setup ..............30 7.2.2.1.4.
- Page 5 List of Figures Figure 2-1 Front Panel of TDMoE Card ....................7 Figure 4-1 Loopback Diagram ....................... 10 Figure 5-1 VT-100 Menu Tree for TDMoE..................... 13 Figure 5-2 VT100 Menu Tree – SETUP Section ................... 14 Figure 5-3 VT100 Menu Tree – DISPLAY Section ................15 Figure 7-1 Link Aggregation of TDMoE Card ..................
- Page 6 Bitte führen Sie das Gerät am Ende seinerLewbensdauer den zue Verfügung stehended Rückgabeund Sammelsystemen zu. At the end of the product's useful life, please dispose of it at appropriate collection points provided in your country Une fois le produit en fin devie, veuillez le déposer dans un point de recyclage approprié. Para preservar el medio ambiente, al final dela vida útil de su producto, depositelo en los laguares destinado aello de acuerdo con la legislación vigente.
-
Page 7: Production Description
1. PRODUCTION DESCRIPTION 1.1. Description Loop Telecom’s TDMoE plug-in card is designed for the Loop-AM3440 series. TDMoE card is used to transport TDM traffic over IP network, in addition to Ethernet traffic. As the communications network migrates from TDM to IP, the TDMoE card provides a flexible and cost effective choice for the transport of legacy TDM signals. -
Page 8: Clock Recovery
CHAPTER 1 PRODUCTION DESCRIPTION 1.2.1. Clock Recovery Sophisticated TDM clock recovery mechanisms, one for each E1/T1 interface, allow end-to-end TDM clock synchronization, despite packet delay variation of IP/MPLS/Ethernet network. TDMoEthernet supports the following clock recovery modes: • Adaptive clock recovery •... -
Page 9: Application
CHAPTER 1 PRODUCTION DESCRIPTION 1.3. Application TDMoE plug-in card in AM3440 series is to transport TDM traffic (voice signals/E1/ T1/ DTEs/ Ethernet) into IP Traffic. Point to Point Application... - Page 10 CHAPTER 1 PRODUCTION DESCRIPTION Point to Multi-Point Application Remote Management...
-
Page 11: Specifications
CHAPTER 1 PRODUCTION DESCRIPTION Ethernet and QE1/T1 Protection Ethernet Radio Ethernet Radio AM3440-A/B/C AM3440-A/B/C TDMoE TDMoE Master TDMoE and QE1/T1 Master 1+1 protection Slave Slave QE1/T1 QE1/T1 Leased line Backup line 1.4. Specifications Optical SFP Module Characteristic for Gigabit Ethernet(GbE) SFP Optical Direction Data Rate... - Page 12 CHAPTER 1 PRODUCTION DESCRIPTION PTE2D Single bi-directional fiber 1.25G 1550nm LC with DDM 20 Km PTD4D Single bi-directional fiber 1.25G 1310nm LC with DDM 40 Km PTE4D Single bi-directional fiber 1.25G 1550nm LC with DDM 40 Km PTD6D Single bi-directional fiber 1.25G 1310nm LC with DDM...
-
Page 13: Installation
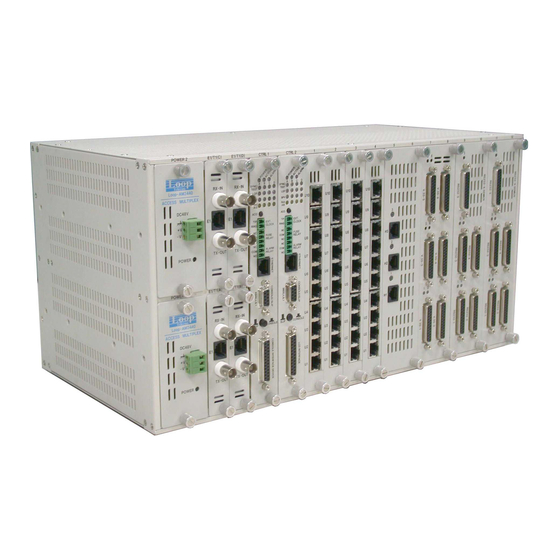
CHAPTER 2 INSTALLATION 2. INSTALLATION 2.1. Mechanical Installation The TDMoEthernet card can be plugged into any of the available full size slots in the AM3440 chassis. Figure 2-1 Front Panel of TDMoE Card... -
Page 14: Table 2-1 Ethernet Function Table
CHAPTER 2 INSTALLATION The front panel is shown in Figure 2-1. Pin definition and pin connection of the console port are listed in the following tables. NOTE: If you see protruding screw heads on the slot 3 of CHB or slot 5 of CHC as shown in the figure below, do not plug the TDMoE card into these two locations because the card might be damaged. -
Page 15: Operation
CHAPTER 3 OPERATION 3. OPERATION 3.1. Alarm When the TDMoE card reports an alarm condition, such as loss of synchronization, the ALARM will cause the LED on the front panel to light. Each alarm can be individually enabled or disabled. The alarm types are listed in the table as below. -
Page 16: Maintenance
CHAPTER 4 MAINTENANCE 4. MAINTENANCE 4.1. Near End Loopback The near end loopbacks such as backplane loopback, payload loopback, local loopback, and line loopback, are activated by the TDMoE. The loopbacks are at the near end facility. The following paragraph describes each loopback in detail. 4.1.1. -
Page 17: Terminal Operation
CHAPTER 5 TERMINAL OPERATION 5. TERMINAL OPERATION The TDMoE provides comprehensive report and configuration capability through the console port. By using single-character commands and arrow keys, the TDMoE can be configured and monitored through the use of a VT-100 terminal. The single-character commands are not case sensitive, except for when using a password. - Page 18 CHAPTER 5 TERMINAL OPERATION After choosing the appropriate slot, the Port Menu will appear for the TDMoE card. You will see DISPLAY and LOG sections on the main menu. SLOT 2 TDMoE === Port Menu === 11:30:59 05/24/2010 FPGA Version: Ver.A OSC Type: TCXO Software Version: V1.01.02 05/03/2010 [DISPLAY]...
-
Page 19: Figure 5-1 Vt-100 Menu Tree For Tdmoe
CHAPTER 5 TERMINAL OPERATION VT100 Main Menu Overview [DISPLAY] [SETUP] 15-Min/1-Hr/7 Days Perf. Report LoopBack Setup > > System Setup 15-Min/1-Day Perf. Report > > Time Slot IP Assignment System Configuration > > Alarm Setup All Time Slot Assignment > >... -
Page 20: Figure 5-2 Vt100 Menu Tree - Setup Section
CHAPTER 5 TERMINAL OPERATION Figure 5-2 VT100 Menu Tree – SETUP Section... -
Page 21: Figure 5-3 Vt100 Menu Tree - Display Section
CHAPTER 5 TERMINAL OPERATION Figure 5-3 VT100 Menu Tree – DISPLAY Section... -
Page 22: System Status
CHAPTER 6 SYSTEM STATUS 6. SYSTEM STATUS This chapter shows the DISPLAY section on VT100 Main Menu. This is where you can get the information about current system status. You can also check your settings here after you do the setup configuration in the SETUP section. -
Page 23: 15-Min/1-Day Perf. Display
CHAPTER 6 SYSTEM STATUS 6.2. 15-Min/1-Day Perf. Display Command Path Main Menu > (2) 15-Min/1-Day Perf. Report Function Display the 15-Min/1-Day performance report Table 6-2 24-Hour Perf. Display Field Setting Options Default Register Port Trib1~4 Trib1 Register Bundle 00~31 00~24 Register Parameter Rx-Lost, J-UR, J-OR Rx-Lost... -
Page 24: Miscellaneous Display
CHAPTER 6 SYSTEM STATUS 6.3.1. Miscellaneous Display Command Path Main Menu > (C) System Configuration > (A) Miscellaneous Display Description Display the active bundle time, alarm filter, and delay switch time 6.3.2. QoS Display Command Path Main Menu > (C) System Configuration > (C) QoS Display Description There are three options you can select from the QoS Display: (A) Class of Service (B) Transmission Scheduling (C) Rate... -
Page 25: Flow Control
CHAPTER 6 SYSTEM STATUS (C) WRR Weight Display. 6.3.2.2.1. Flow Control Command Path Main Menu > (C) System Configuration > (C) Qos Display > (B) Transmission Scheduling > (A) Flow Control Display Description Display the state of flow control for Ethernet 1~4 6.3.2.2.2. -
Page 26: Rstp Display
CHAPTER 6 SYSTEM STATUS 6.3.6. RSTP Display Main Menu > (C) System Configuration > (R) RSTP Display Command Path Description You will see actions RSTP, ETH1, ETH2, ETH3 and ETH4 at the button of the screen. Use arrow keys to select the action you need, then, press Enter to show the detail information of the action you choose. -
Page 27: Tributary Display
CHAPTER 6 SYSTEM STATUS 6.3.7. Tributary Display Main Menu > (C) System Configuration > (T) Tributary Display Command Path Description There are two options you can select from the Tributary Display: (A) Tributary Mode Display and (B) Tributary Display. 6.3.7.1. Tributary Mode Display Command Path Main Menu >... -
Page 28: Time Slot Ip Configuration
CHAPTER 6 SYSTEM STATUS All Time Slot Assignment Screen: SLOT 2 TDMoE === All Time Slot Assignment === 15:21:03 01/07/2010 P BID UDP Format Cell Jit-Tol Jit-Buf Dest. IP Address = === ===== ====== ==== ======= ======= ================ AAL1 001.001.001.002 <<... -
Page 29: Bundle Ip Display
CHAPTER 6 SYSTEM STATUS << Press ESC key to return to previous menu >> 6.5.3. Bundle IP Display Command Path Main Menu > (H) Time Slot IP Configuration > (C) Bundle IP Display Description Display the Source IP address, subnet mask, and gateway IP 6.5.4. -
Page 30: Mac Address Display
CHAPTER 6 SYSTEM STATUS Ethernet Port Statistics Screens: Use arrow keys to select an action and press Enter: SLOT 2 TDMoE === Ethernet Port Statistics === 16:33:58 12/30/2009 Select Action >> *ETH1 ETH2 ETH3 ETH4 Then you will see the traffic statistics for the port you select listed as below: SLOT 2 TDMoE === Traffic Statistics === 18:19:13 01/05/2010... -
Page 31: Bundle Status
CHAPTER 6 SYSTEM STATUS << ESC key to return to previous menu, SPACE bar to refresh >> 6.6.4. Bundle Status Command Path Main Menu > (N) Status & Statistics > (D) Bundle Status Description Display whether the bundle is active or inactive Bundle Status Screen: SLOT 2 TDMoE === Bundle Status ===... -
Page 32: Sfp Status
CHAPTER 6 SYSTEM STATUS 6.6.6. SFP Status Command Path Main Menu > (N) Status & Statistics > (G) SFP Status Description You will see selections ETH1 and ETH2 at the button of the screen. Use arrow keys to select the action you need, then, press Enter to show the detail information of the action you choose. -
Page 33: System Setup
CHAPTER 7 SYSTEM SETUP 7. SYSTEM SETUP This chapter introduces setup procedures of TDMoE. This includes loopback setup, system setup, time slot IP assignment, alarm setup, clear alarm history, clear performance data, and firmware upgrade. Please go to the SETUP section in the main menu to find the part you want to operate. 7.1. -
Page 34: System Setup
CHAPTER 7 SYSTEM SETUP Table 7-1 Loopback Setup Field Setting Options Default Near-End Loopback OFF, Backplane, PLB, LLB, Local LB Port Trib1~4 Trib1 LB MAP CH01~CH32 CH01~CH24 7.2. System Setup Command Path Main Menu > (S) System Setup Function In System Setup section, you can change the original system configuration. -
Page 35: Qos Setup
CHAPTER 7 SYSTEM SETUP Delay Switch When alarm is issued in the primary line, the configured time is the waiting time to activate the switching protection (switch from the primary line to the backup line). Recover Delay It’s the delay switch for the backup line to switch back to the Master one when the Master line recovers from link failure. -
Page 36: Fixed Priority Setup
CHAPTER 7 SYSTEM SETUP When the configuration is successfully changed, the screen will return to the previous menu. 7.2.2.1.2. Fixed Priority Setup Command Path Main Menu > (S) System Setup > (C) QoS Setup > (A) Class of Service > (B) Fixed Priority Setup Function Enables users to change the transmission priority of each port Description... -
Page 37: Tos Field Priority Setup
CHAPTER 7 SYSTEM SETUP SLOT 2 TDMoE === Vlan Cos Priority Setup === 13:18:47 12/31/2009 ARROW KEYS: CURSOR MOVE, TAB: ROLL OPTIONS Cos priority Transmission priority NOTE: Priority:P3 > P2 > P1 > P0 << Press ESC key to return to previous menu >> After you choose the transmission priority for each tag priority, press Esc. -
Page 38: Transmission Scheduling
CHAPTER 7 SYSTEM SETUP When the configuration is successfully changed, the screen will return to the previous menu. 7.2.2.2. Transmission Scheduling Command Path Main Menu > (S) System Setup > (C) Qos Setup > (B) Transmission Scheduling Description There are four options you can select from the Class of Service: (A) Flow Control Setup (B) Scheduling Algorithm (C) WRR Weight Setup. -
Page 39: Wrr Weight Setup
CHAPTER 7 SYSTEM SETUP Main Menu > (S) System Setup > (C) Qos Setup > (B) Command Path Transmission Scheduling > (B) Scheduling Algorithm Function Enables users to change the scheduling method for each port Description Scheduling Algorithm: SP: depends on the hierarchy of the transmission priority. P3 is the highest, and P0 is the lowest WRR: depends on the weight of each priority Table 7-8 Scheduling Algorithm... -
Page 40: Rate Control Setup
CHAPTER 7 SYSTEM SETUP ARROW KEYS: CURSOR MOVE, Please Input: 0~100, BACKSPACE to edit P0 queue P1 queue P2 queue P3 queue Weight: 007% 013% 027% 053% NOTE: The sum of weights must equal 100 << Press ESC key to return to previous menu >> After you enter new WRR Weight for each queue, press Esc. -
Page 41: Ethernet Port Setup
CHAPTER 7 SYSTEM SETUP When the configuration is successfully changed, the screen will return to the previous menu. 7.2.3. Ethernet Port Setup Command Path Main Menu > (S) System Setup > (E) Ethernet Port Setup Function Enables users to change state, auto negotiation, speed, and duplex for each port Description You will see selections ETH1, ETH2, ETH3, and ETH4 at the... -
Page 42: Ethernet Switch Setup
CHAPTER 7 SYSTEM SETUP Electrical [ETH1] Port Status : Enable Auto Negotiation: Enable Speed : 10Mbps Duplex : Half << Press ESC key to return to previous menu >> NOTE: If Auto Negotiation is Enable, then there is no need to setup Speed and Duplex. If both local and remote devices configure Auto Negotiation as Disable, then configurations of Speed and Duplex for both devices should be the same. - Page 43 CHAPTER 7 SYSTEM SETUP Age Time: 0000300 NOTE: Setting the age time to zero disables the aging process. Aging time must be a multiple of 15 << Press ESC key to return to previous menu >> If you select MAC address, you’ll first have to choose from two actions: Add (add a new static address) or Del (delete a port or a static address).
-
Page 44: Link Aggregation Setup
CHAPTER 7 SYSTEM SETUP 7.2.5. Link Aggregation Setup Command Path Main Menu > (S) System Setup > (P) Link Aggregation Setup Function Enables users to change the state of Trunk1 and Trunk 2 for the link aggregation Description Link Aggregation Setup: Disable: disable the link aggregation function Leader_ETH1~4: the trunk group’s configuration depends on the leader port’s setting... -
Page 45: Rstp Configuration Setup
CHAPTER 7 SYSTEM SETUP Figure 7-1 Link Aggregation of TDMoE Card Redundancy Link Aggregation implicitly provides redundancy, yet it is not a truly port backup function of a TDMoE card. For example, If 160 Mbps of data are transmitting over the trunk group, which implies each of the two ports forwards 80 Mbps respectively. - Page 46 CHAPTER 7 SYSTEM SETUP RSTP Configuration Screens: When you enter this section, you will first see the RSTP Configuration menu. Use arrow keys to select the action you need. SLOT 2 TDMoE === RSTP Setup === 15:58:41 12/31/2009 Select Action >> *RSTP ETH1 ETH2 ETH3 ETH4 Press Enter key.
-
Page 47: Table 7-17 Rstp Configuration
CHAPTER 7 SYSTEM SETUP Table 7-17 RSTP Configuration Field Setting Options Default RSTP state OFF, STP, RSTP When RSTP state is RSTP Priority 0~65534 32768 Hello time (sec.) 1~10 Maximum age (sec.) 6~40 Forward delay (sec.) 4~30 After you change the RSTP state, priority, hello time, maximum age, and forward delay, press ESC. A prompt will ask if you wish to change configuration. -
Page 48: Tributary Setup
CHAPTER 7 SYSTEM SETUP assigned to ports with slower media. Link type Defines the link type attached to this interface: Auto: device automatically determines if the interface is attached to a point-to-point link or to shared media. This feature is applicable only for RSTP. P-to-p: connection to exactly one other bridge Shared: connection to two or more bridges Edge port... -
Page 49: Table 7-21 Tributary Configuration Setup (Trib1, Trib2, Trib 3, Trib4)
CHAPTER 7 SYSTEM SETUP Tributary Setup Screens: When you enter this section, you will first see the Tributary Setup menu. Use arrow keys to select the action you need. SLOT 2 TDMoE === Tributary Setup === 16:21:41 12/31/2009 Select Action >> *Trib1 Trib2 Trib3 Trib4 Press Enter key. -
Page 50: Time Slot Ip Assignment
CHAPTER 7 SYSTEM SETUP 7.3. Time Slot IP Assignment Command Path Main Menu > (T) Time Slot IP Assignment Description There are four options you can select from the Time Slot IP Assignment: (A) Bundle Allocation Setup (B) Time Slot Assignment Setup (C) Bundle IP Setup (D) Time Slot IP Assignment. -
Page 51: Bundle Ip Setup
CHAPTER 7 SYSTEM SETUP Time Slot Assignment Setup Screen: SLOT 2 TDMoE === Time Slot Assignment Setup 18:31:33 01/05/2010 ARROW KEYS: CURSOR MOVE, TAB: ROLL OPTIONS Port:Trib1 TS0 : Idle TS16: Idle TS1 : Idle TS17: Idle TS2 : Idle TS18: Idle TS3 : Idle TS19: Idle... - Page 52 CHAPTER 7 SYSTEM SETUP Time Slot IP Assignment Screens: There are two unframed modes for user to choose: AAL1 and SAToP. AAL1: SLOT 2 TDMoE === Time Slot IP Assignment === 14:08:55 01/04/2010 ARROW KEYS: CURSOR MOVE, TAB: ROLL OPTIONS Port : Trib1 Bundle ID...
-
Page 53: Table 7-25 Time Slot Ip Assignment
CHAPTER 7 SYSTEM SETUP << Press ESC key to return to main menu or save system setup >> After configured it, press “Y” or “N” to confirm it. are you sure [Y/N] ? After confirming to save the configuration, the screen will be shown as below: SLOT 2 TDMoE === Time Slot IP Assignment === 09:00:43 01/06/2010... -
Page 54: Alarm Setup
CHAPTER 7 SYSTEM SETUP Bundle, Activate All, Stop Tx Bundle Confirm Yes, No Note: 1. There are 4 ports to have UDP number from 1 to 65535. If one port gets UDP number such as 100, another port cannot use the same UDP number. 2. -
Page 55: Clear Alarm History
CHAPTER 7 SYSTEM SETUP Alarm Setup Screen: SLOT 2 TDMoE === Alarm Setup === 09:24:53 01/04/2010 ARROW KEYS: CURSOR MOVE, TAB: ROLL OPTIONS [Type] [Alarm] [Threshold] ARP/bundle DISABLE 00001 Rx-Lost/bundle DISABLE 00001 Cell-Lost/bundle DISABLE 00001 Underrun/bundle DISABLE Overrun/bundle DISABLE Ethernet Link Down DISABLE <<... -
Page 56: Clear Performance Data
CHAPTER 7 SYSTEM SETUP 7.6. Clear Performance Data Command Path Main Menu > (X) Clear Performance Data Function Enables users to clear performance data Clear Performance Data Screen: To clear alarm history, press X from the port menu. A prompt will ask if you are sure you want to clear the performance data. -
Page 57: Table 7-27 Download Firmware
CHAPTER 7 SYSTEM SETUP Table 7-27 Download Firmware Field Setting Options Default TFTP Server IP Setup by User 000.000.000.000 Firmware File Name Blank... -
Page 58: Appendix A: Quality Of Service (Qos) Setup
CHAPTER 8 Appendix A: Quality of Service (QoS) Setup 8. APPENDIX A: QUALITY OF SERVICE (QOS) SETUP 8.1. Overview This chapter provides a more detailed explanation on Quality of Service (QoS) and Scheduling Algorithm. QoS is a control mechanism with the ability to provide different priorities to different data flows and to ensure a corresponding level of performance to each data flow. -
Page 59: Qos For Ingress Traffic - Writing Data From Ethernet Interface To Its Queues
CHAPTER 8 Appendix A: Quality of Service (QoS) Setup 8.2.1. QoS for Ingress Traffic – Writing Data From Ethernet Interface To Its Queues In IP Networks, Quality of Service (QoS) serves as an essential role to guarantee the transmission quality of service of the packets in a Best-Effort environment. Real-time video and voice data, for example, require larger bandwidth and smaller transmission delay variation than e-mail service. -
Page 60: Cos Priority Setup
CHAPTER 8 Appendix A: Quality of Service (QoS) Setup One thing should be noticed. If the priority mode of ETH4 is set as CoS or ToS, for instance, and then you go on to configure its Fixed priority, the system will ignore the setting of Fixed Priority. This is because that if you set the priority mode of an interface as CoS or ToS, the next step is to perform the VLAN CoS priority setup or ToS field priority setup rather than Fixed Priority, and both CoS and ToS are introduced in succeeding sections. -
Page 61: Scheduling Algorithm For Ingress Traffic - Reading Data From Queues To Tdm
CHAPTER 8 Appendix A: Quality of Service (QoS) Setup Type of Service (ToS) is an 8-bit field placed in the IP header to indicate how packets are treated. ToS determines the relationship between priorities of ingress IP packet traffic and queues. The 3 leftmost bits possess a priority value ranging from 0 to 7, which implies the importance of a packet. - Page 62 CHAPTER 8 Appendix A: Quality of Service (QoS) Setup Scheduling > (C) WRR Weight Setup) Weighted Round Robin (WRR): When a port uses the WRR algorithm, the transmission scheduling depends on the weight ratio of each queue. The port will read out data of the 4 queues in a round robin way relying on the configured Weight Ratio.
-
Page 63: Appendix B: 1 + 1 Protection Between Tdmoe And Qe1/T1 Card
CHAPTER 9 Appendix B: 1 + 1 Protection between TDMoE and QE1/T1 Card 9. Appendix B: 1 + 1 Protection between TDMoE and QE1/T1 Card 9.1. Overview TDMoE card supports 1 + 1 protection function with QE1/T1 card, which is illustrated in the figure below. This chapter predominantly provides users with step by step guide for configuring 1 + 1 protection. -
Page 64: Configuring Tdmoe Card
CHAPTER 9 Appendix B: 1 + 1 Protection between TDMoE and QE1/T1 Card 9.2. Configuring TDMoE Card To setup 1 + 1 protection, start with the TDMoE card. Five steps listed in the previous section are to be fulfilled. This section will detail each setup steps. 9.2.1. -
Page 65: Step 3: Configure Bundle Ip
CHAPTER 9 Appendix B: 1 + 1 Protection between TDMoE and QE1/T1 Card of the screen: SLOT 1 TDMoE === Tributary Setup === 15:35:35 08/03/2011 ARROW KEYS: CURSOR MOVE, TAB: ROLL OPTIONS Framing Mode : T1-ESF : Off Remote Loss : Continue NOTE: Send Packet after remote unit is undetected Warning!! If you need to change FRAME and CAS,... -
Page 66: Configure Parameters For Each Bundle
CHAPTER 9 Appendix B: 1 + 1 Protection between TDMoE and QE1/T1 Card TS11: Bundle0 TS12: Bundle0 TS13: Bundle0 TS14: Bundle0 TS15: Bundle0 << Press ESC key to return to previous menu >> To check the time slot assignment setting, users can go to Time Slot Assignment Display (TDMoE Main Menu >... -
Page 67: Configuring Am3440 Controller
CHAPTER 9 Appendix B: 1 + 1 Protection between TDMoE and QE1/T1 Card P BID Format Cell Jit-Tol Jit-Buf Dest. IP Address = === ===== ======= ==== ======= ======= ================ 1 AAL1 192.168.014.200 << ESC key to return to previous menu, SPACE bar to refresh >> 9.3. -
Page 68: Configure Tsi Map
CHAPTER 9 Appendix B: 1 + 1 Protection between TDMoE and QE1/T1 Card (Command Path: TDMoE Main Menu > (S) System Setup > (A) Miscellaneous Setup). 2. 1+1 nonrevertive: After the working line switches from master to backup, it will not shift back to the master even though the master line has recovered. -
Page 69: Configure Clock Source
CHAPTER 9 Appendix B: 1 + 1 Protection between TDMoE and QE1/T1 Card NOTE: To make sure whether the MAP is activated, users can check the Current TSI MAP from the System Main Menu. Command Path: AM3440 Controller Menu > (C) System Configuration > (D) Current TSI MAP LOOP AM3440-A === System Configuration (Current Map) == 15:51:10 08/03/2011 ARROW KEYS: CURSOR MOVE, TAB: ROLL OPTIONS... - Page 70 CHAPTER 9 Appendix B: 1 + 1 Protection between TDMoE and QE1/T1 Card Bundle Status Command Path: TDMoE Main Menu > (N) Status & Statistics > (D) Bundle Status SLOT 1 TDMoE === Bundle Status === 15:44:46 08/03/2011 P BID status = === ======== active <<...
Need help?
Do you have a question about the AM3440 series and is the answer not in the manual?
Questions and answers