
Subscribe to Our Youtube Channel
Related Manuals for ion science CUB


Summary of Contents for ion science CUB
- Page 1 ® Instrument User Manual V2.1 For Sales & Service Contact 2650 E. 40th Ave. • Denver, CO 80205 Phone 303-320-4764 • Fax 303-322-7242 1-800-833-7958 www.geotechenv.com Unrivalled Detection. www.ionscience.com Part number: 871026...
- Page 2 Thank you for purchasing your Ion Science instrument. The standard warranty of your instrument can be extended to up to five years on PhoCheck Tiger and two years on other Ion Science instruments. To receive your extended warranty, you must register your instrument online within one month of purchase ( terms and conditions apply.)
-
Page 3: Warnings
Static Hazards: Do not use abrasive or chemical detergents to clean the Cub instrument as this may reduce the antistatic properties of the materials used, clean it using a damp cloth only. -
Page 4: Declaration Of Conformity
Potentially Explosive Atmospheres – Application of Quality Systems On behalf of Ion Science Ltd, I declare that, on the date this product accompanied by this declaration is placed on the market, the product conforms to all technical and regulatory requirements of the above listed directives. -
Page 5: Table Of Contents
Turning Off ..............................9 Batteries ................................. 9 Using your Cub .............................. 11 Turning the Cub on ............................11 Alarms ................................11 Displaying other Screens and Data ......................12 CubPC software ............................. 15 ... -
Page 6: Statements
Important It is essential that the Cub is always used with a supplied 0.5 micron PTFE Filter Disc fitted to the front of the instrument. Without a filter, particles of debris and dust can be drawn into the detector inhibiting the function of the instrument. -
Page 7: Introduction To Cub
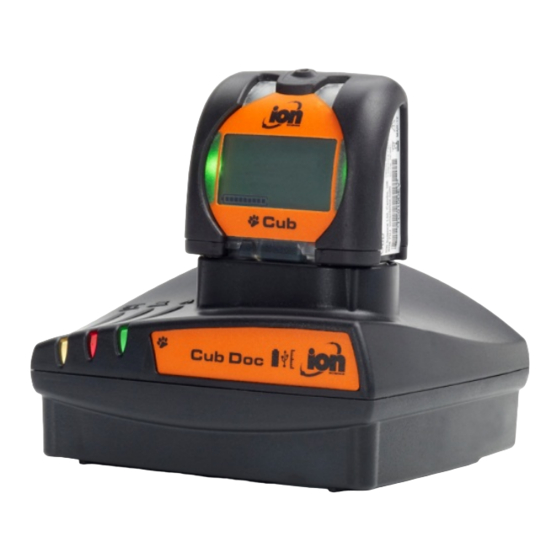
LEDs. Red and Orange LED’s indicate High and Low conditions respectively. The Cub can be used with three types of Cub Docking Stations, these docking stations are for indoor use only, are not Intrinsically Safe so must only be used in a safe area. -
Page 8: Getting Started
Press and hold the button on the top of your Cub for three seconds to turn it on. The Cub will beep when the button is first pressed. A progress bar is shown on the display screen as the unit switches on, with segments being added to it from left to right. -
Page 9: Turning Off
Li-Ion Batteries can be damaged if left in a discharged state. Please recharge Cub if battery indicator is showing empty. Please note also that if Cub is left for one year unused, the instrument needs to be charged fully before it can continue to be kept in storage. Please repeat annually. - Page 10 Ion Science Ltd Introduction to the display screen Battery charge indicator Detected gas level Gas level units (ppm or mg/cm3, depending on how the Cub is configured) “Volatile Organic Compound” This indicates the gas sensor type selected This symbol appears when a STEL or TWA alarm is exceeded If the “TLV”...
-
Page 11: Using Your Cub
The low level alarm symbol will be displayed on the screen. Depending on how the Cub was set up (see Configuring a Cub, below), an alarm may also sound and the unit may vibrate. -
Page 12: Displaying Other Screens And Data
Using your Cub Displaying other Screens and Data Cycle through the different Cub data screens by pressing the button. When a new screen is accessed the display is illuminated with a coloured light which will turn off after a few moments. - Page 13 This is the remote calibration screen, it is via this screen the custom calibration routine is accessed. This allows the Cub to be calibrated in the field using a portable gas supply. Please note: To carry out a remote calibration the Span gas type and concentration must be setup on the configuration screen within CubPC and sent to the Cub instrument.
- Page 14 E- - 5 will be displayed. If this occurs the previous valid calibration levels will be used. At the end of the calibration sequence the Cub will revert to the general VOC / normal running. IMPORTANT: Always check the calibration in normal running before use.
-
Page 15: Cubpc Software
PC communicate – e.g. while any logged data from a connected Cub is transferred to the PC. When this is complete, the USB LED will change to green. - Page 16 CUB MANUAL Ion Science Ltd CubPC software If it is running XP, the Found New Hardware Wizard is started: Click any of the above options as required and then click ‘Next’. Click ‘Install the software automatically’. The wizard then installs the software.
-
Page 17: Starting Cubpc
For example: Note: Where there are multiple docking stations connected, it may not be obvious on the Cub’s page which is which. In order to identify which unit is which, click in one of the ‘Status’ fields. The Charge and Diagnostic LEDs on the docking station in question will both flash purple for a few seconds. - Page 18 Used browse back and forward through the CubPC pages you have viewed. Used to close CubPC. Additional data and facilities for a Cub can be accessed by clicking the + symbol next to the serial number of that Cub. The additional details are then displayed: Unrivalled Detection.
- Page 19 Logged Data). Upgrading Firmware and Software Before you do anything else you may wish to check whether any upgrades are available for either the Cub, the docking station, or the software. Software updates are installed using the Help page (see below).
-
Page 20: Getting Help
CUB MANUAL Ion Science Ltd CubPC software The current software version is displayed at the top of the page, along with copyright information, who is it licensed to, etc. Getting Help The ‘View Manual’ button opens this manual. If you can’t find the help you need in this manual, you can get help in two further ways. -
Page 21: Setting Docking Station Preferences
CUB MANUAL Ion Science Ltd CubPC software Other Facilities The Adobe Website button opens the Adobe Reader download page. It is recommended that this manual is viewed using Adobe Reader. To view the release notes for the software, click ‘View Release Notes’. A new window is then displayed in which the release notes can be viewed. -
Page 22: The Dock Page
), the instrument is automatically recalibrated. If all data is to be deleted from a Cub when it is placed in a docking station, click the sixth checkbox. Note that all data on a Cub is automatically downloaded and stored on the connected PC when it is docked. -
Page 23: Configuring A Cub
The units of measurement may be chosen as parts per million (ppm) or milligrams per cubic metre (mg/m Clock Set the time and date and tick the checkbox to the right of these fields to set the time on your Cub. Alternatively, tick the lower box to synchronise your Cub with the time on your computer. - Page 24 Vibrate If, when there is an alarm, the Cub is to vibrate, select the second radio button. If not, select the first. Select the PID lamp type from the two options. Ensure that the lamp selected is the same as that fitted in your Cub.
-
Page 25: Downloading Data Logged Readings
The time and date of each connection is recorded, along with the name and firmware version of the Cub at that time, the time and date of the calibration that the Cub was operating under at the time, and the time and date of the last bump test of the Cub made before the connection. -
Page 26: Saving Logged Data To A Csv File
Browse to the folder that the file is to be saved into, enter its filename in the File Name field, and click Open to save the file. Note that logged data may automatically be saved to a CSV when a Cub is connected to a docking station, depending on the options selected on the Preferences page. -
Page 27: Viewing Details Of Logged Data
To view details of a data log, press this button in the Data log column for the log in question: To view details of the most recent data log recorded by a Cub, press the same button on the Cubs page for the Cub in question. - Page 28 CUB MANUAL Ion Science Ltd CubPC software If the table of readings is clicked on, a vertical green line is added to the graph to indicate the time of the reading. For example: Above the line, the gas level at that time and exact time of the reading are displayed.
-
Page 29: Deleting All Logged Data
Deleting all Logged Data To delete a logged data currently stored by a Cub, press this button on the Cub’s page for that Cub: A message is then displayed requesting that the deletion be confirmed. Once confirmed, the deletion will take place. -
Page 30: Software Disclaimers
No oral or written information or advice given by Ion Science Ltd, its dealers, distributors, agents or employees will create a warranty or in any way increase the scope of the obligations of Ion Science Ltd under this agreement, and you may not rely on any such information or advice. -
Page 31: Battery Charging
Non Hazardous environment. Recharging Battery Ensure the Cub is charged for at least 4 hours before using it for the first time. The Cub should be charged in a non-hazardous environment only. To charge your Cub, first connect the CubDoc Cub Docking Station which is connected to mains power. The Charge LED will indicate that power is on with a green light. -
Page 32: Diagnostics
CUB MANUAL Ion Science Ltd Diagnostics Error Description Resolution code Sensor configuration error Contact distributor Flash memory error Contact distributor i2c bus error Contact distributor i2c bus to fuel gauge error Contact distributor 1. Check calibration setup Calibration fail 2. Check calibration gas connection to the calibration dock 3. -
Page 33: Maintenance
Software’ section of the manual. Ensure you have the cylinder(s) of gas, regulator(s) and / or a zero carbon filter for your Cub on hand before starting the procedure. Alternatively a known clean air supply may be used as the ‘zero’ gas. Please ensure you are familiar with the entire calibration procedure before attempting to calibrate your Cub. -
Page 34: Bump Test
Ingress of Water If the Portable Cub has been subject to a deluge of water then it is necessary to shake the Cub vigorously to remove entrapped water from underneath the protective gauze lying above the filter located over the gas sensor. - Page 35 Maintenance Note: With the Filter Disc (2) and O Rings (3 and 5) correctly fitted the Cub has a IP rating of 65 (independently tested by BASEEFA). With the Filter Disc and O Rings removed the IP rating will drop to 43.
-
Page 36: Lamp Cleaning
The Cub lamp is fragile. Handle with great care! First ensure that the Cub is turned off and that you are in a clean environment such that the sensor parts will not be contaminated by dust, oil or grease. -
Page 37: Cub Parts
CUB MANUAL Ion Science Ltd Cub parts Item Number Part Number Description 871026 PTFE Filter Membrane 5/OO-108 O’Ring Seal 18mm A-846267 Pellet burnt (PPB) A-846417 Pellet burnt (10eV) MiniPID 2 Lamp Krypton 10.6eV ppm LA4TM600 TIGER MP6SX6BXV2 MiniPID 2 6-pin 10.6eV... -
Page 38: Accessories
CUB MANUAL Ion Science Ltd Accessories Ion Science Ltd has developed an exclusive range of high quality accessories to compliment the Cub. Please see a selection of these below: Item Number Part Number Description A-871027 Cub Cap Moulding Complete 871037... -
Page 39: Instrument Warranty And Service
Service Ion Science is pleased to offer a number of service options on our Cub product range that allow you to choose the instrument cover that best suits your needs. At Ion Science we recommend that all of our gas detection instruments be returned for service and factory calibration once every 12 months. -
Page 40: Technical Specifications
CUB MANUAL Ion Science Ltd Technical specifications Response time: T90 < 13 second Detectable ranges: ppm: 0 to 5,000 ppm (0.1 ppm sensitivity) ppb: 0 to 5000 ppm (0.001 ppm sensitivity) TAC: 0 to 5000 ppm (0.01 ppm sensitivity) Resolution: Depends on the model (see Detection range above. -
Page 41: Manual Log
Cover page: Registration symbol added to the word Cub 20/08/2013 Page 4: Changes made to declaration of conformity (Directive, Report number and BS EN 61326-1:2006) Cub depth dimension updated 04/09/2013 Specification updated Page 40 MiniPID 2 2 spring part number updated Page 19/4/2016 37.MiniPID 2 Unrivalled Detection.
Need help?
Do you have a question about the CUB and is the answer not in the manual?
Questions and answers