Table of Contents
Advertisement
Available languages
Available languages
Quick Links
Trade Mark
COSMO s.r.l.
Loc. Roata Raffo, 64
12022 BUSCA – Cuneo – ITALY
Tel. +39 0171 946654/946655
Fax +39 0171 946723
www.cosmosrl.com
imcosmo@cosmosrl.com
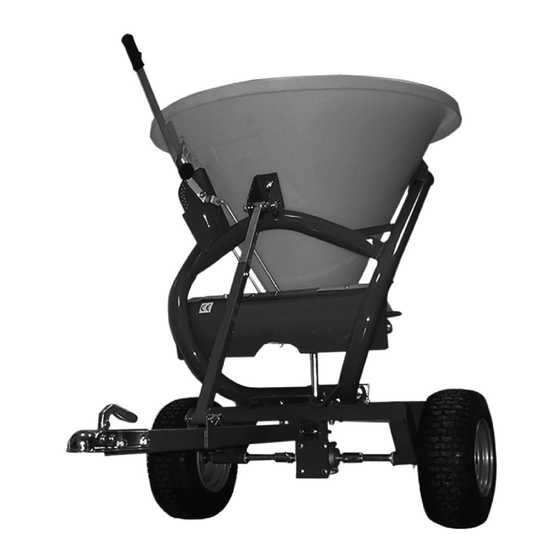
S S P P A A N N D D I I C C O O N N C C I I M M E E C C E E N N T T R R I I F F U U G G O O
T T R R A A I I N N A A T T O O P P E E R R A A T T V V - - M M o o d d . . P P T T P P
C C E E N N T T R R I I F F U U G G A A L L P P U U L L L L T T Y Y P P E E S S P P R R E E A A D D E E R R
F F O O R R A A T T V V - - M M o o d d . . P P T T P P
M M A A N N U U A A L L E E D D ' ' U U S S O O E E M M A A N N U U T T E E N N Z Z I I O O N N E E
O O W W N N E E R R ' ' S S M M A A N N U U A A L L
Leggere attentamente questo Manuale prima dell'utilizzo della macchina
Read the Operator's manual entirely before using the machine
Advertisement
Table of Contents

Related Manuals for Cosmo PTP


Summary of Contents for Cosmo PTP
- Page 1 Trade Mark COSMO s.r.l. Loc. Roata Raffo, 64 12022 BUSCA – Cuneo – ITALY Tel. +39 0171 946654/946655 Fax +39 0171 946723 www.cosmosrl.com imcosmo@cosmosrl.com S S P P A A N N D D I I C C O O N N C C I I M M E E C C E E N N T T R R I I F F U U G G O O T T R R A A I I N N A A T T O O P P E E R R A A T T V V - - M M o o d d .
- Page 2 COSMO lf found defective. All warranty claims must be forwarded to COSMO Srl Italy within 10 (Ten) days after occurence of failure. Receipt of warranty claim after 10 (Ten) days from occurence wilI automatically invalidate the warranty claim.
-
Page 3: Table Of Contents
ARICO DELLA TRAMOGGIA 4.4.................15 ISTRIBUZIONE DEL FERTILIZZANTE IN CAMPO .................17 4.4.1. RRORI DELLA DISTRIBUZIONE MANUTENZIONE......................18 5.1......................19 NGRASSAGGIO 5.2..............19 OSTITUZIONE DELLE PALETTE DEL DISTRIBUTORE 5.3......................20 MMAGAZZINAMENTO 5.4.......................20 ARTI DI RICAMBIO GARANZIA .........................21 TAVOLE ESPLOSI....................40/41/42 Spandiconcime Centrifugo mod. PTP... -
Page 4: Introduzione
E’ necessario, quindi, osservare tutte le regole riportate. Si raccomanda l’utilizzo di ricambi e accessori originali. Le parti non originali oltre a far decadere la garanzia potrebbero risultare pericolose riducen- do la durata e le prestazioni della macchina. Spandiconcime Centrifugo mod. PTP... -
Page 5: Informazioni Sulla Macchina
2.2.2. C ARATTERISTICHE DELLA MACCHINA Lo spandiconcime mod. PTP è caratterizzato da un distributore di concime completamente in accia- io inox dotato un disco distributore con quattro palette regolabili in quattro diverse posizioni per otte- nere la massima precisione di spargimento ed uniformità nella distribuzione a seconda del tipo di pro- dotto che si deve spandere. - Page 6 La verniciatura come viene effettuata con vernice epossidica a forno a 150°C con l’applicazione della mano di fondo a bagno, garantendo una grande protezione e una lunga durata della macchina. Spandiconcime Centrifugo mod. PTP...
-
Page 7: Identificazione Dei Componenti
8 – 12 / 26’ – 40’ 8 – 12 / 26’ – 40’ (metri/ft) da 27 a 55 ha/h da 7 a 15 acres/h Lavoro per ora da 27 a 55 ha/h da 7 a 15 acres/h Spandiconcime Centrifugo mod. PTP... -
Page 8: Informazioni Sulla Sicurezza
• Durante le fasi di carico sussiste il pericolo di inalazione di polveri prodotte dalla miscelazione dei componenti del concime utilizzato. Si consiglia di utilizzare trattrici dotate di cabina con filtri sul sistema di ventilazione oppure, di utilizzare idonei sistemi di protezione delle vie respiratorie quali maschere antipolvere o maschere con filtro. Spandiconcime Centrifugo mod. PTP... - Page 9 - modifiche o interventi non autorizzati; - utilizzo di ricambi non originali o specifici per il modello; - inosservanza totale o parziale delle istruzioni; - inosservanza delle comuni norme di sicurezza nell’ambito di lavoro; - eventi eccezionali. Spandiconcime Centrifugo mod. PTP...
- Page 10 è necessario applicare una barra luci ripetitiva e/o dei cartelli di segnalazione posteriore. Durante i trasferimenti su strada, l’organo distributore non deve essere azionato. Disinserire il blocco meccanico dall’as- sale della ruota come mostrato in figura. Spandiconcime Centrifugo mod. PTP...
-
Page 11: Segnaletica Di Sicurezza
Mantenere una distanza di sicurezza minima di 50 m dalla macchina. 3. ATTENZIONE! – PERICOLO! Vietato entrare nella tramoggia o farsi trasportare dalla macchina. 4. ATTENZIONE! Utilizzare i Dispositivi di Protezione Individuale richiesti. Ubicazione dei pittogrammi sulla macchina Spandiconcime Centrifugo mod. PTP... -
Page 12: Utilizzo Dello Spandiconcime
4.1. COLLEGAMENTI Le macchine spandiconcime mod. PTP possono essere agganciate ad ogni tipo di trattrice o mezzi atv-quad muniti di attacco a sfera 50 mm (1 7/8”). Per effettuare il collegamento è necessario inserire l’attacco a sfera nel gancio di traino posto sul mezzo trainante e bloccarlo spingendo verso il basso la maniglia di blocco. -
Page 13: Regolazioni
Inoltre, spostando le alette dalla posizione 1 alla posizione 4, a parità di velocità di avanzamento, si avrà un aumento della larghezza di distribuzione del fertilizzante. Regolazione alette disco distributore Tale regolazione deve essere effettuata a seconda dal tipo di fertilizzante utilizzato e dell’esperienza dell’operatore. Spandiconcime Centrifugo mod. PTP... -
Page 14: Regolazione Della Quantità Da Distribuire
1) in modo da chiudere l’apertura destra posta sul fondo della tramoggia. Per distribuire solo sul alto destro (rif. III) bisogna invece portare la leva “B” verso l’alto (in posizione 1) e regolare la quantità da distribuire con la leva “A” Spandiconcime Centrifugo mod. PTP... -
Page 15: Carico Della Tramoggia
Innestare il blocco sull’assale, in modo che il distributore possa essere azionato dalle ruote durante l’avanzamento, solamente nel momento in cui si deve effettuare la distribu- zione di fertilizzante. Spandiconcime Centrifugo mod. PTP... - Page 16 • Iniziare lo spargimento procedendo in linea retta fino al punto 3. • Girare la trattrice e percorrere una distanza D pari all’ampiezza di lavoro (punto 4). • Ripetere tale procedura finché tutto l’appezzamento sarà coperto. Spandiconcime Centrifugo mod. PTP...
-
Page 17: Errori Della Distribuzione
• Presenza di grumi eccessivi di concime o di dimensioni particolarmente grandi che influiscono negativamente sulla resa della distribuzione. • Corpi estranei nel concime. Errori dovuti alla macchina • Aperture della tramoggia otturate. • Parti dei dischi di distribuzione logorate o danneggiate. Spandiconcime Centrifugo mod. PTP... -
Page 18: Manutenzione
Per interventi particolari che non si conoscono o di sostituzione di parti danneggiate non contempla- te in questo Manuale, è necessario ricorrere a personale specializzato avvalendosi del Servizio Assistenza presso il Costruttore o suoi rivenditori. Spandiconcime Centrifugo mod. PTP... -
Page 19: Ingrassaggio
Nel caso le palettate dei dischi distributori siano rotte o danneggiate è necessario provvedere alla loro sostituzione con atre originali. Svitare con una chiave il dado di fissaggio e sostituire l’elemento danneggiato. Gli elementi di fissaggio (viti e dadi) devono essere dello stesso tipo di quelli prescritti dal Costruttore. Spandiconcime Centrifugo mod. PTP... -
Page 20: Immagazzinamento
- ricoverare, se possibile, la macchina in un locale coperto. 5.4. PARTI DI RICAMBIO Per la sostituzione di parti della macchina SPANDICONCIME CENTRIFUGO Mod. PTP , il cliente deve avvalersi esclusivamente di ricambi originali, ordinandoli direttamente al Costruttore della macchina a rivenditori autorizzati. -
Page 21: Garanzia
Il costruttore o suo rivenditore non sarà responsabile dello smarrimento, né del danno, qualunque esso sia ed in qualunque modo si sia verificato durante il trasporto. L’impegno sopraccitato si riferisce alla persona del cliente e non può essere ceduto o trasmesso ad altri. Spandiconcime Centrifugo mod. PTP... - Page 22 ISTRIBUTION OF THE FERTILIZER IN THE FIELD 4.4.1....................36 ISTRIBUTION ERRORS GENERAL MAINTENANCE ...................37 5.1......................38 UBRICATION 5.2................38 EPLACEMENT OF THE SPREADER VANES 5.3.........................38 TORAGE 5.4......................38 PARE PARTS WARRANTY ........................39 PARTS BREAKDOWN ..................40/41/42 Centrifugal Spreader mod. PTP...
- Page 23 Therefore, it is necessary to observe all the written rules. We recommended to use the original spare parts and accessories. The not original parts, besides to decline the guarantee, could be dangerous reducing the length and the performances of the machine. Centrifugal Spreader mod. PTP...
- Page 24 2.2.2. C HARACTERISTICS OF THE MACHINE The pull-type spreader mod. PTP has a distributor of fertilizer completely in stainless steel equipped with a spreader disc with four adjustable vanes in four different positions, in order to obtain the maximum spreading precision and uniformity in the distribution, depending on the kind of product that must be spreaded.
- Page 25 The painting is made by an epoxy varnish with successive backing at 150°c with the application of the primer bath, assuring a great protection and long life of the machine. Centrifugal Spreader mod. PTP...
- Page 26 8 – 12 / 26’ – 40’ 8 – 12 / 26’ – 40’ (meters/ft) from 27 to 55 ha/h from 27 to 55 ha/h Ground covered per hour from 7 to 15 acres/h from 7 to 15 acres/h Centrifugal Spreader mod. PTP...
- Page 27 • The machine is designed for being used by a single operator who, during the use, must always stay in the stationing control on tractor. • Never work with this machine if you are tired, sick or after having took drinks, drugs or medicines. Centrifugal Spreader mod. PTP...
- Page 28 - changes or not allowed interventions; - use of not original or specific spare parts ; - total or partial inobservance of the instructions; - inobservance of the common safety rules during work; - unusual cases. Centrifugal Spreader mod. PTP...
- Page 29 During the moving on the road, the gearbox must not be switched on. Switch off the mechanical block from the tyres axle, as shown in the picture. Centrifugal Spreader mod. PTP...
- Page 30 Keep a safety distance of 50 meters, at least, from the machine. 3. ATTENTION! - DANGER! Forbidden to go inside the hopper or to transport somebody with the machine. ATTENTION! Use the Devices of individual Protection required. Centrifugal Spreader mod. PTP...
- Page 31 4.1. Connections The pull type spreaders mod. PTP can be hitched to every type of tractor or atv-quad with ball of 45 millimetres (13/4") or 50 millimetres (2"). To make the connection, it is necessary to put the ball hitch in the coupler on the pull type spreader, locking it pushing the lock handle towards the bottom.
- Page 32 This regulation must be made compared to the type of used fertilizer and to the experience of the operator. Spreading disc’s vanes regulation Such a regulation must be done in accordance with the fertilizer type that is used and the operator’s experience. Centrifugal Spreader mod. PTP...
- Page 33 (position 1) in order to close the shutter of the right side. In order to spread only on to the right side (ref. III) you have to move the lever "B" up, (in position 1) and regulate the quantity to spread with the lever "A". Centrifugal Spreader mod. PTP...
- Page 34 Engage the axle with the pin, so that the spreader can be set in action by the turning wheels, only in the moment in which the spreading operation has to be carried out. Centrifugal Spreader mod. PTP...
- Page 35 • Beginning the spreading proceeding in line, straight to point 3. • Turn the tractor and drive a D distance, equal to the working width (point 4); • Repeat such procedure until all the plot will be covered. Centrifugal Spreader mod. PTP...
- Page 36 • Presence of excessive fertilizer lumps or with particular great dimensions that influence negatively on the yield of the spreading; • Foreign body in the fertilizer. Mistakes due to the spreader. • Spreading exits clogged; • Parts of the spreading disc worn away or damaged. Centrifugal Spreader mod. PTP...
- Page 37 As regards particular actions that the user does not know or regarding broken parts replacing which are not shown in this manual, it is necessary to consult specialised personnel, making use of the Assistance service by the manufacturer or its distributors. Centrifugal Spreader mod. PTP...
- Page 38 - store, if possible, the machine in a sheltered place. 5.4 SPARE PARTS For the replacement of parts of the centrifugal pull type spreader Mod. PTP , the customer must use just original parts, ordering them directly to the manufacturer of the machine to authorized dealers.
- Page 39 The manufacturer or its retailer will not be responsible of the loss, neither of the damage, whichever it is and in whichever way it happened during the transport. The aforementioned commitment refers to the person of the customer and it cannot be yielded or be transmitted to others. Centrifugal Spreader mod. PTP...
Need help?
Do you have a question about the PTP and is the answer not in the manual?
Questions and answers