
Related Manuals for Onix ACB-628G1

Summary of Contents for Onix ACB-628G1
-
Page 1: Instruction Manual
UHF CB Radio with FM Transmission WARNING: This unit must be installed by a professional technician only or the warranty will be void. Instruction Manual Model: ACB-628G1 Customer Helpline 1300 886 649... -
Page 2: Table Of Contents
Contents Warranty Details Welcome General Safety Instructions Product Overview Features Operations Tables Installation Repair and Refurbished Goods or Parts Notice After Sales Support Telephone: 1300 886 649 Email: info@tempo.org... -
Page 3: Warranty Details
UHF CB Radio Warranty Details The product is guaranteed to be free from defects in workmanship and parts for a period of 12 months from the date of purchase. Defects that occur within this warranty period, under normal use and care, will be repaired, replaced or refunded at our discretion, solely at our option with no charge for parts and labour. -
Page 4: Welcome
Welcome Congratulations on choosing to buy an ONIX product. All products brought to you by ONIX are manufactured to the highest standards of performance and safety and, as part of our philosophy of customer service and satisfaction, are backed by our comprehensive 1 Year Warranty. -
Page 5: General Safety Instructions
General Safety Instructions Read this manual thoroughly before first use and keep it in a safe place for future reference, along with the warranty card, purchase receipt and carton. The safety precautions enclosed herein reduce the risk of fire, electric shock and injury when correctly adhered to. -
Page 6: Product Overview
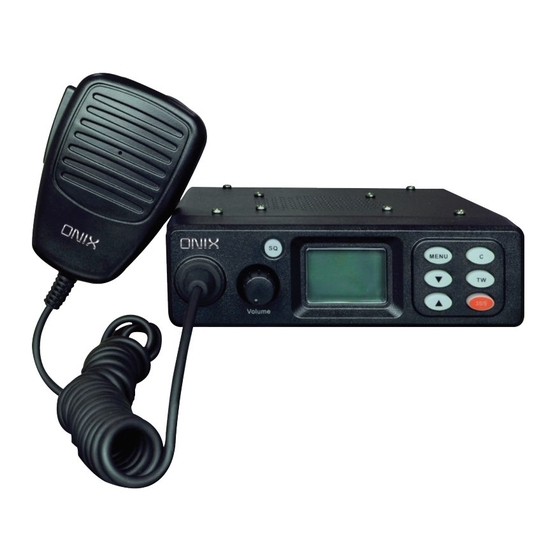
Product Overview Controls and Indicators Controls and Indicators Front view Fr ont View Fr ont View Rear View Rear View Rear view Microphone connection Power ON/OFF / Volume knob Down ( ) button (Channel / Menu) Up ( ) button (Channel / Menu) 35/5 (35/5) button Triple watch (TW) button Squelch (SQ) button... - Page 7 Included wi Product Overview (Cont.) Controls and Indicators Microphone Included with Radio Included with Radio Standard Microphone M E N U M E N U Vo l u me Vo l u me Model CR-92 Model CR-92 UHF CB Mobile Radio UHF CB Mobile Radio Microphone Hanger, Standard Microphone...
- Page 8 Product Overview (Cont.) LCD Display LC Display Icons and displays Keypad lock TX - is illuminated when the radio is in TRANSMIT mode RX - is illuminated when the radio is in RECEIVE mode DW - dual watch function TW - triple watch function CTCSS - continuous tone coded squelch system G DCS - digital coded squelch H CTCSS code number...
-
Page 9: Features
Features • FM transmission, frequency 476.425 - 477.4125 MHz, 1 ~ 80 channels • 5W output power • TOT timer • One touch to Ch35/Ch5 emergency channels (without CTCSS or DCS) • 38 CTCSS and 83 DCS codes for transmission •... -
Page 10: Operations
Operations Turning the radio on • Rotate the Power/Volume knob clockwise to turn the unit on and adjust the volume, it will then go into self-inspection mode. A series of tones will indicate the radio is on and the full screen will be displayed for one second. - Page 11 Operations (Cont.) About channels This unit has 80 channels, but not all of these are available; several are prohibited for voice transmission and other are restricted, as explained below. The selected channel is displayed on the LCD. • Channels 5 and 35 are for emergency calling. Do not use these channels in non-emergency cases.
- Page 12 Operations (Cont.) Receiving a signal The unit is continuously in RECEIVE mode when it is on and not transmitting. When you receive a signal on the current channel, the RX icon will appear on the LC display. Transmitting • Press and hold the PTT button to transmit your voice: the TX icon will be displayed on the LC display and the red LED indicator illuminates.
- Page 13 Operations (Cont.) Triple watch setting Triple Watch mode monitors emergency channels 35 and 5 for a signal while you listen to the currently selected channel. Press the TW button to scan the current channel and channels 35 and 5. • Press the TW button again to return.
- Page 14 Operations (Cont.) • To communicate between two or more radios, both the channel and CTCSS code selections must be the same. • To communicate with other models and brands of radios, the actual radio frequency and CTCSS frequency must be matched. •...
-
Page 15: Channel Scanning
Operations (Cont.) Channel scanning Channel scan performs searches for active signals in an endless loop of channels. Press the MENU button six times (6x) until the SC, channel number and • CTCSS number icons start blinking on the LC display. •... - Page 16 Operations (Cont.) Roger beep tone setting The radio is equipped with a user selectable Roger beep tone feature, which enables you to send a beep tone at the end of each transmission after every release of the PTT button. This will prompt any receiving unit that your transmission has ended.
-
Page 17: Tables
Tables Channel table Channel Frequency Channel Frequency Channel Frequency number (MHz) number (MHz) number (MHz) 476.4250 477.1000 476.7875 476.4500 477.1250 476.8125 476.4750 477.1500 476.8375 476.5000 477.1750 476.8625 476.5250 477.2000 476.8875 476.5500 477.2250 476.9125 476.5750 477.2500 61++ 476.6000 35** 477.2750 62++ 476.6250 477.3000 63++... - Page 18 Tables (Cont.) Channels 1-8 and 31-38, 41-48 and 71-78 are used as repeater channels with 750kHz offset. Channels 1-8 and 41-48 are used for mobile reception and channels 31-38 and 71-78 for mobile transmission. Only use this repeater function when a long distance communication via the local repeater facility is specifically required.
- Page 19 Tables (Cont.) DCS frequency table Channel Octal Channel Octal Channel Octal Channel Octal number code number code number code number code After Sales Support Telephone: 1300 886 649 Email: info@tempo.org...
-
Page 20: Installation
Installation WARNING: This unit must be installed by a professional technician only or the warranty will be void. Important notes • Choose the mounting location where the unit will not interfere with the driver’s normal driving operations and where it cannot injure the passenger if there is a sudden stop, like an emergency stop. -
Page 21: Mounting The Cradle
Installation (Cont.) Mounting the cradle The cradle can be screwed or bolted in any convenient location in your vehicle (under or above the dashboard, on the centre console, etc.) using the mounting slots provided in the base. For maximum sound output from the internal speaker, we recommend the cradle be mounted above the radio to minimise any obstruction of the speaker. - Page 22 Installation (Cont.) Mounting the microphone hanger The microphone hanger comes in two parts. How and where you mount the microphone hanger will determine which parts to use. Conventional mounting with screws (supplied) • Use the front part of the microphone hanger only. •...
- Page 23 Installation (Cont.) WARNING This unit must be installed by a professional technician only or the warranty will be void. Connecting the power leads Connect the (supplied) power cable to the power socket at the back of the CB radio. The red wire is typically connected to a (switched) accessory 12v fuse in the fuse box.
-
Page 24: Repair And Refurbished Goods Or Parts Notice
UHF CB Radio Repair and Refurbished Goods or Parts Notice Unfortunately, from time to time, faulty products are manufactured which need to be returned to the supplier for repair. Please be aware that if your product is capable of retaining user-generated data (such as files stored on a computer hard drive, telephone numbers stored on a mobile telephone, songs stored on a portable media player, games saved on a games console or files stored on a USB memory stick) during the process of...
Need help?
Do you have a question about the ACB-628G1 and is the answer not in the manual?
Questions and answers