Table of Contents
Advertisement
Available languages
Available languages
Quick Links
Advertisement
Table of Contents

Related Manuals for EuroLite Akku flat light 1


Summary of Contents for EuroLite Akku flat light 1
-
Page 2: Table Of Contents
OPERATION ..............................26 Stand-alone mode ............................26 Master/Slave operation ..........................26 Rechargeable Battery Operation ......................... 26 Battery status ............................... 26 EUROLITE IR-13 remote control ......................... 28 DMX-controlled operation ..........................29 QuickDMX ..............................29 Addressing ..............................30 DMX Protocol ............................... 31 CLEANING AND MAINTENANCE ......................... -
Page 3: Einführung
- sich die letzte Version der Anleitung im Internet herunter laden EINFÜHRUNG Wir freuen uns, dass Sie sich für ein EUROLITE AKKU Flat Light 1 entschieden haben. Wenn Sie nachfolgende Hinweise beachten, sind wir sicher, dass Sie lange Zeit Freude an Ihrem Kauf haben werden. -
Page 4: Hinweise Zu Akkus Und Batterien
Unbedingt lesen: Bei Schäden, die durch Nichtbeachtung der Anleitung verursacht werden, erlischt der Garantiean- spruch. Für daraus resultierende Folgeschäden übernimmt der Hersteller keine Haftung. Bitte überprüfen Sie vor der ersten Inbetriebnahme, ob kein offensichtlicher Transportschaden vorliegt. Sollten Sie Schäden am Netzteil oder am Gehäuse entdecken, nehmen Sie das Gerät nicht in Betrieb und setzen sich bitte mit Ihrem Fachhändler in Verbindung. - Page 5 Das Gerät darf nur mit dem beiliegenden Netzteil betrieben werden oder die Stromversorgung kann über den eingebauten Lithium-Ionen-Akku (11,1 V, 5200 mAh) erfolgen, der sich bei Netzanschluss des Geräts aufladen lässt. Der Netzadapter ist nach Schutzklasse 2 aufgebaut und das Gerät entspricht Schutzklasse 3. Die Fernbedienung wird mit einer Knopfzelle vom Typ CR2032 betrieben.
-
Page 6: Gerätebeschreibung
• Integrierte Ladeautomatik mit Ladeanzeige • DMX-gesteuerter Betrieb oder Standalone-Betrieb mit Master-/Slave-Funktion möglich • Steuerbar über EUROLITE IR-13 Fernbedienung, im Lieferumfang enthalten • 3, 4, 6, 8 oder 10 DMX-Kanäle wählbar • Funktionen: statische Farben, stufenlose RGBW-Farbmischung, interne Programme, Dimmer, Strobe- Effekt mit variabler Geschwindigkeit, Musiksteuerung •... -
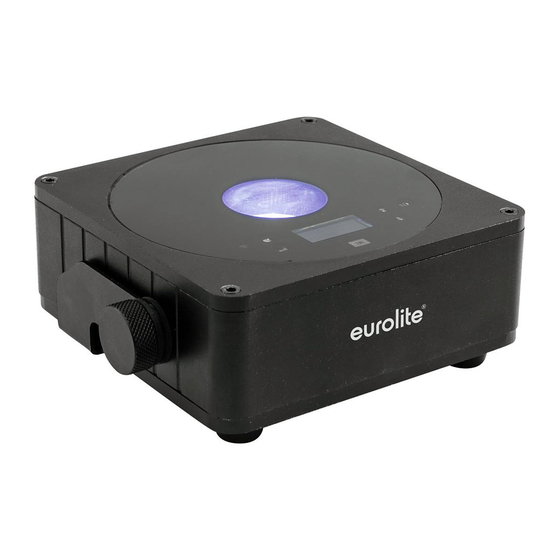
Page 7: Geräteübersicht
Geräteübersicht (1) Gehäuse (2) Montagebügel (3) Linse/LED (4) Feststellschraube (5) Funktion QuickDMX Ein/Aus (6) Menu-Taste (7) Enter-Taste (8) Display (9) QuickDMX-Statusanzeige (10) Infrarotsensor für die Fernbedienung (11) Ladeanzeige (12) Down-Taste (13) Up-Taste (14) Taste ID, zum Ändern des Funkkanals und Koppeln der Geräte (15) Gehäuseschraube (16) Anschluss Ladenetzteil (17) Ein-/Ausschalter... -
Page 8: Installation
INSTALLATION Montage Das Gerät kann direkt auf den Boden gestellt werden oder in jeder möglichen Position im Trussing installiert werden. Überkopfmontage LEBENSGEFAHR! Bei der Installation sind insbesondere die Bestimmungen der BGV C1 und EN 60598-2-17 zu beachten! Die Installation darf nur vom autorisierten Fachhandel ausgeführt werden! Die Aufhängevorrichtungen des Gerätes muss so gebaut und bemessen sein, dass sie 1 Stunde lang ohne dauernde schädliche Deformierung das 10-fache der Nutzlast aushalten kann. -
Page 9: Bedienung
UP, DOWN auswählen. Das Gerät hat zwei Betriebsarten. Es kann entweder im Standalone-Modus über das Control Board und die EUROLITE IR-13 Fernbedienung oder im DMX-gesteuerten Modus über einen handelsüblichen DMX- Controller und QuickDMX, mit einem geeigneten Funksender, drahtlos betrieben werden. -
Page 10: Akkubetrieb
Die Statusanzeige zeigt den eingestellten Übertragungskanal. Kanal Farbe Grün Blau Gelb (Rot/Grün) Cyan (Grün/Blau) Magenta (Rot/Blau) Wählen Sie das Gerät aus, das zur Steuerung der Effekte dienen soll. Dieses Gerät arbeitet dann als Master-Gerät und steuert alle weiteren Slave-Geräte. Stellen Sie beim Master-Gerät den gewünschten Modus ein (alle außer Addr und SLAU). Stellen Sie bei allen Slave-Geräten den Slave-Modus (SL.AU) ein. -
Page 11: Control Board
Control Board Das Control Board bietet mehrere Möglichkeiten: so lassen sich z. B. die DMX-Startadresse eingeben, das vorprogrammierte Programm abspielen oder der DMX-Kanal Modus auswählen. Drücken Sie die Menu-Taste, um das Hauptmenü aufzurufen. Durch MENU Drücken der Up/Down-Tasten können Sie sich im Hauptmenü bewegen. -
Page 12: Fernbedienung Eurolite Ir-13
Um die Tastensperre zu deaktivieren, und den Zugriff auf die Menübefehle on/off zurückzugewinnen, drücken Sie die Tasten ENTER und DOWN gleichzeitig. Fernbedienung EUROLITE IR-13 Halten Sie beim Betätigen einer Taste die Fernbedienung immer in Richtung des Sensors auf der Gerätevorderseite. Zwischen der Fernbedienung und dem Sensor muss Sichtverbindung bestehen. -
Page 13: Dmx-Gesteuerter Betrieb
Unbedingt Bedienungsanleitung des verwendeten Controllers beachten. QuickDMX Schließen Sie den Sender an das DMX-Steuergerät an. Nehmen Sie die Sender und das AKKU Flat Light 1 in Betrieb. Schalten Sie am Gerät den Funktions-Schalter (QuickDMX) an. Die QuickDMX-Statusanzeige leuchtet kurz rot, grün und blau auf. Danach leuchtet sie kontinuierlich gemäß... -
Page 14: Adressierung Des Geräts
Über das Control Board können Sie die DMX-Startadresse definieren. Die Startadresse ist der erste Kanal, auf den das AKKU Flat Light 1 auf Signale vom Controller reagiert. Wenn Sie die Startadresse, im 10 Kanal-Modus, z. B. auf 11 definieren, belegt das AKKU Flat Light 1 die Steuerkanäle 11 bis 20. -
Page 15: Dmx-Protokoll
Schalten Sie das Gerät ein. Das Gerät prüft, ob DMX-512 Daten empfangen werden oder nicht. Wenn Daten empfangen werden, erscheint „d.001“ mit der definierten Startadresse auf dem Display. Werden keine Daten empfangen, erscheint „d001“ mit der definierten Startadresse. Die Meldung erscheint: -wenn der Drahtlos-Empfänger nicht am Drahtlos-Sender eingeloggt ist oder kein Drahtlos-DMX-Signal empfangen wird. - Page 16 6-Kanal-Modus Steuerkanal 1 - Rot Decimal Hexad. Percentage S/F Eigenschaft 0 255 00 FF 0% 100% Rot (0=aus, 255=100% rot) Steuerkanal 2 - Grün Decimal Hexad. Percentage S/F Eigenschaft 0 255 00 FF 0% 100% Grün (0=aus, 255=100% grün) Steuerkanal 3 - Blau Decimal Hexad.
- Page 17 Steuerkanal 4 - Blau Decimal Hexad. Percentage S/F Eigenschaft 0 255 00 FF 0% 100% Blau (0=aus, 255=100% blau) Steuerkanal 5 - Weiß Decimal Hexad. Percentage S/F Eigenschaft 0 255 00 FF 0% 100% Weiß (0=aus, 255=100% weiß) Steuerkanal 6 - Strobe Decimal Hexad.
- Page 18 Steuerkanal 4 - Blau Decimal Hexad. Percentage S/F Eigenschaft 0 255 00 FF 0% 100% Blau (0=aus, 255=100% blau) Steuerkanal 5 - Weiß Decimal Hexad. Percentage S/F Eigenschaft 0 255 00 FF 0% 100% Weiß (0=aus, 255=100% weiß) Steuerkanal 6 - Strobe Decimal Hexad.
-
Page 19: Reinigung Und Wartung
0,1 m Zubehör: EUROLITE TPC-10 Klammer, silber Best.-Nr. 59006856 EUROLITE TPC-10 Klammer, schwarz Best.-Nr. 59006858 EUROLITE Sicherungsseil A 3x600mm bis 5kg, silber Best.-Nr. 58010310 EUROLITE Sicherungsseil A 3x600mm bis 5kg, schwarz Best.-Nr. 58010342 EUROLITE SB-18 Soft-Bag Best.-Nr. 30130555 EUROLITE QuickDMX Funksender Best.-Nr. -
Page 20: Introduction
- download the latest version of the user manual from the Internet INTRODUCTION Thank you for having chosen a EUROLITE AKKU Flat Light 1. If you follow the instructions given in this manual, we are sure that you will enjoy this device for a long period of time. -
Page 21: Regarding Rechargeable Batteries And Batteries
Important: Damages caused by the disregard of this user manual are not subject to warranty. The dealer will not accept liability for any resulting defects or problems. Please make sure that there are no obvious transport damages. Should you notice any damages on the power unit or on the housing, do not take the device into operation and immediately consult your local dealer. - Page 22 The power unit falls under protection-class 2 and the device under protection-class 3. The IR remote control operates with a CR2032 button cell. The integrated QuickDMX receiver for wireless reception of DMX512 signals operates in the 2.4 GHz ISM range and is license-free and generally approved for operation in EU and EFTA countries. Lighting effects are not designed for permanent operation.
-
Page 23: Description Of The Device
• Integrated automatic charging of the battery with indicator • DMX-controlled operation or stand-alone operation with Master/Slave function • Controllable via EUROLITE IR-13 remote control; included in the delivery • 3, 4, 6, 8 or 10 DMX channels selectable • Functions: static colors, stepless RGBW color changing, internal programs, dimmer, strobe effect with variable speed, sound-control •... -
Page 24: Installation
(16) Charger input (17) ON/OFF switch (18) Kensington Security Slot (19) Rubber foot (20) Hole for the clamp (21) Hole for the safety rope INSTALLATION Rigging The device can be placed directly on the stage floor or rigged in any orientation on a truss. Overhead rigging DANGER TO LIFE! Please consider the EN 60598-2-17and the respective national standards during the installation! - Page 25 The operator has to make sure that safety-relating and machine-technical installations are approved by an expert after every four year in the course of an acceptance test. The operator has to make sure that safety-relating and machine-technical installations are approved by a skilled person once a year.
-
Page 26: Operation
MENU, ENTER, UP, DOWN. The device has two operating modes. It can be operated in stand-alone mode via the control board and the EUROLITE IR-13 remote control or in DMX-controlled mode via a standard DMX controller and QuickDMX with suitable wireless transmitter. - Page 27 Control Board The Control Board offers several features: you can simply set the starting address, run the pre-programmed program or select a DMX channel mode. The main menu is accessed by pressing Menu. Browse through the MENU menu by pressing Up or Down. Press Enter in order to select the desired menu.
-
Page 28: Eurolite Ir-13 Remote Control
In order to deactivate or temporarily deactivate the keylock function, press the keys ENTER and DOWN at the same time. EUROLITE IR-13 remote control When actuating a button, always hold the remote control in the direction of the sensor. There must be visual connection between the remote control and the sensor. -
Page 29: Dmx-Controlled Operation
Please note, the starting address depends upon which controller is being used. QuickDMX Connect the transmitter to the DMX controller. Set each transmitter and the AKKU Flat Light 1 into operation. Press the function switch to activate QuickDMX. The QuickDMX status indicator shortly flashes red, green and blue. Afterward, it lights permanently according to the selected transmission channel. -
Page 30: Addressing
AKKU Flat Light 1 will respond to the controller. If you set, for example, the address in the 10 channel mode to channel 11, the AKKU Flat Light 1 will use the channel 11 to 20 for control. -
Page 31: Dmx Protocol
After switching on, the device will automatically detect whether DMX 512 data is received or not. If the data is received, the display will show "d.001" with the actually set address. If there is no data received at the DMX-input, the display will show "d001" with the actually set address. This situation can occur if: - the wireless receiver is not logged in to the wireless transmitter or no wireless DMX signal is received. - Page 32 6 channel mode Control-channel 1 - Red Decimal Hexad. Percentage S/F Feature 0 255 00 FF 0% 100% Red (0=off, 255=100% red) Control-channel 2 - Green Decimal Hexad. Percentage S/F Feature 0 255 00 FF 0% 100% Green (0=off, 255=100% green) Control-channel 3 - Blue Decimal Hexad.
- Page 33 Control-channel 4 - Blue Decimal Hexad. Percentage S/F Feature 0 255 00 FF 0% 100% Blue (0=off, 255=100% blue) Control-channel 5 - White Decimal Hexad. Percentage S/F Feature 0 255 00 FF 0% 100% White (0=off, 255=100% white) Control-channel 6 - Strobe Decimal Hexad.
- Page 34 Control-channel 4 - Blue Decimal Hexad. Percentage S/F Feature 0 255 00 FF 0% 100% Blue (0=off, 255=100% blue) Control-channel 5 - White Decimal Hexad. Percentage S/F Feature 0 255 00 FF 0% 100% White (0=off, 255=100% white) Control-channel 6 - Strobe Decimal Hexad.
-
Page 35: Cleaning And Maintenance
Accessory: EUROLITE TPC-10 Coupler, silver No. 59006856 EUROLITE TPC-10 Coupler, black No. 59006858 EUROLITE Safety bond A 3x600mm up to 5kg, silver No. 58010310 EUROLITE Safety bond A 3x600mm up to 5kg, black No. 58010342 EUROLITE SB-18 Soft bag No. 30130555 EUROLITE QuickDMX Wireless transmitter No. - Page 36 Eurolite is a brand of Steinigke Showtechnic GmbH Andreas-Bauer-Str. 5 97297 Waldbüttelbrunn Germany D00105787 Version 1.0 Publ. 21/12/2016...
Need help?
Do you have a question about the Akku flat light 1 and is the answer not in the manual?
Questions and answers