Table of Contents
Advertisement
Available languages
Available languages
Advertisement
Table of Contents

Related Manuals for Clevo W650EH


Summary of Contents for Clevo W650EH
-
Page 2: Table Of Contents
Contents Apps und Kacheln ................35 Windows 8 Charms-Leiste ..............35 About this Concise User Guide ............1 Grafikfunktionen ................36 System Startup ..................4 Audiofunktionen ................38 System Map: Front View with LCD Panel Open ......5 Energieoptionen ................39 LED Indicators ..................6 Installation der Treiber ..............40 Keyboard ...................7 3G-Modul ..................41 Control Center ...................9... - Page 3 Contenidos Schermata Start e Desktop di Windows ........100 App & Titoli ..................101 Acerca de esta Guía del Usuario Concisa ........67 Charms Bar di Windows 8 ............101 Guía rápida para empezar ...............70 Funzioni video ................102 Mapa del sistema: Vista frontal con panel LCD abierto ....71 Funzionalità...
-
Page 4: About This Concise User Guide
About this Concise User Guide This quick guide is a brief introduction to getting your system started. This is a supplement, and not a substitute for the expanded English language User’s Manual in Adobe Acrobat format on the Device Drivers & Utilities + User’s Manual disc supplied with your computer. -
Page 5: Instructions For Care And Operation
Instructions for Care and Operation Safety Information • Only use an AC/DC adapter approved for use with this computer. The computer is quite rugged, but it can be damaged. To pre- • Use only the power cord and batteries indicated in this manual. vent this, follow these suggestions: Do not dispose of batteries in a fire. - Page 6 Polymer Battery Precautions Note the following information which is specific to polymer batteries only, and where applicable, this overrides the general battery precaution information. • Polymer batteries may experience a slight expansion or swelling, however this is part of the battery’s safety mechanism and is not a cause for concern.
-
Page 7: System Startup
System Startup 1. Remove all packing materials. 2. Place the computer on a stable surface. 3. Insert the battery and make sure it is locked in position. 4. Securely attach any peripherals you want to use with the computer (e.g. keyboard and mouse) to their ports. 5. -
Page 8: System Map: Front View With Lcd Panel Open
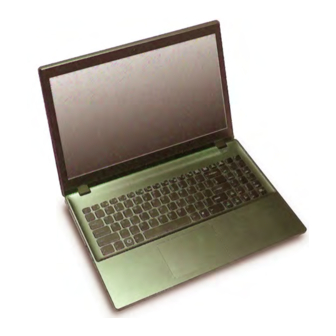
System Map: Front View with LCD Panel Open Figure 2 Front View with LCD Panel Open 1. PC Camera 2. Built-In Microphone 3. *PC Camera LED *When the PC camera is in use, the LED will be illuminated in red. 4. -
Page 9: Led Indicators
LED Indicators The LED indicators on the computer display helpful infor- Icon Color Description mation about the current status of the computer. Icon Color Description Number Lock (Numeric Keypad) Acti- Blue vated The AC/DC Adapter is Orange Blue Caps Lock Activated Plugged In Green The Computer is On... -
Page 10: Keyboard
Keyboard The keyboard has a numeric keypad for easy numeric data input. Pressing Fn + NumLk turns on/off the numeric key- pad. It also features function keys to allow you to change operational features instantly. NumLk & Function Keys ScrLk Numeric eric Keypad... - Page 11 Function Keys & Visual Indicators The function keys (F1 - F11 etc.) will act as hot keys when pressed while the Fn key is held down. In addition to the basic function key combinations, some visual indicators are available (in the Windows Desktop application only and not in the Start Screen) when the hot key driver is installed.
-
Page 12: Control Center
Control Center When in the Windows Desktop application ( not in the Start Screen), press the Fn + Esc key combination, or double- click the icon in the notification area of the taskbar to toggle the Control Center on/off. The Control Center gives quick access to frequently used controls, and enables you to quickly turn modules on/off. - Page 13 Power Status Sleep The Power Status icon will show whether you are cur- Click the Sleep button to bring up the Hibernate rently powered by the battery, or by the AC/DC adapter Sleep buttons, and click either button to have the plugged in to a working power outlet.
-
Page 14: System Map: Front, Left, Right, Rear & Bottom Views
System Map: Front, Left, Right, Rear & Bottom Views Front Left Right Rear Bottom Figure 5 Front, Left, Right, Rear & Bottom Views Overheating 1. LED Indicators 10. Microphone-In Jack To prevent your computer from overheating 2. Multi-in-1 Card Reader 11. -
Page 15: Windows Control Panel
Windows Control Panel Throughout this manual you will see an instruction to open the Control Panel. In Windows 8 right-click the lower left hot corner to bring up the context menu (or use the Windows Logo Key + X key combination) and select Control Panel. -
Page 16: Apps & Tiles
Apps & Tiles The Windows 8 Start screen will contain a number of apps, and many more will be installed as you add more applica- tions etc. Not all of these apps can fit on one screen so you will often need use the slider at the bottom of the screen in order to view all the necessary Apps. -
Page 17: Video Features
Video Features To access the Intel® Graphics and Media Control Pan- The system features both an Intel’s Integrated GPU (for 1. Go to the Control Panel. power-saving) and an NVIDIA’s discrete GPU (for per- Click Intel(R) Graphics and Media in the icon view. formance). - Page 18 Display Devices & Options Using the Windows Logo Key Besides the built-in LCD you can also use an external Key Combination to Switch Displays monitor/flat panel display/TV (TV through HDMI-Out You can also use the + P key combination (or Fn + F7 port only), connected to the external monitor port or to the ) to quickly change display configuration and modes (this HDMI-Out port (High-Definition Multimedia Interface)
-
Page 19: Audio Features
Audio Features Sound Blaster Cinema EQ Install the Sound Blaster Cinema application to allow You can configure the audio options on your computer you to configure the audio settings to your requirements from the Sound control panel in Windows, from the for the best performance in games, music and movies. -
Page 20: Power Options
Power Options The Power Options (Hardware and Sound menu) control panel icon in Windows allows you to configure power man- agement features for your computer. You can conserve power by means of power plans and configure the options for the power button, sleep button (Fn + F4), computer lid (when closed), display and sleep mode (the default power saving state) from the left menu. -
Page 21: Driver Installation
Driver Installation The Device Drivers & Utilities + User’s Manual disc contains the drivers and utilities necessary for the proper operation of the computer. This setup will probably have al- Driver Installation General Guidelines ready been done for you. If this is not the case, insert the disc and click Install Drivers (button), or Option Drivers (button) to access the Optional driver menu. -
Page 22: 3G Module
3G Module If you have included an optional 3G module in your purchase option, follow the instructions below to install the USIM card (which will be provided by your service provider), and then run the appropriate application supplied with your module. -
Page 23: Troubleshooting
Troubleshooting Problem Possible Cause - Solution Wireless LAN/Bluetooth The modules are off as the computer is in Airplane Mode. Check the LED indicator and/or function key indicator to see if it is in Airplane Mode (see Table 1 on page 6). -
Page 24: Specifications
Specifications Intel® Core™ i3 Processor i3-3130M (2.60GHz), i3-3120M (2.50GHz), 15.6" (39.62cm) HD / FHD i3-3110M (2.40GHz) Audio 3MB L3 Cache, 22nm, DDR3-1600MHz, TDP 35W High Definition Audio Compliant Interface Latest Specification Information Intel® Pentium® Processor 2 * Built-In Speakers The specifications listed in this here 2030M (2.50GHz), 2020M (2.40GHz) Built-In Microphone... - Page 25 Mini Card Slot Communication Power One Slot for WLAN Module or WLAN and Built-In Gigabit Ethernet LAN Full Range AC/DC Adapter Bluetooth Combo Module 2M HD PC Camera Module AC Input: 100 - 240V, 50 - 60Hz (Factory Option) Slot 2 for 3G Module or (Factory Option) 3G Mini-Card Module DC Output: 19V, 4.74A (90W) mSATA SSD...
-
Page 26: Über Das Ausführliche Benutzerhandbuch
Über das Ausführliche Benutzerhandbuch Diese Kurzanleitung soll einen Überblick über die Schritte geben, die dazu notwendig sind, das System zu starten. Dieses ist nur eine Ergänzung und kein Ersatz für das erweiterte englischsprachige Benutzerhandbuch, das auf der mitgelieferten Disc Device Drivers & Utilities + User's Manual im Adobe-Acrobat-Format vorliegt. Diese Disc enthält auch die Treiber und Utility-Programme, die für einen einwandfreien Betrieb des Computers notwendig sind (Hinweis: Das Unternehmen behält sich das Recht vor, diese Publikation ohne Vorankündigung zu überarbeiten und den Inhalt zu verändern). -
Page 27: Hinweise Zu Pflege Und Betrieb
Hinweise zu Pflege und Betrieb • Wenn der Computer heruntergefallen ist oder beschädigt wurde (berüh- ren Sie nicht die giftige Flüssigkeit des LCD-Bildschirms). Das Notebook ist zwar sehr stabil, kann aber dennoch be- • Wenn ein ungewöhnlicher Geruch, Hitze oder Rauch aus dem Computer schädigt werden. - Page 28 Polymer Akku Sicherheitshinweise Beachten Sie die folgenden Hinweise, die sich speziell auf Poly- mer Akkus beziehen. Diese Hinweise haben zudem Vorrang gegenüber den Allgemeinen Akku Sicherheitshinweisen. • Polymer Akkus können sich etwas ausdehnen oder anschwellen. Dies ist Teil des Sicherheitsmechanismus des Akkus und kein Anlass zur Sorge. •...
-
Page 29: Schnellstart
Schnellstart 1. Entfernen Sie das gesamte Verpackungsmaterial. 2. Legen Sie den Computer auf eine stabile Unterlage. 3. Setzen Sie den Akku ein, und stellen Sie sicher, dass sie fest sitzt. 4. Schließen Sie alle Peripheriegeräte, die Sie mit dem Computer verwenden wollen (z. -
Page 30: Systemübersicht: Ansicht Von Vorne Mit Geöffnetem Lcd-Bildschirm
Systemübersicht: Ansicht von vorne mit geöffnetem LCD-Bildschirm Abb. 2 Ansicht von vorne mit geöffnetem LCD-Bildschirm 1. PC-Kamera 2. Mikrofon 3. *LED der PC-Kamera *Wenn die PC-Kamera verwendet wird, leuchtet die LED rot. 4. LCD-Bildschirm 5. Netzschalter 6. LED-Anzeigen 7. Tastatur 8. -
Page 31: Led-Anzeigen
LED-Anzeigen Die LED-Anzeigen auf dem Computer zeigen wichtige Informationen über den aktuellen Status des Computers. Symbol Farbe Beschreibung Symbol Farbe Beschreibung blau Die Nummerntastatur ist aktiviert Der AC/DC-Adapter ist ange- Orange schlossen blau Caps-Lock ist aktiviert Grün Der Computer ist angeschaltet Lampe Das System ist im konfigurierten blau... -
Page 32: Tastatur
Tastatur Die Tastatur hat eine eingebettete Nummerntastatur für einfache Zahleneingabe. Durch Drücken auf Fn + Num wird die Nummerntastatur ein- und ausgeschaltet. Zusätzlich gibt es Funktionstasten, über die Sie direkt zwischen den Funktionen um- schalten können. Num & Funktionstasten Rollen Nummemtastatur eric Fn Taste... -
Page 33: Funktionstasten
Funktionstasten Wenn die Funktionstasten (F1 - F11) gleichzeitig mit der Fn-Taste gedrückt werden, funktionieren sie wie Hotkeys. Neben den Tastenkombinationen für die Grundfunktionen gibt es einige visuelle Anzeigen (nur bei der Windows Desktop-An- wendung, aber nicht im Startbildschirm), wenn der Hotkey Treiber installiert ist. Tasten Funktion/ Visuelle Anzeigen Tasten... -
Page 34: Control Center (Steuerzentrum)
Control Center (Steuerzentrum) Drücken Sie auf die Tastenkombination Fn + Esc, oder doppelklicken Sie auf das Symbol im Infobereich auf der Taskleis- te um das Control Center (Steuerzentrum) ein-/auszuschalten in der Windows Desktop-Anwendung (nicht Startbild- schirm). Das Control Center (Steuerzentrum) bietet den schnellen Zugriff auf häufig verwendete Funktionen, und Sie haben hier die Möglichkeit, Module direkt ein-/auszuschalten. - Page 35 Power Status (Energiestatus) Sleep (Schalter) Das Energiestatus-Symbol zeigt an, ob die Stromversor- Klicken Sie auf den Schalter für den Ruhezustand, um die gung aktuell über den Akku oder über das an das Stromnetz Schaltflächen Ruhezustand oder Schlaf aufzuru- angeschlossene Netzteil erfolgt. Die Energiestatus-Anzeige fen.
-
Page 36: Systemübersicht: Ansicht Von Vorne, Links, Rechts, Hinten Und Unten
Systemübersicht: Ansicht von vorne, links, rechts, hinten und unten Vorderseite Linke Seite Rechte Seite Hinterseite Unterseite Abb. 5 Ansicht von vorne, links, rechts, hinten und unten 1. LED-Anzeigen 11. Kopfhörer-Ausgangs- Überhitzung buchse 2. Multi-in-1 Kartenleser USB 3.0 Zum Schutz vor Überhitzung Ihres Computers 12. -
Page 37: Windows Systemsteuerung
Windows Systemsteuerung In diesem Handbuch finden Sie eine Anleitung zum Öffnen der Systemsteuerung. Klicken Sie mit der rechten Maustaste in die linke untere Hot Corner in Windows 8, um das Kontextmenü aufzurufen (verwenden Sie die Tastenkombination Windows-Logo-Taste + X). Wählen Sie dann Systemsteuerung. Verschieben Sie die Maus in die linke untere Ecke Abb. -
Page 38: Apps Und Kacheln
Apps und Kacheln Der Startbildschirm von Windows 8 enthält bereits eine Reihe von Apps, die mit jeder weiteren Installation erweitert wird. Wenn auf dem Bildschirm nicht ausreichend Platz ist, um alle Apps anzuzeigen, können Sie den Schieberegler am unteren Rand des Bildschirms verwenden, um das Fenster entsprechend zu verschieben und die gewünschten Apps sehen zu können. -
Page 39: Grafikfunktionen
Grafikfunktionen Dieses System verfügt sowohl über eine integrierte GPU So rufen Sie die Intel® Steuerung für Grafik und Medien von Intel (zum Energie sparen) und eine diskrete GPU von auf: NVIDIA (für die Leistung). Wenn die Videotreiber in- 1. Rufen Sie die Systemsteuerung auf. stalliert sind, können Sie die Anzeigegeräte wechseln und die 2. - Page 40 Anzeigegeräte Wechseln der Anzeigegeräte mit der Neben dem integrierten LCD-Monitor können Sie auch Windows-Logo-Taste und der Taste P einen externen VGA-Monitor/Flachbildschirm oder ein Wenn Sie gleichzeitig auf die Tasten und P (oder Fn + Fernsehgerät (an die Schnittstelle für externen Monitor oder F7) drücken, konnen Sie bei Windows schnell und einfach an den HDMI-Ausgangsanschluss angeschlossen) als An- die Anzeigeeinstellungen und -modi wechseln (was be-...
-
Page 41: Audiofunktionen
Audiofunktionen Sound Blaster Cinema EQ Mit der Anwendung Sound Blaster Cinema können Sie die Sie können die Audio-Einstellungen Ihres Computers über Audioeinstellungen nach Ihren Anforderungen konfigurie- die Windows-Systemeinstellungen bei Sound , über das ren, um eine bestmögliche Audioleistung bei Spielen und der HD VDeck-Symbol auf dem Desktop oder über das VIA HD Wiedergabe von Musik und Videos zu erreichen. -
Page 42: Energieoptionen
Energieoptionen Die Energieoptionen von Windows ermöglichen Ihnen die Konfiguration der Optionen für das Energiemanagement des Com- puters. Sie können Strom sparen, indem Sie Energiesparpläne erstellen und im linken Menü können Sie die Optionen für den Netzschalter, die Energiespartasten (Fn + F4) und Zuklappeinstellung (beim Schließen des Dekkels) und den An- zeige- und Energiesparmodus (die Standardeinstellung Energie sparen) konfigurieren. -
Page 43: Installation Der Treiber
Installation der Treiber Die Disc Device Drivers & Utilities + User's Manual enthält die Treiber und Hilfspro- gramme, die für das einwandfreie Funktionieren des Computers notwendig sind. Möglicher- Allgemeine Hinweise zur Treiberinstallation weise wurden diese bereits vorinstalliert. Ist das nicht der Fall, legen Sie die Disc ein, und klicken Sie auf Install Drivers (Schaltfläche) oder Option Drivers (Schaltfläche), um das Wenn Sie keine fortge- schrittenen... -
Page 44: 3G-Modul
3G-Modul Wenn Ihr Modell das optionale 3G-Modul enthält, folgen Sie den nachfolgenden Anweisungen, um die USIM-Karte zu in- stallieren (Sie erhalten sie von Ihrem Dienstanbieter). Installieren Sie dann die Anwendung. Einsetzen der USIM-Karte 1. Schalten Sie den Computer aus, drehen Sie es herum, und nehmen Sie den Akku heraus (schieben Sie die Riegel in die unten angezeigte Richtung, und ziehen Sie den Akku heraus). -
Page 45: Fehlerbehebung
Fehlerbehebung Problem Mögliche Ursache - Lösung Die Module Wireless-LAN/ Im Flugzeugmodus sind die Module ausgeschaltet. Prüfen Sie der LED-Anzeige und/ Bluetooth können nicht erkannt oder Funktionstastenanzeige, ob der Computer im Flugzeugmodus ist (siehe Tabelle 1 auf werden. Seite 28). Mit der Tastenkombination Fn + F11 können Sie den Flugzeugmodus ein- oder ausschalten (siehe Tabelle auf Seite 31). -
Page 46: Technische Daten
Technische Daten Intel® Core™ i3 Prozessor Audio i3-3130M (2,60GHz), i3-3120M (2,50GHz), High-Definition-Audio-kompatible i3-3110M (2,40GHz) Schnittstelle 3MB L3 Cache, 22nm, DDR3-1600MHz, 2 eingebaute Lautsprecher Aktualität der technischen Daten TDP 35W Eingebautes Mikrofon Die in diesem Teil aufgeführten techni- Intel® Pentium® Processor Sound Blaster™... - Page 47 Mini-Card-Steckplatz Kommunikation Stromversorgung Ein Steckplatz für Wireless-LAN-Modul o 1 Gbit Ethernet-LAN eingebaut AC/DC-Adapter für den gesamten Kombinierte Bluetooth und WLAN-Modul Spannungsbereich 2M HD PC-Kamera-Modul (Werkseitige Option) Steckplatz 2 für 3G- AC-Eingang: 100-240 V, 50-60Hz (Werkseitige Option) 3G Mini-Card-Modul Modul o mSATA-SSD-Laufwerk DC-Ausgang: 19V, 4,74A (90W) WLAN/ Bluetooth Half Mini-Card Module: Videoadapter...
-
Page 48: A Propos De Ce Guide Utilisateur Concis
A propos de ce Guide Utilisateur Concis Ce guide rapide est une brève introduction à la mise en route de votre système. Il s’agit d’un supplément, et non pas d’une alternative au Manuel de l’Utilisateur en Anglais complet au format Adobe Acrobat sur le disque Device Drivers & Utilities + User's Manual fourni avec votre ordinateur. - Page 49 Instructions d’entretien et d’utilisation • Si une odeur inhabituel, de la chaleur ou de la fumée apparaissait sor- tant de votre ordinateur. L’ordinateur est robuste, mais il peut toutefois être endomma- gé. Afin d’éviter ceci, veuillez suivre ces recommandations : Informations de sécurité...
- Page 50 Précautions concernant les batteries polymères Notez les informations suivantes spécifiques aux batteries po- lymères, et le cas échéant, celles-ci remplacent les informa- tions générales de précaution sur les batteries. • Les batteries polymères peuvent présenter une légère dilatation ou gonflement, mais cela est inhérent au mécanisme de sécurité de la batterie et ne représente pas une anomalie.
-
Page 51: Guide De Démarrage Rapide
Guide de démarrage rapide 1. Enlevez tous les memballages. 2. Posez l’ordinateur sur une surface stable. 3. Installez la batterie et assurez-vous qu’elle correctement posi- tionnée. 4. Connectez fermement les périphériques que vous souhaitez uti- liser avec votre ordinateur (par ex. clavier et souris) à leurs ports respectifs. -
Page 52: Carte Du Système: Vue De Face Avec L'écran Lcd Ouvert
Carte du système: Vue de face avec l’écran LCD ouvert Figure 2 Vue de face avec l’écran LCD ouvert 1. Caméra PC 2. Microphone 3. *Indicateur LED de caméra PC *Quand la caméra PC est en cours d'utilisation le Indicateur LED sera illuminé... -
Page 53: Indicateurs Led
Indicateurs LED Les indicateurs LED sur votre ordinateur affichent des infor- Icône Couleur Description mations utiles sur l’état actuel de votre ordinateur. Icône Couleur Description Verrouillage numérique (pavé numé- Bleue rique) activé Orange L'adaptateur AC/DC est branché Verrouillage majuscule activé Bleue Vert L’ordinateur est allumé... -
Page 54: Clavier
Clavier Le clavier est doté d'un pavé numérique intégré pour une saisie des données numériques plus facile. Le fait d'appuyer sur Fn + Verr Num active ou désactive le pavé numérique. Il est également doté de touches fonction pour vous permettre de changer instantanément de mode opérationnel. -
Page 55: Touches Fonction
Touches fonction Les touches de fonctions (F1 - F11 etc.) agiront comme touches de raccourci (hot-key) quand pressée en maintenant la touche Fn appuyée. En plus des combinaisons des touches de fonction de base, des indicateurs visuels sont disponibles (dans l'ap- plication Bureau de Windows uniquement et pas dans l'écran d'accueil) quand le pilote de touches de raccourci (HotKey Driver) est installé. -
Page 56: Control Center (Centre De Contrôle)
Control Center (Centre de contrôle) Lorsque vous êtes dans l'application Bureau de Windows (pas dans l'écran d'accueil) appuyez sur la combinaison de touches Fn + Échap ou double-cliquez sur l'icône dans la zone de notification de la barre des tâches pour activer/désactiver le Control Center (Centre de contrôle). - Page 57 Power Status (État d'alimentation) Sleep (Veille) L'icône État d'alimentation indique si vous êtes actuelle- Cliquez sur le bouton Veille pour faire apparaître les boutons ment alimenté par la batterie, ou par l'adaptateur AC/DC Veille Prolongée ou Veille , et cliquez sur l’un des branché...
-
Page 58: Carte Du Système: Vues De Face, Gauche, Droite, Arrière & Dessous
Carte du système: Vues de face, gauche, droite, arrière & dessous Face Gauche Droit Arrière Dessous Figure 5 Vues de face, gauche, droite, arrière & dessous Surchauffe 1. Indicateurs LED 11. Prise de sortie haut- Port USB 3.0 Afin de ne pas causer une surchauffe de votre parleurs/casque 2. -
Page 59: Panneau De Configuration De Windows
Panneau de Configuration de Windows Tout au long de ce manuel, vous verrez une instruction pour ouvrir le Panneau de Configuration. Dans Windows 8 cliquez- droit sur le coin chaud inférieur gauche pour faire apparaître le menu contextuel (utilisez la combinaison de touches Touche Logo de Windows + X) et sélectionnez Panneau de Configuration. -
Page 60: Applications Et Vignettes
Applications et Vignettes L'écran d'accueil de Windows 8 contiendra un certain nombre d'applications, et bien d'autres seront installées lorsque vous ajouterez des applications, etc. Toutes ces applications peuvent tenir sur un seul écran ainsi vous aurez souvent besoin d'uti- liser le curseur au bas de l'écran afin d'afficher toutes les applications nécessaires. Barre des charmes de Windows Le côté... -
Page 61: Caractéristiques Vidéo
Caractéristiques vidéo Le système comporte à la fois un GPU intégré Intel (pour Pour accéder au panneau de configuration graphiques et l’économie d’énergie) et un GPU discret NVIDIA (pour les média Intel: performances). Vous pouvez changer de périphérique d’affi- 1. Allez au Panneau de Configuration. chage, et configurer les options d’affichage dès le moment 2. - Page 62 Périphériques d’affichage Utilisez la combinaison de touches du En plus du LCD intégré, vous pouvez aussi utiliser un moni- logo de Windows + P pour changer teur VGA externe/écran plat ou TV (connecté au port moni- d'affichage teur externe ou à la prise de sortie HDMI) comme Vous pouvez utiliser la combinaison de touches + P (ou périphérique d'affichage.
-
Page 63: Caractéristiques Audio
Caractéristiques audio Sound Blaster Cinema EQ Installez l'application Sound Blaster Cinema afin de pou- Vous pouvez configurer les options audio de votre ordinateur voir configurer les paramètres audio adéquats permettant à partir du panneau de configuration Son dans Windows, d’obtenir les meilleures performances de jeux, de musique et à... -
Page 64: Options D'alimentation
Options d’alimentation Le panneau de configuration Options d'alimentation de Windows vous permet de configurer la gestion d'alimentation de votre ordinateur. Vous pouvez économiser de l'énergie à l'aide de modes de gestion de l'alimentation et configurer les op- tions pour le bouton d'alimentation, bouton de veille (Fn + F4), couvercle de l'ordinateur (lorsqu'il est fermé), mode Affichage et Veille (l'état d'économie d'énergie par défaut) dans le menu de gauche. -
Page 65: Installation Du Pilote
Installation du pilote Le disque Device Drivers & Utilities + User’s Manual contient les pilotes et les utilitaires nécessaires pour un bon fonctionnement de votre ordinateur. Cette installation aura proba- Directives générales pour l'installation du pilote blement déjà été faite pour vous. Si ce n'est pas le cas, insérez le disque et cliquez sur Install Drivers (bouton), ou Option Drivers (bouton) pour accéder au menu des pilotes Option- D'une manière... -
Page 66: Module 3G
Module 3G Si votre option d'achat comporte un module 3G optionnel, suivez les instructions ci-dessous pour installer la carte USIM (qui vous sera fournie par votre fournisseur de service), et installez ensuite l'application. Insérer la carte USIM 1. Eteignez l'ordinateur, retournez-le et retirez la batterie (faites glisser le loquet dans la direction indiquée en dessous et sortez la batte- rie). -
Page 67: Dépannage
Dépannage Problème Cause possible - résolution modules sans fil/ Les modules sont désactivés quand l'ordinateur est en Mode Avion. Vérifiez l'indicateur LED Bluetooth ne peuvent pas être et/ou l’indicateur de la touche de fonction pour voir si l'ordinateur est en Mode Avion (voir détectés. -
Page 68: Spécifications
Spécifications Processeur Intel® Core i3 i3-3130M (2,60GHz), i3-3120M (2,50GHz), Interface conforme HDA (Son Haute i3-3110M (2,40GHz) Définition) Cache L3 3Mo, 22nm, DDR3-1600MHz, 2 haut-parleurs intégrés Dernières informations de TDP 35W Microphone intégré spécification Processeur Intel® Pentium® Sound Blaster™ Cinema Les spécifications énumérées dans 2030M (2,5GHz), 2020M (2,4GHz) Sécurité... - Page 69 Logements Mini-carte Communication Mise en marche Un logement pour module LAN sans fil o 1Gbit réseau Ethernet intégré Adaptateur AC/DC pleine bande module combo Bluetooth et LAN sans fil 2M caméra PC HD Entrée AC: 100-240V, 50-60Hz (Option d’usine) Logement 2 pour module (Option d’usine) Module Mini-carte 3G Sortie DC: 19V, 4,74A (90W) 3G o lecteur SSD mSATA...
-
Page 70: Acerca De Esta Guía Del Usuario Concisa
Acerca de esta Guía del Usuario Concisa Esta guía rápida es una breve introducción para poner su sistema en funcionamiento. Es un suplemento y no un sustituto del Manual del usuario completo en inglés en formato Adobe Acrobat del disco Device Drivers & Utilities + User's Manual suministrado con el ordenador. - Page 71 Instrucciones para el cuidado y funcio- • Si hay un olor fuera de lo normal, calor o humo que sale del orde- nador. namiento Información de seguridad El ordenador portátil es muy robusto, pero puede dañarse. Para • Utilice solamente un adaptador de alimentación aprobado para su evitar esto, siga estas sugerencias: uso con este ordenador.
- Page 72 Precauciones para baterías de polímero Tenga en cuenta la información siguiente específica para bate- rías de polímero; además, donde corresponda, invalida la infor- mación sobre precauciones para baterías normales. • Las baterías pueden aumentar o hincharse ligeramente, sin embargo, esto es parte del mecanismo de seguridad de la batería y o supone un problema.
-
Page 73: Guía Rápida Para Empezar
Guía rápida para empezar 1. Quite todos los materiales del embalaje. 2. Coloque el ordenador en una superficie estable. 3. Inserte la batería y asegúrese de que quede bloqueada en su posición. 4. Conecte en los puertos correspondientes los periféricos que desee utilizar con el ordenador (p. -
Page 74: Mapa Del Sistema: Vista Frontal Con Panel Lcd Abierto
Mapa del sistema: Vista frontal con panel LCD abierto Figura 2 Vista frontal con panel LCD abierto 1. Cámara PC 2. Micrófono incorporado 3. *LED de cámara PC *Cuando la cámara PC esté en uso, el LED se iluminará en rojo. 4. -
Page 75: Indicadores Led
Indicadores LED Los indicadores LED en su ordenador muestran una valiosa Icono Color Descripción información sobre el estado actual del ordenador. Icono Color Descripción El teclado numérico (NumLk) está acti- Azul vado Azul El bloqueo de mayúsculas está activado El adaptador AC/DC está conec- Naranja tado El bloqueo de desplazamiento está... -
Page 76: Teclado
Teclado El teclado tiene un teclado numérico para una entrada fácil de datos numéricos. Al presionar Fn + Bloq Num el teclado numérico se habilita o inhabilita. También incluye las teclas de función para permitirle cambiar las características operacionales al instante. Teclas de función Bloq Num &... - Page 77 Teclas de función Las teclas de función (F1 - F11 etc.) actuarán como teclas directas (Hot-Key) cuando se pulsan junto con la tecla Fn. Además de las combinaciones de teclas de función básicas algunos indicadores visuales están disponibles (sólo en la aplicación Escritorio de Windows y no en la pantalla Inicio) cuando el controlador de teclas directas está...
-
Page 78: Control Center (Centro De Control)
Control Center (Centro de control) Presione la combinación de teclas Fn + Esc o haga doble clic en el icono en el área de notificación de la barra de tareas para activar o desactivar el Control Center (Centro de control) en la aplicación Escritorio de Windows (no en la pantalla Inicio). - Page 79 Power Status (Estado de energía) Sleep (Suspender) El icono Estado de energía mostrará si la alimentación Haga clic en el botón Suspender para abrir los botones actual viene dada por la batería o por el adaptador AC/DC Hibernar o Suspender y haga clic en uno de esos enchufado en una toma de corriente.
-
Page 80: Mapa Del Sistema: Vistas Frontal, Izquierda, Derecha, Posterior E Inferior
Mapa del sistema: Vistas frontal, izquierda, derecha, posterior e inferior Parte frontal Lateral izquierdo Lateral derecho Parte posterior Cara inferior Figura 5 Vistas frontal, izquierda, derecha, posterior e inferior Recalentamiento 1. Indicadores LED 11. Conector de salida de Puerto USB Para evitar... -
Page 81: Panel De Control De Windows
Panel de Control de Windows A lo largo de este manual verá una instrucción para abrir el Panel de Control. En Windows 8 haga clic con el botón derecho en la esquina inferior izquierda para abrir el menú contextual (o utilice la combinación Tecla de Windows + tecla X) y seleccionar Panel de Control. -
Page 82: Apps Y Mosaicos
Apps y Mosaicos La pantalla de Inicio de Windows 8 contendrá varias apps y muchas más se instalarán conforme añada más aplicaciones, etc. No todas estas apps caben en una pantalla, por lo que a menudo deberá usar el control deslizante de la parte inferior de la pantalla para ver todas las apps necesarias. -
Page 83: Parámetros De Vídeo
Parámetros de vídeo El sistema incluyo una GPU integrada de Intel (para el Para acceder al Panel de control de gráficos y multimedia ahorro de energía) y una GPU discreta NVIDIA (para Intel®: mayor rendimiento). Puede cambiar los dispositivos de 1. - Page 84 Dispositivos y opciones de pantalla Usar la combinación de teclas del Además del LCD incorporado, también puede utilizar un logotipo Windows + P para cambiar monitor VGA/pantalla plana o TV (conectado al puerto para entre pantallas monitor externo o al puerto de salida de HDMI) como Puede usar la combinación de teclas + P (o Fn + F7) para dispositivo de pantalla.
-
Page 85: Características De Audio
Características de audio Sound Blaster Cinema EQ Instale la aplicación Sound Blaster Cinema para poder Puede configurar las opciones de audio en su ordenador ajustar la configuración de audio según sus necesidades para desde el panel de control de Sonido en Windows, desde el obtener el mejor rendimiento en juegos, música y películas. -
Page 86: Opciones De Energía
Opciones de energía El panel de control de las opciones de energía (menú Hardware y sonido) de Windows permite configurar las funciones de administración de energía del ordenador. Puede ahorrar energía con los planes de energía y configurar las opciones para el botón de encendido, botón de suspensión (Fn + F4), tapa del ordenador (al cerrarla), pantalla y modo de suspensión (el estado de ahorro de energía predeterminado) en el menú... -
Page 87: Instalación De Controladores
Instalación de controladores El disco Device Drivers & Utilities + User’s Manual contiene los controladores y utilitarios necesarios para utilizar el ordenador correctamente. Inserte el disco y haga clic en Install Directrices generales para la instalación del Drivers (botón), u Option Drivers (botón) para acceder al menú de controladores opcional. controlador Instale los controladores en el orden indicado en la Figura... -
Page 88: Módulo 3G
Módulo 3G Si ha incluido un módulo opcional 3G en su opción de compra, siga las instrucciones siguientes para instalar la tarjeta USIM (suministrada por su proveedor de servicios) y luego instale la aplicación. Insertar la tarjeta USIM 1. Apague el ordenador y gírelo para quitar la batería (deslice los pestillos en la dirección indicada abajo y saque la batería). -
Page 89: Solución De Problemas
Solución de problemas Problema Posible causa - Solución Los módulos WLAN y Los módulos están apagados cuando el equipo está en Modo Avión. Compruebe el indicador Bluetooth no pueden y/o el indicador de la tecla de función para ver si el equipo está en Modo Avión (vea detectarse. -
Page 90: Especificaciones
Especificaciones Procesador Intel® Core™ i3 Audio i3-3130M (2,60GHz), i3-3120M (2,50GHz), Interfaz compatible HDA (Sonido Intel de i3-3110M (2,.40GHz) alta definición) Caché de nivel 3 de 3MB, 22nm, DDR3- 2 altavoces incorporados Información actualizada de 1600MHz, TDP 35W Micrófono incorporado especificaciones Procesador Intel®... -
Page 91: Especificaciones
Ranura Mini-Card Comunicaciones Alimentación Una ranura para módulo LAN inalámbrica LAN Ethernet de 1Gbit incorporada Adaptador de AC/DC autodetector de o módulo combo Bluetooth y LAN corriente Módulo cámara PC 2M HD Inalámbrica Entrada AC: 100-240V, 50-60Hz (Opción de fábrica) Módulo Mini-Card 3G (Opción de fábrica) Ranura 2 para módulo Salida DC: 19V, 4,74A (90W) Módulos Half Mini-Card WLAN/... -
Page 92: Informazioni Su Questa Guida Rapida
Informazioni su questa guida rapida Questa guida rapida rappresenta un’introduzione rapida all’avvio del sistema. Si tratta di un supplemento e non di una sostituzione del Manuale per l'utente completo in lingua inglese nel formato Adobe Acrobat, memorizzato sul disco Device Drivers &... - Page 93 Istruzioni per la custodia e il funziona- • Se c'è un odore non usuale, calore o fumo che fuoriesce dal compu- ter. mento Informazioni di sicurezza Il computer notebook è abbastanza rigido, ma è possibile che possa essere danneggiato. Per evitare qualsiasi danno, attenersi •...
- Page 94 Precauzioni relative alla batteria ai polimeri Le informazioni seguenti sono molto importanti e si riferiscono unicamente alle batterie ai polimeri e, ove applicabile, hanno priorità rispetto alle precauzioni generali relative alle batterie. • Le batterie ai polimeri possono espandersi o gonfiarsi leggermente, tuttavia questo fa parte del meccanismo di sicurezza della batteria e non deve essere causa di preoccupazione.
-
Page 95: Guida Di Avvio Rapido
Guida di avvio rapido 1. Eliminare tutti i materiali di imballo. 2. Appoggiare il computer su una superficie stabile. 3. Inserire la batteria e verificare che sia bloccata in posizione. 4. Collegare bene le periferiche che si desidera usare con il computer (per esempio tastiera e mouse) alle porte corrispondenti. -
Page 96: Descrizione Del Sistema: Vista Anteriore Con Pannello Lcd Aperto
Descrizione del sistema: Vista anteriore con pannello LCD aperto Figura 2 Vista anteriore con pannello LCD aperto 1. Camera PC (opzionale) 2. Microfono incorporato 3. *LED della camera PC *Quando si utilizza la camera PC, l'indicatore LED si illumina in rosso. 4. -
Page 97: Indicatori Led
Indicatori LED Gli indicatori LED sul computer segnalano importanti informazioni relative allo stato corrente del computer. Icona Colore Descrizione Icona Colore Descrizione La funzione blocco numerico (tastierino numerico) è attivata Arancione L'alimentatore è collegato Bloc Maiusc è attivato Verde Il computer è acceso Verde lam- Il computer è... -
Page 98: Tastiera
Tastiera Nella tastiera è stato integrato un tastierino numerico per un facile inserimento dei numeri. Premere Fn + Bloc Num per commutare l’attivazione e la disattivazione della tastiera numerica. Dispone anche di tasti funzione che consentono di cambiare istantaneamente le funzionalità operative. -
Page 99: Tasti Funzione
Tasti funzione I tasti funzione (da F1 a F11) agiscono come Hot-Key quando premuti tenendo premuto il tasto Fn. In aggiunta alle combinazioni di tasti funzione base, quando è installato il driver hot key (HotKey Driver) alcuni indicatori visivi sono disponibili (solo nell'applicazione Windows Desktop e non nella schermata Start). -
Page 100: Control Center (Centro Di Controllo)
Control Center (Centro di controllo) Premere la combinazione di tasti Fn + Esc oppure fare doppio clic sull'icona nell'area di notifica della barra delle applicazioni per attivare/disattivare il Control Center (Centro di controllo) dall'interno dell'applicazione Windows Desktop (non nella Schermata Start). Il Control Center (Centro di controllo) consente di accedere rapidamente ai controlli utilizzati più... - Page 101 Power Status (Stato di alimentazione) Sospensione L'icona Stato di alimentazione viene visualizzata se Fare clic sul pulsante Sospensione per mostrare i pulsanti attualmente il computer è alimentatore con la batteria, Ibernazione e Sospensione , quindi scegliere uno oppure mediante l'alimentatore collegato in una presa dei pulsanti per porre il computer nella modalità...
-
Page 102: Descrizione Del Sistema: Vista Anteriore, Sinistra, Destra, Posteriore E Inferiore
Descrizione del sistema: Vista anteriore, sinistra, destra, posteriore e inferiore Lato anteriore Lato sinistro Lato destro Lato posteriore Parte inferiore Figura 5 - Vista anteriore, sinistra, destra, posteriore e inferiore Surriscaldamento 1. Indicatori LED 10. Jack ingresso del Porta USB Per prevenire il surriscaldamento del computer, microfono... -
Page 103: Pannello Di Controllo E Desktop Di Windows
Pannello di controllo e Desktop di Windows In questo manuale sarà richiesto di aprire il Pannello di controllo. In Windows 8 fare clic con il pulsante destro del mouse nell'angolo inferiore sinistro per far apparire il menu contestuale (o utilizzare la combinazione di tasti Tasto logo Windows + X) e selezionare Pannello di controllo. -
Page 104: App & Titoli
App & Titoli La schermata di avvio di Windows 8 conterrà un numero di app, e molte altre ancora saranno installate come si aggiungono ulteriori applicazioni ecc. Non tutte queste applicazioni troveranno posto su uno schermo, così, spesso, per visualizzare tutte le applicazioni necessarie, sarà... -
Page 105: Funzioni Video
Funzioni video Il sistema è dotato sia di una GPU integrata Intel (per il Per accedere al Pannello di controllo grafica e multimedia risparmio energetico) sia di una GPU discreta NVIDIA (per Intel®: le prestazioni). È possibile modificare le Impostazioni di 1. - Page 106 Dispositivi di visualizzazione Utilizzo della combinazione di tasti logo Oltre allo schermo LCD integrato, è possibile utilizzare un di Windows + P per passare da una monitor VGA/LCD a schermo piatto o una TV (collegato visualizzazione all'altra alla porta per monitor esterno o alla porta uscita HDMI) È...
-
Page 107: Funzionalità Audio
Funzionalità audio Sound Blaster Cinema EQ Installare l'applicazione Sound Blaster Cinema per È possibile configurare le opzioni audio del computer dal consentire all'utente di configurare le impostazioni audio in pannello di controllo Audio di Windows, dall'icona HD base ai propri requisiti per ottenere le prestazioni migliori in VDeck sul desktop o dal pannello di controllo VIA HD giochi, musica e filmati. -
Page 108: Opzioni Risparmio Energia
Opzioni risparmio energia Il pannello di controllo delle Opzioni risparmio energia (menu Hardware e suoni) di Windows consente la configurazione delle funzioni di risparmio energetico del computer. Selezionando Risparmio di energia è possibile attivare questa funzione e configurare le opzioni relative al pulsante di alimentazione, pulsante di sospensione (Fn + F4), coperchio del computer (chiuso), schermo e modalità... -
Page 109: Installazione Driver
Installazione driver Il disco Device Drivers & Utilities + User’s Manual contiene i driver e le utilità necessari per il corretto funzionamento del computer. Inserire il disco e fare clic su Install Drivers Linee guida generali per l'installazione dei driver (pulsante), oppure il pulsante Option Drivers per accedere al menu del driver opzionale. -
Page 110: Modulo 3G
Modulo 3G Se nell'opzione di acquisto è stato incluso un modulo 3G opzionale, seguire le istruzioni sotto per installare la carta USIM (presumibilmente fornita dal proprio operatore), quindi installare l'applicazione. Inserimento della carta USIM 1. Spegnere il computer, girarlo e rimuovere la batteria (rilasciare i fermi nella direzione indicata sotto e sganciare la batteria facendola scorrere). -
Page 111: Risoluzione Dei Problemi
Risoluzione dei problemi Problema Possibile causa - Soluzione Non è possibile rilevare i moduli I moduli sono disattivati quando il computer si trova nella modalità aereo. Controllare il LED LAN Wireless e Bluetooth. indicatore e/o l'indicatore del tasto funzione per vedere se il computer è in modalità aereo (vedere la Tabella 1 a pagina 94). -
Page 112: Specifiche Tecniche
Specifiche tecniche Processore Intel® Core™i3 i3-3130M (2,60GHz), i3-3120M (2,50GHz), 15,6" (39,62cm) HD/ FHD i3-3110M (2,40GHz) Audio Cache L3 da 3MB, 22nm, DDR3-1600MHz, Ultimi aggiornamenti delle TDP 35W Interfaccia conforme High Definition Audio specifiche tecniche Processore Intel® Pentium® 2 altoparlanti incorporati Le specifiche tecniche elencate in que- 2030M (2,50GHz), 2020M (2,40GHz) Microfono incorporato... - Page 113 Slot Mini-Card Comunicazione Alimentazione Uno slot per il modulo Wireless LAN o LAN 1Gbit Ethernet Adattatore AC/DC a pieno campo modulo combo Bluetooth e Wireless LAN Modulo di camera PC 2M HD Ingresso AC: 100-240V, 50-60Hz (Opzione di fabbrica) Slot 2 per il modulo (Opzione di fabbrica) Modulo 3G Mini- Uscita DC: 19V, 4,74A (90W) 3G o il modulo per SSD mSATA...
Need help?
Do you have a question about the W650EH and is the answer not in the manual?
Questions and answers