Table of Contents
Advertisement
Quick Links
Advertisement
Table of Contents

Related Manuals for Luminex 200

Summary of Contents for Luminex 200
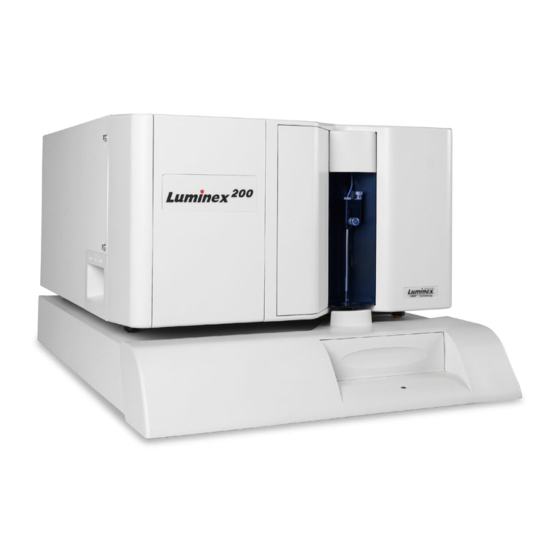
- Page 1 Lum/nex ® ® Luminex 200™ System User Manual...
- Page 2 Surrey KT 17 1EJ, England Luminex Corporation (Luminex) reserves the right to modify its products and services at any time. This guide is subject to change without notice. Although prepared to ensure accuracy, Luminex assumes no liability for errors or omissions, or for any damages resulting from the application or use of this information.
- Page 3 IS CAUSED BY SELLER'S GROSS NEGLIGENCE. 3. Buyer's Use of Product -Buyer agrees that no rights or licenses under Luminex's patents shall be implied from the sale of the Product, except as expressly provided herein, and Buyer does not receive any right under Luminex's patent rights hereunder.
- Page 4 Product. Buyer agrees to comply with instructions, if any, furnished by Seller or Luminex relating to the use of the Product and not misuse the Product in any manner. Buyer shall not reverse engineer, decompile, disassemble or modify the Product. Buyer acknowledges that Luminex retains ownership of all patents, trademarks, trade secrets and other proprietary rights relating to or residing in the Product.
- Page 5 (30) days written notice to you. Your rights under this EULA automatically terminate without further action on the part of Luminex if you do not comply with any of the terms or conditions of this EULA. Upon any...
- Page 6 The waiver or failure of Luminex or you to exercise in any respect any right or rights provided for herein shall not be deemed a waiver of any further right hereunder.
-
Page 7: Table Of Contents
Luminex Software ........ - Page 8 Bead Detail Irregularities ....... . . 42 Luminex SD Problems ........45 Filter.
- Page 9 Luminex 200 System User Manual Hardware ..........47 Software.
-
Page 11: Safety
Do not perform procedures on your Luminex system that are not specifically contained in this manual, unless you are directed to do so by Luminex Technical Support. Intended Use The Luminex 200 Instrument is a clinical multiplex test system intended to measure and sort multiple signals generated in an In Vitro Diagnostic assay from a clinical sample. -
Page 12: Symbols
The protection provided by the equipment may be impaired or the warranty voided if the system is used in a manner not specified by the instructions or by Luminex Corporation. Fluidics This system contains fluidics. -
Page 13: Electromagnetic Compatibility
Class 1, containing two Class 3b lasers, and including an accessory Class 2 bar code reader. The Luminex 200 complies with IEC 60825-1 and 21 CFR 1040.10 and 1040.11 except for deviations pursuant to Laser Notice No. 50, dated June 24,... -
Page 14: Barcode Reader Laser
Luminex 200 System User Manual The following label appears on the back of the Luminex 200 instrument. Under NO circumstances should you remove the Luminex 200 analyzer cover! When performing routine maintenance, turn power to the Luminex 200 analyzer OFF and disconnect the power cord. -
Page 15: Mechanical
Blue Indicator Light The blue light above the Luminex 200 analyzer sample arm indicates the on/off status of the Luminex 200 analyzer, and is harmless. The blue light-emitting diode (LED) does not emit light in the UV spectrum. -
Page 16: Decontaminating The Luminex 200 Analyzer For Return Shipment
Decontaminating Luminex Technical Support will give you a Return Material the Luminex 200 Authorization (RMA) number if they direct you to return the system. They will explain how to return the system according to Luminex Analyzer for Return procedures. Shipment The accessible surfaces and the internal fluidics system must be sanitized and decontaminated before returning the analyzer. -
Page 17: The System
Assay analysis requiring temperature control is provided through the Luminex XYP instrument heater block. There are two fluidics paths in the Luminex 200 analyzer. The first path involves a syringe-driven mechanism that controls the sample uptake. This mechanism permits small sample uptake volumes from small reaction volumes. -
Page 18: Hardware
High speed digital signal processors and advanced computer algorithms provide analysis of the xMAP microspheres as they are processed through the Luminex 200 analyzer. Results of the analyses are processed and provided in a report format. -
Page 19: Required Laboratory Reagents
Distilled water Luminex Software Luminex software provides complete control of the system and performs data analysis. Your Luminex 200 system is preloaded with the Luminex software. However, we supply a software DVD should you need to reinstall the software. This software requires a dedicated system. Unauthorized additional software is prohibited and may result in improper operation of the system. -
Page 20: Accuracy And Precision
Microtiter plates with 96 wells must be compatible with the Luminex XYP instrument plate holder. The following microtiter plate types are compatible with the Luminex XYP instrument plate holder: flatbottom, conical, round, filter bottom, half plates, overall height no more than 0.75” (19 mm), any color. -
Page 21: Luminex 200 Analyzer General
0°C to + 50°C and 20-80% noncondensing, respectively • Input voltage range: 100 - 120 V~ ± 10%, 1.4 Amp, and 200-240 V~ ± 10%, 0.8 Amp, 47-63 Hz. • AC inlet fuse: 3 Amp, 250 V~, fast acting Optics •... -
Page 22: Luminex Xyp Instrument General
Support link to open the FAQ list. Recommended Additional Equipment Uninterruptible Luminex highly recommends using an uninterruptible power supply Power Supply (UPS) to protect your system from power outages. Choose one that can provide 1050 Watts for at least 45 minutes. The UPS should be... -
Page 23: System Overview
Luminex XYP instrument to the computer, and the Luminex SD system to the Luminex 200 analyzer. Luminex 200 Located on the bottom of the Luminex 200 analyzer, the filter must Analyzer be checked and cleaned as necessary. For proper ventilation, do not... -
Page 24: Fluidics
6. XYP Communication Port (DB9) 3. Power Input Module 7. Analyzer ventilation filter (on bottom of analyzer) 4. XYP Ventilation Filter Figure 1 Back of the Luminex 200 Analyzer and Luminex XYP Instrument Fluidics Luminex A stainless steel sample probe acquires the sample. - Page 25 Figure 2 Fluidics Components Access Doors The Luminex 200 analyzer has three access doors. Two of the access doors are on the front, and the third is on the back. The front left access door supplies access to the sheath filter. The front center access door supplies access to the syringe.
-
Page 26: Optical
For proper operation, place the Luminex SD system at the same level Delivery System as the base of the Luminex XYP instrument. Do not put it on top of the Luminex 200 analyzer. If you are not using the SD system, sheath fluid levels must be monitored manually. -
Page 27: Maintenance And Cleaning
Maintenance and Cleaning To ensure accurate test results, properly clean and maintain the Luminex 200 system. Read and follow all instructions in this section. For your convenience, a maintenance log form is included at the end of this chapter. It is important to use only xMAP Sheath Fluid or other Luminex- approved sheath fluid. - Page 28 Luminex XYP instrument plate holder with position A1 in the top left corner. 4. Verify that the correct well location is selected in the Luminex software, and that you are using the appropriate number of alignment discs. Retract the plate.
-
Page 29: After Running Samples
1. Sanitize with a 10% to 20% household bleach solution. 2. Run two Wash cycles with distilled water. 3. Soak with distilled water. Wait until the soak completes. 4. If desired, turn off the Luminex 200 analyzer. Routine Tasks Sheath and Waste Fluids Replace the sheath fluid and empty the waste container as required. -
Page 30: Weekly
Weekly Visual Inspection Open all of the Luminex 200 analyzer doors and visually inspect for leaks, corrosion, and other signs of improper function. Check all visible tubing connections. Check the Luminex XYP instrument air intake filter for buildup of dust. Check the SD system and its connection for leaks. -
Page 31: Flush The System
10% to 20% household bleach solution and then plain distilled water. 4. Dry the sheet metal surfaces to prevent corrosion. 5. Plug in and power on the Luminex 200 analyzer, the Luminex XYP instrument, and the Luminex SD system. Calibrate and Verify the You should calibrate and verfy the system on a monthly basis as part of regularly scheduled maintenance. -
Page 32: Every Six Months
Do not allow the tubing to fall the power cord from the wall source. inside the instrument. 2. On the back of the Luminex 200 analyzer, in the upper left corner, remove the screw at the top of the panel and open the panel door. -
Page 33: Luminex Xyp Instrument Air Intake Filter
Luminex XYP instrument power cord from the wall source. 2. On the back of the Luminex XYP instrument, to the left side, gently remove the screen from the Luminex XYP instrument filter. Do not remove the screws. See Figure 5. -
Page 34: Syringe Seal
Figure 5 Removing the Screen 3. Replace the filter and replace the screen. See Figure 6. Figure 6 Removing and Replacing the Filter 4. Plug in and turn on Luminex XYP instrument power. Syringe Seal To replace the syringe plunger seal:... - Page 35 The syringe is the glass cylinder with a metal plunger inside, shown in the following graphic. Frontal view of a Luminex system with door open and syringe exposed. 3. At the base of the syringe, loosen the thumbscrew by turning it counter-clockwise six quarter-turns.
-
Page 36: Luminex 200 Analyzer Ventilation Filter
Luminex 200 analyzer and the Luminex XYP instrument). When you feel the filter, push the filter toward the left of the analyzer. See Figure 7. 3. Remove the filter from the left side of the Luminex 200 analyzer. Figure 7 Luminex 200 Analyzer Ventilation Filter... -
Page 37: Annually
2. Disconnect the sheath fluid tubing before changing the filter. 3. Open the left door on the Luminex 200 analyzer. Disconnect the filter by pushing down on the metal clamps on each connection. -
Page 38: As Required
To replace the fuses in either the Luminex 200 analyzer or the Luminex XYP instrument: 1. Turn off the power switch on the rear of the analyzer or instrument, then unplug the instrument power cord from the wall source. -
Page 39: Replacing The Sd System With A Sheath Bottle
xMAP Technology Maintenance and Cleaning 6. Replace the module door. 7. Plug in and power on the analyzer or instrument. Replacing the SD System You may need to replace the Sheath Delivery (SD) system with sheath bottles for maintenance or troubleshooting. with a Sheath Bottle ... -
Page 40: Storing The System
Storage Before using the system: 1. Turn on the Luminex 200 and XY Platform and watch for the following indications that the instruments are responding correctly: • The light above the sample probe on the Luminex 200 and the light next to the door of the XY platform are lit. -
Page 41: Maintenance Log
________________________________________ _______________ Luminex 200 Maintenance Log Month(s): Year: Maintenance Log Procedure: Use this form to record information over a four-week period. Fill in the month(s) and year above. Fill in the dates in the first line of the table. For each item listed at the left, enter your initials under each date that you perform the item. -
Page 43: Troubleshooting
Troubleshooting the Troubleshooting procedures help users isolate, identify, and remedy Luminex 200 problems with the Luminex 200 analyzer and Luminex XYP. This chapter does not troubleshoot problems with the PC. For help with System PC problems, please contact the technical support system for your PC’s manufacturer. -
Page 44: Power Supply Problems
Contact Technical Support. Communication Communication problems described in this section involve the links between the data system (PC and software) and the Luminex 200 analyzer and XYP instrument. This section does not address communication issues with other peripheral devices. The term “Communication” refers to: •... -
Page 45: Pressurization
xMAP Technology Troubleshooting Pressurization Normal air and sheath pressure readings vary between 6-9 psi while the compressor runs. If the system pressure is out of range, your sample acquisition will fail or return poor results. Symptom Possible problem Solution Pressurization fails or pressure The sheath and waste lines are Make sure the lines between the is too low. -
Page 46: Fluid Leaks
Luminex 200 System User Manual Regulator not adjusted properly. If using bottles, open the center door on the Luminex analyzer. Use a screwdriver to adjust the regulator to fit in the center of the green region on the Run Batch tab. -
Page 47: Sample Probe
Sample arm is stuck in the down The sample probe height is too DO NOT turn off the Luminex position. low, or the path to the well is XYP instrument. blocked. -
Page 48: Calibration And Control Problems
Luminex 200 System User Manual Sample arm does not go down The 96-well plate is incorrectly Adjust the 96-well plate. smoothly. seated in the XYP instrument. The 96-well plate is warped. Inspect the 96-well plate. Replace it if it is warped. - Page 49 xMAP Technology Troubleshooting There is a partial clog in the Clean the sample probe, then system. flush the system. See page 20. There is air in the system. Verify sample probe height. Run three Prime commands, two Alcohol Flush commands, then three Washes with water.
- Page 50 Luminex 200 System User Manual Wrong control lot number or Verify that the correct lot target values are entered in number and target values are Update CON Targets box. used. The system controls are in the Verify that control microspheres wrong well on the plate.
-
Page 51: Acquisition Problems
xMAP Technology Troubleshooting Acquisition Problems Symptom Possible problem Solution Acquisition fails or slows. The air pressure is out of range. See Pressurization on page 35. The sample probe height is Adjust the sample probe height. incorrect. See page 18. The sample probe is clogged. Clean the sample probe. -
Page 52: Bead Detail Irregularities
Luminex 200 System User Manual The xMAP microspheres are not Gently vortex the plate or fully suspended. resuspend beads with a multichannel pipettor to ensure that the microspheres are present in the solution. You are using photobleached Replace the microspheres with a microspheres. - Page 53 xMAP Technology Troubleshooting Figure 10 Normal Bead Detail The histogram for the bead detail above looks like this: Figure 11 Normal Histogram Symptom Possible problem Solution xMAP microspheres classify You may be using Replace the calibration too high. photobleached calibration microspheres with a fresh batch.
- Page 54 Luminex 200 System User Manual xMAP microspheres hit the You may be using Replace microspheres with a lower right of the region. photobleached xMAP fresh batch. To avoid microspheres. photobleaching, protect your microspheres from light. Beads appear scattered. There is air in the system.
-
Page 55: Luminex Sd Problems
If the empty sheath fluid container is not replaced and the system Problems continues to operate, the Luminex SD system eventually vents pressure to prevent air from being introduced into the Luminex 200 analyzer. This may interrupt a sample and prevent further samples from being collected. - Page 56 Luminex 200 System User Manual...
-
Page 57: Product Numbers
2 Amp, 250 Volts, Fast Acting Fuse (Qty 10) CN-0019-01 3 Amp, 250 Volts, Fast Acting Fuse CN-0051-01 Heater Block, XYP CN-0017-01 Luminex 200 System with IS 2.3 LX200-IS2.3 Luminex 200 System with IS 2.3 LX200-IS2.3WB Developer’s Workbench Luminex 100 IS Developer Guide to xMAP CN-M029-01 Technology Version 2.3... -
Page 58: Software
Syringe Cylinder with Seal CN-0013-01 Syringe Seal (Qty 4) CN-0014-01 Cable, USB CN-0018-01 Waste Bottle CN-0012-01 Luminex SD [Luminex Sheath CN-S001-01 Delivery System] Software Customer Product Description Number CN-SW08-01 Luminex 100 IS Version 2.3 [Software CD] Luminex xPONENT [Software DVD] CN-SWI5-01... -
Page 59: Xmap Reagents
xMAP Technology Product Numbers xMAP Reagents IS 2.3 Customer Product Description Number Microspheres, LX100, CL1 CL2 Calibration L100-CAL1 (xMAP Classification Calibrator) Microspheres, LX100, RP1 Calibration L100-CAL2 (xMAP Reporter Calibrator) Microspheres, LX100, CL1 CL2 Control L100-CON1 (xMAP Classification Control) Microspheres, LX100, RP1 Control (xMAP L100-CON2 Reporter Control) Microspheres, MagPlex, DD CL1 CL2... - Page 60 Luminex 200 System User Manual...
- Page 61 13 accessible surfaces 21 bath sonicator 13 clinical samples 8 printer 13 component of Luminex 100 IS 5 surge protector 13 components 1, 8 vortex 13 connectors additional software 9 air, waste, and sheath fluid 16...
- Page 62 Luminex 200 System User Manual warning 14 as required 28 fluorescence 10 daily 17 fuses monthly 21 product number 47 routine tasks 19 replacing 28 semi-annual 22 weekly 20 general manual adjustment 16 Luminex 100 analyzer specifications 11 mechanical 1, 5...
- Page 63 16, 19 fluidics 11 high volume 20 hardware 8 wipe exterior surfaces 21 Luminex 100 analyzer 11 Luminex 100 IS 9, 11, 13 xMAP 10 Luminex XYP 12 reagents 8 PC 12 reporter laser 11 air intake filter 23...
Need help?
Do you have a question about the 200 and is the answer not in the manual?
Questions and answers