Advertisement
Available languages
Available languages
Advertisement
Table of Contents

Related Manuals for Electrolux mobione ZMO1520


Summary of Contents for Electrolux mobione ZMO1520
- Page 1 ZMO1521M...
-
Page 2: Parts And Accessories
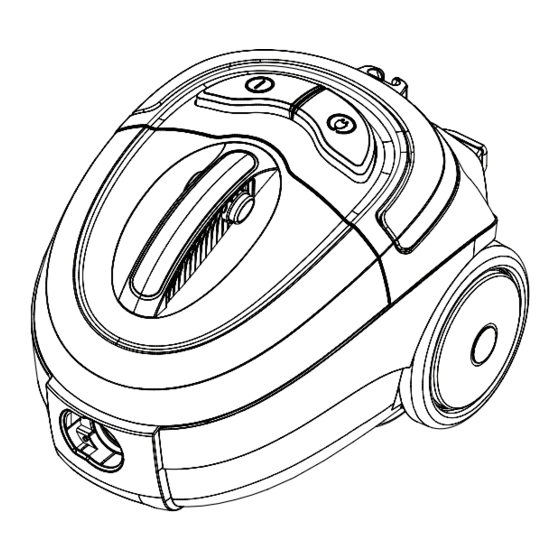
Parts and Accessories 1. Handle 2. On/Off Switch 3. Cord Winder 4. Wheel 5. Dust Cup 6. Remote Control* 7. Flexible Hose 8. Extension Tube (Not applicable for models with telescopic tubes) 9. Telescopic Tube* 10. Floor Nozzle 11. Hard Floor Nozzle* 12. -
Page 3: Safety Instructions
Thank you for purchasing an Electrolux • An extension electrical cord may be vacuum cleaner. used provided that it has a higher rating than the appliance. Please Please read through these operating refer to the information provided on instructions carefully. Above all, please the appliance’s rating plate or consult... -
Page 4: Before Starting
Electrolux. • The vacuum cleaner should only be repaired and/or serviced by an authorized Electrolux Service Centre. Genuine Electrolux spare parts • Insert the hose until the catch should be used at all times. Under no clicks to engage (press the catch to circumstances should the customer release the hose.) - Page 5 • To retract the cord, switch off the appliance and unplug it from the Extension Tube wall socket. The vacuum cleaners has an integrated cord winder. Floor Nozzle To rewind the cable press the foot pedal gently and guide the cord by one hand, this will prevent it striking you or damaging the cleaner.
-
Page 6: Maintenance
The combination floor nozzle can • Replace the dust container, always be set for hard floors or carpets. operate the appliance with Press the foot operated toggle the dust container properly installed. lever on the floor nozzle to select the desired setting. -
Page 7: Changing The Exhaust Filter
CHANGING THE EXHAUST FILTER • Open the filter grill. Remove the exhaust filter. Rinse it under tap water and dry it completely. Put the filter back into the cleaner. Close the filter grill. • If necessary both the HEPA filter and grey protection filter can be washed under a tap with cold water. -
Page 8: Packaging Material
How To Store Your Vacuum 1. Choose a storage location that is both safe and dry. 2. Depending on the space available, you can choose to store it in an upright or horizontal position using the parking slots. 3. Be careful not to trap, twist or tie the electrical cord. -
Page 9: Troubleshooting
Change the hose. or broken. Over heating. Dust container is full. Empty/replace the dust container. Filters are clogged. Clean/replace filters. To locate your nearest Electrolux Service Centre, please contact your country’s Electrolux Customer Care found on the last page of this booklet. - Page 10 Bagian Alat dan Aksesori 1. Gagang 2. Saklar ON/OFF 3. Penggulung Kabel 4. Roda 5. Cangkir Debu 6. Alat Kendali Jarak Jauh (Remote Control)* 7. Selang Fleksibel 8. Pipa Tambahan (Tidak berlaku untuk model-model dengan pipa teleskopik) 9. Pipa Teleskopik* 10.
- Page 11 Electrolux atau orang yang mental. Orang-orang yang kurang pengalaman berkualifikasi serupa untuk menghindari dan pengetahuan, kecuali dengan diberi risiko.
- Page 12 Modifikasi & Perbaikan • Adalah berbahaya untuk melakukan perubahan pada alat. Gunakan hanya aksesori yang dianjurkan oleh Electrolux. • Pengisap debu hanya boleh diperbaiki dan /atau diservis oleh Pusat Servis Resmi Electrolux. Alat ini harus selalu menggunakan suku cadang asli Electrolux.
-
Page 13: Petunjuk Penggunaan
• Untuk menggulung kabel, matikan pengisap debu dan cabut dari stekernya dari stopkontak. Pada pengisap debu terdapat penggulung kabel terintegrasi. Untuk menggulung kabel, tekan pedal kaki dengan hati-hati dan arahkan kabel dengan tangan, hal ini akan mencegah kabel melecut anda atau merusak pengisap debu. - Page 14 Nosel lantai kombinasi dapat diatur untuk • Pasang kembali wadah debu pada lantai padat atau karpet. Tekan tuas dua posisi pengisap debu. yang dioperasikan dengan kaki pada nosel • Pasang kembali wadah debu, gunakan alat lantai untuk memilih setelan yang diinginkan. hanya dengan wadah debu terpasang Saat nosel lantai diatur untuk lantai padat, bulu dengan baik...
- Page 15 MENGGANTI PENYARING UDARA BUANG • Lepaskan kisi penyaring. Lepaskan penyaring udara buang. Bilas penyaring di bawah air keran dan keringkan hingga tuntas. Pasang penyaring kembali pada pengisap debu. Tutupkan kisi penyaring. • Adalah perlu untuk mencuci penyaring HEPA dan penyaring pelindung abu-abu di bawah keran air dingin.
- Page 16 Cara Menyimpan Pengisap Debu Anda 1. Pilihlah lokasi penyimpanan yang aman dan kering. 2. Tergantung tempat yang tersedia, anda dapat memilih untuk menyimpannya pada posisi berdiri atau horizontal menggunakan alur parkir. 3. Hati-hatilah agar kabel listrik tidak terperangkap, terpuntir, atau tersimpul. Gulunglah kabel.
- Page 17 Selang rusak atau patah. Ganti selang. Panas berlebihan. Wadah debu penuh. Kosongkan /ganti wadah debu. Penyaring tersumbat. Bersihkan atau ganti penyaring. Untuk lokasi Pusat Servis Electrolux terdekat, hubungi Layanan Konsumen Electrolux negara anda yang terdapat di halaman terakhir buku ini.
- Page 18 Sản phẩm và Phụ kiện 1. Tay cầm 2. Nút nguồn 3. Chốt thâu giữ dây 4. Bánh xe 5. Khoang chứa bụi 6. * Điều khiển từ xa 7. Ống linh hoạt 8. Ống nối dài (Không có ở các mẫu có ống điều chỉnh được) 9.
- Page 19 Các tiêu chuẩn an toàn của thiết bị điện Ở các khu vực ẩm ướt Electrolux luôn phù hợp với các quy tắc Ở các vị trí gần bình ga hoặc các chất dễ và các điều khoản quy định về an toàn kỹ...
- Page 20 Máy hút bụi chỉ nên được sửa hoặc bảo trì Cắm ống vào sao cho cái hãm gắn vào bởi Trung tâm Bảo hành được Electrolux ủy đúng vị trí. (Bấm cái hãm để rút ống ra) quyền. Luôn luôn sử dụng các phụ tùng thay thế...
- Page 21 Để thu gọn dây điện, tắt thiết bị và rút phích cắm ra khỏi ổ điện. Máy hút bụi có Ống nối dài gắn một chốt thâu giữ dây. Để cuộn dây Đầu hút sàn nhà nguồn lại, giẫm nhẹ vào bàn đạp thâu dây và...
- Page 22 Đầu hút sàn kết hợp có thể sử dụng cho Đặt hộp chứa bụi vào vị trí cũ cả sàn cứng và sàn trải thảm.Dùng chân Đặt hộp chứa bụi vào vị trí cũ, luôn luôn điều chỉnh đòn bẩy ở đầu hút sàn để vận hành thiết bị...
- Page 23 THAY THẾ BỘ LỌC XẢ Mở tấm chắn của tấm bộ lọc. Tháo tấm lọc bụi ra. Rửa tấm lọc dưới vòi nước và làm khô hoàn toàn. Đặt tấm lọc trở lại vị trí cũ. Đóng tấm chắn lại. Nếu cần thiết, rửa cả...
- Page 24 Cất giữ máy hút bụi Lựa chọn vị trí cất giữ an toàn và khô ráo Tùy thuộc vào không gian của nơi cất giữ, để máy theo chiều nằm ngang hoặc thẳng đứng sử dụng giá đỡ Hãy cẩn thận, không đè lên, làm xoắn hoặc buộc dây điện.
- Page 25 Để biết địa chỉ và liên lạc của Trung tâm Bảo hành được Electrolux ủy quyền nơi gần nhất, vui lòng liên hệ Trung tâm Chăm sóc Khách hàng Electrolux tại quốc gia của bạn theo liên lạc ở...
- Page 34 產品及配件 1. 手提柄 2. 開關按鈕 3. 捲線按鈕 4. 大滾輪 5. 集塵盒 6. 吸力切換控制鈕* 7. 軟管 8. 延長管 (不適用於已配備伸縮管的吸塵器型號) 9. 伸縮管* 10. 地板吸頭 11. 硬質地板吸頭* 12. 二合一細縫/毛刷吸頭及沙發小吸頭 *僅部分型號吸塵器配備此配件 本頁圖片僅供參考,產品規格以實品為準。...
- Page 35 • 親愛的客戶 請勿在以下狀態使用此產品: - 潮濕處 感謝您選購伊萊克斯的產品! - 易燃或可燃物質 - 未安裝集塵袋。(基於安全保護措 請仔細閱讀使用本操作說明書。 最重要 施,當沒有安裝濾網或是集塵袋時 的是,亦請遵守本手冊前幾頁的安全說 ,集塵盒蓋會無法關閉)。請不要硬 明。 性關閉集塵盒蓋。 伊 萊 克 斯 電 器 的 安 全 標 準 符 合 目 前 公 - 尖硬物 認 的 電 器 產 品 技 術 規 範 及 安 全 法 規 標 - 液體(有可能會損壞此產品) 準,操作本產品之前,請詳讀下面的安...
- Page 36 • 快速指南 使用本機前,請先確認已安裝集塵盒 及濾網。為確保吸塵器之順暢運作及 • 將產品從包裝中取出時,請先仔細檢 氣流暢通,請先確保所有通風口不受 查是否有所損壞。 阻塞。 • 確認集塵盒及濾網已正確安裝機身中 ,未安裝集塵盒或濾網,請不要使用 • 當在樓梯上吸塵時,應額外小心。 本機。 • 在裝配或拆除配件前,請勿連接電源 • 在暫停使用吸塵器時,將吸頭放置於 插頭。 擺放槽中,可減少吸塵器損壞的風險 ,可自行選擇水平或是垂直的擺放方 裝配吸塵器 式。 安裝及移除軟管 維修處理 • 擅自更改或修改吸塵器規格是危險的 。維修時只能使用伊萊克斯原廠的零 配件。 • 請使用原裝的伊萊克斯配件及讓伊萊 • 將軟管插入機身前端的空氣流通洞, 克斯服務中心修理吸塵器,以免導致 接入軟管,直到連接處卡緊。按下按 保固無效。 鈕便可拆除管子。 • 安裝延長管及配件 無論任何情形下,請勿自行嘗試維修...
- Page 37 • 收回電線時,先將機器關閉,並拔下插 頭,此機配備捲線器,按下收線按鈕同 延長管 時請手握電線,避免造成人身傷害或機 地板吸頭 器損壞的危險。 收線按鈕 • 將吸頭接上延長管。 使用說明 黃色標誌 預備啟動 • 在使用吸塵器之前,先將電線拉出 紅色標誌 足夠的長度,然後再將插頭插入電 源座。電源線上的黃色標誌代表線 的長度在理想範圍內,看到警示紅 色標誌時,請勿繼續拉長電源線, 吸頭配件 否則線將無法收回。 在清潔時,依據不同的清潔物件選擇最 • 按 電源 開 /關按鈕可啟動或暫停運作 。 合適的吸頭配件: • 二合一細縫/毛刷吸頭 開/關按鈕 可用於清理角落、坐墊間等難以清潔的地方。 黃色標誌 紅色標誌...
- Page 38 維護與保養 • 沙發小吸頭 可用於清理布質軟墊傢俱或窗簾。 清理集塵盒的建議流程 注意:從機身取出集塵盒前,請先關閉電 源並拆下軟管。 • 按下集塵盒手柄上的按鈕,即可取出 集塵箱。按下集塵盒開關,即 可將集 塵盒打開。集塵箱是可以移出的配 件 ,用一手握住集塵盒底部,再用另一 手推動按鈕打開集塵箱。 • 兩用吸頭 • 這種兩用吸頭可設定硬地板或地毯使用。 清空集塵箱中的灰塵。 地毯 • 關上集塵盒蓋,確認外蓋已確實固定 。 硬地板 • 將集塵盒裝回機身內。 • 使用吸塵器前,一定要確認集塵盒正 吸頭上設有腳踏切換模鍵,可選 擇 所 確地安裝於機身內,否則不得操作本 產品。 需的模式。當設定硬地板吸塵時, 刷 毛 清潔更換馬達濾網及排風口濾網 微 會觸碰地面;設定地毯吸塵時,毛刷會 •...
- Page 39 • 24小時自然風乾HEPA濾網及灰色保 • 本機內含兩片馬達前置濾網 : 一個 灰色海綿保護濾網及一個含外框的 護濾網,再使用前必須先確認濾網已 HEPA 濾網。 經完全蔭乾。避免直接在陽光下曝曬 或是處於極度乾燥的環境。請勿使用 • 拉取濾網外框頂端右側的突出部,即 吹風機吹乾濾網。 可取出HEPA濾網。只要從灰色海綿 保護濾網置放處拉取灰色海綿保護濾 • 將灰色保護濾網放置於濾網框中,再 網,即可輕鬆取出此濾網 。 將HEPA濾網與集塵盒對齊,即可將 兩個濾網重新置放回集塵盒中。 • 只有正確地安裝濾網,本機才能正常 啟動。當集塵盒無法安裝進機身內, 請勿用力施壓,先確認濾網是否安裝 正確。 • 請切勿重複使用已經損壞的濾網,不 但會影響集塵效率,更有可能損傷馬 • 將HEPA濾網置放於一個平面,用一 達。 張紙包起來輕拍,即可清除HEPA濾 更換出風口濾網 網上過多的塵埃。在開放式的通風處 輕拍灰色海綿保護濾網,即可清除海 打開濾網架,取出濾網,再放置於自來 綿濾網上的灰塵。 水下方沖洗濾網,直到濾網完全蔭乾,...
- Page 40 如何收納你的吸塵器 選擇一個既安全又乾燥的儲存位置。 你可以根據可用空間選擇垂直或水平 不同的吸頭擺放方式。 收好電線,以防絆倒。 請將延長線、吸頭、伸縮管及配件收 置完善,以避免遺失。 吸塵器回收 包裝材質 吸塵器外包裝為對生態環境無害的可回 收材質製成。而機身塑膠材質,塑膠的 材質如標示所示,例如: >PE<、>PS< 。請 依據不同的包裝材質回收到正確的回收 處。 電器回收 此機器外包裝的標誌 表示此機器不 能視同一般家用廢棄物丟棄,必須交由 專門的家用電器回收站回收內含的電 氣 及電子裝備。 使用正確的方式回收此產品,可防備潛 在對環境及人體健康的負面後果,如果 需要更詳盡的回收資訊,請洽詢您所購 買產品的商家。...
- Page 41 萬一發生故障,可能有以下原因。你可在家嘗試以下的解決方法。如果問題仍然存在, 請諮詢您當地授權的伊萊克斯服務中心來協助解決。 問題 可能的原因 解決方法 插頭沒有正確連接到 檢查插頭連接或嘗試 吸塵器無法啟 動 ‧ ‧ 插座 另一個插座 當馬達過熱,高溫過 關閉電源, 等待 ‧ ‧ 20-30分鐘讓馬達降溫 熱保護器啟動 ‧ 集塵袋已滿 ‧ 更換集塵袋 塵滿指示燈 一直顯示 ‧ 濾網阻塞 ‧ 清洗或更換濾網 吸塵力減退 ‧ 軟管堵塞 ‧ 清理軟管 ‧ 吸頭阻塞 ‧ 清理吸頭 ‧ 集...
- Page 42 Customer Care Hotline: (+852) 8203 0298 Website: www.electrolux.com.tw Email: dchead@ead.dch.com.hk Website: www.electrolux.com.hk CHINA Electrolux Floor Care & Small Appliances China Rm1107/1109, 11F, Building 8, Daning@lifehub, No.1968, Gonghexin Rd, Shanghai, China Tel: +(86) 21 6095 8300 Fax: +(86) 21 3387 0368 Customer Care Service: +(86) 800 820 0096 Website: http://www.electrolux.com.cn/...
Need help?
Do you have a question about the mobione ZMO1520 and is the answer not in the manual?
Questions and answers