Table of Contents
Advertisement
Quick Links
Advertisement
Table of Contents

Related Manuals for Sangoma PBXact S-Series


Summary of Contents for Sangoma PBXact S-Series
- Page 1 S-Series VoIP Multiline Telephone User Guide Rev. 1, April, 2017...
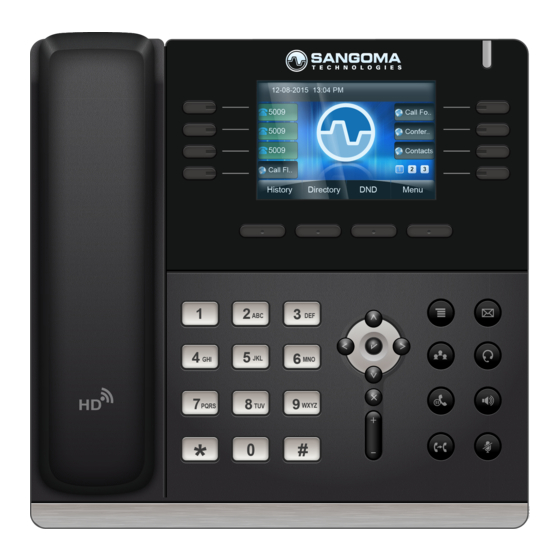
- Page 2 Sangoma S700 & S500 a next generation enterprise grand IP Phone that features up to 6 lines, 4.3 inch LCD, 4 XML programmable context-sensitive soft keys, dual Gigabit network ports, integrated PoE, 3-way conference, and Electronic Hook Switch(EHS). The S700 &...
-
Page 3: Table Of Contents
Table of Contents Meaning of Keys ................................. 3 Using Your Phone ................................6 Handset ..................................6 Speakerphone ................................6 Headset ..................................6 Call History ..................................6 Detail ....................................3 Add to Contacts ................................3 Add to Blacklist ................................4 Delete All ..................................4 Dialing a Number ................................ - Page 4 Enabling/Disabling Headset Mode ..........................11 Adjusting the Headset Volume ............................. 11 Muting the Microphone ............................... 12 Switching from Headset Mode to Another Mode During a Call................... 12 Switching from Another Mode to Headset Mode During a Call................... 12 Hold ....................................12 To Place a Caller on Hold: .............................
- Page 5 Overview ..................................20 Viewing and Changing a Toggle ..........................20 Call Forward App ................................21 Enabling Call Forward ..............................21 Setting Presets ................................21 Conference Room App ..............................22 Viewing Conference Rooms ............................22 Managing Conference Attendees ..........................22 Contacts App..................................23 Viewing Contact Groups ..............................
- Page 6 Parking a Caller into your Default Lot ......................... 32 Presence App ..................................32 Viewing your Current Status ............................32 Changing your Current Status ............................32 Changing your Preferences for When a Status is Active ....................33 Time Conditions App ................................ 34 Overview ..................................
- Page 7 Music On Hold ................................40 Music On Hold Class ..............................40 Allow Menu .................................. 40 Record Conference ............................... 40 Mute on Join ................................. 40 Fax - UCP ................................... 40 Viewing Faxes ................................40 Sending Faxes ................................40 Fax Settings .................................. 42 Presence - UCP ..................................
- Page 8 Receiving SMS Messages ............................46 Viewing SMS History ..............................47 Voicemail - UCP ................................47 Managing Voicemail Settings............................48 Managing Voicemail Greetings............................ 49...
-
Page 9: Meaning Of Keys
Meaning of Keys Meaning S300 S400 S500 S700 DND (Non Phone App) Handset Mode Headset Enabled... - Page 10 Missed Call Muted Network Down Phone Locked Ringer Muted Speaker Phone SRTP active for Call Voicemail Waiting VPN Enabled and Active ZRTP active for Call S500 Phone Features Physical Features 4 VoIP accounts Stand with 3 adjustable angles ...
- Page 11 Anonymous call, anonymous call rejection HTTP/HTTPS web server Message Waiting Indicator (MWI) Time and date synchronization by SNTP Voice mail DNS-NAPTR/DNS-SRV(RFC 3263) Intercom, paging QoS: 802.1p/Q tagging (VLAN), Layer 3 ToS DSCP Call park, call pickup ...
-
Page 12: Handset
Using Your Phone = Dialed Handset Pick up the handset. Speakerphone Press the (speaker) button. Headset You can use the < > (left and right arrow) buttons to filter by call type: Calls, Missed If the phone is not in headset mode: Press Calls, and Calls. -
Page 13: Detail
can be entered. 2. Press the Save soft key when done. 3. Use the Λ or V (up and down arrow) buttons to highlight an option, then press the OK soft key or the √ (checkmark) button to select the option. Detail This screen provides details of the call such as Name, Number, Start Time, Duration, and... -
Page 14: Add To Blacklist
Calls page, all of the missed calls would be If you have a Park Button setup on your Sangoma deleted from the call history, and they will no Phone you can press it at anytime while on a call longer show up here or on the All Calls page. -
Page 15: Setting Up A Park Button On Your Phone
Sangoma s500 or s700 Phones. Go into End Point Manager in your PBX and pick on the Sangoma Brand on the left menu bar. Click on the template in End Point Manager that you want to change a button for. -
Page 16: Using Your Phone
From the Drop Down of button types pick XML- We now need to update the phone config. Our 3 options at the bottom of the template are Save Template- This will only save your changed into the PBX Database but will not write out new config files for the phones that are using this template as mapped in Extension Mapping ... -
Page 17: Message Waiting Indicator (Mwi) Light
Setting up a Visual Voicemail Button on your Phone You can set up a Visual Voicemail button on your phone using the PBX EndPoint Manager by modifying your button layout for your Sangoma s500 or s700 Phones. Message Waiting Indicator (MWI) Light ... - Page 18 Select a model number you want to add a Visual Voicemail Button for From the Value drop-down menu, select REST- Scroll down to the first available Line Key that is Voicemail. not used. From the drop-down menu of button Types, select XML-API.
-
Page 19: Conference Calling
You can also move the button to a different and Rebuild Configs- This will save your position if desired. To do this, click on the line key changes to the PBX Database and will also write name, and while holding the mouse button down, out new config files for the phones that are using drag the row to a new position (up or down). -
Page 20: Adding Additional Callers To A Conference
Splitting a Conference Call Press the Split soft key during a conference call to separate the conference call into individual calls. Each conference participant will be put on hold. 4. Press the (conference) button or the Conference soft key. Person "A" and person "B"... -
Page 21: Speakerphone
What is Headset Mode? Headset mode allows you to make and receive calls through a headset instead of the phone's handset or speakerphone as the default audio method. You can switch to and from headset mode at any time, even during an active call. Enabling/Disabling Headset Mode Press the (headset) button to toggle... -
Page 22: Muting The Microphone
Switching from Headset Mode to Another Mode During a Call Headset to Handset: Pick up the handset. Headset to Speakerphone: Press (speaker) button. Note If you are using the headset and press (headset) button without doing either of the above, the call will go to the handset if it is off-hook, or the speakerphone if the handset is on-hook. -
Page 23: To Resume A Call
Using Intercom Button to Intercom a User If you have a Intercom Button setup on your Sangoma Phone you can press it at anytime. To Resume a Call: Press the (hold) button again or press The phone will then wait for you to enter in the the Resume soft key. -
Page 24: Setting Up A Intercom Button On Your Phone
Scroll down the your first available Line Key that using the PBX End Point Manager by modifying is not used your button layout for your Sangoma s500 or s700 Phones. Go into End Point Manager in your PBX and pick on the Sangoma Brand on the left menu bar. -
Page 25: Using A Feature Code To Intercom
top to make it button 4 on the phone. Left click on currently registered to the PBX immediately with the button and while holding down your left mouse no need to reboot the phones. drag the button to a different spot and release it. Using a Feature Code to Intercom ... -
Page 26: To Un-Mute The Microphone
To Un-Mute the Microphone: Press the (mute) button again. The button will no longer be red, and the red microphone icon will disappear from the screen. Setting Ring Volume Change Volume or Mute Ringer To change the ringer volume, use the + and - (plus and minus) buttons on your phone. -
Page 27: Turning The Speakerphone On Or Off
microphone built into the phone's base, rather than the handset or a headset. You can switch to and from speakerphone mode at any time, even during an active call. Turning the Speakerphone On or Off Speakerphone is the "default" audio mode unless you are using a handset or headset. -
Page 28: Switching From Speakerphone Mode To Another Mode During A Call
Enter the number to transfer the call to. Switching from Speakerphone Mode to Another Mode During a Call Speakerphone to Handset: Pick up the handset. Speakerphone to Headset: Press (headset) button. Switching from Another Mode to Speakerphone Mode During a Call Press the (transfer) button or the Transfer soft key again to complete the... -
Page 29: Paging & Intercom Module
Enter the number to transfer the call to. In the next step, you will be placing a call to this recipient while the caller is still on hold. You will be taken to a screen showing that the inbound call is still on hold. At this point, you can either press the Transfer soft key to keep the Press # or the Send soft key. -
Page 30: To Intercom Another Extension On The System
Viewing and Changing a Toggle Press Speaker button; or Press Headset button with headset plugged in; or Pressing the Call Flow button will bring up a list of all Press an available LINE key to activate speaker; call flows on your system. -
Page 31: Call Forward App
flow controls to either "Normal" or "Override" mode. From here, enter a number that you want calls forwarded to and press the Done button. Call Forward App You can now see that Call Forward is enabled with the number you just defined. You can press Enabling Call Forward the Change button to toggle this back to disabled. -
Page 32: Conference Room App
define your presets. view. From here you can choose any specific conference Enter in the number and press the Done button. room to manage by using the up/down arrow keys and pressing the Select soft key. You can also see at a glance how many callers are in any specific conference room and use the Dial soft key to call in to the conference room. -
Page 33: Contacts App
of callers that are in the conference room. Viewing Contact Groups Pressing the Contacts button will bring up a list of all contact groups created inside the Contact Manager module. You can then kick or Mute the caller who is currently highlighted. -
Page 34: Searching For Users
search criteria. You can now view information like his or her title, company and email address. Complete the call or view details similar to the example above. Searching For Users Do Not Disturb App (DND) From the home page of the Contacts application, press Press the DND button on your phone. -
Page 35: Queue Agents App
Pressing the Change button will change the Enabled field to "Yes." Logging Into a Queue You will see a” (-)" in front of any queue you are Queue Agents App allowed to log into. This means the queue is set up to allow you to log in as a dynamic agent, but you are not Overview currently logged in. -
Page 36: Pausing Yourself In A Queue
logged in as a dynamic agent. Highlighting that queue and pressing the (Un) Pause button will pause you. Highlighting that queue and pressing the Login/out button will log you out. Unpausing Yourself In a Queue Any queue you are logged in to, in which you are currently paused, will be shown with a "(P)"... -
Page 37: Call Queues App
the (Un)Pause button. Viewing Details of a Queue Call Queues App Pressing the Queues button will bring up a list of queues that you are allowed to view and manage. Press the Queues button on your phone. Pressing the Details button for any queue will bring up the details of the queue. -
Page 38: Managing Agents In A Queue
Pressing the Pickup button will allow you to steal that specific caller that is highlighted out of the queue. Pressing the Logout button will log out the highlighted Your phone will then ring. agent from the queue. Managing Agents in a Queue ... -
Page 39: Enabled
option. Initial Ring Time: How long to ring your extension directly before calling the list of numbers in your Follow Me phone numbers list Ring Time: How long to ring the numbers in your Follow Me phone numbers list ... -
Page 40: Initial Ring Time
screen. Managing Confirm Calls Below Confirm Calls is not enabled. Highlight this option and press the Change button to enable it. Initial Ring Time Highlight the Initial Ring Time option and press the Change button. When "Confirm Calls" is enabled, the system will prompt any external numbers that are dialed from your Follow Me with an option to press 1 to accept the call. -
Page 41: Logging Out A User From Your Phone
Logging Out a User from Your Phone Logging In a User from Your Phone Press the Login/Logout application button on the Highlight the Login option and press the Select button device. to log another user in as a new device. You'll then see options to "Login"... -
Page 42: Parking A Caller Into Your Default Lot
parked for. Presence App Viewing your Current Status Press the Presence Application on your phone. From here you can pick up any specific parked call by using the up/down arrow keys and pressing Dial. You can also use the Refresh button to update the list. You will be shown your currently active status. -
Page 43: Changing Your Preferences For When A Status Is Active
Here, you can see the currently active status has a * in Nothing: The system will not enable DND or Follow front of the text, such as *Available. Me, and calls will route no differently than if you had no status set. -
Page 44: Time Conditions App
the Change button. scheduled time change. From there on, the time condition schedule will take over. In our example the override would kick in until 5:00PM, then at 5:00PM the normal schedule will keep the system in Unmatched mode, since that is what the schedule was set up to do. -
Page 45: Overriding Time Conditions
Overriding Time Conditions small For any time condition, you can pick from the following options: Reset Override - Use this option to remove any overrides currently set. This will tell the system to go back to the automated schedule immediately. ... -
Page 46: Transfer To Voicemail App
the Class of Service-Admin Guide for more Press Select to change your password, then exit when information on using COS. finished. To Record You’re Name Transfer to Voicemail App Arrow down to Name then the Select key. Use Play Transferring Calls to the Voicemail of Another key to hear, the Change key re-record it, and the Extension Delete key to delete it. -
Page 47: Listening To Voicemails
If you press the More button, additional options will appear. Listening to Voicemails You can press Select to find out more information about the voicemail message that was left. You now see options to Toggle this voicemail from unread to read or vice versa, and an option to edit Settings. -
Page 48: Home Page
browser. You can login to the User Control Panel by Usage pointing your browser to the IP Address of your PBX and picking the User Control Panel Option. Administrators can login using the admin username and password that is used to access the FreePBX Administration section. -
Page 49: Users Present
Users Present When users are present you will see users and be able to perform various actions on those users Mute User To mute a user click the "speaker" icon next to their name. Kick User To remove a user from the conference click the "X" next to their name. -
Page 50: Music On Hold
User Join/Leave Inbox- These are faxes that have not been viewed yet. Archived- These are faxes that you have viewed but not deleted. Announce user join/leave Outgoing- Faxes that are in progress of being sent. Sent- Faxes that have successfully sent. ... - Page 51 From here define the Fax Number we are sending the Fax to. Either drag the documents you want to fax or use the "UPLOAD DOCUMENT" button. You can upload 1 or more documents and as they are uploaded they will be listed under the Files Section.
-
Page 52: Fax Settings
When a Fax has successfully been sent it will be 1- Try 1 time resending a failed fax. moved to the Sent Folder. If it fails to send after all the 2- Try up to 2 times to resend a failed fax. ... -
Page 53: Available
When in DND do the following On UCP Login Set Status To When you log in to the User Control Panel perform the selected action Extended Away On Browser Close or UCP Logout Set Status To When Extended Away do the following When you close your browser (or tab) for the User Control Panel or Log off perform the selected action Unavailable... -
Page 54: Ring
Call Forwarding number by suffixing a number with a pound (#). ex: 2448089# would dial 2448089. Whether or not to forward calls in a given state. Check the box and enter the destination in the text field. Announcement Message to be played to the caller before dialing this group.First For -
Page 55: Do Not Disturb
Do Not Disturb Used to indicate that this user does not wish to be disturbed. In their settings you will see SIPStation SMS DIDs, Check the box next to the desired numbers Click Submit at the bottom Sending an SMS Login to the User Control Panel Call Waiting On the top right click on the colored dot. -
Page 56: Receiving Sms Messages
Receiving SMS Messages When a user sends a TXT message to a number that is assigned to you. You will get a chat style box when logged in. In the From drop down there will be a list of numbers available to this user Choose the number you wish to send your SMS from. -
Page 57: Viewing Sms History
If you are Not logged in your messages will be under the SMS tab You can click the eye icon to view the message View (eye) the history of the message Delete (trash) the message Voicemail - UCP Managing Voicemail Messages You can click on the number under To, to open up the For each extension we can see all our voicemails. -
Page 58: Managing Voicemail Settings
voicemails inside that folder. Settings is where we can manage the following options for our voicemail box. Pin/Password- The password for our voicemail box. Email Address- Email address if defined where to send voicemails to. Play CID- Play the Caller ID of who left the voicemail anytime you listen to the voicemail ... -
Page 59: Managing Voicemail Greetings
you your changes have been saved Busy- The greeting that is played to callers when you are not available to take their call and you are on another call already. Name- This is a recording of your name and used mainly for things like the Company Directory and other modules. - Page 60 If you would like to copy your unavailable greeting to also be your busy greeting simply drag the Unavailable Greeting to the "Drag Box" of the Busy greeting as shown below.
- Page 61 References Lewis, Tony. Phone Apps. 27 December 2016. 21 April 2017. Schilleman, Mike. Sangoma Phone User Guide. 06 April 2016. April 2017.
Need help?
Do you have a question about the PBXact S-Series and is the answer not in the manual?
Questions and answers