Table of Contents
Advertisement
Quick Links
I N S T A L L A T I O N M A N U A L
S O N A N C E S O U N D B A R S
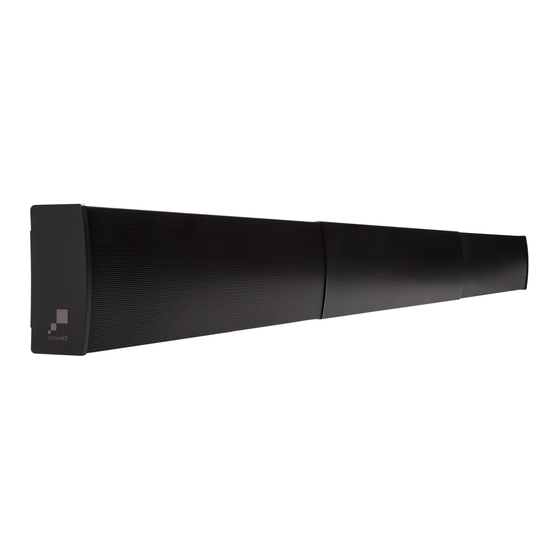
S B 4 6
M
Introduction
Thank you for purchasing the Sonance Soundbar SB46 M or
SB46 L. When properly installed your new Soundbar will give you
years of entertainment pleasure. The Sonance SB46 M & SB46 L
S o u n d b a r i s a h i g h p e r f o r m a n c e L e f t , C e n t e r, & R i g h t
3-way speaker system housed in a sealed aircraft grade
aluminum enclosure. The SB46 M will align with displays from
50" to 65" diagonal. The SB46 L will align with displays from
70" to 80" diagonal.
Box Contents
Sonance
Soundbar
Box
Flat
Soundbar
connectors,
(2) Recessed Soundbar connectors, (1) Key hole wall mount
template, (2) Key hole wall mounts, (2) Display spacers and
(2) Black opaque strips.
(1) Soundbar
(2) Flat Soundbar connectors
(2) Display attachment rails
wall mount template
(2) Key hole
wall mounts
1
A N D
S B 4 6
contains:
(1)
Soundbar,
(2)
Display
attachment
(2) Recessed
Soundbar connectors
(1) Key hole
(2) Black opaque strips
L
The Hardware Pack contains: A. (4) M8 10mm screws
for display attachment rails, B. (4) M8 14mm screws for
flat Soundbar connector, C. (4) M8 23mm short screws for recessed
Soundbar connector, D. (4) M8 38mm long screws for recessed
Soundbar connector, E. (4) M6 25mm screws, F. (4) M8 25mm
screws, G. (8) M8 nuts, H. (8) M6 washers, I. (8) M8 washers and J.
(4) Rubber feet.
A. x 4
(2)
rails,
D. x 4
G. x 8
H. x 8
Wall Mount Installations
Verify the wall mount will support the combined
weight of the display and Soundbar.
SB46 M weighs 24 lbs. (10.88 kg) installed. Suitable for displays
50" to 65" (1270mm to 1651mm).
SB46 L weighs 29 lbs. (13.15 kg) installed. Suitable for displays
70" to 80" (1778mm to 2032mm).
NOTE: CAREFULLY FOLLOW INSTALLATION DIRECTIONS FOR
THE THIRD PARTY DISPLAY WALL MOUNT.
Before any installation carefully plan where wiring will pass
through walls. Perform an obstruction survey using a stud finder
to be certain there are no studs, conduit, pipes, heating ducts,
pocket doors or air returns in the wall cavity. If you are unsure
about obstructions, drill a small hole near where the Soundbar
wire terminals will be located and insert a coat hanger wire
into the hole to feel around for possible obstructions.
Run three sets of speaker wires: Left channel, Center channel,
Right channel as well as the necessary video cable from the
amplifier to the display location. Whenever possible leave extra
wire to make it easy to connect the wire to the Soundbar spring
terminals prior to hanging the display. Extra wire can then be
pushed back into the wall.
NOTE: CONSULT LOCAL BUILDING CODES BEFORE RUNNING
SPEAKER AND ELECTRICAL WIRES THROUGH WALLS.
B. x 4
E. x 4
I. x 8
C. x 4
F. x 4
J. x 4
Advertisement
Table of Contents

Related Manuals for Sonance SB46M


Summary of Contents for Sonance SB46M
- Page 1 SB46 L. When properly installed your new Soundbar will give you Soundbar connector, D. (4) M8 38mm long screws for recessed years of entertainment pleasure. The Sonance SB46 M & SB46 L Soundbar connector, E. (4) M6 25mm screws, F. (4) M8 25mm S o u n d b a r i s a h i g h p e r f o r m a n c e L e f t , C e n t e r, &...
- Page 2 S O N A N C E S O U N D B A R S S B 4 6 M A N D S B 4 6 L Soundbar Placement and Soundbar Connectors for Wall Mount Brackets Options Overview Choose and attach the correct Soundbar connector to the display attachment rails for your desired depth.
- Page 3 S O N A N C E S O U N D B A R S S B 4 6 M A N D S B 4 6 L Display Spacers Mounting Option 2 - Recessed Soundbar Connector Included with your Soundbar are two 8mm thick wood display The recessed Soundbar connector will align with displays from spacers.
- Page 4 S O N A N C E S O U N D B A R S S B 4 6 M A N D S B 4 6 L Step 2 Position the Soundbar as close to display as possible. Firmly fasten B screws with I washers to connect Soundbar to the Carefully place the display face down on a soft flat surface.
- Page 5 S O N A N C E S O U N D B A R S S B 4 6 M A N D S B 4 6 L Mounting Option 3 - Key Hole Wall Mount Rubber feet can be added to the left and right rear top and bottom edges of the Soundbar to rest against the wall.
- Page 6 S O N A N C E S O U N D B A R S S B 4 6 M A N D S B 4 6 L Step 3 Step 4 Adjusting Grille Width Soundbar Wiring Be sure to complete this step prior to attaching the display and We suggest leaving extra wire length to make it easy to Soundbar to wall mount bracket.
- Page 7 Using a subwoofer is recommended. The subwoofer crossover frequency should be set to 100Hz. We recommend the VP10SUB & Amplifier or our Cabinet Subwoofers. The Sonance VP46R SST/SUR, VP66R SST/SUR, and VP66 SST/SUR are perfect surround speakers to mate with the Soundbar.
-
Page 8: Limited Warranty
Dealer/Distributor, will be free from defective workmanship and materials for five (5) years, except for the grille, which is warranted for one (1) year. Sonance will at its option and expense either repair the defect or replace the Product with a new or remanufactured Product or a reasonable equivalent.
Need help?
Do you have a question about the SB46M and is the answer not in the manual?
Questions and answers