Table of Contents
Advertisement
Advertisement
Table of Contents

Related Manuals for healing HHT651


Summary of Contents for healing HHT651
- Page 1 HHT651 MPEG4 Digital Terrestrial Receiver...
-
Page 2: Safety Information
SAFETY INFORMATION TO REDUCE RISK OF FIRE & ELECTRIC SHOCK, DO NOT EXPOSE TO RAIN OR MOISTURE. CAUTION The apparatus must not be exposed to dripping or splashing and no objects To reduce the filled with liquids ,such as vases shall be placed on it. risk of fire and electric shock, do Caution: Maintain electrical safety. -
Page 3: Table Of Contents
CONTENTS SAFETY INFORMATION INTRODUCTION Front panel Rear panel Remote control SYSTEM CONNECTION General Connecting a TV Connecting a HiFi System GETTING STARTED Welcome Installation OPERATION Changing channels Accessing the Electronic Programme Guide(EPG) EDIT CHANNEL Edit Channel menu TV Channel list Radio Channel list Delete All SYSTEM SETUP... -
Page 4: Introduction
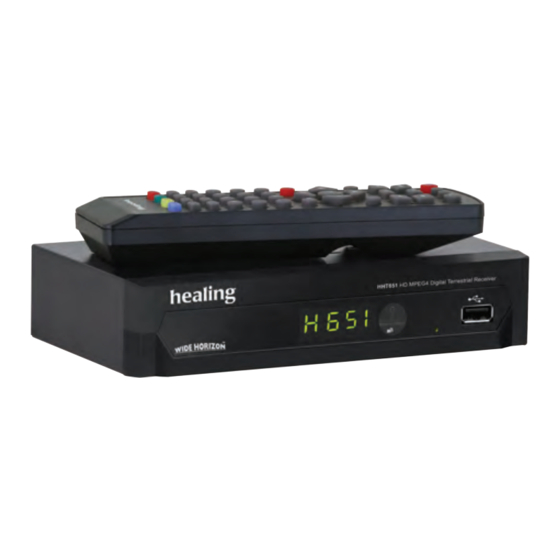
INTRODUCTION Front panel Infra Red USB2.0 port Remote sensor Display Rear panel Antenna input for an external TV antenna AC Mains in Coaxial Digital Audio Composite Video Audio Output Analogue HDMI Digital Antenna loop through Video & Audio to an external device Output English... -
Page 5: Remote Control
INTRODUCTION Remote control Previous/Next PAUSE (Pauses replay or starts TimeShift) Menu (Opens or closes the menu display) Cursor/CH+,-/VOL+.- (Cursor: Navigation keys used to navigate menus and items) (CH+/-: Channel Up and Down (VOL+/-:Volume Up and Down) OK key (Confirms a selection within menu) RECORD (Records the tuned TV program to your USB storage device) -
Page 6: System Connection
SYSTEM CONNECTION General There are many different types of TV display and HiFi equipment to which you can connect to your receiver. In this manual you will see some of the more common ways to connect your equipment. Connecting the TV Antenna Video (Composite) HDMI cable... -
Page 7: Getting Started
GETTING STARTED Welcome Using the receiver for the first time, the "Welcome" menu appears. Welcome Ensure a functional TV antenna is connected. Default parameters Region Poland Language English provide a simple path to Scan for channels in Australia. Display Mode 720p@50HZ Aspect Mode 4:3LB... -
Page 8: Operation
OPERATION Changing Channels There are three ways of selecting channels - stepping through the channel list, selection by number or from the on-screen channel list. Stepping through the channel list: Press the "Up" or "Down" (CH+ CH-) arrow keys on the remote control to move through the channel list, Selected by number: Enter channel numbers directly by pressing the corresponding number keys. -
Page 9: Edit Channel
EDIT CHANNEL Edit Channel menu Edit Channel Press the "MENU" key to enter main menu. TV Channel List Press "UP" or "DOWN " key to highlight "Edit Channel", press the Radio Channel List Delete All "RIGHT" key to enter Edit Channel menu. Press "UP"... -
Page 10: System Setup
SYSTEM SETUP System setup menu System setup menu allows selection of Language, TV System, Local System Setup Time, Time offset, Parental Lock, OSD Setting, Favorites, Audio Language TV System Description, Multiview and more. Local Time Setting Timer Setting Press the "MENU" key to enter main menu. Parental Lock Press "UP"... -
Page 11: Timer Setting
SYSTEM SETUP Timer Setting This menu allows you to set up to 8 program timers. Current Time/date: 01:36PM xx/xx/xxxx Timer Mode: Off, Once, Daily, Weekly or Monthly Timer Mode Daily Timer Service Channel Timer Service: Channel (viewing) or Record Wakeup Channel BBC FOUR Wakeup Date xx/xx/xxxx... -
Page 12: Audio Description Setting
SYSTEM SETUP Audio Description Setting Where broadcast, Auto Description Setting this menu allows selection of AD Service, and AD Volume Offset: AD Service Use AD as default AD Volume Offset AD Service: On or Off Use AD as default: On or Off AD Volume Offset: -3 to 3 Multiview Setting... -
Page 13: Tools
TOOLS Tools main menu Tools Press the "MENU" key to enter main menu. Information Press "UP" or "DOWN" key to select "Tools", press the "RIGHT" Factory Setting S/W Upgrade by OTA key to enter the Tools menu. Upgrade By USB Remove USB device safely Press "UP"... -
Page 14: Game
GAME Game provides some games for additional user entertainment. Game Othello Press the "MENU" key to enter main menu. Sudoku Press "UP" or "DOWN" key until "Game" is highlighted. Press the "OK" key to enter Game sub menu. Press the "RIGHT" key and then with "UP" or "DOWN" key select from Othello or Suduko and press the "OK"... -
Page 15: Rec
REC main menu With a USB storage device connected, press the "MENU" key. Media Player Press "UP"or "DOWN" key repeatedly until "REC" menu is selected, PVR Storage Information PVR Setting press "RIGHT" key once to enter the REC menu. Press "UP" or "DOWN" cursor key to select an item and press "OK"... -
Page 16: Pvr Information
Video: "BLUE" To enter to edit sub-menu press the "Blue" key. "2" To sort by Name, Time or Size press the number "2" key . "EXIT" To return to parent directory press the "EXIT" key. Record: PVR Recordings play here! "RED"... -
Page 17: Timeshift/Record
TIMESHIFT/RECORD Connecting a compatible external USB Storage Device to the USB 2.0 port in your receiver enables Timeshift and PVR program Recording. This receiver can also convert TMS to PVR recordings. Time Shift effectively pauses a program by writing it to your USB storage device so you can continue watching it a little later. -
Page 18: Troubleshooting
TROUBLESHOOTING As the TV signal may be weak in some places, particular attention to Antenna system may be necessary. In the event of poor pictures, please call an experienced TV Antenna specialist. Problem Possible cause What to do Mains lead unplugged Standby light not lit Check mains lead Mains fuse blown... -
Page 19: Specifications
SPECIFICATIONS TUNER & CHANNEL RF INPUT CONNECTOR x1 (IEC-TYPE, IEC169-2, FEMALE) RF OUTPUT CONNECTOR x1 (IEC-TYPE, IEC169-2, MALE (LOOPTHROUGH)) FREQUENCY RANGE: 174MHz to 230MHz (VHF) 470MHz to 862MHz (UHF) SIGNAL LEVEL: -15 to -70 dbm DECODER Video decoder MPEG-2 MP@HL AVC or H.264 HP @L4.1MPEG-4 ASP Audio decoder MPEG-1 Layer 1,2, PCM or HE-AAC V1.0... - Page 20 copyright 2014 www.healingdigital.com...
Need help?
Do you have a question about the HHT651 and is the answer not in the manual?
Questions and answers