Advertisement
Advertisement
Table of Contents

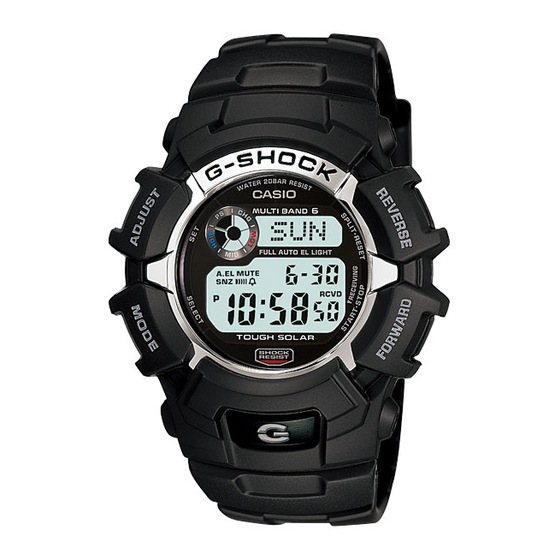
Related Manuals for Casio QW-3195


Summary of Contents for Casio QW-3195
- Page 1 ERVICE ANUAL & PARTS LIST REF. NO. S/M-1097 NOV. 2009 MODULE NO. QW-3195 GW-2310 (WITHOUT PRICE) INDEX...
-
Page 2: Table Of Contents
2-2. CHECKING TERMINALS AND COMPONENTS ........3 3. EXPLODED VIEW: MODULE QW-3195 ..........4 4. PARTS LIST: MODULE QW-3195 ............5 5. REPLACEMENT OF BATTERY: MODULE QW-3195 ......6 6. DISASSEMBLY: MODULE QW-3195 ............. 7 7. TESTING: MODULE QW-3195 7-1. MEASURING CURRENT CONSUMPTION ..........7 7-2. -
Page 3: Specifications: Module Qw-3195
SPECIFICATIONS: MODULE QW-3195 Item Detail Battery CTL1616 (Storage battery) Note: Use CTL1616 only1 Other storage battery or CR1616 can cause damage to the watch1 Battery life Approx. 10 months Current consumption 1.22 µA maximum See page 7 Alarm system Piezo plate on Cover/Back Accuracy ±15 sec./month... -
Page 4: Drawings: Module Qw-3195
DRAWINGS: MODULE QW-3195 2-11 LCD DIAGRAM PSAVE CHARGE HIGH0 LOW0 MID0 AUTOEL MUTE col1 col0 L 37 L 36 L 35 x0y2 x0y3 x0y4 x0y0 x0y1 x1y2 x1y4 x1y3 x1y0 x1y1 x2y2 x2y4 x2y3 x2y0 x2y1 x3y2 x3y3 x3y4 x3y0... -
Page 5: Checking Terminals And Components
2-21 CHECKING TERMINALS AND COMPONENTS KI10 VDSP VDD3 KI11 VDD1 KI12 1. PCB ASS'Y (00000000) SCIN VOUT Short pad for switching modules KI11-GND: Open Short pad for switching modules KI12-GND: Open KI7-GND: Open KI8-GND: Open KI10-GND: Open SENSOR/TILT TAPE/ADHESIVE 2306 ANT2 ANT1 PLL_C2... -
Page 6: Exploded View: Module Qw-3195
EXPLODED VIEW: MODULE QW-3195 7 (10323019) 6 (10300759) 13 (10080941) 2 (10332415) 10 (10321674) 3 (10323021) 12 (72301036) 8 (10323023) 8 (10323023) 1 (10330011) PCB Ass'y 14 (10054634) 11 (72300511) 4 (10291127) Battery Storage (CTL1616) 5 (10168959) 9 (10065664) – 4 –... -
Page 7: Parts List: Module Qw-3195
4. PARTS LIST: MODULE QW-3195 QW-3195AT 1 QW-3195AT-01TK Note: 1. Prices and specifications are subject to change without prior notice. 2. Spare parts are classified as follows according to their importance in after-sales service. A Rank ----------------------------------------- Important C Rank -----------------------------------------Not Important 3. -
Page 8: Replacement Of Battery: Module Qw-3195
REPLACEMENT OF BATTERY: MODULE QW-3195 5-11 AC (ALL CLEAR) Be sure to perform AC (All Clear) after batteries are replaced. Unless AC is performed, the memory and/or counters may be displayed incorrectly. Touch the AC contact and the main plate with the metallic tweezers. -
Page 9: Disassembly: Module Qw-3195
DISASSEMBLY: MODULE QW-3195 When removing the back cover, do not misplace the spring/coil. On removing of the module from the case, please insert the precision screw driver between the mod- ule and the case pointed by arrows. SPRING/COIL 2709-4 SPRING/COIL 1253-2... -
Page 10: Solar Cell-Pcb Ass'y Contact Checking
7-77 SOLAR CELL-PCB ASS’Y CONTACT CHECKING Check a Solar cell and PCB ass’y are contacted correctly by contact spring, when a module is disassembled. To enter TEST mode. 1-11 While pressing button, press buttons at the normal timekeeping mode. → Figure 1 Figure 2 SLR Bright... -
Page 11: Time Calibration Signal Test
7-51 TIME CALIBRATION SIGNAL TEST A signal reception failure may be caused by a number of of reasons. Follow the steps shown in the flowchart below to run the signal receiving test. START Check the Receiving Station MANUAL Reception "Insufficient Signal" may also be the reason Reception OK? AUTO Reception for the signal receiving fault. - Page 12 777777 TEST MODE While on the Timekeeping mode, hold down and press at the same time to go to the Time Calibration Signal Test mode. Each time is pressed, the test signal receiving station changes as shown below: JJY40 (J40) →JJY60 (J60) →WWVB (U60) →DCF77 (G77) →MSF (L60) →BPC1 (B01) →BPC2 (D02) →BPC3 (G03) →BPC4 (T04) Press while in a receiving station state to start receiving a signal.
- Page 13 CASIO COMPUTER CO.,LTD. Overseas Service Division 6-2, Hon-machi 1-Chome Shibuya-ku, Tokyo 151-8543, Japan...
Need help?
Do you have a question about the QW-3195 and is the answer not in the manual?
Questions and answers
How to set up the time on g shock watch 3195?