
Related Manuals for tell GSM Pager3 Z6


Summary of Contents for tell GSM Pager3 Z6
- Page 1 GSM Pager3 Z6 INSTALLATION AND USER MANUAL for module version v3.20 and up Document version: 1.3 05.12.2013...
-
Page 2: Table Of Contents
Table of contents 1 Main functions of GSM Pager3 Z6 ................3 2 Installer settings ......................3 2.1 Setting parameters through USB serial connection ..........3 2.2 Setting parameters through modem connection ..........4 2.3 Module status monitoring ..................4 2.4 Setting parameters....................7 2.5 Customization of parameters ................7 2.5.1 Zone settings ....................7... -
Page 3: Main Functions Of Gsm Pager3 Z6
Arming / disarming, status query and relay control through phone call 2 Installer settings Settings can be edited using the “GSM Pager3 Z6 Remoter” software. Do not open the software after installation, connect the module to USB first and let the OS install the necessary drivers! The desired program language can be selected using the flag icons in the lower right corner of the software window. -
Page 4: Setting Parameters Through Modem Connection
2.2 Setting parameters through modem connection For this a GSM modem is required (TELL GT64 recommended). GSM data call (CSD) service must be activated on the SIM cards placed in the modem and in the module. Start the „GSM Pager3 Z6 Remoter” software and select Connection page ... - Page 5 GSM signal: exact value of GSM signal strength (and graphic level display) Arm / Disarm: the module can be armed/disarmed through the software using these buttons, if arming/disarming mode 3, 4 or 5 is set. This function is available from module version v3.10.
- Page 6 Communication details>>>: pressing this button opens a window showing detailed information about the procedures running in the module (only for troubleshooting) Message flow can be started and stopped by pressing Start/Stop button Messages can be saved to text file using the “Save to File” button...
-
Page 7: Setting Parameters
2.4 Setting parameters To configure the settings select „Parameter settings” tab. Functions of the upper 6 icons, respectively from left to right : Read data from file, Save data to file, Read data from module, Write data to module, Compare parameters with module settings and Change password. -
Page 8: Event Settings
2.5.2 Event settings Z1…Z6 Alarm: new alarm events generated by external contacts on inputs Z1…Z6, according to the zone settings Z1…Z6 Restore: alarm restoration events generated by restoration of external contacts on inputs Z1…Z6, according to the zone settings. The Contact ID code of the restoration event is inherited from the given alarm Contact ID code, and the module substitutes the restoration parameter automatically (3 instead of 1, e.g.: when 1130 restores, 3130 is reported). -
Page 9: Relay Output Settings
2.5.3 Relay output settings Control through phone call: if enabled, the relay becomes controllable remotely through phone call. In the following rows all events are specified for which can be enabled to activate the relay on occurrence. 01. Z1 Alarm (alarm in zone 1) 02. -
Page 10: Phone Number Settings
2.5.4 Phone number settings 1 - 4. Phone number: 4 user telephone numbers can be entered where alarms will be reported through voice call and/or SMS message (according to event settings). Acknowledgement: three confirmation modes can be selected: 0 - no ack.: event confirmation is not necessary 1 - * = ack.: event must be confirmed by pressing * key on the phone 2 - * = ack, # = stop: event must be confirmed by pressing * key on the phone,... -
Page 11: Setting Phone Numbers Through Sms
2.5.4.1 Setting phone numbers through SMS The phone numbers can be set, replaced or erased also by sending an SMS to the module's SIM card from phone numbers configured in the module, containing the following commands: Setting SMS command Specification Module response Substitute "X"... -
Page 12: Alarm Settings
2.5.5 Alarm settings Arm / Disarm method: arming and disarming can be performed with external unit (access keypad, key switch, radio controller etc.), and through the phone. For arming/disarming with external unit one (Z6) or two (Z5 and Z6) inputs can be used depending on the available switching signal: 0 - Always Armed: it is not necessary to arm/disarm the module when used as transmitter device. -
Page 13: Changing The Module's Password
Arming is not allowed if any zone is active: if enabled, the module cannot be armed if any of the zones is activated. Maximum Alarming time: can be adjusted between 5 and 25 minutes, means how long should the module make attempts to report an event through GSM. When this time expires and there are still calls or SMS to be performed for the given event, the module will cancel the alarm process and will not make any more attempts of reporting this specific event. -
Page 14: Event Log
2.7 Event log After the connection to the module is established successfully, the event list can be downloaded after pressing the “Event List >>>” button: Requested list length: length of event list, this number of latest events will be displayed ... -
Page 15: Reading The Module's Version
2.8 Reading the module’s version Right after the connection is established successfully, the firmware version of the connected module is automatically displayed in the upper right corner of the main window. From the example the following details can be read: ... -
Page 16: Remote Control And Status Query Through Sms
Example: Caller identification: case of 0 – no identification, and password: 1111 : a. Activation of Relay1: Enter password: 91111# (accepted: 3 beeps) Activation of Relay1: 311# (Relay1 closed: 6 beeps) b. State query of Relay1: ... - Page 17 yyyy = module password (default: 1111, optional parameter, to be used only from phone numbers which are not set in the module, or from those which are set, but for which "0 - None." option is assigned at Caller ID setting – these phone numbers are considered unauthorized, therefore password is necessary).
-
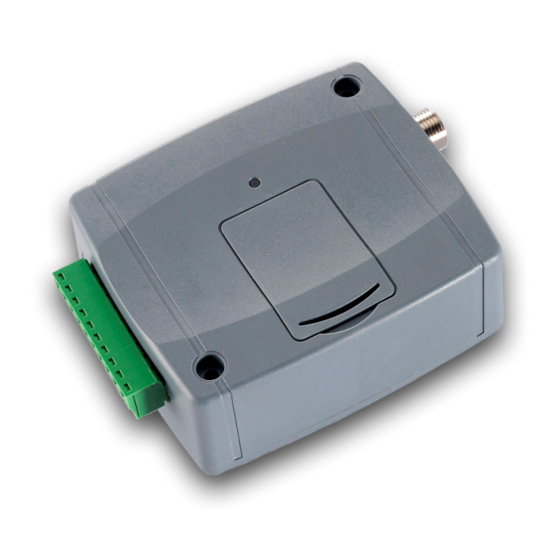
Page 18: External Elements And Functions
3 External elements and functions 3.1 SIM card case The cover can be opened by pulling horizontally towards the LED display on its marked end. Insert the SIM card here and replace the cover. 3.2 LED signals GSM network is not available or Red is continuously lit phone restart/power up in progress Red and green blink slowly and... -
Page 19: Installation Guide
Check the SIM card to be placed into its case properly. Check the antenna to be fixed properly to the GSM Pager3 Z6. Check the wiring to be done according to the wiring instructions. -
Page 20: Technical Details
84 x 72 x 32mm Weight: 200g (packed: 300g) 5.2 Contents of the package GSM Pager3 Z6 + terminal connector GSM 900/1800 MHz antenna User manual, warranty card, CD 5.3 The manufacturer’s contact T.E.L.L. Software Hungária Kft 4034 Debrecen, Vágóhíd u.
Need help?
Do you have a question about the GSM Pager3 Z6 and is the answer not in the manual?
Questions and answers