
Subscribe to Our Youtube Channel
Related Manuals for Orbit OCEANTRX4-500

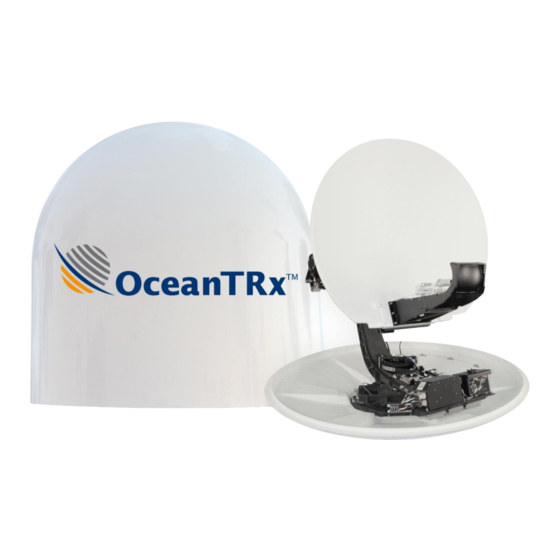
Summary of Contents for Orbit OCEANTRX4-500
- Page 1 Installation and Operations Manual Doc P/N: MAN33-0907, Rev. X2 1.15m (45”) Linear Ku-Band Maritime Stabilized VSAT System...
-
Page 2: About This Manual
Orbit Communication Systems Ltd. Disclaimer of Warranty Orbit Communication Systems Ltd. has made every effort to ensure the accuracy and relevancy of the material in this document. It is expected that all sections of this document will be read thoroughly and that all information and procedures should be fully understood. - Page 3 Preface Material Certifications Orbit Communication Systems Ltd. is an ISO 9001 registered company. Registration License No. 27870, issued May 1 , 2005. ORBIT OceanTRx™4-500 Stabilized Maritime Satellite Communication System is in conformity with the appropriate standards: IEC EN 60950-1; IEC EN 60950-22; UL 60950-1; UL 60950-22;...
- Page 4 When installing the system, ensure to use the materials and tools recommended in this manual. NOTE: System interfaces require high-quality connectors and cables. Use only Orbit-authorized parts for repair. Ocean TRx™ 4500 Installation and Operations Manual...
- Page 5 Preface Material Radiation Safety NOTE: The Minimum Distances in the table are calculated according to ACGIH (American Conference of Governmental Industrial Hygienists), and ICNIRP (International Commission on Non-Ionizing Radiation Protection), which is also adopted by FCC. (See 47 CFR §§2.1091 and 2.1093 on source- based time-averaging requirements for mobile and portable transmitters.) Table ...
-
Page 7: Table Of Contents
3.6.1 Power Requirements ............3-11 3.6.2 Cabling Guidelines .............. 3-11 3.7 Verify Tx/Rx Path Gain Budgets ............ 3-11 3.7.1 OceanTRx4-500 Single System Configuration ......3-15 3.7.2 OceanTRx4-500 Dual System Configuration ......3-19 3.8 Pre-Installation Checklist .............. 3-25 Unpacking and Mounting ..............4-1 4.1 Unpacking the System .............. - Page 8 Contents Installation Procedure ............... 5-1 5.1 Required Tools ................5-2 5.2 ADE Physical Preparations and Connections ........5-2 5.2.1 Opening the Hatch ............... 5-3 5.2.2 Unlocking the Pedestal Axes ..........5-3 5.2.3 ADE to BDE LMR Coaxial RF Cable Connection ......5-4 5.2.4 Power Connections and Power ON ..........
- Page 9 Contents 8.1 System Operation Modes ............... 8-2 8.1.1 Operating Modes Menu Options ..........8-2 8.1.2 Acquire Mode ............... 8-3 8.1.3 Acquire Satellite Preset Mode ..........8-3 8.1.4 Step-Track Mode ..............8-4 8.1.5 Peak Mode ................8-4 8.1.6 Point to Satellite Mode ............8-4 8.1.7 Satellite Preset Mode ............
- Page 10 Contents 9.2 Graphics Data Logger ..............9-10 9.2.1 Using the Graphic Data Logger..........9-10 9.2.2 Configuring the Graphic Data Logger ........9-10 9.2.3 Logging Data with the Graphic Data Logger ......9-11 9.2.4 Analyzing and Saving Logger Data ........9-12 9.3 Calibrating and Activating Noise Floor Correction......
-
Page 11: Introduction
1 Introduction This chapter introduces the OceanTRx 4-500 system. The following information is included in this chapter: 1.1 About Orbit .................. 1-2 1.2 About OceanTRx 4-500 Ka Band Inherent Support ......1-3 1.3 OceanTRx™4 Key Features and Advantages ........1-5 1.4 System Architecture for Standard Topology ........ -
Page 12: About Orbit
Figure 1 -1: Orbit’s Distribution and Support Centers ORBIT is a public company, traded in the Israeli stock exchange, with a headquarter in Israel and international sales and customer support network that includes the United States, Europe, Brazil and Singapore, in addition to its international technical service centers located around the world. -
Page 13: About Oceantrx Tm 4-500 Ka Band Inherent Support
Introduction About OceanTRxTM 4-500 Ka Band Inherent Support About OceanTRx 4-500 Ka Band Inherent Support OceanTRx 4-500 is part of OceanTRx4™product family. OceanTRx™4 is a revolutionary compact, lightweight maritime antenna system. (Other typical solutions require 88% more deck space and can be up to 40% heavier). OceanTRx™4 innovative platform supports a variety of 1.15m stabilized maritime antenna system configurations in the Ku and Ka bands. - Page 14 About OceanTRxTM 4-500 Ka Band Inherent Support Introduction This system consists of two main assemblies: Above Deck Equipment (ADE) - antenna system Below Deck Equipment (BDE) - Control and management unit. Installed in a 19” rack below deck and connected to the ship’s communication and navigational (GPS) infrastructure Figure ...
-
Page 15: Oceantrx™4 Key Features And Advantages
Ku and Ka bands. For over 30 years, Orbit designs and manufactures elite tracking products with best in class tracking technology. This technology is used for its vast product portfolio such as missile and aircrafts tracking which have the most demanding tracking requirements. - Page 16 “STANAG 4484” and “Skynet 5-Paradigm”(for X Band). World-Class Customer Support - five regional service centers located around the globe, ORBIT’s trained support engineers/technicians are available 24x7 to handle the immediate needs of customers worldwide. A global inventory replenishment system ensures efficient spare parts distribution across regions.
-
Page 17: System Architecture For Standard Topology
Introduction System Architecture for Standard Topology System Architecture for Standard Topology The OceanTRx™4-500 system consists of the following main elements: Antenna system – mounted above deck as a single unit, the system is designed to operate with a specific satellite band. It receives and transmits high-frequency signals from and to the satellite. -
Page 18: Dual System Topologies
Dual System Topologies Introduction Dual System Topologies Dual system topologies are used in scenarios where installation space and line-of-sight to the sky/satellite is limited. In this type of scenario, the installation of two smaller antenna systems instead of one larger antenna system is recommended. In a dual-system topology, two smaller antenna systems (installed above deck), are connected to the management equipment (located below deck), for single-source management. -
Page 19: Ku-Band Buc Configurations
Introduction Ku-Band BUC Configurations Ku-Band BUC Configurations Specific configurations of OceanTRx™4-500 system provide support for continuous communication on global voyages via automatic beam switching between satellites. This feature supports a wide variety of configurations that cover Global-Ku Band and future Ka/X Band requirements and consists of the following components: ... -
Page 20: Control And Monitoring
The system can be managed by opening a local or remote session to the CCU. The CCU supports Ethernet and USB connections on the front and on the rear panel. NOTE: Optional - foldable LCD and 1U keyboard can be ordered from Orbit. ... -
Page 21: System Description
2 System Description The following information is included in this chapter: 2.1 System RF Layout ................. 2-2 2.2 Above Deck Equipment (ADE) - Antenna Unit ........2-3 2.3 Central Control Unit (CCU) ............. 2-4 2.4 Dual System Selector (DSS) ............2-6 Ocean TRx™... -
Page 22: System Rf Layout
System RF Layout System Description System RF Layout The following figure shows the frequencies and RF measurements at various points in the system. Figure 2 -1: OceanTRx 4-500 RF Layout Ocean TRx™ 4500 Installation and Operations Manual... -
Page 23: Above Deck Equipment (Ade) - Antenna Unit
System Description Above Deck Equipment (ADE) - Antenna Unit Above Deck Equipment (ADE) - Antenna Unit The ADE consists of the antenna system, completely covered and protected by a Radome. Maintenance access is provided by a service hatch in the Radome base. The antenna system supports three rotary axes: ... -
Page 24: Central Control Unit (Ccu)
Central Control Unit (CCU) System Description Central Control Unit (CCU) The CCU is installed below deck, in a 19” rack. It provides interfaces to the following: ADE - Antenna unit Ship’s compass Satellite modem Communication infrastructure The CCU implements the required IF and RF conversion functions, and supports both local and remote system management and control functionality via MtsVLink management software installed on the CCU. - Page 25 System Description Central Control Unit (CCU) 2.3.1.2 CCU Rear Panel The CCU rear panel contains interfaces to the ADE and to the ship’s communication equipment. NOTE: BDE equipment pinouts are provided in Appendix D. Figure 2 -4: CCU Rear Panel The following table describes the connectors and switches on the rear panel of the CCU.
-
Page 26: Dual System Selector (Dss)
Dual System Selector (DSS) System Description Dual System Selector (DSS) The DSS is used to implement dual-system configurations (see section 1 .5). Both systems are managed via the CCU. See section 1 .5. The DSS provides interfaces to the following: ... - Page 27 System Description Dual System Selector (DSS) 2.4.1.2 DSS Rear Panel Interfaces The DSS rear panel contains the power interfaces, and connections to the CCU and second antenna unit (ADE). NOTE: BDE equipment pinouts are provided in Appendix D. Figure 2 -6: DSS Rear Panel Table ...
-
Page 29: Pre-Installation Requirements
3 Pre-Installation Requirements This chapter provides the criteria for choosing the exact installation site for the satellite and the required installation equipment. The following information is included in this chapter: 3.1 System Physical Specifications ............3-2 3.2 Overview of the Pre-installation Requirements ........3-2 3.3 Location for ADE ................ -
Page 30: System Physical Specifications
* Model dependent ** Varies according to BUC model NOTE: Since Orbit’s below deck equipment consists only of the CCU (and DSS for dual-system configurations), most of the information in this chapter describes the pre-installation requirements for the antenna system. - Page 31 Pre-Installation Requirements Overview of the Pre-installation Requirements The following figure provides an overview of the system architecture and connected equipment. Figure 3 -1: Architecture Detailed Overview OceanTRx 4-500 Installation and Operations Manual...
-
Page 32: Location For Ade
Location for ADE Pre-Installation Requirements Location for ADE When choosing the location for the ADE, consider the following criteria: Surface Stability Location Criteria Radom Support requirements Line of Sight 3.3.1 Surface Stability Mechanical stability - support the ANTENNA’s weight (200Kg or 440lb including Radome) and dynamics. -
Page 33: Radome Support (Mast) Requirements
Pre-Installation Requirements Radome Support (Mast) Requirements 3.3.2.5 Line Of Sight (LOS) The LOS is a straight line between the antenna and the satellite. This line is typically obstructed by the ship’s funnels and masts. Ideally, there should be no obstructions to the LOS, with a clear view of the satellite in all directions. -
Page 34: Support Structure Minimum Requirements
Radome Support (Mast) Requirements Pre-Installation Requirements 3.4.1 Support Structure Minimum Requirements Support structure minimum requirements Mast must be of rigid construction and mounting It is recommended that the mast be welded directly above one of the deck’s support beams, as shown in the following figure. -
Page 35: Example Of Mast Design
Pre-Installation Requirements Radome Support (Mast) Requirements 3.4.2 Example of Mast Design The following figures provide a suggested mast design. Figure 3 -4: Mast Design Figure 3 -5: Base Plate Interface (left) and Upper Plate Interface (right) OceanTRx 4-500 Installation and Operations Manual... -
Page 36: Mounting Surface Layout
The following figure displays the mounting surface layout, including the holes required to bolt the ADE securely to the mounting surface. The bolts attaching the system to the support are supplied by Orbit. Refer to Orbit drawing DCD31-1249. Figure 3 -6: Mounting Surface Layout... - Page 37 Pre-Installation Requirements Radome Support (Mast) Requirements Figure 3 -5: Mounting Interface Layout NOTE: BEFORE screwing the bolt in, TEST that it is suitable by simply inserting it in the thread; the bolt must protrude 15 to 20mm BEFORE being screwed in. Figure ...
-
Page 38: Crane And Harness Specifications
Crane and Harness Specifications Pre-Installation Requirements Crane and Harness Specifications Verify a crane and harness meeting the following specifications are available: Equipment Specs Additional info Harness Support for over 500Kg per single harness. Figure 3 -7: Harness lifting the unit 3-10 Ocean TRx™... -
Page 39: Main Power Cabling And Ups Guidelines
Pre-Installation Requirements Main Power Cabling and UPS Guidelines Main Power Cabling and UPS Guidelines 3.6.1 Power Requirements All equipment: Antennas, CCU and DSS are classified and must be installed according to Over Voltage Category (OVC) II specifications. All equipment must be connected via single-pole or dual-pole circuit breaker - depending on the ship's electrical infrastructure. - Page 40 Verify Tx/Rx Path Gain Budgets Pre-Installation Requirements For short range ADE-BDE connections (up to 30m), use a 30m LMR-200 cable (in order to achieve sufficient cable loss) or use the following CCU rear-panel attenuator selectors: BDMX ATTEN RX Selector – Select Rx Attenuator (“I” position: 0dB, “0” position: 8dB) ...
- Page 41 Pre-Installation Requirements Verify Tx/Rx Path Gain Budgets Figure 3 -10: LMR-400 Cable Attenuation OceanTRx 4-500 Installation and Operations Manual 3-13...
- Page 42 Verify Tx/Rx Path Gain Budgets Pre-Installation Requirements Figure 3 -11: LMR-600 Cable Attenuation The calculated coarse value of the modem output for 1dB BUC compression is well within the typical modem dynamic output range (0 to -30dB). 3-14 Ocean TRx™ 4500 Installation and Operations Manual...
-
Page 43: Oceantrx4-500 Single System Configuration
The calculation of the Tx L-Band path takes into consideration all Losses & Gains of the OceanTRx4-500™ system: CCU losses, Attenuation Set-Up in the CCU, LMR Cable loss (according to the length and type), Cables / RJ losses in the pedestal, BUC Power, BUC internal attenuation Set-Up, BUC Gain, ADMx / BDMx Tx Path Total Gain. - Page 44 Derived Total ADE to BDE LMR-600 Cable Gain/loss (according to length) with Standard CCU dB -4.2 Derived L-Band (Tx) Output from Modem for BUC P1dB with Standard CCU -10.8 Figure 3 -14: Calculations for Example of Single OceanTRx4-500 L-Band Tx Path 3-16 Ocean TRx™ 4500 Installation and Operations Manual...
- Page 45 The calculation of the Rx L-Band path takes into consideration all Losses & Gains of the OceanTRx4-500™ system: CCU losses, Attenuation Set-Up in the CCU, LMR Cable loss (according to the length and type), Cables / RJ losses / Splitter in the pedestal, LNB Gain, ADMx / BDMx Rx Path Total Gain.
- Page 46 Derived Total ADE to BDE Gain/Loss (according to length) with Standard CCU 10.2 Derived L-Band (Rx) Input to Modem with Standard CCU -40.9 Figure 3 -16: Calculations for Example of Single OceanTRx4-500 L-Band Rx Path 3-18 Ocean TRx™ 4500 Installation and Operations Manual...
-
Page 47: Oceantrx4-500 Dual System Configuration
The calculation of the Tx L-Band path takes into consideration all Losses & Gains of the OceanTRx4-500™ system: CCU losses, Attenuation Set-Up in the CCU, DSS losses, LMR Cable loss (according to the length and type), Cables / RJ losses in the pedestal, BUC Power, BUC internal attenuation Set-Up, BUC Gain, ADMx / BDMx Tx Path Total Gain. - Page 48 Verify Tx/Rx Path Gain Budgets Pre-Installation Requirements Example of Dual-Band L-Band Tx Levels calculations: In the example, the calculation of Tx attenuation separated to two paths for two systems: On the first path’s system (Yellow marked on the Excel) the OTRx4 system is connected to the CCU via LMR-600 cable length of 50m.
- Page 49 Derived Total ADE to BDE LMR Cable Gain/loss (according to length) with Standard CCU and DSS -19.5 Derived L-Band (Tx) Output from Modem for BUC P1dB (System2) -7.5 Figure 3 -18: Calculations for Example of Dual OceanTRx4-500 L-Band Tx Path OceanTRx 4-500 Installation and Operations Manual 3-21...
- Page 50 The calculation of the Rx L-Band path takes into consideration all Losses & Gains of the OceanTRx4-500™ system: CCU losses, Attenuation Set-Up in the CCU, DSS losses, LMR Cable loss (according to the length and type), Cables / RJ losses / Splitter in the pedestal, LNB Gain, ADMx / BDMx Rx Path Total Gain.
- Page 51 Pre-Installation Requirements Verify Tx/Rx Path Gain Budgets Example of Dual-System L-Band Rx Levels calculations: In the example, the calculation of Rx attenuation separated to 2 paths for 2 systems: On the first path’s system (Yellow marked on the excel), the LMR-600 cable length is 50m, LNB Gain is 63 dB, Rx Ku-Band is 11.2 GHz, CCU "BDMx"...
- Page 52 Derived Total ADE to BDE Gain/Loss (according to length) Derived L-Band (Rx) Input to Modem with Standard CCU -45.9 Figure 3 -20: Calculations for Example of Dual OceanTRx4-500 L-Band Rx Path 3-24 Ocean TRx™ 4500 Installation and Operations Manual...
-
Page 53: Pre-Installation Checklist
Pre-Installation Requirements Pre-Installation Checklist Pre-Installation Checklist Before bringing the installation crew to the site, the customer should fill out the pre-installation checklist provided in Pre-Installation Checklist, in order to verify that the installation site and customer-supplied equipment are available and ready. OceanTRx 4-500 Installation and Operations Manual 3-25... -
Page 55: Unpacking And Mounting
4 Unpacking and Mounting The following information is included in this chapter: 4.1 Unpacking the System ..............4-2 4.2 Mounting ADE ................4-4 Ocean TRx™ 4500 Installation and Operations Manual... -
Page 56: Unpacking The System
ATTENTION!! Two people are required for the ADE unpacking and mounting procedures. (In most cases), the following procedures are the responsibility of the shipyard: Preparing for the attachment of Orbit’s Base Ring to the Radome support Installing the ADE/BDE cables and wiring ... -
Page 57: Crate Inspection And Unpacking
Unpacking and Mounting Unpacking the System 4.1.2 Crate Inspection and Unpacking Note the following: Be sure to place the crate on a flat steady surface with enough access room. The crate contents may have shifted during transport. As soon as you open the crate, check for any evidence of external damage. -
Page 58: Mounting Ade
Verify all items are present, according to the packing list. c. Visually inspect all items. Report any damaged parts to the shippers and to supportgroup@orbit-cs.com, Shrink as units damaged during shipping are not covered by the warranty terms and conditions. - Page 59 Unpacking and Mounting Mounting ADE Step 2 Attach the anchor shackles at the end of each strap to the eye bolt in 4 lifting points protruding from the RADOME. Step 3 Remove the platform adapters 3/8" X 4 bolts securing it to the base plate. Step 4 Using the 4 eye bolts, lift the OceanTRx™4-500 slightly in the air so the wooden platform can be...
-
Page 60: Mounting And Securing Onto The Support Structure (E.g. Mast)
Mounting ADE Unpacking and Mounting 4.2.2 Mounting and Securing onto the Support Structure (e.g. Mast) Note the following when mounting the antenna system to the support structure (e.g. mast) Four(4) 60mm screws are included in the system installation kit. ... -
Page 61: Installation Procedure
5 Installation Procedure The following information is included in this chapter: 5.1 Required Tools ................5-2 5.2 ADE Physical Preparations and Connections ........5-2 5.3 BDE Installation Procedure ............. 5-6 Ocean TRx™ 4500 Installation and Operations Manual... -
Page 62: Required Tools
Required Tools Installation Procedure NOTE: The procedures in this section are performed after the ADE is mounted securely. Before entering the Radome for maintenance purposes, shut off the main power to the system from the ship’s electrical panel. Upon entry, switch off the ADE power box. -
Page 63: Opening The Hatch
Installation Procedure ADE Physical Preparations and Connections 5.2.1 Opening the Hatch NOTE: It is recommended to use a flashlight when working inside the dome. To open the hatch door 1. Reach under the ADE base and remove the hatch fasteners (1/2 turn). 2. -
Page 64: Ade To Bde Lmr Coaxial Rf Cable Connection
ADE Physical Preparations and Connections Installation Procedure Azimuth Axis pin Figure 5 -2: Azimuth Axis Stow Pin Polarization Axis pin Figure 5 -3: Polarization Axis Stow Pin 5.2.3 ADE to BDE LMR Coaxial RF Cable Connection A single coax cable connects the antenna to the CCU side. ... -
Page 65: Power Connections And Power On
Installation Procedure ADE Physical Preparations and Connections 5.2.4 Power Connections and Power ON The power box is located in front of you as you enter the dome through the hatch. 1. Connect the following cables to the ADE power Connection box: ... -
Page 66: Bde Installation Procedure
BDE Installation Procedure Installation Procedure BDE Installation Procedure 5.3.1 Rack Installation Criteria Install the CCU in a 19-inch rack If a bracket is supplied, use the supplied bracket for the installation. Note the depth of the CCU and DSS. ... -
Page 67: Ccu Installation Procedure
Installation Procedure BDE Installation Procedure 5.3.2 CCU Installation Procedure Figure 5 -5: CCU Rear Panel Interface To connect the CCU 1. Connect the following cables: LMR Coax cable from ADE Ground cable from ‘GND Lug’ to rack's Ground ... - Page 68 BDE Installation Procedure Installation Procedure 3. For CCU with 10MHz reference signal - connect the Modem as follows: CCU AUX-IF2 port to CCU Tx port CCU AUX-IF1 port Modem Tx port CCU Rx port to Modem Rx port Figure ...
-
Page 69: Dss Installation Procedure
Installation Procedure BDE Installation Procedure 5.3.3 DSS Installation Procedure The Dual System Selector (DSS) is only used in dual system configurations. One system is connected to the CCU and other system is connected to the DSS. NOTE: it is recommended to install the DSS in the rack adjacent to the CCU since they are interconnected. - Page 70 BDE Installation Procedure Installation Procedure 2. DSS to CCU connections: DSS AUX to CCU AUX DSS ETH to CCU ETH DSS Tx to CCU Tx DSS Rx to CCU Rx Figure 5 -13: CCU to DSS Connections 3.
- Page 71 Installation Procedure BDE Installation Procedure 4. For DSS to CCU with 10MHz reference signal - connect the Modem as follows: DSS Tx to CCU AUX-IF2 DSS Rx port to Modem Rx DSS AUX-IF1 port Modem Tx Figure 5 -15: DSS to CCU with 10 MHz Tx/Rx Modem Connections OceanTRx 4-500 Installation and Operations Manual 5-11...
-
Page 73: Navigating The Mtsvlink
6 Navigating the MTSVLink The MTSVLink management application is used to setup, operate and monitor the system. The application is installed on the CCU and can be accessed by either locally or remotely via and in-band or out-of-band connection to the CCU. -
Page 74: Opening A Session To The Ccu
Remotely or locally – via a computer (running the MTSVLink application) that is connected to the CCU Ethernet port. NOTE: 1U KB and 1U “foldable” screen for direct connection can be ordered from Orbit. The following figure shows the rear panel peripheral connections. - Page 75 Navigating the MTSVLink Opening a Session to the CCU 2. Launch the MTSVLink application. The Initial screen appears. Note the countdown: When the countdown is complete, the Basic (monitoring only) screen is automatically accessed. To access the Operations (configuration and control options) screen, do the following: o During countdown - press [C] and enter the password al-7200 o From the Basic screen (countdown completed) - press [O] and the password...
-
Page 76: Main Screens
Main Screens Navigating the MTSVLink 3. Verify antenna is operational - screen view will be populated (not empty of parameters). Below is an example of the Operation screen – before setup, only some of the parameters may be displayed. Figure 6 -3: Operation Screen Main Screens Three main screens are available: ... -
Page 77: Startup Screen
Navigating the MTSVLink Main Screens 6.2.1 Startup Screen The Startup screen displayed after power-up or reset shows the software's logo, current Date & Time and release version of the application. The Startup screen automatically appears for 10 seconds (countdown) after you power on the CCU. -
Page 78: Basic Screen
Main Screens Navigating the MTSVLink 6.2.2 Basic Screen This mode only allows you to configure a few basic parameters such as remote communication (modem, IP, etc.), monitor the system and perform a few basic operations. The Basic Operation screen consists of the following main areas: ... - Page 79 Navigating the MTSVLink Main Screens 6.2.2.1 Basic Screen Menu Bar Item Description Esc – Exit Closes and exits application. Host Edit Communication properties. Version Release version of application. 6.2.2.2 Basic Screen Display Area Information Item Description Ship coordinates Shows ship’s date & time, exact geographic coordinates, position relative to sea level and compass status.
-
Page 80: Operation Screen
Main Screens Navigating the MTSVLink Operation Screen 6.2.3 This mode allows you to configure/update all the relevant parameters, perform maintenance and manual system operations. NOTE: All information except for the Antenna Target area and Local Position area is parallel to the Basic screen. - Page 81 Go back to the previous screen or quits the application (from the last screen). Satellites Shows available satellite constellation and orbit options and provides detailed configuration parameters (section 7 .3). Mode Antenna mode control options (Acquire, Search, etc.). Most of these options are parallel to the Side Bar shortcut buttons (section ...
-
Page 82: Saving Configuration Changes
Saving Configuration changes Navigating the MTSVLink Side Bar Description Buttons Database (without taking into account the tracking signal level or tracking frequency for the satellite from the Satellite Database). SatPreset Points the Antenna to a user-defined geo-stationary longitude. Can also be used for satellites whose not included in the database. Search Moves the Antenna in an expanding and contracting spiral until the AGC signal is above the threshold. -
Page 83: Shortcuts
Navigating the MTSVLink Shortcuts Shortcuts Keyboard Shortcuts Shortcut buttons NOTE: Saving configuration changes. System configuration changes made using the software are stored in volatile memory. Changes not saved to non-volatile memory will be lost when the system reboots. Therefore, it is important to save any system configuration changes. ... -
Page 84: Configuring The Display
Configuring the Display Navigating the MTSVLink Configuring the Display The units and scale displayed in the AGC and Az/El Deviation windows in the Operation Screen can be configured. To configure the AGC and Az/El Deviation display: 1. Open the Config menu and select Display. The Display Configuration dialog box appears. -
Page 85: Setup Procedure
7 Setup Procedure This chapter describes the procedures required for initially setting up the antenna. The procedures are described in the order in which it is recommended that they be performed. The following information is included in this chapter: 7.2 Compass Input Configuration ............7-2 7.3 Selecting a Satellite ............... -
Page 86: Overview Of The Commissioning Procedure
Overview of the Commissioning Procedure Setup Procedure Overview of the Commissioning Procedure NOTE 1: The OceanTRx 4-500 Maritime Satellite Communication System is preconfigured and tested before it is shipped. Tampering with any of the system settings that are not explicitly mentioned in this manual can impair the functioning of the system. -
Page 87: Set Compass Communication Parameters
Setup Procedure Compass Input Configuration To select the compass type 1. From the Config menu, select Compass. The following dialog appears: Set initial value. To be updated after accurate offset value is calculated Figure 7 -1: Compass Dialog Box 2. - Page 88 Compass Input Configuration Setup Procedure To set compass communication parameters 1. From the Host menu, select Hardware Interface, click the Enable tab and verify Enable Hardware is set to Yes. Click Apply. Figure 7 -2: Host Hardware Interface Enable Tab 2.
-
Page 89: Setting Ship's Heading Manually
Setup Procedure Selecting a Satellite 6. For NEMEA type compass: Set Enable to Yes. Under COM Port Number – set according to the type of physical connection: o RS422 type - COM2 o RS232 type - COM3 Set Baud Rate –... -
Page 90: Loading A Satellite List File
Loading a Satellite List File To select a satellite 1. From the Operation Screen, click the Satellite menu and choose the relevant orbit type. The Satellite management dialog will vary according to the previously selected orbit: GEO, O3B or LEO. -
Page 91: Manually Defining A Satellite
Setup Procedure Selecting a Satellite Click OK. The list of available satellites will be displayed. NOTE: The list may be modified (Add, Remove satellite definitions, channels, etc.), by clicking the Edit button and using the available management options. See section 8 .2 for detailed descriptions of the Satellite Management options. -
Page 92: Defining Channels (Tracking Signals)
Selecting a Satellite Setup Procedure 7.3.3 Defining Channels (Tracking Signals) 7.3.3.1 Criteria for Selecting the Tracking Signal A good-quality signal strength – defined as the highest possible signal-to-noise ratio – is required to perform step-tracking of the antenna. The tracking signal received from the satellite may be one of the following: ... - Page 93 Setup Procedure Selecting a Satellite 7.3.3.2 Configuring Channels NOTE: The required parameter values are provided by your satellite operator. To define channels manually 1. Click the Edit button and click Add Channel. The following dialog appears. Figure 7 -7: Add Channels Dialog 2.
-
Page 94: Selecting The Desired Satellite And Channels
Selecting a Satellite Setup Procedure To toggle the system polarization: 1. From the Operation Screen, open the Command menu and select Toggle Polarization. The Polarization Status dialog box appears. Figure 7 -9: Polarization Status Dialog Box 2. Click OK (Enter). The system polarization toggles and the Polarization Status dialog box closes. -
Page 95: Perform Compass Offset
Setup Procedure Perform Compass Offset Perform Compass Offset The vessels compass and the OceanTRx™4-500 system must be aligned according to the vessel's bow-to-stern axis. Ideally, the OceanTRx™4-500 system is installed so the 'marker' is aligned with the bow- to-stern axis of the ship (and with the ship's compass). However, this ideal installation is not always possible, due to physical limitations of the OceanTRx™4-500 installation site. - Page 96 Perform Compass Offset Setup Procedure To calibrate the compass offset 1. Make a 'naked-eye' rough estimate of the offset angle, using the following syntax: Clockwise rotation from the ship's bow = positive (+) values Counter-clockwise from the ship's bow = negative (-) values In the following figure, an appropriate estimate would be (-30°).
- Page 97 Setup Procedure Perform Compass Offset Enter the 'naked-eye' estimate in the Offset field. If the data latency (in seconds) is known, enter the latency in the Latency field. If the latency is not known, leave the factory default setting of 0.060 seconds. ...
- Page 98 Perform Compass Offset Setup Procedure Setting the antenna to Peak Mode (see Section 8 .1.5 Peak Mode on page 8-4) and calculating the difference between the resulting azimuth and the nominal azimuth. 6. Calculate the degree to which the original ‘naked-eye’ estimation of the compass offset angle must be corrected in order to reach the accurate zero setting: 7.
-
Page 99: Setup Blockage Zone
Setup Procedure Setup Blockage Zone Setup Blockage Zone This section describes how to configure blockage zones. These zones are areas in which elements (such as the ship’s funnel) may interfere with antenna to satellite communication. The zones may also be areas frequented by personnel, in which case it is recommended to configure the LNB to be disabled when the signal transverses these areas. - Page 100 Setup Blockage Zone Setup Procedure Figure 7 -17: Side View of Blockage Zones(Elevation) 7-16 Ocean TRx™ 4500 Installation and Operations Manual...
- Page 101 Setup Procedure Setup Blockage Zone To configure the Blockage Zones 1. From the Config menu, select Antenna Blockage. The following dialog appears. Figure 7 -18: Blockage Zones configuration 2. For each blockage zone: Configure the horizontal blockage range: enter start (From) and end (To) Azimuth angles relative to the ship’s bow-to-stern axis.
-
Page 102: Acquire Satellite And Verify Agc
Acquire Satellite and Verify AGC Setup Procedure Acquire Satellite and Verify AGC This section describes how to acquire the last satellite selected (or defined) satellite. To acquire the satellite and Verify AGC 1. Click the Acquire side button. This activates Acquire mode. Activating Acquire Mode points the Antenna at the satellite last selected from the database and activates Step-Track Mode, which moves the antenna to the position of maximum AGC based on tracking signal level. -
Page 103: Openamip Connection - Optional For Idirect Modems
Setup Procedure OpenAMIP Connection – Optional for Idirect Modems OpenAMIP Connection – Optional for Idirect Modems NOTE: This is relevant only for Idirect modems This procedure (relevant only for Idirect type modems, is used to verify that modem is locked on the correct satellite. To receive monitoring information from a satellite modem via an Ethernet connection, the OpenAMIP must be configured on the system. -
Page 104: Cpi And 1Dbcp Compression Point Test
CPI and 1dBcP Compression Point Test Setup Procedure CPI and 1dBcP Compression Point Test Perform Cross Polarization Isolation (CPI) test and 1dBcP compression point test with the NOC and verify proper operation. If necessary, modify the system parameters according to your satellite operator’s input, according to the procedure described in this section. ... -
Page 105: Configure Modem And Verify Rx Lock
Setup Procedure Configure Modem and Verify Rx Lock Under, Alignment offsets, add or delete the value the antenna was skewed and verify signal level with operator. For example: if the measured value was +1°, °, and current Cross-polSkew was “0”... -
Page 106: Fine Adjustment (1Dbc)
Configure Modem and Verify Rx Lock Setup Procedure The OceanTRx 4-500 system can be configured to perform periodic checks to verify that the antenna is locked on the right satellite, provided that the necessary satellite information can be obtained. The IRD Lock function checks the status of a Lock/Unlock indication returned from the modem at a predefined interval. -
Page 107: Submitting The Commissioning Checklist
System’s installation and commissioning. Commissioning Checklist Commissioning Checklist provided in Commissioning Checklist (on page 1) - to allow Orbit to follow up on field installation and commissioning issues. The Checklist includes: 1. Customer information 2. Commissioning requirements 3. -
Page 109: System Operation
8 System Operation This chapter describes the standard system operation and control options. The following information is included in this chapter: 8.1 System Operation Modes ............... 8-2 8.2 Satellite Database Management ............8-9 8.3 Manual Input to the System ............8-16 8.4 Rebooting the ACU .............. -
Page 110: System Operation Modes
System Operation Modes System Operation System Operation Modes NOTE: When the power-up sequence is completed, the system is automatically locked onto the last satellite that was selected and saved prior to system shutdown. In principle, after proper installation, configuration, and alignment, the OceanTRx 4-500 system functions completely automatically. -
Page 111: Acquire Mode
System Operation System Operation Modes 8.1.2 Acquire Mode Activating Acquire Mode points the Antenna to the satellite last selected from the database and activates Step-Track Mode, which moves the antenna to the position of maximum AGC based on tracking signal level. ... -
Page 112: Step-Track Mode
System Operation Modes System Operation 8.1.4 Step-Track Mode Under normal working conditions, Step-Track Mode is activated automatically from the Acquire and Acquire Satellite Preset Modes. However, you may need to activate it manually for maintenance and integration purposes. To activate Step-Track Mode: 1. -
Page 113: Satellite Preset Mode
System Operation System Operation Modes 8.1.7 Satellite Preset Mode Activating Satellite Preset Mode moves the Antenna to a user-defined geo-stationary longitude. To activate Satellite Preset mode: 1. From the Operation Screen, open the Mode menu and select Sat. Preset. The Satellite Preset Mode dialog box appears. -
Page 114: Stand-By Mode
System Operation Modes System Operation 8.1.9 Stand-by Mode Activating Stand-by Mode halts all axes in their current position. To activate Stand-by Mode: 1. From the Operation Screen, open the Mode menu and select Stand-by. A confirmation message box appears. 2. -
Page 115: 8.1.11 Stow Mode
System Operation System Operation Modes accordance with the ANTENNA displacement on the arch. This mode is most useful in ‘hunting’ for adjacent satellites. 3. Set the desired Increment Size for each angle, representing the size of one step in degrees. Default settings are 0.05º for azimuth and elevation, and 0.1º for polarization skew. -
Page 116: 8.1.12 Test Trajectory Mode
System Operation Modes System Operation 8.1.12 Test Trajectory Mode Activating Test Trajectory Mode allows you to test the performance of each of the antenna axes. To activate Test Trajectory Mode: 1. Open the Mode menu and select Test Traj. A confirmation message box appears. 2. -
Page 117: 8.1.13 Program Route Mode
System Operation Satellite Database Management 8.1.13 Program Route Mode NOTE: Reserved for future use. Activating Program Route Mode points the antenna to the point defined in the Two Line Elements (TLE) file. 8.1.14 Acquire Program Track Mode NOTE: Reserved for future use. Activating Acquire Program Track Mode points the antenna to the point defined in the Two Line Elements (TLE) file and initiates step tracking. - Page 118 Satellite Database Management System Operation 8.2.1.1 The Satellite Database Dialog To view the satellite database Select Satellites on the Menu Bar. Then select the relevant constellation, the following dialog appears (below is an example of a Geostationary constellation database). The satellites in the currently loaded file are displayed.
- Page 119 System Operation Satellite Database Management 8.2.1.2 Adding a Satellite To add a satellite to the database 1. In the Satellites dialog box, click Edit and select Add Satellite. The following dialog box appears. Figure 8 -8: Add Satellite Dialog Box 2.
- Page 120 Satellite Database Management System Operation 8.2.1.3 Defining Channels To add a channel to a satellite in the database 1. In the Satellites dialog box, select a satellite from the satellites list. 2. Click Edit and select Add Channel. The following dialog box appears. Figure ...
-
Page 121: Filtering The View Of Available Satellite Definitions
System Operation Satellite Database Management 8.2.2 Filtering the View of Available Satellite Definitions The satellites list can be filtered for easy searching of satellites. To filter the satellites list: 1. In the Satellites dialog box, click Filter. The following dialog box appears. Figure ... - Page 122 Satellite Database Management System Operation 8.2.3.2 Loading the Satellite Database from A File To load satellite database from a file: 1. From the Satellites dialog box, click Load and select Load from File. A file browser window appears. Figure 8 -12: Load Satellite Database File ...
- Page 123 System Operation Satellite Database Management Don’t load automatically – No database is loaded automatically. On first connection – Automatically loads database from ACU on the first connection to the CCU. On each connection – Automatically loads database from ACU on each connection to the CCU.
-
Page 124: Manual Input To The System
Manual Input to the System System Operation To save the satellite database to a file: 1. From the Satellites dialog box, click Save and select Save in File. A file browser appears. Go to the directory in which the database file will be saved. ... -
Page 125: Setting The Ship's Heading
System Operation Manual Input to the System 8.3.2 Setting the Ship’s Heading Caution! This is only used if the compass malfunctions; changes will be overwritten when the compass is functional again. If the ship uses a Step-by-Step compass, or if the compass becomes inactive or unconnected (for example, during system installation), you need to set the ship’s heading manually. -
Page 126: Setting The Gps Position
Manual Input to the System System Operation 8.3.3 Setting the GPS Position Caution! This is only used if the GPS antenna malfunctions; changes will be overwritten when the GPS antenna is functional again. If for some reason there are no GPS position updates, or the GPS is malfunctioning or disconnected, you can enter the ship’s position manually. -
Page 127: Rebooting The Acu
System Operation Rebooting the ACU Rebooting the ACU If the system did not start correctly or if you want to initialize the ACU, you can reboot the system. To reboot the system: 1. From the Operation Screen, open the Commands menu and select Reboot. A confirmation message box appears. -
Page 128: Compass Configuration
Configuring Host Hardware Interfaces System Operation Description Enable Globally enables hardware interfaces. Must always be set to Yes. Compass Input Compass input Communication parameters and state GPS Input GPS input Communication parameters and coordinates display GPS Output GPS output Communication parameters IRD source and state (section ... - Page 129 System Operation Configuring Host Hardware Interfaces 8.5.2.1 ADVANCED - Configuring NMEA-0183 Compass Defaults This procedure can be performed only when using an NMEA-0183 compass. To configure NMEA-0183 compass defaults: 1. Open the Config menu and select Compass NMEA. The NMEA Setup for Compass dialog box appears.
-
Page 130: Viewing Additional Modem Parameters
Ethernet connection. Installation and integration of the modem is under the customer’s responsibility. Follow the instructions below and consult with Orbit’s Service Department for further assistance. 1. From the Host menu, select Hardware Interface... The following dialog appears: Figure ... -
Page 131: Configuring Ird Signal Lock
System Operation Configuring Host Hardware Interfaces 8.5.4 Configuring IRD Signal Lock This section describes how to configure the source type of IRD signal and enable the signal. 8.5.4.1 Configuring the IRD (Integrated Receiver Decoder) Lock Hardware Interface To configure the IRD LOCK hardware interface: 1. -
Page 132: Configuring The Gps Output Hardware Interface
Configuring Host Hardware Interfaces System Operation 8.5.4.2 Enabling the IRD Lock Signal To enable the IRD Lock Signal 1. From the Config menu, select Satellite Validation. The following dialog box appears. Figure 8 -21: Satellite Validation Dialog Box 2. -
Page 133: Configuring The Cease Tx Function
(for example, when the antenna is pointing towards a predefined blockage zone). Configuring this function is under the customer’s responsibility. Follow the instructions below and consult with Orbit’s Service Department for further assistance. The default setting is control AUTO – OceanTRx... -
Page 134: Tx Chain Windows
Configuring the Cease Tx Function System Operation 8.6.1 Tx Chain Windows The Tx Chain window is displayed on the Maintenance Screen, accessed from the Maint control on the Operation Screen Menu Bar. Figure 8 -23: Tx Chain Window The window provides the following options: Item Description Control... - Page 135 System Operation Configuring the Cease Tx Function 8.6.1.2 Criteria for Disabling Transmit Click the maint menu option and in the Tx Chain dialog area, click Depend. The following dialog appears. Figure 8 -24: Tx Chain Dependency Dialog Box Item Description Minimum Elevation The antenna elevation angle, relative to the horizon, below...
-
Page 136: Configuring The Restart Mode
8.6.1.3 BUC Attenuation Control Capability Atten – This button opens the BUC Attenuator dialog box, which is used to define the attenuator control capability of the Orbit-certified BUC units. Figure 8 -25: BUC Attenuator Dialog Box Configuring the Restart Mode By default, the system automatically enters Acquire mode after it restarts. -
Page 137: Configuring Agc Threshold
System Operation Configuring AGC Threshold 4. In the Timeout (min) field, enter the number of minutes after which the system will automatically reboot if it fails to engage the defined operating mode. 5. Click Ok (Enter). The Restart Mode dialog box closes. NOTE: For normal system operation, the restart mode should be set to Acquire. -
Page 138: Configuring The Nbr
Configuring the NBR System Operation 3. Click OK (Enter). The new threshold level appears in the AGC (dBm) window. Figure 8 -28: AGC (dBm) Window Configuring the NBR Narrow Band Receiver (NBR) parameters can be configured manually, without modifying the satellite database. -
Page 139: System Constellation And Communication Parameters
1. From the Operation Screen, open the Config menu and select System Type. The System Type dialog box appears. Figure 8 -30: System Type Dialog Box 2. Select the constellation (and orbit) type of the system satellite. From the Constellation field select the relevant constellation: ... - Page 140 System Constellation and Communication Parameters System Operation 4. Select the polarization mode from the Polarization field. Select the Linear option. The following options are available: Linear – Linear Polarization broadcast. Circular – Circular Polarization broadcast. Linear/ Circular – Linear and/or Circular Polarization broadcast. Click and then click [V] on the keyboard and press Enter to save.
-
Page 141: Monitoring And Analysis Tools
9 Monitoring and Analysis Tools The following information is included in this chapter: 9.1 Spectrum Analyzer Tool ..............9-2 9.2 Graphics Data Logger ..............9-10 9.3 Calibrating and Activating Noise Floor Correction......9-14 9.4 Monitoring System Voltage and Temperature Test Points ....9-19 9.5 Monitoring the MtsVLink Work Session ........... -
Page 142: Spectrum Analyzer Tool
Spectrum Analyzer Tool Monitoring and Analysis Tools Spectrum Analyzer Tool The spectrum analyzer tool is used for various measurements and analysis operations such as measuring the floor noise. The power levels can be displayed over a user defined frequency range. The display can be customized for optimal view and can be saved for reference either as a file or an image to a user defined location. -
Page 143: Navigating The Spectrum Analyzer Tool
Monitoring and Analysis Tools Spectrum Analyzer Tool 9.1.1 Navigating the Spectrum Analyzer Tool To Access the Spectrum Analyzer Screen From the Operation screen or from the Maintenance Screen, select the Spectrum menu option. The spectrum analyzer screen appears. The following figure illustrates a display with acquired data (the initial screen is empty). - Page 144 Spectrum Analyzer Tool Monitoring and Analysis Tools Shortcut Buttons Next Print Select Measure Colors Window Window Item Description New Window Opens additional graph window. Several graph windows can be simultaneously displayed (only one of the windows can actively acquire data at any one time). The windows can be tiled or arranged via the Window menu.
-
Page 145: Acquisition Criteria
Monitoring and Analysis Tools Spectrum Analyzer Tool 9.1.2 Acquisition Criteria These are the criteria according to which the data will be acquired. These include (among other parameters), the measurement steps and the acquisition rate per step (measurement point). Duration of a measurement point = 2.5 milliseconds (ms). Duration of a complete band = (Number of averaging points)*(Number of steps)*(0.0025). -
Page 146: Configuring The Display
Spectrum Analyzer Tool Monitoring and Analysis Tools Averaging – Measurement rate per step. Range: 8 to 100. AGC Unit – Select the desired AGC Unit. Values: dBm, dBµV. 3. In the Grid field, determine to show (Yes) or hide (No) the Grid. 4. -
Page 147: Running A Measurement
Monitoring and Analysis Tools Spectrum Analyzer Tool Figure 9 -4: Spectrum Analyzer Zoom Parameters Dialog Box 4. To manually Customize graph colors: Select the Colors option. Set Display Colors – Any color. Set Print Colors – Any color. ... - Page 148 Spectrum Analyzer Tool Monitoring and Analysis Tools The following figures show examples of Spectrum Analyzer displays. Figure 9 -6: Anritsu MS2721A Spectrum Analyzer Display with a 3 KHz RBW Figure 9 -7: Anritsu MS2721A Spectrum Analyzer Display with a 30 KHz RBW Ocean TRx™...
- Page 149 Monitoring and Analysis Tools Spectrum Analyzer Tool Figure 9 -8: MtsVLink Spectrum Analyzer Display with an NBR IfBw of 150 KHz NOTE: Wide band scans are also possible, although the scan resolution must be taken into account. In the figure below, a 200 MHz scan is taken using an NBR IfBw of 300 KHz at a resolution of 0.1 MHz with 8-point averaging.
-
Page 150: Graphics Data Logger
Graphics Data Logger Monitoring and Analysis Tools Graphics Data Logger 9.2.1 Using the Graphic Data Logger The Graphic Data Logger can record up to 32 simultaneous channels of data for a specified time interval and calculate the mean value and standard deviation for the recorded period. -
Page 151: Logging Data With The Graphic Data Logger
Monitoring and Analysis Tools Graphics Data Logger 3. Set the desired sampling time and sampling points. NOTE: When logging data at 1 sample per tick, it is recommended to set the number of points to 30,720, corresponding to 60 seconds of logging time per tick. Consequently, each additional minute represents a single tick. -
Page 152: Analyzing And Saving Logger Data
Graphics Data Logger Monitoring and Analysis Tools Figure 9 -13: Logging Multiple Parameters 5. Open the Command menu and select Run (or press the <R> key). The Logger begins recording data. A progress bar appears during the logging process, and intermediate results are displayed for measurements that last a considerable time (i.e. - Page 153 Monitoring and Analysis Tools Graphics Data Logger 2. Set the desired Scale and Offset values for each parameter. For example, the following figures show the Logger results before and after scaling: Figure 9 -15: Logger Results before Scaling Figure 9 -16: Logger Results after Scaling In the above example, the Yaw curve was offset by 225.0°...
-
Page 154: Calibrating And Activating Noise Floor Correction
Calibrating and Activating Noise Floor Correction Monitoring and Analysis Tools Select Replace to overwrite the data currently displayed. Select Add to add the saved data to the data currently displayed. To save the current Logger settings: 1. Open the File menu and select Save Setup (or press the <V> key from the Logger screen). - Page 155 Monitoring and Analysis Tools Calibrating and Activating Noise Floor Correction 3. Open the Noise-Floor menu and select Start Calibration. The Start Noise-Floor Calibration dialog box appears. Figure 9 -18: Start Noise-Floor Calibration Dialog Box 4. Check the relevant calibration lines in accordance with the LNB bands (single, dual or quad).
-
Page 156: Typical Noise Floor Curves
Calibrating and Activating Noise Floor Correction Monitoring and Analysis Tools 8. To review the measured data, open the Noise-Floor menu and select Read Calibration. The Read Noise-Floor Calibration dialog box appears. Figure 9 -20: Read Noise-Floor Calibration Dialog Box The curves may be presented in pairs. - Page 157 Monitoring and Analysis Tools Calibrating and Activating Noise Floor Correction Figure 9 -22: Norsat 1x07HC (10GHz LO), NBR 150 KHz Figure 9 -23: Norsat 1x07HC (10 GHz LO), NBR 300 KHz OceanTRx 4-500 Installation and Operations Manual 9-17...
-
Page 158: Activating Noise Floor Correction
Calibrating and Activating Noise Floor Correction Monitoring and Analysis Tools 9.3.3 Activating Noise Floor Correction After noise floor correction has been configured, the NBR should be configured to use noise floor correction. To activate noise floor correction on the NBR: 1. -
Page 159: Monitoring System Voltage And Temperature Test Points
Monitoring and Analysis Tools Monitoring System Voltage and Temperature Test Points Monitoring System Voltage and Temperature Test Points From the Maintenance Screen, open the Config-View menu and select Show Power State (or press the <P> key). The Power and Temperature Status window appears. Figure ... -
Page 160: System Messages Log
System Messages Log Monitoring and Analysis Tools System Messages Log To view the last 1,000 status messages generated by the system: Open the Host menu and select the Log > Show sub-menu from System Messages. The System Messages Log Snapshot window appears. Figure ... -
Page 161: Downloading The Status Dump File
Monitoring and Analysis Tools Downloading the Status Dump File Downloading the Status Dump File The Status Dump command generates the Status Dump Report, an ASCII file containing the system parameters defined during the commissioning process, as well as system status indications. These parameters and indications can be used to analyze system performance and determine the possible source of system faults. -
Page 162: Viewing Software Version Details
Viewing Software Version Details Monitoring and Analysis Tools Viewing Software Version Details To view software version details: Click the Version control on the Operation Screen Menu Bar. The Version window appears, displaying the version numbers and dates of the MtsVLink and ACU software modules. -
Page 163: Appendix A: Technical Specifications
Appendix A: Technical Specifications Table 9 -1: System Technical Specifications Parameter Specification Antenna Type Dual-offset Gregorian 1.15m (45”) Antenna Diameter ADE Weight (including Radome; without RF) 200 Kg (440lbs.) Radome 1.55m (61”) Dome Diameter 67m (66”) Base Diameter 1.69m (67”) Radome Height Radome Color White (RAL 9010) or Grey (RAL 7035 / RAL 7045) - Page 164 Appendix A: Technical Specifications Satellite Narrow-Band Tracking Receiver (NBR) Built-In 950-2150Mhz BUC Options 4W, 8W, or 16W BUC (standard or extended) System EIRP (typical) 50.5dBW (with 8W BUC) 53dBW (with 16W BUC) 55dBW (with 25W BUC) Range of Motion Full hemisphere coverage, down to satellite elevation view angle as low as 0°...
- Page 165 Appendix A: Technical Specifications Modem Lock (IRD) VGA Out Ship Gyro Interface NMEA-0183, Synchro, or Step-by-Step CE Compliance Safety and Ergonomics IEC EN 60950-1 IEC EN 60950-22 UL 60950-1 UL 60950-22 CAN/CSA-C22.2 Conducted & Radiated Emission Immunity IEC 60945:2002 IEC 61000-4-2:1995 IEC 61000-4-3:1995 IEC 61000-4-4:1995 IEC 61000-4-5:1995...
-
Page 167: Appendix B: Mib For The Antenna Control Unit
Appendix B: MIB for the Antenna Control Unit The actual MIB file is provided by Orbit as part of the system software. The following description is for reference purposes only. NOTE: The provided MIB was up to date at publication time. However, the MIB file may have been updated. - Page 168 Appendix B: MIB for the Antenna Control Unit Object ID Node Name Description System Shutdown CPU Power Out of Tolerance CPU Temp Out of Tolerance LNB Voltage Out of Tolerance Antenna View Blocked Servo Azimuth Config Init Error Set Servo Azim Config from File Servo Elev Config Init Error Set Servo Elev Config from File Servo PolSkew Config Init Error...
- Page 169 Appendix B: MIB for the Antenna Control Unit Object ID Node Name Description Satellite Database is Truncated Receiver Cal Table not Found Satellite Recognition Running Azimuth Stuck Azimuth Init in Progress Azimuth was not Initialized Azimuth Initialization Failed Azimuth Encoder Fault Azimuth CW Software Limit Azimuth CCW Software Limit Azimuth Driver Temperature High...
- Page 170 Appendix B: MIB for the Antenna Control Unit Object ID Node Name Description PolSkew Driver Memory Error PolSkew Communication Error PolSkew 96V out of Range PolSkew Overcurrent on 96V Bus PolSkew Overcurrent on 5V iNBR High LO Unlocked iNBR Low LO Unlocked Tracking Error Exceeds Limit BUC Tx Stopped NBR Powr/Tempr out of Tolerance...
- Page 171 Appendix B: MIB for the Antenna Control Unit Object ID Node Name Description nodeSc 1 scComp Compass Compass Offset Command (interval: -360.0 – 360.0) nodeScComp 1 scCompOfs nodeAcu7107 5 Maintenance Static Data nodeMs 1 msRcv Receiver nodeMsRcv 1 msRcvFreq L-band Tracking Frequency Command (interval: 920.000 –...
- Page 172 Appendix B: MIB for the Antenna Control Unit Object ID Node Name Description Obstruction Zone Elevation Maximum (interval: -360.0 – nodeMsAntblcEntry 5 msAntblcElmax 360.0; resolution: 0.1°) nodeAcu7107 6 Commands nodeCmd 1 cmdReboot ACU Reboot Command (SET) Ocean TRx™ 4500 Installation and Operations Manual...
-
Page 173: Appendix C. Status Messages
Appendix C. Status Messages The CCU displays system status messages for a variety of purposes. These are classified into three categories, each identified by a different color: Message (informative) – green (for example, System Shutdown Warning – blue (for example, Compass Communication Failed ... -
Page 174: Warning Messages
Appendix C. Status Messages Warning Messages Controller Screen Label Description WRN 000: Tuner-1 LNB Power Over-Current The controller 13V/18V power supply feeding the LNB is overloaded. WRN 001: NBR-ACU Communications Fault There is no communication with the NBR. WRN 002: Compass Communication Failed There is no communication with the compass. - Page 175 Appendix C. Status Messages Controller Screen Label Description WRN 081: Tilt Driver Temperature High The tilt axis servo-driver temperature is above the alarm temperature setting. WRN 082: Tilt Driver Memory Error The tilt axis servo driver failed one of its memory test routines.
-
Page 176: Error Messages
Appendix C. Status Messages Controller Screen Label Description WRN 154: PolSkew Communication Error There was a checksum error or timeout on commands received for the polarization skew axis. WRN 155: PolSkew 96V out of range Input 96V power is too high or low on the polarization skew axis. - Page 177 Appendix C. Status Messages Controller screen label Description ERR 058: No Valid IMU Calibration File The ACU could not find the IMU calibration file in its flash memory (C:\) on power-up. The tilt axis is stuck – no motor motion occurs in response ERR 074: Tilt Stuck to received commands.
-
Page 179: Appendix D: Bde Equipment Pinout
Appendix D: BDE Equipment Pinout Modem M&C Connector pin-out RS-232 (D-Type 9 pin) Cable: Signal Function Monitor GPS Output General 12 VDC Output IRD Lock Signal IRD Indicator IRD Lock Signal General NOTE: 7th and 8th Pins should be connected via a ‘dry-contact’ relay. SYNCHRO &... - Page 180 Appendix D: BDE Equipment Pinout Figure 9 -31: SYNCHRO Mating Connector Wiring Diagram NOTE: The CCU supports SYNCHRO compasses with a 115 VAC reference. The following figure shows the mating connector wiring diagram in a SBS compass signal. Figure 9 -32: SBS Mating Connector Wiring Diagram NOTE: The CCU supports SBS compasses with +20 VDC to +70 VDC and dual polarity: Positive –...
-
Page 181: Nmea Compass Connector Pin-Out
Appendix D: BDE Equipment Pinout NMEA Compass Connector pin-out RS-422 (D-Type 9 pin) Cable: Table 9 -3: NMEA Connector Pin-out Signal Reserved RX - Reserved RX + NOTE: 1st and 3rd Pins are reserved for internal use only and must be left open. The following figure shows the mating connector wiring diagram for the RS-422 NMEA-0183 compass signal. - Page 183 Appendix E: Preparing the ADE-BDE Cable Tools You will need the following tools to prepare the connectors of the ADE-BDE coaxial cable. Prep tool for LMR-400 crimp-style connectors Part No.: ST-400EZ Stock No.: 3190-401 Debarring tool Part No.: DBT-01 Stock No.: 3190-406 ...
- Page 184 Appendix E: Preparing the ADE-BDE Cable Preparing the Cable Perform the following procedure to prepare the connectors on both sides of the LMR cable. 1. Flush cut the cable squarely. 2. Slide the heat-shrink boot and crimp ring onto the cable. Strip the cable end using the ST-400-EZ prep/strip tool by inserting the cable into End 1 and rotating the tool.
-
Page 185: Appendix E: Preparing The Ade-Bde Cable
Appendix E: Preparing the ADE-BDE Cable 5. Flare the braid slightly and push the connector body onto the cable until the connector snaps into place, then slide the crimp ring forward, creasing the braid. 6. Temporarily slide the crimp ring back, and remove the connector body from the cable to trim the excess braid at the crease line, then... -
Page 186: Appendix F: Pre-Installation Checklist
Appendix F: Pre-Installation Checklist Dear customer, please review and fill out this document, in accordance with the OceanTRx™4-500 Installation and Operation Manual. For any assistance or questions, please contact Orbit Service team at supportgroup@orbit-cs.com. Customer and Ship Information Customer Name Country P.O No. -
Page 187: Line Of Sight
Appendix F: Pre-Installation Checklist Line of Sight Straight line between the ANTENNA and the satellite Other Considerations 10m and 10° from main lobe of any radar (IEC 60945, section 10.4) Maximum non-blocked hemispheric view down to 10° visibility Mounting Surface RADOME support bolted to mounting surface Both central and peripheral support for the system’s base plate Available 2U height in 19’’... -
Page 189: Appendix G: Installation Checklist
Vessel/Platform Name Orbit SL No./Customer PO Orbit’s Sales Director RECEIPT OF SHIPMENT Orbit systems are packaged and secured for smooth shipment to the customer’s address. Each system delivered includes the following G-Shock detector labels: 1 internal (15G) on the ADE. ... -
Page 190: Crate Visual Inspection
Appendix G: Installation Checklist Crate Visual Inspection Please conduct a general visual inspection of each crate, to verify that no external damage has occurred. Crate # Inspection Date Reported Condition #1 System #2 Radome #3 Other CHECKLIST System crate is unpacked –4 side walls and top of crate removed RADOME crate is unpacked –4 side walls and top of crate removed Tie-wraps removed from RF Feed, Azimuth, Elevation, and Tilt Axes Stow locks are removed:-... -
Page 191: Appendix H: Commissioning Checklist
System is connected to a UPS unit – On-line or Line Interactive type Power source is within the range of 90-220 VAC Installation Location System is installed on the ship’s mast, as per the mast design recommended by Orbit or its equivalent. Installation location complies with the following requirements: Mechanical Stability... -
Page 192: Other Considerations
Appendix H: Commissioning Checklist Other Considerations 10m and 10° from main lobe of any radar (IEC 60945, section 10.4) Maximum non-blocked hemispheric view down to 10° visibility Mounting Surface Radome support bolted to mounting surface Both central and peripheral support for the system’s base plate CCU is installed in a 19’’... - Page 193 Appendix H: Commissioning Checklist SYSTEM INSPECTION Criteria Pass / Fail Remarks Radome Condition Immediately report any External damage damage to supportgroup@orbit- cs.com Internal damage Antenna moves without obstruction Visual inspection GPS Module is secured Wiring Loose or free cable Damage on cables...
- Page 194 Appendix H: Commissioning Checklist Compass offset procedure performed as per instructions in Installation Manual Tracking frequency selected IF BW filter was set up as per instructions in Installation Manual Satellite Acquisition: Selected satellite was acquired and system went to Step Track Mode Modem is locked: Tx and Rx are locked System restarted and...
- Page 195 Appendix H: Commissioning Checklist CCU Settings Satellite Information Satellite Name Location Antenna Position Azimuth Elevation Polarization – Vertical/ Horizontal System Status Mode (Should be in Step-Track Mode) IRD Lock Polarization (degree) Modem Type and Model AGC Status AGC level (dBm) Threshold level (dBm) L-Band Settings L-Band Bandwidth setting (50,150 or...
- Page 196 Appendix H: Commissioning Checklist System Cables ADE-BDE Cable Length Brand/Type CCU-Modem Cable Length Brand/Type CCU-Modem Console GPS Cable Length Brand/Type CCU-Gyrocompass Cable Length Brand/Type System Configuration Network Modem IP Address SBC IP address CCU IP address Parameter Configuration SNR value Rx-power (dBm) TX-power (dBm) Temperature (Celsius)
- Page 197 Appendix H: Commissioning Checklist System Components System Manufacturer Orbit Communication Systems Ltd. System Model OceanTRx™4-500 Above Deck Equipment Item Part Number Serial Number Central Control Unit (CCU) L00720001 / L00720004 / L00720002 With or without 10MHz Dual System Selector (DSS)
Need help?
Do you have a question about the OCEANTRX4-500 and is the answer not in the manual?
Questions and answers
we are looking for the following power supply or equivalent for urgent purchase New preferable or refurbished as a last option. 1] POWER SUPPY 115/230VAC 48V 10A 480W LF Manufacturer Part No : E22000021 Manufacturer : TERRASAT or any other - QTY= 5 2] POWER SUPPY 115/230VAC 24V 5A 120W Manufacturer Part No : E22000031 Manufacturer : TERRASAT or any other QTY=4 These will be shipped in sub Sahara Africa, so your quote to reflect such. Thank you Ambassador Ogbe Montech Technologies https://www.montechng.com Ambassador@montechng.com +13022686313; +18047782759