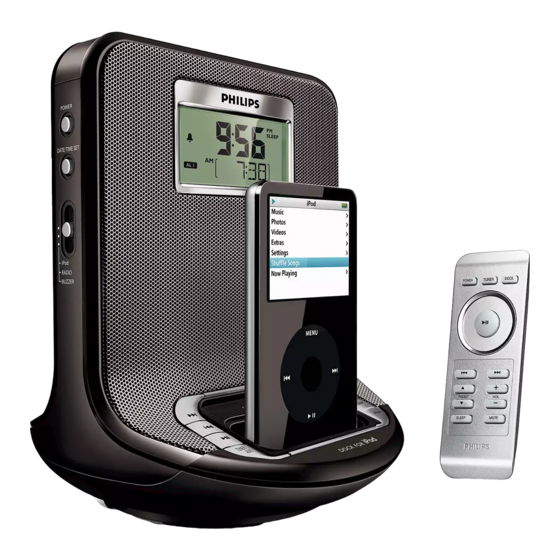
Summary of Contents for Philips AJ301DB/79
- Page 1 Docking Entertainment System AJ301DB Register your product and get support at www.philips.com/welcome User manual...
- Page 2 POWER DOCK TUNER PRESET SLEEP MUTE &...
-
Page 4: Supplied Accessories
Congratulations on your purchase, and welcome to Philips! To fully benefit from the support that Philips offers, register your product at www.philips.com/welcome. SUPPLIED ACCESSORIES – 1 X certified AC/DC adapter: OH-1018A0902000U-SAA (Input: 100-240V ~ 50/60Hz 650mA, Output: 9V – Docking kit •... -
Page 5: Repeat Alarm
8 VOL+/- – adjusts the sound level 9 MUTE – switches playback sound off and on. 0 Display – shows clock/alarm times and status of the set ! Dock connector (30 pins) – connects iPod player ALM 2 – activates/confirm ALARM 2 time setting –... -
Page 6: Remote Control Important
Remote control Important! • Before using the remote control, remove the insulation plastic tab as shown in the figure. • If the remote control does not function correctly or the operating range is reduced, replace the battery with a new (CR2025) type battery. -
Page 7: Illumination Brightness
BASIC OPERATION. Switching on the system • Press POWER. ™ The system will switch to the last selected source. • Press TUNER/AUX or DOCK. ™ The system will switch to the selected source. Switching the system to standby mode • In any source mode, press POWER. Switching off the volume temporarily Press MUTE on the remote control to stop sound play-back instantly. -
Page 8: Tuning To Radio Stations
TUNER 1 Press TUNER/AUX once to switch on the radio (FM only). ™ Display shows the radio frequency of the last selected waveband. Your pre- set station is also shown if you are listening to a preset. (See 2) 2 Adjust the sound using VOL+/-. 3 To select preset stations, press the respective PRESET button (1-5). -
Page 9: Setting The Alarm Time & Mode
SETTING THE ALARM TIME (See 3) 1 In any mode, press and hold ALM1 or ALM2 for two seconds. ™ ALM1 / ALM2 icon and the hour digits flash. And the icon for the current alarm mode also flashes. 2 Hold down or press ¡1 / 2™ repeatedly to set and adjust the hours. 3 Press ALM1 or ALM2 to confirm. -
Page 10: Compatible Portable Player
REPEAT ALARM This repeats your alarm call at 9 minute intervals. • During the alarm call, press REPEAT ALARM / ™ Display shows ALM1 or ALM2 flashing during a repeat alarm. • Repeat if desired (up to a maximum of 6 times). CANCELING THE ALARM COMPLETELY •... -
Page 11: Charging Ipod Battery Using The Dock
– The buttons ( 2;, ¡1, 2 ™ and VOLUME ) on the AJ301DB and its remote con- trol can work only with playback of the audio contents stored on the docked player. CHARGING iPod BATTERY USING THE DOCK Docking your iPod to AJ301DB, you can charge the iPod in the standby mode and power-on mode of AJ301DB. -
Page 12: Connecting An External Device
Reset Should your set receive external interference e.g. static electricity from carpets, thun- derstorms, etc. RESET allows you to clear all previous settings and start up again. • Use a ballpoint pen to press the RESET hole found on the bottom of the set. CONNECTING AN EXTERNAL DEVICE You can listen to the sound of the connected external device through your AJ301DB’s speakers. -
Page 13: Troubleshooting
TROUBLESHOOTING If a fault occurs, first check the points listed below before taking the set for repair. If you are unable to remedy a problem by following these hints, consult your dealer or service centre. WARNING: Under no circumstances should you try to repair the set yourself, as this will invalidate the guarantee. - Page 14 12 months prior to the date of your claim. 5. In the event of a failure, Philips shall be under no liability for any injury, or any loss or damage caused to property or products other than the product under guarantee.
- Page 16 Docking Entertainment System Meet Philips at the Internet http://www.philips.com English AJ301DB_UM_79_V3.1_1035...


Need help?
Do you have a question about the AJ301DB/79 and is the answer not in the manual?
Questions and answers