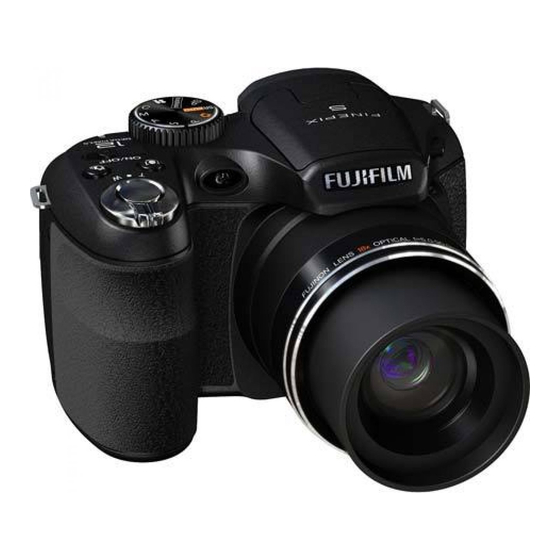
FujiFilm FinePix S1800 Service Manual

FujiFilm FinePix S1800 Service Manual

Us/ef/e1/eg/ee/ch-model
Hide thumbs Also See for FinePix S1800:

Advertisement

BECAUSE THIS PRODUCTIS RoHS LEAD-FREE COMPLIANT, USE THE DESIGNATED
AFTER-SELES PARTS AND THE DESIGNATED LEAD-FREE SOLDER WHEN
PERFORMING REPAIRS.
THE COMPONENTS IDENTIFIED WITH THE MARK "
AND IN THE PARTS LIST ARE CRITICAL FOR SAFETY.
PLEASE REPLACE ONLY WITH THE COMPONENTS SPECIFIED ON THE SCHEMATIC
DIAGRAM AND IN THE PARTS LIST.
IF YOU USE PARTS NOT SPECIFIED, IT MAY RESULT IN A FIRE AND AN ELECTRICAL
SHOCK.
FUJIFILM Corporation
Confidential: FUJIFILM Service Center Use Only

DIGITAL CAMERA

FinePix S1800/
SERVICE MANUAL
US/EF/E1/EG/EE/CH-model
" ON THE SCHEMATIC DIAGRAM
S1850/
S1880/
S1900
Ref.No.: ZM00812-103
Printed in Japan 2010.03

Advertisement

Table of Contents
loading

Summary of Contents for FujiFilm FinePix S1800

  • Page 1: Digital Camera

    Confidential: FUJIFILM Service Center Use Only DIGITAL CAMERA FinePix S1800/ S1850/ S1880/ S1900 SERVICE MANUAL US/EF/E1/EG/EE/CH-model BECAUSE THIS PRODUCTIS RoHS LEAD-FREE COMPLIANT, USE THE DESIGNATED ● AFTER-SELES PARTS AND THE DESIGNATED LEAD-FREE SOLDER WHEN PERFORMING REPAIRS. THE COMPONENTS IDENTIFIED WITH THE MARK "...
  • Page 2 Confidential: FUJIFILM Service Center Use Only SAFETY CHECK-OUT After correcting the original problem, perform the following safety check before return the product to the customer. CAUTION: FOR CONTINUED 1. Check the area of your repair for unsoldered or poorly PROTECTION AGAINST FIRE soldered connections.
  • Page 3 Confidential: FUJIFILM Service Center Use Only RoHS lead-free compliance With the exception of parts and materials expressly excluded from the RoHS directive, all the internal connections and component parts and materials used in this product are lead-free compliant under the European RoHS directive (*1). Use the designated after-sales parts and the designated lead-free solder when performing repairs.
  • Page 4: Table Of Contents

    BOARD ASSY & EVF ASSY & EVF........1-4 5-1. Packing and Accessories .......5-1 FLASH TCOVER PI B & FLASH HINGE & 5-1-1. FinePix S1800 E1-model .......5-1 FLASH BOTTOMASSY & TOP COVER CONST:..1-7 5-1-2. FinePix S1800 EF-model .......5-2 MAIN PWB ASSY ..............1-8 5-1-3.
  • Page 5: Disassembly

    1.Disassembly Confidential: FUJIFILM Service Center Use Only ■ REAR COVER ASSY B: Prerequisites: [1] Remove: 1. If the memory card or battery inside the camera, please remove it. To Remove: ★ [1] Remove the screws (085-0352-001)*7 and (085-0339-001)*4 [3] Take out the REAR COVER ASSY B.
  • Page 6: Rear Cover Assy

    1.Disassembly Confidential: FUJIFILM Service Center Use Only BATTERY COVER ASSY B: Prerequisites: [1] Remove: • REAR COVER ASSY To Remove: [1] Take out the BATTERY COVER ASSY. To Install: [1] Reverse the steps in the removal procedure Postrequisites: None...
  • Page 7: Lcd Holder Assy And Lcd

    1.Disassembly Confidential: FUJIFILM Service Center Use Only LCD HOLDER ASSY and LCD: Prerequisites: [1] Remove: •REAR COVER ASSY •BATTERY COVER ASSY To Remove: [1] Remove the screws *3. (085-0340-001) [2] Remove the LCD FPC [3] Separate LCD from LCD HOLDER ASSY.
  • Page 8: Strap Left & Top Board Mylar & Wire Ffc &Pcba Shutter Assy & Top Board Assy & Evf Assy & Evf

    1.Disassembly Confidential: FUJIFILM Service Center Use Only STRAP LEFT & TOP BOARD MYLAR & WIRE FFC &PCBA SHUTTER ASSY & TOP BOARD ASSY & EVF ASSY & EVF: Prerequisites: [1] Remove: • REAR COVER ASSY • BATTERY COVER ASSY • LCD HOLDER ASSY & LCD Warning: Dangerous voltage.
  • Page 9 1.Disassembly Confidential: FUJIFILM Service Center Use Only [4] Take out TOP BOARD MYLAR and WIRE FFC [5] Remove the screws *2 screw *1 unsolder soldering (085-0343-001), (085-0340-001) and joints. [6] Take out the PCBA SHUTTER ASSY. TOP BOARD WIRE FFC...
  • Page 10 1.Disassembly Confidential: FUJIFILM Service Center Use Only EVF ASSY [11] Remove the screws *2 (085-0340-001) [12] Take out the EVF. To Install: [1] Reverse the steps in the removal procedure. [2]The aligned points for assemble TOP BOARD MYLAR on the TOP BOARD ASSY.
  • Page 11: Flash Tcover Pi B & Flash Hinge & Flash Bottomassy & Top Cover Const

    1.Disassembly Confidential: FUJIFILM Service Center Use Only FLASH TCOVER PI B & FLASH HINGE & FLASH BOTTOM ASSY & TOP COVER CONST: Prerequisites: [1] Remove: • REAR COVER ASSY • BATTERY COVER ASSY • LCD HOLDER ASSY & LCD To Remove: [1] Remove the screws *2 (085-0340-001).
  • Page 12: Main Pwb Assy

    1.Disassembly Confidential: FUJIFILM Service Center Use Only MAIN PWB ASSY: Prerequisites: [1] Remove: • REAR COVER ASSY • BATTERY COVER ASSY • LCD HOLDER ASSY & LCD • TOP COVER ASSY To Remove: [1]Remove the screws *1( 085-0340-001 [2]Unsolder SPEAKER wires, Microphone wires, AF wires and Battery wire from Main board.
  • Page 13: Pcba Af Led Assy

    1.Disassembly Confidential: FUJIFILM Service Center Use Only PCBA AF LED ASSY: Prerequisites: [1] Remove: • REAR COVER ASSY • BATTERY COVER ASSY • LCD HOLDER ASSY & LCD • TOP COVER ASSY To Remove: [1] Remove screw*3 ( 085-0343-001 [2] Take out the PCBA AF LED ASSY.
  • Page 14: Lens Const

    1.Disassembly Confidential: FUJIFILM Service Center Use Only LENS CONST: Prerequisites: [1] Remove: • REAR COVER ASSY • BATTERY COVER ASSY • LCD HOLDER ASSY & LCD • TOP COVER ASSY •MAIN PWB ASSY_1 To Remove: [1] Remove screw*4 ( 085-0341-001 [2] Take out the LENS CONST.
  • Page 15: Front Cover Assy B & Frame Assy & Cap Mylar

    1.Disassembly Confidential: FUJIFILM Service Center Use Only FRONT COVER ASSY B & FRAME ASSY & CAP MYLAR Prerequisites: [1] Remove: • REAR COVER ASSY • BATTERY COVER ASSY • LCD HOLDER ASSY & LCD • TOP COVER ASSY •MAIN PWB ASSY_1 • LENS CONST To Remove: [1] Remove the CAP MYLAR.
  • Page 16 1.Disassembly Confidential: FUJIFILM Service Center Use Only To Install: [1] Reverse the steps in the removal procedure. [2]The aligned points for assemble CAP MYLAR on the FRAME ASSY. Microphone on Main Frame. [3] Follow the grooves to assemble the wires of...
  • Page 17: Cautions

    Confidential: FUJIFILM Service Center Use Only 2.Scematics 2. Scematics ■ 2-1. Cautions <Cautions when replacing parts> • Do not reuse removed parts. Always use new parts. • Note that the negative side of tantalum condensers is readily damaged by heat.
  • Page 18 2. Schematics Confidential: FUJIFILM Service Center Use Only...
  • Page 19 2. Schematics Confidential: FUJIFILM Service Center Use Only...
  • Page 20 2. Schematics Confidential: FUJIFILM Service Center Use Only...
  • Page 21 2. Schematics Confidential: FUJIFILM Service Center Use Only...
  • Page 22: Adjustments

    Confidential: FUJIFILM Service Center Use Only 3. Adjustments ★ 3. Adjustments 3-1-1. The handling of image files in internal memory Image files contained in the internal memory should be handled as described below. <Procedure for handling images> When either of following work is necessary, as many as possible of the image files should be extracted from the camera's internal memory and then written into the internal memory in the repaired or replacement camera before the camera is returned to the customer.
  • Page 23: Adjustment When Replacing Major Parts

    Confidential: FUJIFILM Service Center Use Only 3. Adjustments 3-1-2. Adjustment when replacing major parts Note that the adjustment data will be erased if the adjustment sequence is not followed correctly. Replacing MAIN PWB ASSY LENS CONST parts ○ ○ LCD Adjustment ★...
  • Page 24: Use Jig List

    Common with the FinePix F50fd OIS Calibration ZJ01134-100 QR Code reader USB_ID/LENS DATA Writing Common with the FinePix S8000fd * In the future, if upgraded versions of the firmware are released, use the most recent version. Please downloaded from Web server (https://denhin.fujifilm.co.jp/csg_en/index.htm or http://fujifilm-di.intranets.com/).
  • Page 25: Calibration Method Of Pattern Box

    Confidential: FUJIFILM Service Center Use Only 3. Adjustments 3-4. Calibration method of pattern box <Use the pattern box for Camera adjustment> Turn on the power supply in the pattern box. Afterwards, wait for about ten minutes so that the source of light may stabilize.
  • Page 26: Preparation Of Adjustment Software

    Confidential: FUJIFILM Service Center Use Only 3. Adjustments ★ 3-5. Preparation of Adjustment Software 3-5-1. Various downloading software decompressions, preservation methods, and notes The PC adjustment softwares are in a specified Web server, and both of these are the compression of ZIP form files.
  • Page 27: Composition Of Adjustment Software, And Creation Of Sd Card For Adjustment

    3-5-3. Creating a firmware SD card In order to perform Firmware Download, it is necessary to create a firmware SD card. <Step 1> Downloadcompressed Firmware (ZJ01732-***.zip) from Web server (https://denhin. fujifilm.co.jp/csg_en/index.htm). <Step 2> Decompression the downloaded compression file (Fig. 3-5-6).
  • Page 28: Creating A Lcd Adjustment Sd Card

    LCDTypeSelect_GPT 3.0 WINTEK WINTEK LCDTypeSelect_WINTEK3.0 <Step 1> Download compressed Adjustment software of LCD from Web server (https://denhin.fujifilm.co.jp/csg_en/index.htm) (Figure : for WINTEK). <Step 2> " Fx S1700 W PC SOFT Ver.2.00" is opened. (Fig. 3-5-8). <Step 3> Copy the "Batch" folder stored in LCDTypeSelect_WINTEK 3.0 folder directly under the SD card (Fig. 3-5-9).
  • Page 29: Lcd Adjustment

    Confidential: FUJIFILM Service Center Use Only 3. Adjustments 3-6. LCD Adjustment [Note] • Do not turn the camera off until the LCD Adjustment is completed. <Step 1> Insert the LCD Adjustment SD card into the camera. <Step 2> Connect the DC COUPLER CP-04 to the camera.
  • Page 30 Confidential: FUJIFILM Service Center Use Only 3. Adjustments 3-7. Firmware Download [Note] • Always download the latest version of the firmware. • Do not turn the camera off until the Module Select is completed. <Settings for Firmware Download > DC COUPLER CP-04 <Step 1>...
  • Page 31 Confidential: FUJIFILM Service Center Use Only 3. Adjustments <Step 6> The "RESET OK?" screen is displayed. Press the T button and the left arrow key at the same time. <Step 7> Select "NAND TOOL" and press the MENU/OK button. <Step 8>...
  • Page 32 Confidential: FUJIFILM Service Center Use Only 3. Adjustments <Step 9> If the "Result: Success(0) !" screen appears, turn the camera off. <Step10> Repeat from <Step 3> to <Step 6>, and select "FIRMWARE VERSION". --> The version information is displayed. 3-11...
  • Page 33: Module Select

    Confidential: FUJIFILM Service Center Use Only 3. Adjustments 3-8. Module Select [Note] • Do not turn the camera off until the Module Select is completed. <Settings for Module Select > It's same as 3-7 Firmware Download. <Step1> Set the camera's power switch to "ON"...
  • Page 34: Efa Adjustment

    Confidential: FUJIFILM Service Center Use Only 3. Adjustments 3-9. EFA Adjustment <Settings for EFA Adjustment> (1) Set up the Siemens star chart and conversion lens so that they are 600 ± 5 mm apart. (2) Position the chart so that the brightness of the chart surface is between 1000 ~ 200 LUX.
  • Page 35: Shutter Delay Adjustment

    Confidential: FUJIFILM Service Center Use Only 3. Adjustments 3-10. Shutter Delay Adjustment [Note] • Darken the surroundings during calibration (a darkroom environment is ideal). • Calibrate the pattern box before the adjustment. • Any soiling on the pattern box dispersion plate or reflective plate will result in unevenness in the lighting and cause errors during adjustment.
  • Page 36: Iso_Dbp_Shading Adjustment

    Confidential: FUJIFILM Service Center Use Only 3. Adjustments 3-11. ISO_DBP_Shading Adjustment [Note] • Perform Shutter Delay Adjustment before performing this step. <Settings for ISO_DBP_Shading Adjustment> Within 5 mm from the lens face with the TELE position <Step 1> Copy the following items directly under SD card; the files, "Big_Lamp_l145.fig", "Small_Lamp_L145_1.fig", "ISO_Flash_L145.txt"...
  • Page 37 Confidential: FUJIFILM Service Center Use Only 3. Adjustments <Step 3> Select " SmallLampNo:1 " and press the OK button. The message "Shading Verify OK!!" will be displayed approximately 4 minutes later. When screen returns to ISO Big/Small/Factory Mode, turn power OFF.
  • Page 38: Runin_Wbp Adjustment

    Confidential: FUJIFILM Service Center Use Only 3. Adjustments 3-12. RunIn_WBP Adjustment [Note] • Darken the surroundings during calibration (a darkroom environment is ideal). Alternatively, prepare a box that is painted black on the inside and perform the adjustments with the camera enclosed in the box.
  • Page 39: Ois Data Download

    Confidential: FUJIFILM Service Center Use Only 3. Adjustments 3-13 OIS DATA Download <STEP > FxS1700_W Copy the "Batch" folder and “OISFW.srt” of the "OIS _FW" folder, which is stored in the folder, directly under SD card. * When a "Batch" folder already exists directly under SD card, delete this folder before copying.
  • Page 40: Preparation Of Fxs1700 Usb Id/Lens Data Writing Software

    Confidential: FUJIFILM Service Center Use Only 3. Adjustments 3-14. Preparation of FxS1700 USB ID/LENS DATA Writing Software <Step 1> The adjustment software is downloaded from WEB, and Fx S1700 USB ID/LENS DATA Writing Software ZJ01734-100..Zip software is installed in the PC.
  • Page 41 Confidential: FUJIFILM Service Center Use Only 3. Adjustments <Step 4> Double-click [Setup.exe], which is stored in the "Vista for Service FF 4.1.2.7" folder. <Step 5> When the window shown below appears, click the "Next" button. <Step 6> When the window shown below appears, click the "Next" button.
  • Page 42 Confidential: FUJIFILM Service Center Use Only 3. Adjustments [Note] Click the "Yes" button when the following image is displayed. <Step 7> Double-click [AInf.exe], which is stored in the "Upgrade inf file" folder. <Step 8> When the window shown below appears, click the "Browse" button.
  • Page 43 Confidential: FUJIFILM Service Center Use Only 3. Adjustments <Step 9> The following image is displayed. Select "FUJI_A215.inf" and click the "Open" button. <Step 10> The following image is displayed. Click the "Copy source INF file to Windows INF's directory" button.
  • Page 44: Lens Data Read

    Confidential: FUJIFILM Service Center Use Only 3. Adjustments 3-15 LENS DATA Read Perform this step before assembling the camera (with the lens unit removed). <STEP1> (1) Connect the QR code reader to the USB port on the PC. (2) Make a txt file and make the save file of the qr cord (3) Scan the QR code with the QR code reader <STEP2>...
  • Page 45: Usb_Id/Lens Data Writing

    Confidential: FUJIFILM Service Center Use Only 3. Adjustments 3-16. USB_ID/LENS DATA Writing 3-16-1USB_IDWriting <Step 1> Connect the DC COUPLER CP-04 and USB cable to the camera, and turn the power switch ON while pressing the T button and the right arrow key.
  • Page 46 Confidential: FUJIFILM Service Center Use Only 3. Adjustments <Step 5> Input the camera's serial number for Product Serial, and click the "Write" button. <Step 6> Click the "OK" button. <Step 7> Turn the camera off. USB_ID Writing ends. 3-25...
  • Page 47: Lens Data_Writing

    Confidential: FUJIFILM Service Center Use Only 3. Adjustments 3-16-2 LENS DATA_Writing <STEP1> Choose the thing that a txt file name accords with a cereal of the repair object product and open LENS DATA which I stored to a PC beforehand <STEP2>...
  • Page 48: 3-17.Ois Calibration

    Confidential: FUJIFILM Service Center Use Only 3. Adjustments 3-17. OIS Calibration 3-17-1. OIS Test <STEP > OIS_Test FxS1700_W Copy the "Batch" folder of the " " folder, which is stored in the folder, directly under SD card. * When a "Batch" folder already exists directly under SD card, delete this folder before copying.
  • Page 49 Confidential: FUJIFILM Service Center Use Only 3. Adjustments S1700 ADP for Vibration generator adapter usage To Remove: [1] Remove the screws of the stopper back side *4 [2] Unscrew the clamp and adjust it so that a stopper comes to the center of EVF.
  • Page 50 Confidential: FUJIFILM Service Center Use Only 3. Adjustments Calibration Software installation Various downloading software decompressions, preservation methods, and notes The PC adjustment softwares are in a specified Web server, and both of these are the compression of ZIP form files.
  • Page 51 Confidential: FUJIFILM Service Center Use Only 3. Adjustments 3-17-2. Gyro calibration “ZJ01735-100” is a compression of “ZIP type” file. The “Fxs1700 OIS Calibraion Software” folder can be done by extracting it by “Compression software”. Copy the “Fxs1700 OIS Calibraion Software” folder to the “C” drive on the Adjustment PC.
  • Page 52 Confidential: FUJIFILM Service Center Use Only 3. Adjustments <STEP > Set a camera at Vibration generator Connect the camera to PC via USB cable. (LCD shows blue screen) Press “Tele” + “Power” button to power on the camera to enter Vista mode.
  • Page 53: Destination Setting

    Confidential: FUJIFILM Service Center Use Only 3. Adjustments 3-18. Destination Setting [Note] • Do not turn the camera off until the Destination Setting is completed. <Step 1> Look at the 3rd digit from the left in the camera's serial number , and then copy the "Batch" folder of the corresponding "Reset_*"...
  • Page 54: Inspection

    4. Inspection Confidential: FUJIFILM Service Center Use Only 4. Inspection ■ 4-1. Required Measuring Equipment Parts number Measuring equipment Remarks Power supply AC adapter (AC-5V), Regulated power supply Digital voltmeter For general use Ammeter For general use (able to measure 1mA or less)
  • Page 55: Inspection And Factory Settings

    4. Inspection Confidential: FUJIFILM Service Center Use Only 4-3. Inspection and Factory Settings Preparations for adjustment Method of adjustment Measuring Item Mode (measurement points, subject, other) (VRs, waveforms, required values) equip. and jigs External visual (1) Observe the camera. (1) Check for damage to the outer check casing.
  • Page 56 4. Inspection Confidential: FUJIFILM Service Center Use Only Preparations for adjustment Method of adjustment Measuring Item Mode (measurement points, subject, other) (VRs, waveforms, required values) equip. and jigs Flash Auto mode (1) Set the flash mode to Forced (1) Press the 4-way button (right) and...
  • Page 57 4. Inspection Confidential: FUJIFILM Service Center Use Only Preparations for adjustment Method of adjustment Measuring Item Mode (measurement points, subject, other) (VRs, waveforms, required values) equip. and jigs Playback (1) Insert a LCD INSPECTION SD ZJ00885-100 dust/defect card. check (2) Play back a completely black (2) Check that there are no noticeable image.
  • Page 58: Parts List

    Confidential: FUJIFILM Service Center Use Only 5. Parts List 5-1. Packing and Accessories ★ 5-1-1. FinePix S1800 E1-model Ref NO. Parts No. Deseription Comment A101 082-0892-001 UNITARY BOX S1800 W A102 082-0901-001 TRAY A103 083-0075-001 PLASTIC BAG 250X155 A104 083-0523-001...
  • Page 59 Confidential: FUJIFILM Service Center Use Only 5. Parts List 5-1. Packing and Accessories ★ 5-1-2. FinePix S1800 EF-model Ref NO. Parts No. Deseription Comment A101 082-0892-001 UNITARY BOX S1800 W A102 082-0901-001 TRAY A103 083-0075-001 PLASTIC BAG 250X155 A104 083-0523-001...
  • Page 60 Confidential: FUJIFILM Service Center Use Only 5. Parts List 5-1. Packing and Accessories ★ 5-1-3. FinePix S1800 EE-model Ref NO. Parts No. Deseription Comment A101 082-0892-001 UNITARY BOX S1800 W A102 082-0901-001 TRAY A103 083-0075-001 PLASTIC BAG 250X155 A104 083-0523-001...
  • Page 61 Confidential: FUJIFILM Service Center Use Only 5. Parts List 5-1. Packing and Accessories ★ 5-1-4. FinePix S1800 EG-model Ref NO. Parts No. Deseription Comment A101 082-0892-001 UNITARY BOX S1800 W A102 082-0901-001 TRAY A103 083-0075-001 PLASTIC BAG 250X155 A104 083-0523-001...
  • Page 62 Confidential: FUJIFILM Service Center Use Only 5. Parts List 5-1. Packing and Accessories ★ 5-1-5. FinePix S1800 US-model Ref NO. Parts No. Deseription Comment A101 082-0892-001 UNITARY BOX S1800 W A102 082-0901-001 TRAY A103 083-0075-001 PLASTIC BAG 250X155 A104 083-0523-001...
  • Page 63 Confidential: FUJIFILM Service Center Use Only 5. Parts List 5-1. Packing and Accessories ★ 5-1-6. FinePix S1850 EG-model Ref NO. Parts No. Deseription Comment A101 082-0928-001 UNITARY BOX S1850 EG A102 082-0901-001 TRAY A103 083-0075-001 PLASTIC BAG 250X155 A104 083-0523-001...
  • Page 64: Finepix S1880 Ch-Model

    Confidential: FUJIFILM Service Center Use Only 5. Parts List 5-1. Packing and Accessories 5-1-7. FinePix S1880 CH-model Ref No. Parts No. Deseription Comment A101 082-0893-001 UNITARY BOX S1880 CH A102 082-0901-001 TRAY A103 083-0075-001 PLASTIC BAG 250X155 A104 083-0523-001 PLASTIC BAG 150X200...
  • Page 65: Finepix S1900 Ee-Model

    Confidential: FUJIFILM Service Center Use Only 5. Parts List 5-1. Packing and Accessories ★ 5-1-8. FinePix S1900 EE-model Ref NO. Parts No. Deseription Comment A101 082-0927-001 UNITARY BOX S1900 W A102 082-0901-001 TRAY A103 083-0075-001 PLASTIC BAG 250X155 A104 083-0523-001...
  • Page 66 Confidential: FUJIFILM Service Center Use Only 5. Parts List 5-1. Packing and Accessories ★ 5-1-9. FinePix S1900 EG-model Ref NO. Parts No. Deseription Comment A101 082-0927-001 UNITARY BOX S1900 W A102 082-0901-001 TRAY A103 083-0075-001 PLASTIC BAG 250X155 A104 083-0523-001...
  • Page 67: Mechanical Block

    5-2. Mechanical Block ★ S1800/S1850/S1880/S1900 Ref No. Parts No Description Comment FRONT COVER ASSY B M201 002-CY73-000 M202 002-CY75-000 REAR COVER ASSY B M203 002-CY76-000 BATTERY COVER ASSY B EVF ASSY M204 002-CY77-000 FLASH BOTTOM ASSY M205 002-CY79-000 M206 002-CY81-000 TOP COVER CONST M207 002-CY84-000 LENS CONST...
  • Page 68: Electrical Parts

    5-3. Electrical parts * Due to standardization, replacement in the parts list may The components indicated by mark     are critical for safety. be different from the parts list specified in the circuit or the When indicated parts by reference number, please include components used on the set.
  • Page 69: Appendix

    Confidential: FUJIFILM Service Center Use Only 6.Appendix 6-1 List of Related Technical Updates Issued To ensure that after-sales srevice is performed accuratety, keep a record here of the technical updates issued that cover this device. Technical Update No. Date Title Details/Other 2009-184...
  • Page 70 Midtown West, 7-3, Akasaka 9-chome, Minato-ku, Tokyo 107-0052, Japan...

This manual is also suitable for:

Finepix s1850Finepix s1880Finepix s1900

Table of Contents