
Related Manuals for Convaid Cruiser


Summary of Contents for Convaid Cruiser
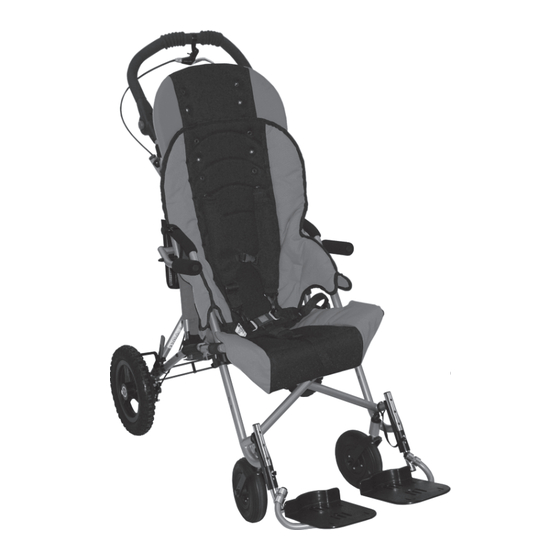
- Page 1 ENGLISH User s Guide Cruiser Fixed-Tilt READ INSTRUCTIONS BEFORE USING SAVE THIS BOOK FOR FUTURE REFERENCE...
-
Page 2: Table Of Contents
CONVAI D USER’S GUI DE Table of Contents Unpacki ng the chai r ..........1 Setting Up Warni ngs . - Page 3 CONVAI D USER’S GUI DE Cruiser Cruiser Planar Scout Cruiser Classic i i i...
-
Page 4: Unpacking The Chair
SETTI NG UP Unpacking Unpacking the Chair Check to see that the followi ng i tems are i ncluded wi th the chai r: • Left and ri ght footplates • Accessori es as ordered • Hex wrench (5/32) -
Page 5: Warnings
C UTION: If the user’s weight is less than 50lbs, the use of anti-tip tubes is encouraged. C UTION: Convaid belts and shoulder straps are for positioning only and are not to be used as a vehicle restraint. C UTION: •... -
Page 6: Unfolding
SETTI NG UP Set-up and Adjustments Unfolding Note: One - Piece Push Handle will unfold as the chair opens. 1. Lay chai r flat on ground and unbuckle closure strap. Fig. 1A 2. Stand chai r on front caster, grasp si de of Push Handle and push down on Seat Tube. -
Page 7: Folding
CONVAI D USER’S GUI DE Folding 1. Swi ng footplates to the si de. Fig. 4A & 4B 2. Press grey buttons on each si de of Push Handle and rotate Push Handle down completely. Fig. 5A & 5B 3. Unlock Rear Lock Brace by ki cki ng up on center of brace wi th foot. Fig. 6A 4. -
Page 8: Seat Back Height
FI TTI NG GUI DE Fitting Guide Convai d’s li ghtwei ght, foldi ng chai rs are desi gned to be more than just a conveni ent chai r. Order the correct si ze chai r by fi rst determi ni ng the user’s hei ght, wei ght and seati ng measurements. -
Page 9: Seat Depth
CONVAI D USER’S GUI DE Seat Depth Measure from the most posteri or To change seat depth, parti ally fold porti on of the buttocks to the the chai r to reli eve fabri c tensi on. back of the knee. Subtract from Undo the Velcro®... -
Page 10: Attachi Ng Support Strap For Seat Depth Extensi On Tubes
FI TTI NG GUI DE ttaching Support Strap for Seat Extension Tubes 1. Remove Seat Upholstery. Fig. A & B 2. Change and Install Seat Depth Tubes. Press grey detent pi n and move Seat Depth Tube to desi re setti ng. Fig. C 3. -
Page 11: Quick Release Wheels
CONVAI D USER’S GUI DE Wheels Quick Release Wheels TIRE REMOVAL 1.To remove, press down and hold the Rear Wheel Locki ng Pi n. Grasp wheel and pull. 2. No tools are requi red to remove ti re. Rear Wheel Locki ng Pi n TIRE INSTALLATION Caution: Ensure the wheels are installed properly. -
Page 12: Locking And Unlocking
To release lock: To lock: Li ft upward on wheel lock Press downward on wheel lock For All Cruiser Size 18, Cruiser Classic Models, and Cruisers with Scout Option Toggle Wheel Locks To release lock: To lock: Pull up on red handle. -
Page 13: Three-Point Positioning Belt
CONVAI D USER’S GUI DE Operating Instructions Three-Point Positioning Belt The three-poi nt posi ti oni ng belt i s opti onal wi th every Convai d chai r. Adjust the belt so the user stays securely i n posi ti on. The qui ck-release buckle i s attached to the crotch strap, and joi ns the crotch strap to both belts. -
Page 14: H-Harness With Padded Covers
OPERATI NG I NSTRUCTI ONS H-Harness with Padded Covers Shoulder pads for the H-harness shoulder straps help the user H- harness are standard. retai n upri ght trunk posi ti on. To adjust, The pads come equi pped i nsert the bolt at the end of the strap wi th a snap buckle for through the grommet hole i n the seat back. -
Page 15: Footplate Hei Ght Adjustment
CONVAI D USER’S GUI DE Footplate Height djustment Seat-to-footplate hei ght i s measured from the back of the knee to the bottom of the heel. Feet or heels should rest comfortably on top of footplate. Fig. 24 All Convai d footplates are hei ght adjustable. Footplates swi ng away for access or foldi ng. -
Page 16: Angle Adjustable Footplates
OPERATI NG I NSTRUCTI ONS ngle djustable Footplates Angle adjustable footplates can be moved fore and aft, si deways, and rotated verti cally and hori zontally. To adjust the angle, loosen the bolts on the footplate and move to desi red posi ti on. Reti ghten the bolts. Fig. 32 - Fig. 36 Fig. -
Page 17: Foot Positioners
CONVAI D USER’S GUI DE Foot Positioners Foot Posi ti oners may be cri ss-crossed over the foot to secure the whole foot Fig. 37 or can be converted i nto si mple ankle straps. To attach foot posi ti oner, thread strap through footplate as shown i n Fig. -
Page 18: Caster Locks
OPERATI NG I NSTRUCTI ONS Caster Locks Caster locks hold the swi vel wheels i n a forward faci ng posi ti on to prevent the wheels from turni ng si de to si de. (For 2’’ wi de ti res only) Fig. -
Page 19: Addi Ti Onal Accessori Es
Convai d offers a wi de vari ety of accessori es to help properly posi ti on the user. Note: Convaid’s chairs provide a semi-contour fit around the body. The user must be fitted correctly into the chair to achieve optimal posture and comfort. - Page 20 OPERATI NG I NSTRUCTI ONS ttaching Lateral Trunk Support Single Flap 1. Attach the Lateral Trunk Support to the chai r by wrappi ng the two rear straps around the back of the chai r and securi ng wi th Velcro®. 2.
- Page 21 CONVAI D USER’S GUI DE ttaching Lateral Trunk Support Double Flap The Double Flap Lateral Trunk Support bri ngs the trunk to mi dli ne posi ti on. • The Inner flaps mobi li ze the trunk. • The Outer flaps centrali ze the trunk and keep the arms i n the front of the chai r. •...
- Page 22 OPERATI NG I NSTRUCTI ONS • To support the ri ght si de of the trunk, attach the Support to the chai r wi th the double-si ded Velcro® strap on the ri ght. • To support the left si de of the trunk, attach the Support to the chai r wi th the double-si ded Velcro®...
-
Page 23: Full Torso Swi Ng-Away Vest Support
CONVAI D USER’S GUI DE Full Torso Swing- way Support Vest An adjustable support vest keeps the user i n place comfortably and securely. It helps to mai ntai n mi dli ne seati ng posi ti on and prevents forward slumpi ng. The vest i s attached to the chai r wi th straps that wrap around the seat back and connect wi th Velcro®, and shoulder straps that... -
Page 24: Padded Headwings
OPERATI NG I NSTRUCTI ONS Padded Headwings Adjustable padded headwi ngs provi de soft foam support for mi dli ne posi ti oni ng. Fig. 50 The padded headwi ngs can be attached at any hei ght by wrappi ng the Velcro® straps around the frame and attachi ng at the back of the chai r. -
Page 25: Occi Headwing
CONVAI D USER’S GUI DE Occi Headwing Occi Headwi ng supports and posi ti ons the head at the occi pi tal area. Thi s headrest provi des added comfort, allows si de to si de head movement wi thout obstructi on, and does not block the i ndi vi dual’s ears and li ne of vi si on. - Page 26 OPERATI NG I NSTRUCTI ONS 4.Rei nsert the Lock Brace onto the housi ng F by pushi ng i t wi th the palm of your hand G. Lock the Rear Lock Brace by pressi ng down on the Rear Lock Brace H. ADJUSTING THE PELVIC BELT STRAP To Tighten:...
-
Page 27: Seat Cushions
CONVAI D USER’S GUI DE Seat Cushions Support: General Use Cushion Flat foam wi th wooden i nsert Fig. 53 • Promotes stabi li ty and posture control and provi des comfort for the user. • Waterfall front eli mi nates pressure poi nts at the back of the knees. - Page 28 OPERATI NG I NSTRUCTI ONS Fitting The fi tti ng of the cushi on should be done by a cli ni ci an. When fi tted correctly, the cushi on wi ll help provi de stable support and promote good posture. Consult your cli ni ci an for questi ons regardi ng i ndi vi dual needs.
-
Page 29: Upper Extremity Support Surface (Tray)
CONVAI D USER’S GUI DE Accessories Upper Extremity Support Surface (Tray) ATTACHING THE TRAY 1. Rai se front of the tray wi th the tray supports completely unfolded. Fig. 56 NOTE: For Scout opti on, rai se armrest before engagi ng knobs. 2. -
Page 30: Saddle Bags
ACCESSORI ES Saddle Bags 1. To i nstall, i nsert Front Button Strap i nto openi ng i n Mesh Seat Bottom and over Seat Tube. Fig. A 2. Veri fy the strap i s i n front of the Seat Tube Retai ni ng Bolt, then snap button shut. -
Page 31: Headrest Cover (Canopy)
CONVAI D USER’S GUI DE Headrest Cover (Canopy) ATTACHING CANOPY 1. Remove Canopy from box. Fig. A 2. Ali gn plasti c Canopy Retai ni ng Cli ps wi th upper tubi ng on back of the chai r. Fig. B Push on cli ps wi th the ball of your hand unti l they snap i nto place. -
Page 32: Heavy-Duty Reinforced Upholstery
ACCESSORI ES Heavy-Duty Reinforced Upholstery Heavy-duty, rei nforced, padded seat and seat back come wi th pockets whi ch have removable plasti c sti ffeners. Use when extra fi rmness i s requi red. Sti ffeners easi ly li ft out of pockets for custom-formi ng wi th a heat gun. -
Page 33: Utility Bag
CONVAI D USER’S GUI DE Utility Bag The Uti li ty Bag attaches to the back of the chai r, but can be removed and converted to a tote bag. Fig. 61 & 62 Caution: Do not overload bag. To attach: 1. -
Page 34: Bus Transport Models
The wheelchai r transport model has been crash tested and performed sati sfactori ly at 30 mph/20 g decelerati on. Convai d conforms to RESNA WC19 standards. Dummy wei ghts are: All Cruiser Models Model CX10T..66lbs / 30kg Model CX12T..66lbs / 30kg Model CX14T..100lbs / 45.5kg... -
Page 35: Fabric Removal
CONVAI D USER’S GUI DE Miscellaneous Fabric Removal Parti ally fold the chai r to reli eve fabri c tensi on (see fold i nstructi ons on page 4). The lower seat panel i s attached to the back panel wi th Velcro®. Remove Velcro® from the top of the seat bottom. -
Page 36: Planar Back Adjustments
PLANAR OPTI ON Planar Options ttaching Planar Seat To attach the soli d planar seat: 1. To remove the fabri c seat from the chai r, fi rst detach i t from the Velcro® pad on the back of the chai r. Fig. 69 2. - Page 37 CONVAI D USER’S GUI DE Planar Back djustments Adjust seat back hei ght by removi ng/addi ng secti ons. 1. BASIC INSTALLATION: Leavi ng the fabri c back i n place, attach the planar back to the chai r frame usi ng the Velcro straps, as shown. Fig. A 2.
- Page 38 PLANAR OPTI ON Planar Positioning Options H-Harness with Padded Covers H-harness shoulder straps help the user retai n upri ght trunk posi ti on. To reposi ti on the H-harness: Remove the Planar Back from chai r. Remove the H-harness by unscrewi ng i t from the back.
- Page 39 CONVAI D USER’S GUI DE djustable Firm Lateral Thoracic Supports Adjust seat back hei ght by removi ng/addi ng secti ons. 1. Outermost Posi ti on: As shi pped, laterals are i nstalled at the furthest poi nt outwards. See posi ti ons 2 and 3 for other posi ti on possi bi li ti es. Fig. A 2.
- Page 40 Fig. 84 Note: ll other positioning options and accessories are utilized on the planar seating system the same way as on the standard Cruiser. See front of User Guide for detailed information. Fig. 84...
-
Page 41: Wheel Lock Adjustment & Hand Brakes
CONVAI D USER’S GUI DE Scout Options Wheel Lock djustment Set wheel locks to locked posi ti on. Push chai r wi th li ght pressure on the rear wheels. If wheel rotates, adjust tensi on by turni ng the adjustment nut unti l wheels no longer rotate whi le locked. - Page 42 SCOUT OPTI ON Lever djustment To i ncrease brake pressure, turn adjusti ng nut (A) counter clockwi se, then turn locknut (B) clockwi se to secure nut (A) i n posi ti on. Fig. 88 Fig. 88 Inner Pad djustment Turn nut clockwi se to move pad closer to di sk (wheel should spi n and not grab).
- Page 43 CONVAI D USER’S GUI DE Removal of Brake Pads Remove cali pers from the axle brackets by unscrewi ng Hex bolts (A) & (B) wi th a 5mm wrench. Fig. 92 Fig. 92 Remove outer pad fi rst by pulli ng tab downward. Fig.
- Page 44 SCOUT OPTI ON To i nstall new pads, fi rst i nsert i nner pad as shown. Fig. 98 Note: Spring should lightly clip onto the small post in the center of the piston and push inward. Fig. 98 Usi ng the 2.5mm Hex wrench i nserted i nto (A), replace the pad i nto the housi ng.
-
Page 45: Mai Ntenance, Operati Ng And Safety I Nstructi Ons
CONVAI D USER’S GUI DE Important Information Maintenance, Operating & Safety Instructions • READ ALL INSTRUCTIONS BEFORE USING THE PRODUCT • ALWAYS FOLLOW THESE SAFETY INSTRUCTIONS • SAVE SAFETY INSTRUCTIONS FOR FUTURE REFERENCE C UTION: • For increased safety, the seat belt should be used at all times. •... - Page 46 I MPORTANT I NFORMATI ON 4. Safety Instructions • Follow foldi ng/unfoldi ng i nstructi ons. • Never leave occupi ed chai r unattended. • Do not attempt to take occupi ed chai r up or down stai rs, escalators, steep i ncli nes, or i cy or sli ppery surfaces.
- Page 47 CONVAI D USER’S GUI DE • When goi ng down a curb, approach the curb backwards. Lower the rear wheels down the curb and conti nue backwards, taki ng the wei ght off the front wheels so they can be gently lowered. •...
- Page 48 I MPORTANT I NFORMATI ON Every 3 Every 6 MAINTENANCE CHART Weekly As necessary months months • Ri ms, ti res and ti re pressure • Wheel locks and hand brakes • Accessori es • Front and rear wheel axles •...
- Page 49 CONVAI D USER’S GUI DE Cleaning of wheels and brakes: Wheels should be cleaned of di rt or mud after each use so as to not i nterfere wi th pushi ng the chai r. The brakes are to be kept free of di rt or mud, so as not to i nterfere wi th locki ng. Wi pe wheels and brakes wi th a moi st cloth as needed and readjust brakes i f i ndi cated.
- Page 50 I MPORTANT I NFORMATI ON 10. Tools Required User: • 3⁄8”, 7⁄16”, 3⁄4” or 2 adjustable wrenches wi th 3⁄4” capaci ty Phi lli ps head screwdri ver • Hex key 5⁄32” (i ncluded) 11. Spare Parts If you need any spare parts for your chai r, please vi si t or call a Servi ce Faci li ty. If the part i s not under warranty, you wi ll recei ve an esti mate of the cost and, i f necessary, shi ppi ng i nstructi ons for the return of the chai r for repai rs.
- Page 51 Limited Lifetime Warranty Convai d warrants to the ori gi nal retai l purchaser of the Convai d product, that i f any part thereof proves functi onally defecti ve i n materi al or workmanshi p wi thi n the speci fi ed warranty peri od, such defecti ve part wi ll be repai red or replaced (at Convai d’s di screti on) free of charge.
Need help?
Do you have a question about the Cruiser and is the answer not in the manual?
Questions and answers