
Subscribe to Our Youtube Channel
Related Manuals for Siqura XSNet 1800 SW

Summary of Contents for Siqura XSNet 1800 SW
-
Page 1: User Manual
User Manual XSNet 1800 SW Firmware version 3.0 Field-hardened layer-2 Ethernet switch with 2 optical 100Mbit uplinks + 4 10/100Base -T ports... -
Page 2: Table Of Contents
VLAN Control and VLAN Port Control ......................9 Settings example ............................10 Application example ............................11 6. XSNet 1800 SW Quality of Service (QoS) ....................12 7. XSNet 1800 SNMP management by traps and/or polling ............... 13 Introduction ..............................13 Traps ................................ -
Page 4: Part I: Description, Features, Hardware Installation
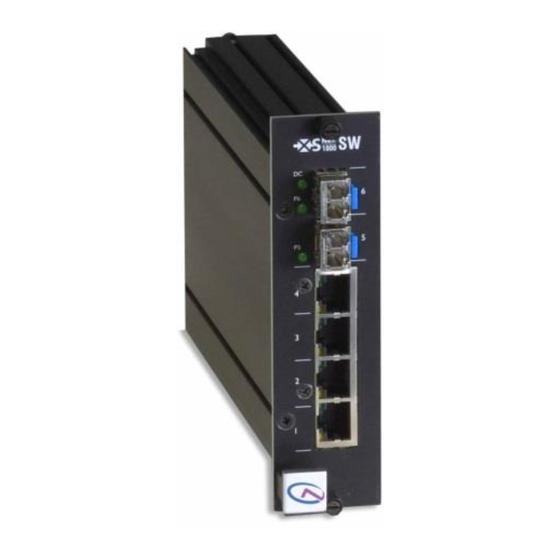
Part I: description, features, hardware installation 1. General description XSNet 1800 SW switches have four electrical Ethernet ports, and also provide up to two independent 100 Mbit optical uplinks through either dual multimode or dual single-mode fibres (one fibre pair per port), at wavelengths of 850 nm (MM), 1310 nm, or CWDM (SM), the latter for longer spans. -
Page 5: Installation
3.4. Updating Device Definitions If a network device, such as a codec, is not supported by the Siqura application software on your host PC, an update can be downloaded from www.optelecom-nkf.com. -
Page 6: Part Ii: Configuration Pages
Part II: Configuration pages 1. Logging in Logging in to the XSNet 1800 SW internal http server enables the user to configure the switch without using separate application software. A standard Web browser will suffice to find the module by its IP address. - Page 7 XSNet 1800 SW v3 Pt. II: Configuration pages After completing login, the Home page (see the Homepage section) will appear. Figures 3a,b. Page selection menu (left) and port connections display The other HTML pages can be called up next from the navigation menu appearing in the top left corner of each page (figure 3a);...
-
Page 8: Xsnet 1800 Home Page
XSNet 1800 SW v3 Pt. II: Configuration pages 2. XSNet 1800 Home page This page (see figure 4) has the following sections: Identification pane: administrative data, including the article code, serial number, software version, and uptime Labels pane: label entries (editable) Status pane: an alarm status overview (alarms active or not), including the level of the highest occurring configured alarm (Module status field). -
Page 9: Xsnet 1800 Network Settings
XSNet 1800 SW v3 Pt. II: Configuration pages 3. XSNet 1800 network settings Figure 5. Network page For correct functioning of the 1800 SW, it is essential to set its network addressing to be compatible with the subnet it is hooked into; see figure 5. -
Page 10: Xsnet 1800 Sw Alarms
XSNet 1800 SW v3 Pt. II: Configuration pages 4. XSNet 1800 SW alarms The Alarms settings page shows the Status and Alarm level settings panes. In the Status pane, the Module Status entry shows the highest level of the occurring and configured alarms, while the other fields in that pane represent the actual status of some alarms. -
Page 11: Sw Vlans
XSNet 1800 SW v3 Pt. II: Configuration pages 5. 1800 SW VLANs XSNet 1800 switches support up to 50 virtual tagged LANs, organizing ports into separate groups. These VLANs are to be enabled from the VLAN Control menu with at least one entry in the VLAN Port Control menu, and a management VLAN defined. -
Page 12: Vlan Control And Vlan Port Control
XSNet 1800 SW v3 Pt. II: Configuration pages VLAN Control and VLAN Port Control Before any entry on this page is made, the list on the VLAN Entries page must be filled in. Figure 8. 1800 SW VLAN control and Port Control settings If - in the VLAN Control pane - the VLAN Enable box is checked, it is possible to add, remove or modify Q-tags in packets, according to the ingress rules set in the VLAN Port Control pane (see figures 8 and 11). -
Page 13: Settings Example
XSNet 1800 SW v3 Pt. II: Configuration pages - incoming non-Q frames can be handled as follows (see figure 10): a default Q-tag can be inserted the priority inside the tag is preserved (this if the VLAN ID is zero but a priority value is set) they can be dropped ( this also for tags in which the VLAN ID is zero) Figure 10. -
Page 14: Application Example
XSNet 1800 SW v3 Pt. II: Configuration pages Application example Internet Ports 5, 6 are members of VLAN v1, v5, v10 SW 2 SW 1 Router IP : 137. 92. 254. 10 tagged frames IP : 137. 92. 254. 11... -
Page 15: Xsnet 1800 Sw Quality Of Service (Qos)
XSNet 1800 SW v3 Pt. II: Configuration pages 6. XSNet 1800 SW Quality of Service (QoS) Figure 13. The example has QoS enabled, weights of 4 and 1, ports 1-3 set to high priority, and a TCI-threshold of 4. Enabling QoS on the 1800 SW instates two priority levels (high/low) and corresponding queues, used in case of network congestion. -
Page 16: Xsnet 1800 Snmp Management By Traps And/Or Polling
Figure 14. 1800 SW SNMP se ttings Traps Traps generated by the XSNet 1800 SW can be caught by any SNMP manager. Traps can be generated by configuring an alarm level A-N on the Alarm settings page for the available events or variables to be monitored using the SNMP manager program. -
Page 17: Polling
XSNet 1800 SW v3 Pt. II: Configuration pages The 1800 SW will always generate cold boot and port link up traps (if connected) while booting; this behaviour is fixed through using the SNMP MIB group mgmt:snmp:snmp-Traps:TrapsInfo (in RFC1213-MIB). Link- down/up traps will be sent when a port is disconnected and connected, respectively. -
Page 18: Xsnet 1800 Sw Rstp
The 1800 SW and RSTP The XSNet 1800 SW can use the Rapid Spanning Tree Protocol, which can be enabled or disabled for the switch as a whole, not per VLAN. Port configuration for this protocol works as follows (see the tables in figure 17): under General RSTP settings, specify the values for Bridge priority, Forward delay, Hello time and Max age. - Page 19 XSNet 1800 SW v3 Pt. II: Configuration pages Each port 1-6 can be set to be either an edge port or a non-edge port. Edge ports should not be connected to form loops, since rapid spanning-tree will ignore edge ports. Optical ports 5-6 are factory set to be non-edge ports;...
- Page 20 STP configuration: the ports are all forwarding (see figure 18). To force full compatibility with STP-only equipment from the start, you will need additional MX configuration software (set the internal variable Force Version to zero). Figure 18. XSNet 1800 SW (R)STP with RSTP not enabled...
-
Page 21: Xsnet 1800 Multicast Settings
XSNet 1800 SW v3 Pt. II: Configuration pages 9. XSNet 1800 multicast settings The 1800 SW series switches support multicasting, each group of receivers listening to its own source. Inside a switch, regular unicast traffic only passes through the central switch matrix, unaffected by the multicast switch mode. -
Page 22: Xsnet 1800 Sw Port Settings
XSNet 1800 SW v3 Pt. II: Configuration pages 10. XSNet 1800 SW Port Settings While in a network, enabled ports in the 1800 SW will have to use a link mode compatible with ports of connected devices. This can be done by selecting auto-negotiation (see the ‘link mode’ column in the table below) or by setting duplex/half duplex and link speed per port manually. -
Page 23: Xsnet 1800 Sw Port Statistics
XSNet 1800 SW v3 Pt. II: Configuration pages 11. XSNet 1800 SW port statistics Figure 21. XSNet 1800 SW port statistics The 1800 SW port loads are represented in figure 21. Transmit and receive port loads are shown in terms of maximum loads (per port) in the upper two graphs, while received packet size and error statistics are depicted in the lower two. -
Page 24: Xsnet 1800 Reboot And Restore
From this page (figure 22), the 1800 SW can be rebooted, either keeping its settings, only keeping its network settings, or restoring all factory defaults, including its network settings: Figure 22. XSNet 1800 SW Rebooting and restoring settings in the field marked ‘Reboot’ (figure 23), the ‘Stay operational’ option does exactly what it says: the unit... - Page 25 XSNet 1800 SW v3 Pt. II: Configuration pages Overview of reboot/restore: ‘Reboot option’ ‘Restore default settings’ option Effect on reboot stay operational any setting will do nothing reboot keep settings reboot the switch without changing values reboot restore factory defaults...
-
Page 26: Technical Specifications
XSNet 1800 SW v3: Technical specifications, Safety, EMC and ESD 13. Technical specifications 14. Safety, EMC and ESD Information General XSNet 1800 SW The safety information contained in this section, and on 1800 1800 1800 other pages of this manual, must be observed whenever this... -
Page 27: Product Disposal
XSNet 1800 SW v3: Technical specifications, Safety, EMC and ESD The equipment has been tested and found to meet the CE- regulations relating to EMC, and complies with the limits for a Class B device, pursuant to Part 15 of the FCC rules.
Need help?
Do you have a question about the XSNet 1800 SW and is the answer not in the manual?
Questions and answers