Table of Contents
Advertisement
Quick Links
Home Repair Manuals
Hotpoint WMA32
Dismantle & Repair
Unofficial
Home Repair
Workshop Manual
for
Hotpoint
WMA 32 Series
Washing Machine
(1200 spin)
'Dismantle & Repair'
For Trade and Home user
Copyright © D Smith 2007
Disclaimer
All the entries in this document have been compiled from information gained over the years by different
engineers whilst working on these machines. All photos and artwork have been produced solely for this
series of pdf files, and are for recognition purposes only. Any similarity to any other publication in part or
whole is by way of an accident rather than design, and should any such oversight be brought to our
attention we will examine it in full and if necessary alter or remove the said section. This manual was
developed independent to the manufacturer of this product and no connection to them is inferred or
implied. Although a majority of the faults are universal to most makes and models the solutions do vary.
Whilst every effort has been made to insure the information in this document is correct, we cannot hold
ourselves responsible for any omissions or changes you may encounter. All the procedures listed in this
manual are intended for individuals that are competent in both electro and mechanical repair work, but as
we have no way of knowing the competence or capabilities of everyone using this manual, we cannot be
held responsible for any lose, Damage or injury which may occur. It remains the sole responsibility of each
person to work in a safe and sensible manner. We stress that the appliance should be disconnected from the
main power supply when any electrical testing is carried out and that all sharp edges are covered before
working on the machine.
Page 1 of 50
Advertisement
Table of Contents

Related Manuals for Hotpoint WMA 32 Series


Summary of Contents for Hotpoint WMA 32 Series
-
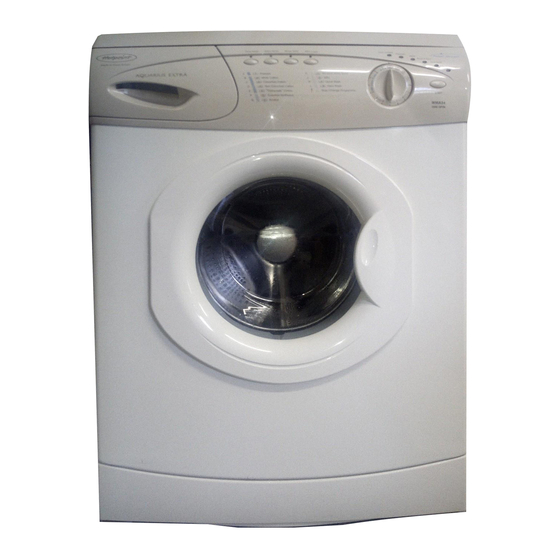
Page 1: Washing Machine
Home Repair Manuals Hotpoint WMA32 Dismantle & Repair Unofficial Home Repair Workshop Manual Hotpoint WMA 32 Series Washing Machine (1200 spin) ‘Dismantle & Repair’ For Trade and Home user Copyright © D Smith 2007 Disclaimer All the entries in this document have been compiled from information gained over the years by different engineers whilst working on these machines. -
Page 2: Table Of Contents
Home Repair Manuals Hotpoint WMA32 Dismantle & Repair CONTENTS INTRODUCTION....................... 4 ........................... 4 REFACE ......................5 OOLS EQUIRED 1.2.1 H .................... 6 OW TO USE YOUR ETER 1.2.2 M ......................7 OTOR ESTING • • • • To Test the Armature: ....................7 •... - Page 3 Home Repair Manuals Hotpoint WMA32 Dismantle & Repair (20) Inner drum ........................37 (21) Bearings......................... 38 (22)Door Assembly ......................39 INNER DRUM LIFTERS......................40 (23)Early Type ........................40 (24)Later type…........................40 SOME COMMON FAULTS AND SOLUTIONS..............41 The machine does not switch on..................41 Door seal has mouldy black marks on it................
-
Page 4: Introduction
Home Repair Manuals Hotpoint WMA32 Dismantle & Repair INTRODUCTION Preface During the development of this manual it has become clear that a percentage of the components have changed. Although the model number may be the same the independent manufacturers of parts and there fittings are different on some machines to those on another. -
Page 5: Tools Required
Home Repair Manuals Hotpoint WMA32 Dismantle & Repair Tools Required If this is your first attempt at repairing your washing machine, here are a few tools you will need. Although a neon screwdriver and pair of pliers may be good enough to change a plug, you will need a few more to work on your washing machine. -
Page 6: How To Use Your Meter
Home Repair Manuals Hotpoint WMA32 Dismantle & Repair How to use your Meter 1.2.1 This is the only piece of equipment we will give instructions on how to use, mainly because if you have never had to use one before you may not be aware of the different settings and how they work. -
Page 7: Motor Testing
Home Repair Manuals Hotpoint WMA32 Dismantle & Repair Motor Testing 1.2.2 It is possible to test the separate parts on the motor via the wiring which connects onto the module. All the relevant connection points are numbered as shown in the ‘component wiring connection’... -
Page 8: To Test The Field Windings
Home Repair Manuals Hotpoint WMA32 Dismantle & Repair To Test the Field Windings: Set the multi-meter to ohms and place one probe into terminal 7 on the module connecting block and the other in terminal 6 (see picture on previous page). The reading should be about 1.25 . -
Page 9: How A Washing Machine Works
Home Repair Manuals Hotpoint WMA32 Dismantle & Repair How a Washing Machine works A good Engineer has an idea on what is wrong with an appliance even before they look at it, just by the information they are given (providing the information is correct). The art is to know what a machine is supposed to be doing at a given time or what it is not doing. -
Page 10: Components And Some Attributed Faults
Home Repair Manuals Hotpoint WMA32 Dismantle & Repair Components and some attributed faults Motor spin---brushes, wiring, motor burnt out. Bad load distribution. No motor action---brushes, wiring, motor burnt out. Noisy---motor bearings, motor loose. Belt jumps off---motor bearings, motor pulley faulty, motor mountings loose Tripping fuse box---worn brushes, carbon build up inside motor housing, wiring. -
Page 11: Hotpoint Home Page For Users
Hotpoint home page for users’ handbook http://www.hotpointservice.co.uk The above link will take you to the Instruction Book page on the Hotpoint Web site, were you can download free of charge, the user handbook which applies to your machine. If you get a message that the site is unobtainable, copy and past the address into your browser window. -
Page 12: What Parts Look Like And Their Functions; In Breif
If one or more of the tracks are blown it is most likely to be attributed to a fault somewhere else on the machine, so if your appliance is under 5 years old it would be cheaper to call out Hotpoint. (If you want to have a go at fixing it ……Remember). -
Page 13: Pressure Chamber (Old & New)
Home Repair Manuals Hotpoint WMA32 Dismantle & Repair 2.2 Pressure Chamber (Old & new) Attributed faults • Overfilling • Will wash but Not Spin • Will go straight into wash without any water • Heater comes on without any water... -
Page 14: Pressure Switch
Home Repair Manuals Hotpoint WMA32 Dismantle & Repair Pressure Switch Attributed faults • Overfilling • Intermittent Over or Under Filling • Fill Valves Dead The pressure switch controls the fill valves, and in some cases will prevent the motor from going into spin. It operates via an internal diaphragm which activates and deactivates the internal switch/s. -
Page 15: Fill Valves
Home Repair Manuals Hotpoint WMA32 Dismantle & Repair Fill Valves Double Cold Solenoid Valve Single Hot Solenoid Valve Attributed faults • No Water • Drum Fills When Power Off The Fill valves, or (solenoid valves) allow water into the machine via a diaphragm... -
Page 16: Door Switch
Home Repair Manuals Hotpoint WMA32 Dismantle & Repair Door Switch Attributed faults • Machine will not start • Door will not open The door switch has a bimetallic strip inside that heats up when an electric current is passed through it. It only takes a matter of seconds to get hot and bend, as it bends it touches another terminal which completes the circuit, also activating a locking mechanism that prevents the door from being opened. -
Page 17: Heater & Cut-Out With Thermistor
Home Repair Manuals Hotpoint WMA32 Dismantle & Repair Heater & Cut-out with Thermistor Attributed faults • No Heater • Machine Stops Washing • Poor Wash Results • Overheating/Boiling The heater is fitted with a thermistor as an integral part of its make up. It also has a built in thermal cut out just in case it over heats, this cut out is not re-settable and if it goes the heater will not work and must be replaced. -
Page 18: Heater Guard
Home Repair Manuals Hotpoint WMA32 Dismantle & Repair Heater Guard Attributed faults • Noisy The heater guard is designed to hold the heater down and prevent it from rubbing on the inner drum as it revolves. Because it lips under part of the container it can only be fitted onto the heater one way. -
Page 19: Tacho Generator / Motor
Home Repair Manuals Hotpoint WMA32 Dismantle & Repair Tacho Generator / Motor Motor Tacho Attributed faults Attributed faults • Noisy Distribute speed wrong • No Drum Action Motor Spins • Earth Leakage (Trips fuse box) Erratic Spin Speed Bangs on Spin... -
Page 20: Pump
Home Repair Manuals Hotpoint WMA32 Dismantle & Repair Pump Attributed faults • No pump out • Noisy • Leaking The pump is situated under the washing machine at the rear of the cabinet and its function is to evacuate the drum of water. Although quite robust for its size it doesn’t take too much to stop it from working, blockages being the main cause for concern, although even a cotton bud or elastic band can prevent the impellor from turning. -
Page 21: Sump Filter-(Old & New)
Home Repair Manuals Hotpoint WMA32 Dismantle & Repair 2.10 Sump Filter-(Old & New) Attributed faults • No pump out • Noisy • Leaking Old type Sump Filter New type Sump The sump is connected to the underside of the container and houses the filter. Inside of which is a plastic ball whose function is to prevent powder from being washed away as the machine fills with water. -
Page 22: 2.11 Stabilizer Leg & Peg
Home Repair Manuals Hotpoint WMA32 Dismantle & Repair 2.11 Stabilizer Leg & Peg Attributed faults • Noisy • Drum Twisted Retaining peg Not to be confused with suspension legs, the stabilisers prevent the container from twisting during the wash or spin, and give a bit of assistance with its balance. They are located either side, on the lower half of the container, and held in place by a plastic peg on the container and two mounting brackets on the cabinet. -
Page 23: 2.12 Bearings & Water Seal
Home Repair Manuals Hotpoint WMA32 Dismantle & Repair 2.12 Bearings & Water Seal Attributed faults • Noisy • Leaking • Belt comes off • Marks on clothing Bearings are the most common cause for excessive noise on a washing machine; however they do cause other problems also. -
Page 24: 2.13 Belt
These belts contain a certain amount of carbon and act as an earth between the inner drum and the motor, dissipating any static electricity that may build up. If replacing the belt only fit a Hotpoint one, or the LEDs on your machine could light it up like a Christmas tree. -
Page 25: Machine Dismantle And Reassembly By Stages
Home Repair Manuals Hotpoint WMA32 Dismantle & Repair Machine Dismantle and Reassembly by stages. (1) Top Cover….Removal 1. Either side, at the front of the top cover is a plastic plug; under this is a star headed screw. Remove both plugs and screws. -
Page 26: Control Module
Home Repair Manuals Hotpoint WMA32 Dismantle & Repair (4) Control Module…..Removal Prior to working on any sensitive electronic components, always ground yourself, (touch the sink or a radiator, to dissipate any static electricity in your body), and never touch any of the circuits or components on the board, because you could inadvertently damage them. -
Page 27: Front Panel
Home Repair Manuals Hotpoint WMA32 Dismantle & Repair (5) Front Panel…Removal 1. First do (1), (2), (3) 2. Open machine door and remove plastic clasp holding door seal retaining ring. This can be done by inserting a fine screwdriver in the opening provided, and lever upward. -
Page 28: Door Seal From Container
Home Repair Manuals Hotpoint WMA32 Dismantle & Repair (6) Door Seal from container…Removal 1. First do (1), (2), (3), (5) 2. Undo the retaining strap around the door seal and container. If it is the zipper type retainer follow instructions for removal and fitting as in 3. -
Page 29: Soap Dispenser
Home Repair Manuals Hotpoint WMA32 Dismantle & Repair (9) Soap dispenser….Removal 1. First do (1),(2),(3),(5) 2. Undo retaining clip on dispenser hose on front of container, and pull off. 3. Remove inlet pipes at rear, (from fill valves). 4. Unhook from cabinet and lift out. -
Page 30: Solenoid Valves
Home Repair Manuals Hotpoint WMA32 Dismantle & Repair (11) Solenoid valves……Removal 1. Remove the top 2. Undo the water inlet hoses. 3. Remove the wiring plugs. (You may need to use a small screw driver for this). 4. Press the lugs on either side of the valve in, whilst turning it anti clockwise. -
Page 31: Pump
Home Repair Manuals Hotpoint WMA32 Dismantle & Repair (12) Pump….Removal 1. To gain access to the pump you must first remove the lower back panel on the cabinet. 2. If possible put the free end of outlet hose in a bucket or bowl lower than the drum. -
Page 32: Sump / Pressure Chamber
Home Repair Manuals Hotpoint WMA32 Dismantle & Repair (13) Sump / Pressure chamber….Removal 1. To gain access to the sump you must first remove the lower back panel on the cabinet. 2. As with the pump the end of the outlet hose should if possible be placed in a bucket or bowl, lower than the container, 3. -
Page 33: Motor
Home Repair Manuals Hotpoint WMA32 Dismantle & Repair (14) Motor…….Removal 1. To gain access to the motor you must first remove the lower back panel on the cabinet. 2. The belt should be removed before you attempt to remove the motor, by gently pulling it towards you as you turn the pulley and it will come off easily. -
Page 34: Stabilizer
Home Repair Manuals Hotpoint WMA32 Dismantle & Repair (15) Stabilizer…….Removal 1. To gain access to the Stabilizers you must first remove the lower back panel on the cabinet. 2. Tilt the machine forward and place something under it to prevent it falling back. -
Page 35: Heater
Home Repair Manuals Hotpoint WMA32 Dismantle & Repair (16) Heater…….Removal 1. To gain access to the heater you must first remove the lower back panel on the cabinet. 2. Remove the black water shield by unscrewing the plastic nut in the centre. -
Page 36: Suspension Springs
Home Repair Manuals Hotpoint WMA32 Dismantle & Repair (18) Suspension springs………Removal 1. Remove top cover 2. Unhook any wires attached to the spring retaining clip 3. Prise spring retaining clip out with small flat screw driver. 4. Lift spring out of bearing point. -
Page 37: Inner Drum
Home Repair Manuals Hotpoint WMA32 Dismantle & Repair (20) Inner drum……Removal 1. Complete all procedures in step (19) 2. Lay the container on its front with the pulley facing upwards. 3. Undo the bolt in the centre of the pulley and lift it off. You may need an extractor, but they usually come off easily. -
Page 38: Bearings
Home Repair Manuals Hotpoint WMA32 Dismantle & Repair (21) Bearings…….Removal On the earlier models the bearings were held in by a cir-clip, however this is no longer the case but it would be wise to check first anyway. 1. Complete all procedures in step (20) 2. -
Page 39: Door Assembly
Home Repair Manuals Hotpoint WMA32 Dismantle & Repair (22)Door Assembly…..Removal 1. First remove the door seal retaining clip and band. 2. Ease the door seal away from the cabinet by the door hinge. 3. Undo the two screws holding the hinge on to the front panel. You will have to hold the nut at the rear of the hinge plate. -
Page 40: Inner Drum Lifters
Home Repair Manuals Hotpoint WMA32 Dismantle & Repair Inner Drum Lifters NOTE: There are two types of lifters: The early ones had plastic lugs that held them in place, but they break off when they are removed, because they were not designed to be refitted and should be discarded if they need changing, or have come out. -
Page 41: Some Common Faults And Solutions
Home Repair Manuals Hotpoint WMA32 Dismantle & Repair Some Common Faults and Solutions The machine does not switch on. The obvious first; Check the fuse, check the door is shut, check the power is on i.e. (there isn’t a power... -
Page 42: Door Seal Has Mouldy Black Marks On It
Home Repair Manuals Hotpoint WMA32 Dismantle & Repair That has covered the mains cable, the plug and fuse and the power socket. If they all checked out OK you know you have power going into the appliance and the latch assembly is working as it should. -
Page 43: The Drum Is Stuck And Will Not Turn
Home Repair Manuals Hotpoint WMA32 Dismantle & Repair The drum is stuck and will not turn. There is an item of clothing wedged between the inner and outer drum, possibly a handkerchief. The easiest way to get at it would be by removing one of the lifters inside the drum, although if you have the MK 1 type lifters you would need to replace the one you remove. -
Page 44: Noisy
Home Repair Manuals Hotpoint WMA32 Dismantle & Repair Noisy There are so many reasons why a machine would become noisy, here are a few: If the machine sounds like a jet engine when it spins then it is more than likely the bearings, if there is a grating noise when it turns then either there is something inside, or the heater has come adrift from it’s fixing and is rubbing on the drum. -
Page 45: Noisy On Spin But Fine On Wash
Home Repair Manuals Hotpoint WMA32 Dismantle & Repair Noisy on spin but fine on wash Open the door and try moving the inner drum up and down; there is a certain amount of movement but not much. If you are not sure remove the lid and watch the pulley as... -
Page 46: The Start Button Does Not Work
Home Repair Manuals Hotpoint WMA32 Dismantle & Repair The Start button does not work Check that none of the buttons is stuck in (maybe accompanied by a flashing LED) or could be the program was abandoned due to a major error condition. Check: •... -
Page 47: Component Test (Auto)
Home Repair Manuals Hotpoint WMA32 Dismantle & Repair Component test (Auto) It is possible to test each component individually or let the machine test them for you. To get the machine to test them you first have to set the programme up like this. The first part of this set up will test the controls 1. -
Page 48: Component Test (Auto) Codes
Home Repair Manuals Hotpoint WMA32 Dismantle & Repair Component test (Auto) codes What you see. What it means. Possible solutions. If just the END light is No reading from door Door not closed or on and flashing. lock circuit.. interlock related... -
Page 49: Component Test (Manually)
Home Repair Manuals Hotpoint WMA32 Dismantle & Repair Component test (Manually) To test each component individually you first have to set the programme by following these instructions: 1 Make sure the selector is set to off, then press and hold the Super Rinse and Rinse Hold buttons for the count of 5 whilst selecting F on the dial. -
Page 50: Wiring Connections
Home Repair Manuals Hotpoint WMA32 Dismantle & Repair Wiring Connections Page 50 of 50...
Need help?
Do you have a question about the WMA 32 Series and is the answer not in the manual?
Questions and answers