
Related Manuals for Eckman EKEWLV1

Summary of Contents for Eckman EKEWLV1
- Page 1 ELECTRIC WHEELED VACUUM/BLOWER/MULCHER MODEL EKEWLV1 INSTRUCTION MANUAL PLEASE READ & SAVE THESE INSTRUCTIONS FOR FUTURE REFERENCE Any questions or problems? Call the Eckman helpline on : 0844 441 3011 or go to www.eckman.co.uk...
-
Page 2: Table Of Contents
CONTENTS Explanation of the warning symbols…………………………………………………..2-3 General Safety Warnings…………………………………………………………………4-6 Technical Specifications……………………………………………………………………7 Parts Identification…………………………………………………………………………...8 Assembly……………………………………………………………………………………..8-11 Operating…………………………………………………………………………………….11-13 Maintenance & Storage ....………………………………………………………..14 GUARANTEE………………………………………………………………......14 EC declaration of conformity………………………………………………………………15 Exploded View………………………………………………………………………………..16... -
Page 3: Explanation Of The Warning Symbols
This appliance is designed solely to blow and vacuum dead leaves in private gardens. Any other usage that is expressly not permitted in this manual may damage the appliance and constitute a serious hazard for the user. 1. SAFETY INSTRUCTIONS EXPLANATION OF SYMBOLS In this manual and/or on the appliance the following symbols are used: Read the instructions carefully. - Page 4 Waster electrical products should not be disposed of with household waste. Please recycle where facilities exist. Check with you local Authority or retailer for recycling advice. Guaranteed sound power level according to noise directive 2000/14/EC and 2005/88/EC: 110 dB(A)
-
Page 5: General Safety Warnings
General safety warnings WARNING Read all the safety warnings and all instructions in order to familiarise yourself with the controls and how to handle the appliance correctly. Failure to follow warnings and instructions can lead to electric shock, fire and/or serious injury. Keep all warnings and instructions for future reference. - Page 6 b) NEVER allow children to use the appliance. Local laws and regulations may set a minimum age limit for users. c) It is advisable that you supervise children to ensure they do not play with the appliance. d) NEVER allow people unfamiliar with these instructions to use the appliance. e) Do not handle if you are tired or are under the influence of drugs, alcohol or medication.
- Page 7 g) Disconnect the appliance from the power supply when checking the appliance, in the event of blockages or if it vibrates abnormally. h) Do not rush. Remain in a stable and balanced position at all times. Always be sure of your steps on slopes. Strap the appliance to yourself using the accessory designed for this purpose.
-
Page 8: Technical Specifications
Technical Specifications TECHNICAL SPECIFICATIONS Voltage rating 230-240 V Type of power supply and Frequency rating 50 Hz 1800 Power rating 13500/min No Load speed Max. Airflow(Vacuum) 520 m 38.52m/s Max .Air Speed(blowing) Class II Electrical protection class: IP 20 Appliance protection against penetration by solids and liquids Collector capacity 45 L Net/Gross Weight... -
Page 9: Parts Identification
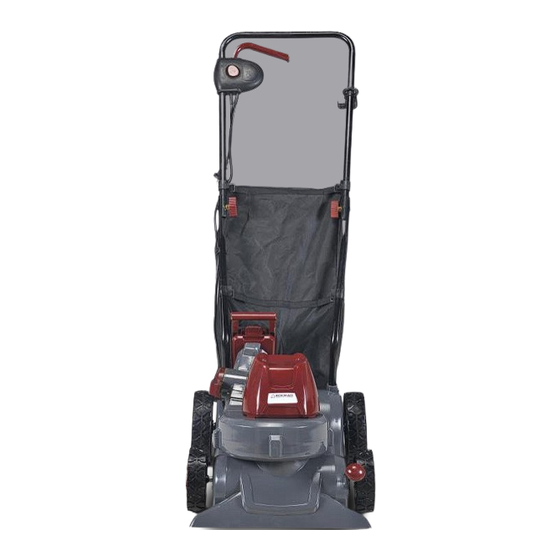
Parts Identification 1. Throttle control trigger lever 2. On/off switch lock button 3. Cable hanging hook 4. Collection bag 5. Collection bag collector 6. Motor housing case 7. Blow/Vacuum quick change lever 8. Machine height adjustment handle 9. Blowing outlet/vacuuming inlet 10.Machine transportation wheels ASSEMBLING YOUR APPLIANCE Your appliance comes with the fully assembled main unit, the unassembled rear handle and leaf bag. - Page 10 Fitting the handle Remove the two handle locking screws from their position on the chassis by using the screwdriver, and keep them on the side for next step. (Fig. 1) Fig. 1 Insert the two ends of the lower handle into the mounting holes on the chassis as shown. (Fig. 2) Fig.
- Page 11 Attach the upper handle to the lower handle with the hand-tighten knobs provided making sure the two parts are attached properly and the knobs are fastened tightly. (Fig. 3) WARNING : Take care! Do not damage the power cable! Fig. 3 - Check and make sure the both upper and lower handles are fitted properly(Fig.
-
Page 12: Operating
Fig. 8 Fig. 9 Operating A.USING YOUR BLOWER & VACUUM 1. Ensure that the handle has been correctly fitted and is firmly fastened to the machine (see assembly instructions). 2. Always ensure that the leaf bag is fitted properly before using (see assembly instructions). 3. - Page 13 area, etc. 1. Push down the adjusting handle and move forward can bring the vacuum inlet close to the ground, for use of vacuuming and blowing on the hard surface. (Fig. 10) Fig. 10 2. Push down the adjusting handle and move backward can bring the vacuum inlet up higher, for using on the lawn and garden bed and other rough surface.
- Page 14 Fig. 13 2. Start the machine and vacuum away the leaves by moving the appliance over the area to be cleared. 3. Always start the machine from a standing position, never kneeling or sitting next to the machine. EMPTYING THE BAG 1.
-
Page 15: Maintenance & Storage
MAINTENANCE AND STORAGE Keep all nuts, bolts and screws tight to be sure the appliance is in safe working condition. Check the vacuum bag frequently for wear or deterioration. Replace worn or damaged parts. Use only genuine replacement parts and accessories. Store the appliance only in a dry, locked place out reach of children Guarantee This product is guaranteed against faulty workmanship for a period of 24 months from the date of purchase. -
Page 16: Ec Declaration Of Conformity
Address: No. 718 Yangming West Road, Yuyao, Zhejiang 315400 P.R. China declare that the machines Designation: Electric Blower/Vacuum Model/Type: CXD1800(EKEWLV1) correspond with the applicable EU directives 2006/42/EC, 2006/95/EC, 2004/108/EC and are manufactured in accordance with the following standards or standardized documents:...
Need help?
Do you have a question about the EKEWLV1 and is the answer not in the manual?
Questions and answers