Table of Contents
Advertisement
Available languages
Available languages
© PET MATE Ltd · Lyon Road · Hersham · Surrey · KT12 3PU · England
N.America only:
Ani Mate · 104A Longview Drive · Conroe · Texas 77301
www.pet-mate.com
®
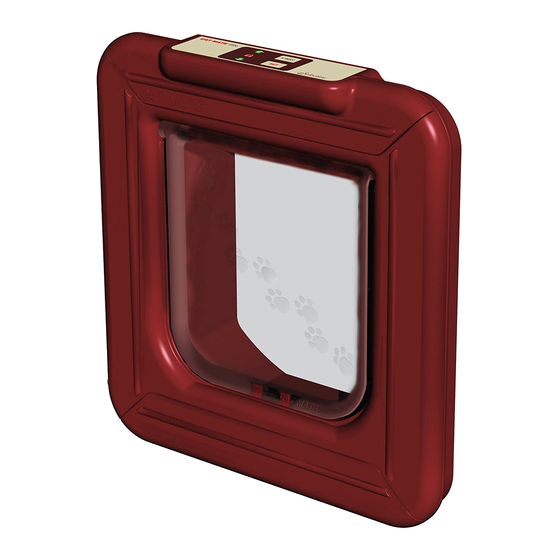
CAT MATE Elite
ID Disc model - Ref. 305 · Chip & Disc model - Ref. 355
IMPORTANT - READ BEFORE USE
OPERATION INSTRUCTIONS
WICHTIG - BITTE VOR VERWENDUNG LESEN
D
BETRIEBSANLEITUNG
IMPORTANT - À LIRE AVANT USAGE
F
MODE D'EMPLOI
IMPORTANTE - LEA ANTES DE USAR
E
INSTRUCCIONES DE OPERACIÓN
NL
BELANGRIJK! DIT EERST LEZEN VOOR GEBRUIK
HANDLEIDING
www.pet-mate.com
+44 (0)1932 700 001
N America (936) 760 4333
30503/0312
CAT FLAP
KATZENKLAPPE
Pet Mate Ltd. guarantees your product for a period of 3 years from the date of purchase,
CHATIÈRE
subject to the registration of your purchase details on our website www.pet-mate.com
within 14 days of purchase. (If you do not have access to a computer, please send details of
GATERA
your purchase with copy of receipt along with your name and address.) In the event of a fault
KATTENDEUR
developing contact Pet Mate customer services for a returns authorisation number. The
guarantee is limited to any defect arising due to faulty materials or manufacture. Any
defective item will be repaired or replaced free of charge at the manufacturer's discretion,
provided that the defect has not been caused by neglect, misuse or normal wear and tear.
Your statutory rights are not affected.
D
GARANTIE
Pet Mate Ltd. gewährt auf Ihr Produkt eine Garantie von 3 Jahren ab dem Kaufdatum, unter der
Voraussetzung, dass die Registrierung Ihres Produkts auf unserer Website www.pet-mate.com
innerhalb von 14 Tagen des Kaufdatums erfolgt ist. (Wenn Sie keinen entsprechenden Computerzugang
haben, senden Sie uns bitte Ihre Kaufangaben zusammen mit einer Kopie Ihres Einkaufsbelegs und
Angabe Ihres Namens und Ihrer Adresse.) Sollte an Ihrem Produkt eine Störung auftreten, so kontaktieren
Sie bitte den Kundendienst von Pet Mate, damit wir Ihnen eine Rücksendungs-Genehmigungsnummer
übermitteln können. Die Garantie ist auf Mängel beschränkt, die auf fehlerhaftes Material oder
Produktionsfehler zurückzuführen sind. Fehlerhafte Artikel werden nach Ermessen des Herstellers
kostenlos repariert oder ersetzt, vorausgesetzt, dass der Defekt nicht durch ein Missgeschick,
Vernachlässigung, falsche Bedienung oder normale Abnutzung verursacht wurde. Ihre gesetzlichen
Rechte sind nicht betroffen.
GARANTIE
F
Pet Mate Ltd garantit votre produit pour une période de 3 ans à compter de la date d'achat, sous réserve
d'enregistrement des détails de votre achat sur notre site www.pet-mate.com dans les 14 jours suivant
l'achat. (Si vous n'avez pas accès à un ordinateur, veuillez envoyer les détails de votre achat avec une
copie du reçu, accompagnée de votre nom et de votre adresse.) En cas de panne/mauvais
fonctionnement, contactez Pet Mate pour obtenir un numéro d'autorisation de retour. Les articles
défectueux seront remplacés ou réparés gratuitement à la discrétion du fabricant, sous réserve que le
mauvais fonctionnement ne soit pas le résultat d'un usage inadapté ou abusif ou d'une usure normale.
Ces conditions n'affectent pas vos droits statutaires.
GARANTÍA
E
Pet Mate Ltd. garantiza su producto durante un período de 3 años a partir de la fecha de compra,
siempre y cuando haya registrado los detalles de su compra en nuestro sitio web, www.pet-mate.com,
durante los 14 días posteriores a la fecha de compra. (Si no tuviera acceso a un ordenador, por favor,
envíe los detalles de su compra junto con una copia del recibo, su nombre y dirección.) En caso de
producirse un fallo, póngase en contacto con Servicio al Cliente de Pet Mate para obtener un número de
autorización de devolución. La garantía se limita a aquellos fallos que se produzcan como consecuencia
de materiales o fabricación defectuosos. Todo artículo defectuoso se reparará o reemplazará a la
discreción del fabricante, siempre y cuando el defecto no haya sido causado por negligencia, uso
indebido o el uso y desgaste normales. Sus derechos estatutarios no resultarán afectados.
NL
GARANTIE
Pet Mate Ltd. geeft drie jaar garantie op uw product, vanaf de koopdatum en afhankelijk van de
registratie binnen 14 dagen na aankoop van uw koopgegevens op onze website www.pet-mate.com.
(Als u geen toegang tot een computer hebt, wilt u dan de gegevens over uw aanschaf samen met een
kopie van uw koopbewijs inclusief uw naam en adres opsturen.) Mocht zich een defect voordoen, neemt
u dan contact op met de klantendienst van Pet Mate en u ontvangt een autoriseringsnummer voor retour.
Deze garantie betreft slechts defecten ten gevolge van materiaal- of fabrieksfout. Elk defect onderdeel
wordt gratis gerepareerd of vervangen, dit ter beoordeling van de fabrikant, en op voorwaarde dat het
defect niet ontstaan is door onzorgvuldigheid, onjuist gebruik of door normale slijtage. Dit heeft geen
effect op uw vastgelegde rechten.
Advertisement
Chapters
Table of Contents
Troubleshooting

Related Manuals for Pet Mate Cat Mate Elite Super Selective


Summary of Contents for Pet Mate Cat Mate Elite Super Selective
- Page 1 Rechte sind nicht betroffen. GARANTIE Pet Mate Ltd garantit votre produit pour une période de 3 ans à compter de la date d'achat, sous réserve IMPORTANT - À LIRE AVANT USAGE d'enregistrement des détails de votre achat sur notre site www.pet-mate.com dans les 14 jours suivant MODE D'EMPLOI l'achat.
- Page 2 1. ‘SET’ button 6. ‘TIMER’ function indicator 12. CAT 3 location symbol 2. Microchip / I.D. Disc search 7. ‘TIMER’ mode ‘Start/Finish’ 13. ‘PROGRAM’ button indicator indicators (under battery cover) 3. ‘INDIVIDUAL’ lock setting 8. ‘TIMER’ button 14. ‘4 WAY’ lock indicators indicator (Ref.
-
Page 3: Table Of Contents
3.2 'CAT 1' and the number '1' will flash - there will be lines moving around the first 'TWO ZEROS'. The Cat Mate Elite Super Selective Cat Flap allows you to control up to 9 cats' access to and from your cat flap. Furthermore, it will allow you to monitor up 3.3 Place the front of the I.D. -
Page 4: Access Options
3.4 When programmed, the 'TWO ZEROS' will disappear and 'Pr1' will flash. 4.2.4 Repeatedly press the '4 WAY' button until the required access option for Cat 1 is obtained. 3.5 Take the I.D. Disc or 'CAT 1' well away from the flap and then press the 'SET' button to save the setting. -
Page 5: Fitting I.d. Disc(S) To Your Cat(S)
4.3.9. The display will show the word 'START' and the minutes will flash. entrance/exit to the house or if the cat has followed another cat through the Press the '+' button until the desired minutes setting is shown, (in the cat flap;... -
Page 6: Reprogramming A New I.d. Disc Or Microchipped Cat
10. Reprogramming a New I.D. Disc or Microchipped Cat 12.2 Flap does not open in response to programmed I.D. Disc or microchip • Check '4 WAY' lock is programmed to permit access in the chosen 10.1 Press the 'PROGRAM' button on the circuit board (Fig. 4), for 5 seconds, direction. - Page 7 Damit der Mikrochip oder die I.D Ihrer Katze(n) durch die Klappe erkannt werden kann, ist folgendes Vorgehen erforderlich: Vielen Dank dafür, dass Sie sich für den Kauf der Cat Mate Elite Super Selective Katzenklappe entschieden haben. 5 Sekunden lang auf die PROGRAMMIERTASTE auf der Leiterplatte (Abb. 4) DIESE ANWEISUNGEN SORGFÄLTIG LESEN UND DIE KATZENKLAPPE VOR DEM...
- Page 8 Sobald die Programmierung wirksam wird, verschwinden die zwei NULLSTELLEN, 4.2.5 Auf die Taste "SET" drücken, womit Ihre Einstellung gespeichert wird. und "Pr1" beginnt zu blinken. 4.2.6 Die Schritte 4.2.4 und 4.2.5 für alle Katzen mit einer programmierten I.D.- Marke wiederholen. Die I.D.-Marke oder "KATZE 1"...
- Page 9 4.3.11 Im Display wird die "FINISH"-Zeit (Ablaufzeit) angezeigt. Diese auf gleiche 7. Betrachten, wann die Katze(n) zuletzt die Klappe betätigt hat/haben Weise wie die "START"-Zeit einstellen. Auf die Taste "SET" drücken, womit Zur Überprüfung, vor wieviel Stunden und Minuten die Katzen 1, 2 oder 3 Ihre Einstellung gespeichert wird.
- Page 10 10. Umprogrammieren einer neuen I.D.-Marke oder eines neuen Mikrochips • Der Batteriesparmodus ist wahrscheinlich aktiviert worden (durch "Eon" auf dem einer Katze Display angezeigt). Die Klappe nicht bewegen, bis "Eon" verschwunden ist. 10.1 PROGRAMMIERTASTE auf der Leiterplatte (Abb. 4) 5 Sekunden lang drücken; nun •...
-
Page 11: Introduction
Page De Contenu Afin d'éviter que vos réglages ne soient facilement modifiés, nous avons conçu les touches de commandes de sorte qu'elles nécessitent une pression ferme pour fonctionner. 1. Introduction ..........20 Une fois que vous aurez lancé... -
Page 12: Options D'accès
Lorsque le système sera programmé, les deux « ZÉROS » disparaîtront et la 4.2.4 Appuyez plusieurs fois sur la touche « 4 WAY » jusqu'à obtention de l'option mention « Pr1 » clignotera. d'accès requise pour le Chat 1. Écartez le disque d'identification ou le Chat 1 de la chatière, puis appuyez sur 4.2.5 Appuyez sur la touche «... -
Page 13: Pose D'un(De) Disque(S) D'identification Sur Votre(Vos) Chat(S)
4.3.9 L'écran affichera la mention « START » et les minutes clignoteront. Appuyez 7. Visualisation du temps écoulé depuis la dernière utilisation de la chatière sur la touche « + » jusqu'à obtention du réglage correct des minutes, (dans par le(s) chat(s) l'exemple ci-dessus «... -
Page 14: Reprogrammation D'un Nouveau Disque D'identification Ou D'un Autre Chat Équipé D'une Micropuce
10. Reprogrammation d'un nouveau disque d'identification ou d'un autre • Il se peut que le circuit d'économie d'énergie ait été activé (ce qui est indiqué chat équipé d'une micropuce par la mention « Eon » à l'écran). Ne déplacez pas la chatière, jusqu'à ce que la mention «... - Page 15 Página Del Contenido Para asegurar que los ajustes elegidos no puedan manipularse fácilmente, hemos creado botones de control cuyo accionamiento requiere una pulsación firme. 1. Introducción ......... . . 28 Cuando haya iniciado el proceso de ajuste y desee interrumpir una tarea particular, Vd.
- Page 16 3.4 Una vez realizada la programación, los 'DOS CEROS' desaparecerán y 'Pr1' 4.2.4 Pulse repetidamente el botón '4 WAY' hasta obtener la opción de acceso destellará. requerida para el Gato 1. 3.5 Aleje el disco de I.D. o 'GATO 1' de la gatera y pulse el botón 'SET' para 4.2.5 Pulse el botón 'SET' para guardar el ajuste.
- Page 17 4.3.9 La pantalla mostrará la palabra 'START' y los minutos destellarán. Pulse el tiene una ruta alternativa de entrada/salida de la casa; si el gato ha seguido a otro botón '+' hasta visualizar el ajuste deseado de minutos (en el ejemplo gato a través de la gatera;...
- Page 18 10. Reprogramación de un nuevo disco de I.D. o gato con microchip • Podrían haberse activado los circuitos de ahorro de energía (denotados por 'Eon' en la pantalla). No mueva la hoja hasta que 'Eon' desaparezca. 10.1 Pulse el botón 'PROGRAM' en el tablero de circuitos (Fig. 4) durante 5 •...
- Page 19 KATTENDEUR VOORDAT U HEM INSTALLEERT. 'CAT 1' en het nummer 1 gaan knipperen en er verschijnen bewegende lijnen Met de Cat Mate Elite Super Selective Kattendeur kunt u de toegang tot en het om de eerste 'TWO ZEROS' (twee nullen).
-
Page 20: Toegangsmogelijkheden
Na programmering, zullen de 'TWO ZEROS' verdwijnen en zal 'Pr1' knipperen. 4.2.5 Druk de 'SET' knop in om de instelling op te slaan. Houd de I.D. disc of 'CAT 1' goed uit de buurt van de kattendeur en druk de 4.2.6 Herhaal de stappen 4.2.4 en 4.2.5 tot al uw katten een geprogrammeerde knop met 'SET' in om de stand op te slaan. -
Page 21: Het Bevestigen Van De I.d.disc(S) Aan Uw Kat(Ten)
4.3.10 U stelt vervolgens het gewenste uur op dezelfde manier in (in bovenstaand de andere kat kort opgevolgd heeft bij het gebruiken van de kattendeur, of als de kat maar net zijn neus door de kattendeur heeft gestoken, enz. voorbeeld 19:00). 4.3.11 Het display scherm laat nu de 'FINISH' tijd zien. -
Page 22: Herprogrammering Van Een Nieuwe I.d. Disc Of Kat Met Microchip
10. Herprogrammering van een nieuwe I.D. disc of kat met microchip • Het energiebesparende schakelsysteem misschien geactiveerd (aangegeven met 'Eon' op de display). Houdt de kattendeur stil totdat 'Eon' 10.1 Houd de knop met 'PROGRAM' op de printplaat (afb. 4) 5 seconden ingedrukt verdwenen is. - Page 23 Record your cat(s) I.D. Disc number(s) here: Bitte tragen Sie die Nummer(n) der I.D.-Marke(n) Ihrer Katze(n) hier ein: Notez ci-dessous le numéro du disque d'identification de votre chat (vos chats) : Anote el número(s) del disco(s) de I.D. de su gato(s) aquí: Noteer nummer(s) van I.D.disk(s) van uw kat(ten) hier:...
Need help?
Do you have a question about the Cat Mate Elite Super Selective and is the answer not in the manual?
Questions and answers
How do you set the clock? The current time is not showing on the display though I can see that the times of access programmed can be viewed.
To set the clock on the Pet Mate Cat Mate Elite Super Selective, follow these steps:
1. Press and hold the '4 WAY' button for 5 seconds until the display flashes.
2. If you want to switch between a 24-hour clock and an AM/PM setting, press the 'TIMER' button.
3. Repeatedly press the '4 WAY' button until 'IND' appears on the LCD display.
4. Press the 'SET' button to save the setting.
5. The display will then show the time with the Hour symbol flashing.
6. Press the '+' button until the correct hour is displayed.
7. Press the 'SET' button to save the hour setting.
8. The display will show 'START' and the minutes will flash.
9. Adjust the minutes if needed and press 'SET' to save.
This completes the clock setting process.
This answer is automatically generated