Table of Contents
Advertisement
Advertisement
Table of Contents

Related Manuals for Cedima CTS-125 G


Summary of Contents for Cedima CTS-125 G
- Page 1 OPERATING MANUAL SAFETY INSTRUCTIONS BENCH SAW CTS-125 G...
- Page 2 • CEDIMA • Technical Documentation • All rights reserved as per DIN 34 • Subject to modifications due to progressive development • ®...
- Page 3 find useful tips for maintenance and for maintaining the safety of operation, accident protection and value of your machine as much as possible. CEDIMA ® Diamantwerkzeug- und Maschinenbauges. mbH • CEDIMA • Technical Documentation • All rights reserved as per DIN 34 • Subject to modifications due to progressive development • ®...
- Page 4 Trademark is a registered trademark of CEDIMA ® Diamantwerkzeug- und Maschinenbauges. mbH • CEDIMA •...
- Page 5 Le présent document a pour but de certifier que sur la base de la directive 98/37/CE (inclus leurs mdifications) de la Parlement et de la Communauté en date du 22 juin 1998 Scie à Table CTS-125 G à partir de l’année de construction 2005 CEDIMA ®...
- Page 6 Diamantwerkzeug und Maschinenbauges. mbH Lärchenweg 3 • 29227 Celle/Germany Phone +49 (0) 5141/88 54 - 0 Fax +49 (0) 51 41/ 8 64 27 internet: www.cedima.de www.cedima.com e-mail: info@cedima.de • CEDIMA • Technical Documentation • All rights reserved as per DIN 34 • Subject to modifications due to progressive development •...
-
Page 7: Table Of Contents
4-12 4.6. General information concerning the use of the bench saw CTS-125 G 4-12 4.6.1 Switching ON/OFF the emergency stop of the CTS-125 G and water pump 4-12 4.6.2 Overload protection of the saw blade drive motor 4-13 Preparation for cutting operation, position of the operator 4-13 4.7.1... - Page 8 4-15 4.10 Handling the special accessories 4-15 CHAPTER 5 Maintenance and care Maintenance and care of the bench saw CTS-125 G Cleaning - cleaning agents Procedure for cleaning - Dry cleaning - Wet cleaning Maintenance and care of the motor...
-
Page 9: Chapter 1 Technical Data And Accessories
Technical data and accessories Technical specifications of the bench saw CTS-125 G Output and SOLIDMAN: 2,2 kW (2800 rpm) electrical ratings of the drive motor 230 V at 50 Hz, 10 Amp. EMG: 2,2 kW (2770 rpm) 230 V at 50 Hz, 12 Amp. -
Page 10: Items Supplied With The Machine
PRISM for round shaped material Adjustable angle stop (range of adjustment approx. 240°) For further accessories please refer to the present CEDIMA -price list. ® CEDIMA is not responsible for any damages resulting from the operation of accessories that do not ®... -
Page 11: Chapter 2 Description Of The Bench Saw
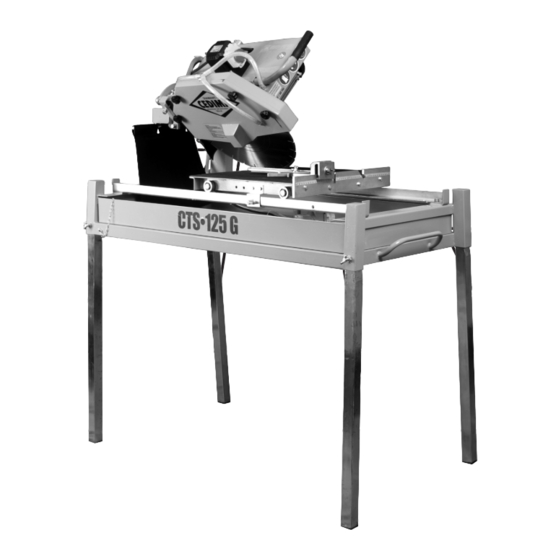
The bench saw CTS-125 G The CTS-125 G is a versatile and sturdy Bench Saw for fast and clean cutting of flag tiles, wall tiles, marble slabs and natural stone as well as pebble-shot concrete slabs, paving stones and similar abrasive building materials (always with a suitable diamond saw blade). - Page 12 The cutting head is fixed to a lockable swivel arm which The Bench Saw CTS-125 G is equipped with a cooling/ ensures the cutting operation to run true to angle and flushing system for wet cutting operations, which allows depth.
-
Page 13: Chapter 3 General Safety Instructions
• CEDIMA • Technical Documentation • All rights reserved as per DIN 34 • Subject to modifications due to progressive development • ®... -
Page 14: Selecting Qualified Staff; General Duties
• CEDIMA • Technical Documentation • All rights reserved as per DIN 34 • Subject to modifications due to progressive development • ®... -
Page 15: Special Work Related To The Use And Maintenance Of The Machine As Well As Fault Clearing And Disposal
3.2.4.27 Repair and maintenance work may only be ated from the driver seat /place of operation! carried out when the machine is securely placed on (CTS-125 G, in front of the roll-table, resp. swivel arm an even and firm ground and is secured against roll- handle)! ing-off! 3.2.4.15 Before starting the machine, make sure that... -
Page 16: Information On Special Risks Related To The Electricity
• CEDIMA • Technical Documentation • All rights reserved as per DIN 34 • Subject to modifications due to progressive development • ®... -
Page 17: Gas, Dust, Vapour, Smoke
3.2.10.3 Determine an experienced instructor for the 3.2.7.2 Wear ear protectors as required (UVV 29 §10) lifting/hoisting process! • CEDIMA • Technical Documentation • All rights reserved as per DIN 34 • Subject to modifications due to progressive development • ®... - Page 18 The set-up and operation of the machine must always comply with the directions of the operating manual! • CEDIMA • Technical Documentation • All rights reserved as per DIN 34 • Subject to modifications due to progressive development • ®...
-
Page 19: Chapter 4 Installation And Operation
2. Loosen the 4 wing screws of the leg holders on the corners of the frame (Fig. 4.3)! 3. Lift the frame of the bench saw CTS-125 G carefully, starting with the rear end and stick the rear legs into the holders (Fig. - Page 20 CTS-125 G water tank securing device, swivelled onto the bench saw frame Fig. 4.5 8. Slide the water tank into the frame of the CTS-125 G (Fig 4.6) NOTE CTS-125 G front left leg, perpendicular (obliquely spread) installed Fig.
- Page 21 NOTE Insert the bottom part of the splash guard into the water tank, so that the water runs down the splash CTS-125 G The splash guard is inserted into the water tank guard into the water tank! Fig. 4.9 12. Loosen the roller table transport lock by pulling the detent pin and turning it 90°...
- Page 22 Fig. 4.11 Star grip screw Work-piece stop with measurement gauge CTS-125 G Side- and angle guide mounted for cutting at 90° (adjusted) Fig. 4.13 To be able to cut at various angles from 0° -180° an ad- justable angle guide is available as a special accessory (with graduation, sect.
-
Page 23: Cooling And Rinsing Water
(solid-free, non-polluted) to CTS-125 G water tank electric cable avoid blocking the cooling system! Water pump of the CTS-125 G pumps water out of the water tank Do not use salt water! Fig. 4.15 • CEDIMA • Technical Documentation • All rights reserved as per DIN 34 • Subject to modifications due to progressive development •... - Page 24 Water tap View from the operators place, water supply Fig. 4.17 CTS-125 G reversed side, water supply Fig. 4.16 • CEDIMA • Technical Documentation • All rights reserved as per DIN 34 • Subject to modifications due to progressive development •...
-
Page 25: Mounting The Diamond Saw Blade
Star-grip nuts Blade pressure flange Clamping nut (left thread) CTS-125 G Blade cover lid, Blade pressure flange, removed Fig. 4.20 6. Make sure the thread of the blade shaft is kept clean, especially the blade flange! It is best to remove the... - Page 26 A saw blade that is not properly tightened will revolve untrue and become a danger! A diamond saw blade without enough tension will revolve untrue and wobble! CTS-125 G the diamond saw blade, mounted on the blade shaft in the right running direction Fig. 4.21 • CEDIMA •...
-
Page 27: Checking The Adjustment Of The Swivel Cutting Arm
(dam- age)! For adjusting the end stop for the swivel cutting arm, refer to chapter 5.7.1! CTS-125 G Saw blade guard lid covering the mounted diamond saw blade Fig. 4.25 • CEDIMA •... -
Page 28: Adjustment For Cutting At A Constant Depth With Fixed Swivel Cutting Arm
The angle must be flush against the blade! 3. Position the 0° end stop of the cutting head swivel device according to requirement, refer to chapt. 5.7.2 CTS-125 G swivel cutting arm, adjusted to the maximum cutting 45°-Cut: (bevel) depth Fig. 4.26 2. -
Page 29: The Electrical Connections In General
DANGER! Make sure that the bench saw is switched off before connecting to the main supply! ATTENTION! CTS-125 G Combined emergency OFF and main switch button All electric connections must be carried Fig. 4.28 out correctly! – Connect the main connecting cable (Fig. 4.29) with... -
Page 30: Using A Cable Drum Or Supply Line
4.6.1 Switching ON/OFF the emergency stop of the CTS-125 G and water pump DANGER! CTS-125 G rear side, main cable with the main supply cable As soon as the motor starts, the diamond connection plug Fig. 4.29 saw blade and the blade e.g. drive shaft... -
Page 31: Overload Protection Of The Saw Blade Drive Motor
(Fig. CTS-125 G Combined emergency button and main switch (the 2.2 and 4.3.1)! yellow lid with the emergency button switch open) Fig. -
Page 32: Cutting With The Swivel Cut (Free-Movable Swivel Cutting Arm)
(sect. 4.4.3 and Fig. 4.27)! – Retighten the clamping screw lever of the swivel device (Fig. 4.27)! CTS-125 G position of the operator (view point) on the bench Fig. 4.31 4.7.1 Cutting with the swivel cut (free-movable swivel cutting arm) The swivel cut is recommended for the easy cutting of greater depths (sect. -
Page 33: Changing The Diamond Saw Blade
– Mount the Jolly-table onto the front work piece stop of the roller table. Star grip screw Lateral angle plate CTS-125 G, 45°-cutting position Fig. 4.33 Optional Jolly-table Fig. 4.34 Changing the diamond saw blade The diamond saw blade should be changed: Prism-table •... - Page 34 • CEDIMA • Technical Documentation • All rights reserved as per DIN 34 • Subject to modifications due to progressive development • ®...
-
Page 35: Chapter 5 Maintenance And Care
Maintenance and care Maintenance and care of the bench saw CTS-125 G Procedure for cleaning When carrying out care- and maintenance work, the basic safety instructions in chapter 3 of this operat- Dry cleaning ing manual are to be observed. -
Page 36: Maintenance And Care Of The Motor
(Fig. 4.15) Please observe sect. 5.7.5 The operating manual of the water pump is rel- evant! • CEDIMA • Technical Documentation • All rights reserved as per DIN 34 • Subject to modifications due to progressive development • ®... -
Page 37: Maintenance Intervals Table For The Cedima ® Bench Saw Cts-125 G
Maintenance and care Maintenance intervals table for the CEDIMA bench saw CTS-125 G ® • CEDIMA • Technical Documentation • All rights reserved as per DIN 34 • Subject to modifications due to progressive development • ®... -
Page 38: Safety Checks Of The Electrical System According To (Employers' Liability Insurance Association) Bgv 4 § 5, Instruction For Execution, Paragraph 1 No
*) For more concrete specifications, refer to “Rules for safety and health protection - Selection and operation of electrical installations and operating equipment on job sites“. • CEDIMA • Technical Documentation • All rights reserved as per DIN 34 • Subject to modifications due to progressive development •... -
Page 39: Maintenance Work
(Fig. 4.4)! Now the swivel arm with the diamond saw blade can be lowered without damage to the roller table! approx. 3 mm CTS-125 G swivel cutting arm, adjusted to the maximum cutting depth Fig. 5.3 • CEDIMA •... -
Page 40: Adjusting The End Stop Of The Cutting Head Swivel Device (Mitre Cut)
11. Adjust the end stop screw on the swivel arm support until the 45 ° angle is reached and then retighten the lock nut of the end stop screw (Fig. 5.4)! CTS-125 G Cutting head swivel device, adjustable end stop (0°- cut adjusted) Fig. 5.4 •... -
Page 41: Checking And Adjusting The Roller Table, Rollers And Guides
(nuts) of the guide rail on which the roller table guide rollers run and adjust the guide rail (Fig. 5.7)! NOTE CTS-125 G Roller table with running roller Fig. 5.6 Only loosen the retaining screws (nuts) as far as to be able to move the guide rails! 4. -
Page 42: Adjusting The Roller Table Locking Device
Guide rail Screws Roller table Detent pin, engaged Tilting stop CTS-125 G roller table detent pin in transport position, (roller table secured) Fig. 5.8 3. Should the automatic locking device not function correctly, loosen both screws of the tilt safety device (which also holds the locking device) and adjust the locking device according to Fig. -
Page 43: Longer Stand-Down Times, Winter Operation, Storage
Pay attention to the following when transporting the CTS-125 G (i.e. for stowing the machine into the small- est possible space): • Switch off the electric motor completely by pushing the emergency button and disconnect the bench saw from the main supply by pulling the plug! •... - Page 44 • CEDIMA • Technical Documentation • All rights reserved as per DIN 34 • Subject to modifications due to progressive development • ®...
-
Page 45: Chapter 6 Trouble Shooting, What If
Trouble shooting, what if …? Faults / trouble shooting for the CEDIMA bench saw CTS-125 G ® Problems when starting (engine) Problem Possible cause Remedy Engine does not start Power cable is not properly Check that the machine is properly connected to the when switched on fixed/plugged in... -
Page 46: Problems When Cutting (Diamond Saw Blade)
Send back saw blade Too high load on saw blade Use correct saw blade Diamond segments blunt Sharpen saw blade • CEDIMA • Technical Documentation • All rights reserved as per DIN 34 • Subject to modifications due to progressive development • ®... - Page 47 The problems and their possible causes are primarily the result of normal wear and the improper use of the bench saw or the diamond saw blades. Therefore please read this operating manual carefully! • CEDIMA • Technical Documentation • All rights reserved as per DIN 34 • Subject to modifications due to progressive development • ®...
- Page 48 Trouble shooting, what if …? • CEDIMA • Technical Documentation • All rights reserved as per DIN 34 • Subject to modifications due to progressive development • ®...
-
Page 49: Chapter 7 Wiring Diagram
Wiring diagram Wiring diagram of the CEDIMA bench saw CTS-125 G ® with SOLIDMAN drive motor water pump brown plug Fig. 7.1 • CEDIMA • Technical Documentation • All rights reserved as per DIN 34 • Subject to modifications due to progressive development •... - Page 50 Wiring diagram Wiring diagram of the CEDIMA bench saw CTS-125 G ® with EMG drive motor switch water pump brown blue green/yellow U1, U2 = Motorwicklung 1 U1, U2 = Motorwicklung 2 T1, T2 = Thermoschalter Fig. 7.2 • CEDIMA •...
-
Page 51: Chapter 8 Appendix
– Energy storage devices – Control potentiometers and manual switch- ing elements Page 1 off 2 Pages • CEDIMA • Technical Documentation • All rights reserved as per DIN 34 • Subject to modifications due to progressive development • ®... - Page 52 CEDIMA ® Diamantwerkzeug- und Maschinenbaugesellschaft mbH, Celle Celle, Germany Status: January 2005 Page 2 off 2 Pages • CEDIMA • Technical Documentation • All rights reserved as per DIN 34 • Subject to modifications due to progressive development • ®...
- Page 53 Appendix • CEDIMA • Technical Documentation • All rights reserved as per DIN 34 • Subject to modifications due to progressive development • ®...
- Page 54 • Bench saws • Joint cutters • Drill machines • Wall saws • Wire saws • • Chain saws • Steel concrete breakers • Special machines • CEDIMA ® Diamantwerkzeug- und Maschinenbauges. mbH Lärchenweg 3 • 29227 Celle/Germany Tel. +49(0) 5141-8854 0 • Fax +49(0)5141-86427 Internet: www.cedima.de • E-mail: info@cedima.de...