Table of Contents
Advertisement
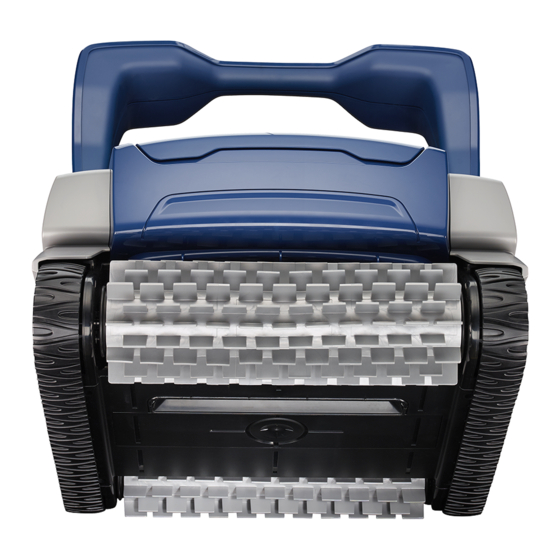
9400
8050 Sport
TYPE EM27--
Robotic Pool Cleaner
OWNER'S MANUAL
|
|
ENGLISH
FRANÇAIS
ESPAÑOL
WARNING
FOR YOUR SAFETY - For anything other than the routine cleaning and maintenance described in this manual, this product must be
serviced by a contractor who is licensed and qualified in pool equipment by the jurisdiction in which the product will be installed
where such state or local requirements exist. In the event no such state or local requirement exists, the maintainer must be a
professional with sufficient experience in pool equipment installation and maintenance so that all of the instructions in this manual
can be followed exactly. Improper installation and/or operation will void the warranty.
Advertisement
Table of Contents

Subscribe to Our Youtube Channel
Related Manuals for Polaris 8050 Sport


Summary of Contents for Polaris 8050 Sport
- Page 1 9400 8050 Sport TYPE EM27-- Robotic Pool Cleaner OWNER’S MANUAL ENGLISH FRANÇAIS ESPAÑOL WARNING FOR YOUR SAFETY - For anything other than the routine cleaning and maintenance described in this manual, this product must be serviced by a contractor who is licensed and qualified in pool equipment by the jurisdiction in which the product will be installed where such state or local requirements exist.
-
Page 2: Table Of Contents
Storing the Cleaner ..........11 THANK YOU FOR PURCHASING THE POLARIS CLEANER. YOUR POLARIS ROBOTIC CLEANER HAS BEEN DESIGNED AND MANUFACTURED TO BE EASILY INSTALLED AND TO PROVIDE LOW MAINTENANCE OPERATION. PRIOR TO INSTALLING YOUR NEW POLARIS CLEANER, PLEASE DO THE FOLLOWING: Complete and return the warranty registration card. -
Page 3: Section 1. Important Safety Instructions
• Do not bury cord. Locate cord so as to prevent it from being damaged by lawn mowers, hedge trimmers and other equipment. • To reduce the risk of electrical shock, do not use the Polaris robotic cleaner or control unit if the cord is worn or damaged. Contact Zodiac Pool Systems, Inc. -
Page 4: Section 2. Cleaner Specifications
Section 3. Assembly and Setup • Check cleaner and components for damage. • If there are missing parts or damage, contact Unpacking Polaris Technical Support: The packaging should contain the following items: USA 1-800-822-7933 Canada 1-888-647-4004 . • Robotic cleaner and floating power cable •... - Page 5 Page 5 Push base unit down (Figure 3) so the metal handle frame is seated in the recess on the underside of the base. Figure 5. Snap in Support Blocks and Attach Wheels Slide the control unit base / caddy handle attachment down over the metal tubing until it snaps into place.
-
Page 6: Connecting The Control Unit To The Caddy
Page 6 Figure 9. Attach the Control Unit onto Caddy Connecting to a Power Source WARNING Failure to comply with the following warnings can result in permanent injury, electrocution or drowning. PREVENT ELECTRICAL SHOCK Figure 7. Fully Assembled Transport Caddy •... -
Page 7: Section 4. Operation
(see Figure 11.) coils in the cable before storing the cleaner. The Polaris robotic cleaner includes a safety feature that automatically stops the cleaner if it is powered on but not submerged in water. For pools equipped with a... -
Page 8: The Cleaner Control Unit
Page 8 Cleaner Control Unit Surface Control System™ (SCS) LEDs indicating for wall cleaning SURFACE CONTROL SYSTEM pump strength for (rough to smooth surfaces) ROUGH SMOOTH Start/Stop Cleaner Error Cleaner Indicator Select Cleaning Surface • Floor • Floor and Walls Submerging the Cleaner Submerge the cleaner vertically (1) and hold it under the surface, moving gently from side to... -
Page 9: Starting The Cleaner
Page 9 Spread the floating cable over the pool, making NOTE: Periodically the cleaner will pause for up to 20 sure there are no kinks or coils in the cable . seconds throughout the cleaning cycle. The cleaner is calibrating its position in the pool during this NOTE: For optimal patterning and reduced tangling, the process. -
Page 10: Stopping The Cleaner And Removing From The Pool
Page 10 • Press to adjust the wall climbing setting one level higher. • One additional LED lights each time you press the button to indicate stronger grip on the wall. • To decrease setting, press button to cycle through back to one LED (lowest setting). Stopping the Cleaner and Removing from the Pool If the cleaner is still in operation, press... - Page 11 Page 11 Figure 15. Release Filter Canister Handle Figure 17. Remove Filter Canister Lid Using a hose with clean water, rinse the filter canister and lid to remove all debris (see Figure 18). Periodically, use mild soap to wash the canister mesh and remove fine debris that can clog the flow through the filter canister.
-
Page 12: Storing The Cleaner
Page 12 Storing the Cleaner The cleaner must be cleaned regularly using slightly soapy clean water. Do not use solvents such as acetone or its equivalent. Rinse the cleaner generously using clean water. Do not let your cleaner dry in direct sunlight near the pool. -
Page 13: Replacing The Brushes
Page 13 Cleaner Recommended cleaner caddy / control unit cleaner Recommended entry point Control Unit /Caddy Floating Cable Figure 22. Untangle the Floating cable Length Figure 21. Spread Floating Cable Across Farthest Distance of the Pool Check for Brush Wear The cleaner is fitted with PVC brushes in front and IMPORTANT rear. -
Page 14: Replacing The Tracks
Replacing the Tracks If the treads on the interior side of the tracks appear completely worn or if pool coverage is not normal, contact your local Polaris dealer for diagnostic and track replacement. Section 6. Replacement Parts The complete spare parts list and exploded Figure 25. -
Page 15: Section 7. Troubleshooting
Check brushes for debris. Start a new cleaning cycle. If the problem is not resolved through troubleshooting, first contact your local retailer to request a diagnostic review, or contact Polaris Technical Support at (USA) 1-800-822-7933; 1-888-647-4004 (Canada). LED flashes three times with one Check the pump cover for debris. -
Page 16: General Troubleshooting
Disconnect the control unit and wait at least 20 code or flashing lights. seconds before reconnecting. If the problem is not resolved through troubleshooting, first contact your local retailer to request a diagnostic review, or contact Polaris Technical Support at 1-800-822-7933 (USA); 1-888-647-4004 (Canada). - Page 17 Page 17 Problem Cause Solution Cleaner stops up to 20 Cleaner is performing normal No user action required. The pause does not affect seconds during cleaning calibration operation. the overall cleaning cycle. cycle. Cable is tangling in the pool Too much cable length in the water. Do not unravel the entire cable.
- Page 18 Page 18 NOTES...
- Page 19 Page 19 NOTES...
- Page 20 2115 South Service Road West, Unit 3 Oakville, Ontario • Canada L6L 5W2 1.888.647.4004 | www.ZodiacPoolSystems.ca POLARIS ® and the Polaris 3-wheeled cleaner design are registered trademarks of Zodiac Pool Systems, Inc. ZODIAC ® is a registered trademark of Zodiac International, S.A.S.U., used under license.
Need help?
Do you have a question about the 8050 Sport and is the answer not in the manual?
Questions and answers
how to replace tracks polaris 8050