Advertisement
Quick Links
Advertisement

Summary of Contents for SHOOTOOLS AUTOPAN
- Page 1 AUTOPAN INSTRUCTION MANUAL MANUALE D’ISTRUZIONE MADE IN IT ALY...
-
Page 3: Components
Be sure that the device is well fixed and not unstable. Be sure that the camera is well fixed to the head that supports it and that the head is well fixed to ShooTools device. Do not use the device if the supports (tripods, lightstands, monopods, legs, quick release systems, other types of fixing and support) are not well fastened yet and if they are not a safe foothold. - Page 4 Accertarsi che il dispositivo sia ben fissato e non traballante. Accertarsi che la videocamera/fotocamera sia ben fissata alla testa che la sostiene e che quest’ultima sia ben fissata al dispositivo ShooTools. Non utilizzare il dispositivo se i supporti utilizzati (cavalletti, stativi, monopiedi, piedini, sganci rapidi, altri tipi di fissaggio e sostegno) non risultano ben ancorati e se non forniscono una sicura base d’appoggio.
- Page 5 CONTENTS SOMMARIO Components page 6 Componenti pag. 6 Getting Started page 7 Informazioni Preliminari pag. 7 Set-up page 8-9 Installazione pag. 8-9 Settings pag. 10 Programmazione page 10 Firmware upgrade procedure for Windows Vista , Windows 7 e Windows 8.0 pag.
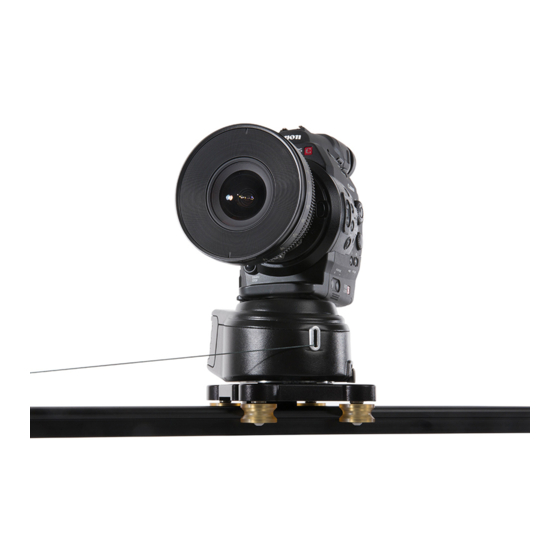
- Page 6 AUTOPAN AUTOPAN (1) Usb (only for update firmware, no charging) (2) Release Button (3) Shutter Release (4) External Sensor (5) Power: 9V - 1A DC ( max 9W ) (6) 1/4” thereaded pin (7) 3/8” thereaded hole (8) Adapter 1/4” 3/8”...
-
Page 7: Getting Started
Even if AutoPun is turned off, the batteries are in charg- Se l’AutoPan è spento il led di stato della batteria rimane ing. To know the statuts of the charge, turn on AutoPan. spento ma la gestione di carica della batteria continua. -
Page 8: Set-Up
RELEASE BUTTON: releasing AutoPan temporary, it allows the manual rotation by steps of 45°. Fix the AutoPan’s encoder sync wire to one of the slider’s end. Dopo l’avvitamento è possibile direzionare correttamente l’u- scita del filo encoder premendo l’apposito pulsante di sblocco RELEASE BUTTON, esso sbloccherà... -
Page 9: Set-Up
NOTE: set up the device until stable, but without putting too much effort as it could cause an unnecessary stress to the internal components. NOTE: screw the 3/8” 1/4” adaptor on the video head and not directly on AutoPan’s pivot. NOTA: avvitare il dispositivo in modo che risulti stabile ma senza applicare troppa forza, stringerlo eccessivamente comporterebbe una inutile sollecitazione dei componenti interni. -
Page 10: Programmazione
10. If an error occurs, press at least for 3 seconds END END KEY FRAME per resettare i Key Frame memorizzati. KEY FRAME in order to reset the stored Key Frames NOTE: When AutoPan is turned off, the stored Key Fra- Fra- NOTA: Quando l’AutoPan viene spento, i Key Frame me- mes are deleted. - Page 11 17) disconnect AutoPan usb port and check AutoPan 8) Check AutoPan battery status with green led. automatically switch OFF. 9) Connect AutoPan usb port to high speed pc usb AutoPan firmware upload is complete. post 2.0 or 3.0 directly without hub connection.
- Page 12 6) check AutoPan battery status with green led. 13) AutoPan automatically switch OFF and return 7) Connect AutoPan usb port to high speed pc usb ON (do not disconnect or switch off AutoPan during post 2.0 or 3.0 directly without hub connection.
- Page 13 “AutoPan Update Tool V2.1” press OPEN 3) Follow the software installation steps, You will find the Icon “AutoPan Update Tool” in your list of Applications 4) Check AutoPan battery status with green led. 5) Connect AutoPan usb port to high speed pc usb post 2.0 or 3.0 directly without hub connection.
- Page 14 DATASHEET & CERTIFICATIONS SPECIFICHE TECNICHE E CERTIFICAZIONI Model / Modello AutoPan Battery / Batteria Li-Ion 7.4V 2000 mAh Power / Alimentazione DC 9V-1A 9W max Weight / Peso 900 gr Dimensions / Dimensioni 160x120x85 mm Fixing / Fissaggio 3/8” - 1/4”...
- Page 15 -2006/42/EC -2014/30/CE...
- Page 16 Smaltimento del prodotto Disposal of product Si raccomanda di smaltire il prodotto alla fine della sua vita At the end of its useful life, the product should be disposed of in an environmentally compatible way, using its parts and utile in modo ambientalmente compatibile, riutilizzando parti dello stesso e riciclandone componenti e materiali.
- Page 17 FIRMWARE UPGRADE AND MORE AGGIORNAMENTO DEL FIRMWARE E ALTRO DISCOVER more support@shootools.com Video Instructions - Firmware Upgrade and More http://www.shootools.com/public/support/index.html...
- Page 19 C 0 - M 100 - Y 100 - K 0 R 255 - G 0 VIA GRADO, 4 INT. 5 www.shootools.com C 0 - M 0 - Y 0 - K 10 R 0 - G 0 - B PAVIA DI UDINE 33050 UD - ITALY 1.1 Logo negativo...

Need help?
Do you have a question about the AUTOPAN and is the answer not in the manual?
Questions and answers