Table of Contents
Advertisement
Advertisement
Table of Contents

Related Manuals for Cord panorama BT

Summary of Contents for Cord panorama BT
- Page 1 Internet, DAB+ and FM Radio with Bluetooth Users Guide...
-
Page 2: Important Safety Precautions
Important Safety Precautions: To achieve the utmost in enjoyment and performance from your CORD Panorama BT, and in order to become familiar with its features, please read this manual carefully before operation. This will ensure you years of faithful, trouble free performance and listening pleasure. -
Page 3: Important Safety Information
Important Safety Information: Some Do’s and Don’ts on the Safe Use of this Equipment: This equipment has been designed and manufactured to meet international safety standards but, like any electrical equipment, care must be taken if you are to obtain the best results and safety is to be assured. -
Page 4: Table Of Contents
Table of Contents: Important Safety Precautions ....................... 2 Important Safety Information ....................... 3 Table of Contents .......................... 4 Package Contents ........................6 Front Panel Overview ....................... 7 Rear Panel Overview ........................ 8 Internet Radio Quick Start Guide ....................9 What you need before you can use your Internet Radio ............9 Chapter 1 - Initial Setup ...................... - Page 5 Chapter 5 - Aux in ........................22 To switch the unit into Aux in Mode ..................22 Chapter 6 - Bluetooth ........................ 23 Chapter 7 - General Operations ....................24 7.1 Setting Station Presets ....................24 7.2 Selecting a Preset Station ....................24 7.3 Sleep Function .......................
-
Page 6: Package Contents
Package Contents: Main Unit and Remote Control Internet, DAB+ and FM Radio with Bluetooth Instruction Manual and Warranty Information Users Guide... -
Page 7: Front Panel Overview
Front Panel Overview: Display screen Infrared Remote Receiver Point SCROLL/SELECT SNOOZE MODE INFO MENU BACK VOLUME STANDBY/ON Control Function - VOLUME + Press to turn the radio on or off. Turn to adjust the volume level. When the alarm is sounding, press to turn off alarm. Note: to obtain a strong radio signal, please fully extend the antenna found on the rear of the unit, before you turn your radio on. -
Page 8: Rear Panel Overview
For inserting 3.5mm headphones. For connecting 3.5mm stereo audio cable. AUX IN socket: For connecting RJ-45 LAN cable to connect with your wired computer LAN socket: network. Power cord socket: Fixed AC mains power cord and plug (non removable type). -
Page 9: Internet Radio Quick Start Guide
Internet Radio Quick Start Guide What you need before you can use your Internet Radio: A broadband Internet connection. A wireless access point (Wi-Fi) connected to your broadband Internet, preferably via a router, or; A wired network with a spare point on your router, switch or hub where you can connect with a Cat5/6 LAN cable with an RJ-45 connector. -
Page 10: Chapter 1 - Initial Setup
Chapter 1 - Initial Setup 1.1 Turning on 1. Connect to the mains power and extend the antenna fully. 2. Press STANDBY/ON to switch on your radio, for initial use, a welcome message will appear, then ask you to enter the ‘Setup wizard’. 1.2 Setup Wizard 1. -
Page 11: Access To Internet Radio Stations
3. If a WEP/WPA key (password) is required, the radio will ask you to input the WEP/WPA code and display the password entry screen as follows: Turn SELECT to cycle through the alphanumeric character list, press SELECT to select an appointed character. -
Page 12: Local Stations
3. Then refer to the following section to choose stations. Or if it failed to connect to the network, please perform the following steps: a. Check your Router to see if it is working normally. b. Relocate your radio to a stronger signal position if necessary. c. -
Page 13: Selecting A Podcast
1.7 Selecting a Podcast To access the list of available Poscasts, press MENU < Station list > < Podcasts >, press SELECT to confirm, and then Turn SELECT to choose your desired option. Press SELECT to confirm, and then step by step to your selecting program. 1.8 Get Access Code and FAQ Solutions 1. -
Page 14: Adding Internet Radio Stations To 'My Favourites
1.10 Adding Internet Radio Stations to ‘My Favourites’ Visit website: http://www.wifiradio-frontier.com Click on the register link. To create your account, enter the Access code which can be found on the previous page, section 1.7. Then provide your email address and your chosen passoword and your account will be created. -
Page 15: Adding Internet Radio Stations To 'My Added Stations
1.11 Adding Stations to ‘My Added Stations’ Even though the Internet radio portal contains thousands of stations, you may want to listen to stations not listed. You can add your own stations via the portal. Visit website: http://www.wifiradio-frontier.com Login as a member (at previous page, you registered). You will able to take advatage of the various additional features and services offered by the Frontier internet Radio Portal. -
Page 16: Connecting To A Wired Network
1.12 Connecting to a Wired Network Step 1 – Choose LAN Setting: Note: make sure your LAN cable is connected to the LAN socket. 1. Press MENU Turn SELECT to < Main Menu >, press SELECT to confirm. 2. Turn SELECT to < System settings >, press SELECT to confirm. 3. -
Page 17: Chapter 2 - Music Player Mode
Chapter 2 - Music Player Mode 2.1 Setting up a Music Server In order for your radio play music files from a computer, the computer must be set up to share files or media. UPnP media sharing allows devices like this radio to play music from a shared media library, navigating through tag menus such as Artist, Album or Genre. -
Page 18: Play Shared Media
2.3 Play Shared Media Press MODE repeatedly until < Music player > is displayed. Note: Or, enter < Main menu >, and then turn SELECT to < Music player >, press SELECT to confirm. 2. While the cursor points to < Shared media >, press SELECT to confirm, and then step by step to your selecting Music. -
Page 19: Chapter 3 - Dab Mode
Chapter 3 - DAB Mode 3.1 Shift to DAB Mode 1. Press MODE repeatedly to enter DAB function. Note: a. For initial use, it will conduct a full scan and store all DAB/DAB+ radio stations. b. In use, a full scan can be conducted by pressing MENU <... -
Page 20: Prune Invalid
3.5 Prune Invalid 1. Press MENU < Prune invalid >, and then press SELECT to confirm. 2. Turn SELECT to ‘YES’, then press SELECT to confirm. 3.6 DRC (Dynamic Range Control) You can set the level of the compression of stations to eliminate the differences in dynamic range or sound level between radio stations. -
Page 21: Chapter 4 - Fm Mode
Chapter 4 - FM Mode 4.1 General Operation Press MODE repeatedly until < FM Radio > is displyed. For initial use, it will start at the beginning of the FM frequency range (87.50MHz). Otherwise, the last listened FM station will be selected. ... -
Page 22: Chapter 5 - Aux In
Chapter 5 - Aux in 5.1 To switch the unit into Aux in Mode: 1. Repeatedly press MODE until <AUX IN> is displayed. Note: Or enter ‘Main menu’, turn SELECT to <Auxiliary Input >, and then press SELECT to confirm. -
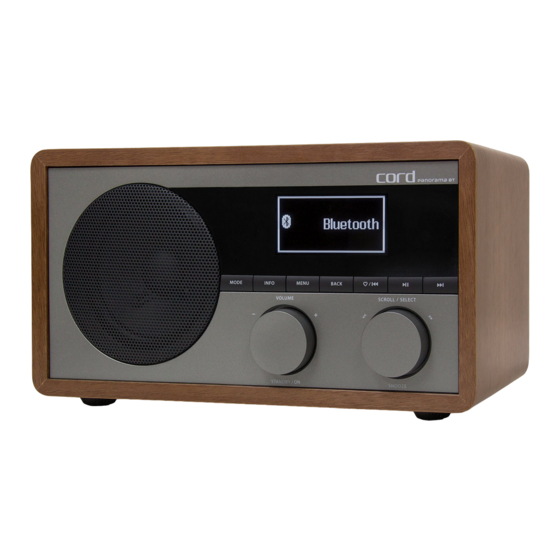
Page 23: Chapter 6 - Bluetooth
Activate your Bluetooth device, such as your smartphone, and select the search mode. “Panorama BT” will appear on your Bluetooth device. Select “Panorama BT” and enter “0000” for the password if necessary. icon will remain displayed on the screen while the connection is successful. -
Page 24: Chapter 7 - General Operations
Chapter 7 - General Operation 7.1 Setting Station Presets Your radio can store up tp 10 Internet Radio, 10 DAB+ and 10 FM station presets. To store the current station: 1. Press and hold your target PRESET button (Between 1-10) on your remote control untill your radio shows ‘Preset stored’. -
Page 25: Setting The Clock
7.4 Setting the Clock 1. Clock setting mode can be activated by pressing MENU < Main menu > < System settings > < Time/Date >, press SELECT to confirm. Note: Turn SELECT to see the range of time settings available, which includes the functionality to set: ... - Page 26 To check the alarms status, press STANDBY/ON to enter standby mode. Turn Alarm off : When alarm is sounding, press STANDBY/ON (or press on remote control) to turn it off. Activate Snooze Function: Press SELECT (or press SNOOZE/SLEEP on remote control) to postpone it, repeatedly press SELECT (or press SNOOZE/SLEEP on remote control), the SNOOZE time can be 5 / 10 / 15 / 30 minutes in turn.
-
Page 27: Chapter 8 - System Settings
Chapter 8 - System settings 8.1 Equaliser Note: If you want to adjust the style of the sound output there are several preset EQ modes available as well as one user-defined setting: 1. Press MENU to < Main menu > < System settings > < Equaliser >, press SELECT to confirm. -
Page 28: Factory Reset
Note: High brightness levesl can make it much easier to view playback information. It can be activated as follows: < Main menu > < System settings > < Backlight > < Power-on Level > < Low/High >. ... -
Page 29: Sw Version And Radio Id
C A U T I O N Before starting a software upgrade, ensure that your radio is plugged into a stable mains power connection. Disconnecting power during a software update may permanently damage the unit. Software Update can be activated from < Main menu > <System settings > < Software update >... -
Page 30: Chapter 9 - Specifications
Chapter 9 - Specifications ITEMS SPECIFICATIONS Internet, DAB+, FM radio with Bluetooth V4.0 Description: Power Requirements: 100-240 Vac, 50/60 Hz FM: 87.5-108MHz Frequency Range: DAB+: 174-240MHz Rated Output Power: 7W rms Speaker: 4 ohm full range Dimensions: 250 x 130 x 136mm This symbol on the product or in the instructions means that your electrical and electronic equipment should be disposed at the end of its life separately from your household waste. -
Page 31: Warranty Conditions
Normal wear & tear and maintenance, cleaning, periodic check-ups or charges for installation, removal or reinstallation of the product. Audio or video data stored on your iPod and or other devices used with or connected to your CORD product or media of any type. WHEN YOU NEED SERVICE If you should require warranty service please visit our web site for details of any warranty updates and the location your nearest authorised Service Centre.
Need help?
Do you have a question about the panorama BT and is the answer not in the manual?
Questions and answers