Table of Contents
Advertisement
Available languages
Available languages
Advertisement
Table of Contents

Subscribe to Our Youtube Channel
Related Manuals for FULGOR FM36CDFDS1


Summary of Contents for FULGOR FM36CDFDS1
- Page 1 FM36CDFDS1...
-
Page 2: Environmental Advice
Welcome to the world of simple handling and no worries Thank you for choosing Fulgor Milano .This manual contains all the information you will need to safely and correctly use your refrigerator. Please read all the instructions prior to using the appliance and keep this manual in a secure place for future reference. -
Page 3: Table Of Contents
Contents Safety......................03 Product Description...................05 Installation....................07 Door Handles....................17 Making Minor Adjustments between doors..........18 Installing the water line................19 Operation....................21 Cleaning and Maintenance...............25 Solutions to Problems................26 Attention The refrigerator you have just purchased may be slightly different from the one shown in the drawings in this manual, but its overall design intent is the same. -
Page 4: Safety
Safety For children Please keep children from entering or climbing the refrigerator to avoid locking the children inside the refrigerator and hurting them should the refrigerator tip over due to their weight. Be mindful of children's whereabouts when closing and opening doors and drawers to avoid injuries to probing hands and fingers. - Page 5 Don't put fluid in bottles or sealed containers into the freezer, such as bottled beer or drinks to avoid the containers cracking or exploding and potentially causing damage to other contents or the appliance. During a power outage or cleaning, pull out the plug. Wait at least 5 minutes after cutting the power before restarting to allow the refrigeration system to equilize as immediate startup might damage the compressor When the refrigerator is out of service, please remove the refrigerator's doors...
-
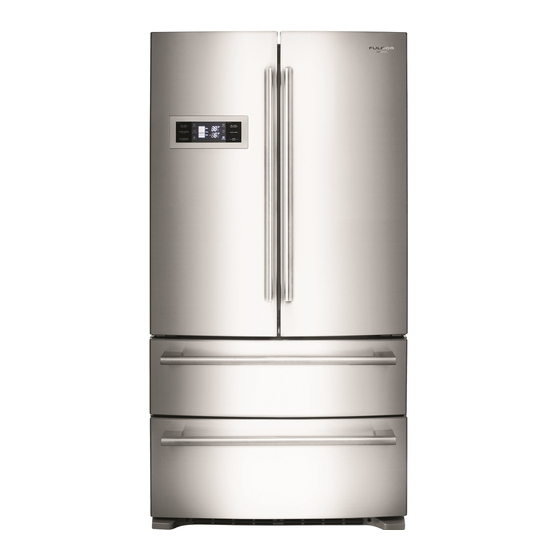
Page 6: Product Description
Product description Rated Voltage/Frequency: 115V/60Hz Rated Current: 2.7A Total Storage Volume 20.8cu.ft/590L Freezer Storage Volume: 6cu.ft/170L Refrigerator Storage Volume: 14.8cu.ft/420L Net Weight: 137kg Gross Weight: 148kg Product Dimensions: 911x728.5x1775mm 35.8x28.6x69.9in (without handle) Refrigerator body Ice storage bin Display Ice scoop Left door for refrigerator compartment Partition plate for lower freezer drawer Upper drawer for freezer compartment... - Page 7 Left door for refrigerator compartment Right door for refrigerator compartment Butter box Cantilever shelf Air duct cover plate French door sealing flap Folded cantilever shelf Sliding cantilever shelf Side lamp for refrigerator compartment Fruit and vegetable drawer Gallon bottle shelf (with egg holder) Water tank Large drawer Light-wave freshness lamp...
-
Page 8: Installation
Installation Transport and Placing of Your Remove all packaging material before Refrigerator using the new refrigerator. This includes the foam base and all Transport adhesive tape holding the refrigerator Keep upright and avoid squeezing or accessories inside and outside. vibration during transport. Avoid a Clean both the inside and outside of slant angle over 45 degree during the refrigerator with wet cloth (a little... - Page 9 Placement Place your refrigerator in a well- ventilated place and avoid proximity to heat sources and direct sunlight. Don't place it in any humid or wet place so as to avoid rust and reduction to the effectiveness of the insulation. There must be a space not less than 1 inch from the top of your refrigerator and not less than 1 inch from both...
- Page 10 Start Up 4. Put Food into Your Refrigerator You must observe all safety Depending on ambient conditions it precautions and make sure that may take several hours for the cooling your refrigerator has been placed and freezing compartments to reach properly in its final position before their set temperatures.
- Page 11 Refrigerator compartment The refrigerator compartment is designed to maintain a temperature in the range of Adjustment of cantilever shelf 2°C to 8°C (36°F to 46°F) and should be considered as short term storage. Always ensure items are fit for consumption prior to Upper end of fixed leg ingesting.
- Page 12 2. Ice storage bin is used to store the Food suggested to store in ice. refrigerator compartment 1. Leftovers 3. The lower drawer of the freezer is used to store fish, meat and 2. Snack food, food subject to packaged poultry meat. tainting, dairy product 3.
- Page 13 Taking-out and installation of the lower freezer drawer Rear stopper for the lower drawer 1. Pull out the lower freezer drawer first. 2. Take out the two fixed screws from the partition plate of the lower freezer drawer with screw driver and then take off the partition plate.
- Page 14 Large crisper drawer The large crisper drawer has a maximum load of 10kg. Hook Removal and installation of large crisper drawer 1. Extend the large crisper drawer. Big drawer 2. Find the hook at the left and right sides at the drawer bottom (shown Sliding rail in the figure).
- Page 15 Ice-maker Fig.1 Operating instructions for the ice- maker 1. When the refrigerator is used for the first time, wait at least 20 minutes before The ice-maker is starting the ice maker. capable of producing 1.2~1.7Kg(2.5 - 3.75 lbs), ice in 24hr depending on the temperature Fig.2 of freezer compartment, ambient temperature, frequency of door...
- Page 16 Removal, cleaning and installation of ice tray lf the ice maker isn't used for a long Fig.3 period, ice cubes that are just produced might have unpleasant odor and / or taste. You must take out and clean the ice cube tray. Open the upper drawer in the freezer compartment, rotate the knob of ice maker counterclockwise by 90°, turn...
- Page 17 Removal and installation of ice maker assembly Fig.4 If the ice maker is not being used, Ice maker's it can be removed to provide power socket maker's additional storage space for frozen hook Ice maker's goods. power plug Push the Ice Maker button on the control panel at the refrigerator door and confirm the icemaking icon disappears.
-
Page 18: Door Handles
Handle Installation Assembly instructions of refrigerator door handle: Inner socket head cap 1. Find the mounting studs in the screw for handle fixing refrigerator. Thread by hand into the receivers on the door face. Bolt Tighten snug using an appropriate screw driver. -
Page 19: Making Minor Adjustments Between Doors
Making minor adjustments between doors Remember a level refrigerator is necessary for getting the doors perfectly even. If doors are uneven, follow the procedure below to raise the lower door up to be even with the higher door Do as follows 1) Raise the left door or the right door. -
Page 20: Installing The Water Line
Installing the water line The appliance can be connected to a water line using a standard 1/4" ice maker connection kit available at your Cold water line dealer or at hardware or plumbing stores. Pipe clamp Connecting to the water supply line 1. - Page 21 Water connector ice maker connection kit (not supplied). Turn on water and ensure there are no leaks. Fulgor Milano is not responsible for water damage due to improperly connected water lines. Only connect the water line to a drinkable water source.
- Page 22 Appliance Functions 13 15 17 14 16 Control buttons Energy saving mode Refrigerator temperature control Ice-making switch Freezer temperature control Child Lock Auto mode Display items Off icon: means refrigera Fast-cooling icon Locked icon shut down Fast-freezing icon Refrigerator compartment icon Refrigerator temperature Freezer compartment icon Energy-saving icon...
- Page 23 Appliance Functions Energy saving mode In order to save energy, this mode sets the temperature in the refrigerator at 7℃ and the temperature in the freezer at -15℃, “AUTO” mode default settings are 5℃ and -18 ℃, respectively . To activate the “Energy Saving”mode, Press the ENERGY SAVING MODE button and the “ENERGY SAVING”icon will illuminate.
- Page 24 Appliance Functions Fast-freezing mode This function is used to counteract a sudden rise in the freezer compartment in order to preserve the nutritional content of the food. It is recommended that this mode be activated at least two hours before a large quantity of items are placed into the freezer.
- Page 25 Appliance Functions To s et the temperature of the freezer compartment Press the FRZ.TEMP button and the Freezer Temperature digital display will illuminate. To change the temperature setting, press the FRZ. TEMP. button again, until the desired temperature is displayed. The temperature of the freezer compartment can be adjusted between -13 and -22 degrees C with a step of 1°C or between 9 and -8 degrees Fahrenheit wi th a step of 1 °F .
-
Page 26: Cleaning And Maintenance
Cleaning and maintenance Refrigerator's maintenance and repair Cleaning Clean regularly dust from the back of refrigerator and floor Clean regularly the space inside the refrigerator to avoid any unpleasant odor. Before cleaning, pull out the plug and use soft towels and neutral detergent and y l l . - Page 27 Distinctive Appliances Service Department Toll free: 1-800-361-0799 Email: service@distinctive-online.com www.distinctive-online.com For Western Canada (Manitoba -> west): Pacific Specialty Brands Service Department Email: service@pacificspecialtybrands.com or Toll free: 1-877-430-5253x106 For United States: Fulgor-Milano USA Service Email: fulgor@adcoservice.com or Toll free: 1-855-4-fulgor (855-438-5467)
-
Page 28: Operation
If power cables are damaged, please get it changed by a qualified technician recommended / assigned by our Service Centers to avoid any risk. Sounds attributable to normal operation During cooling cycles, the sound of refrigerant traveling through the capillary into the evaporator may manifest as gurgling, hissing or occassionally popping. - Page 29 Lea las instrucciones sobre instalación y operación antes de utilizar su refrigera- dor y guárdelas en un lugar seguro para futuras consultas. Fulgor una vez más Consejos ambientales papel y cartón y enviarlos a las compañias de reciclaje.
- Page 30 29 Fulgor...
- Page 31 30 Fulgor...
- Page 32 31 Fulgor...
- Page 33 32 Fulgor...
- Page 34 33 Fulgor...
- Page 35 34 Fulgor...
- Page 36 35 Fulgor 1 inch 1 inch 1 inch 1 inch 1 inch 1 inch...
- Page 37 36 Fulgor...
- Page 38 37 Fulgor...
- Page 39 38 Fulgor...
- Page 40 39 Fulgor...
- Page 41 40 Fulgor...
- Page 42 41 Fulgor...
- Page 43 42 Fulgor...
- Page 44 43 Fulgor...
- Page 45 44 Fulgor...
- Page 46 45 Fulgor...
- Page 47 46 Fulgor...
- Page 48 47 Fulgor...
- Page 49 48 Fulgor 13 15 17 14 16...
- Page 50 49 Fulgor...
- Page 51 50 Fulgor...
- Page 52 51 Fulgor...
- Page 53 52 Fulgor...
- Page 54 53 Fulgor...
- Page 55 Attention Le réfrigérateur que vous venez d'acheter pourrait être légèrement différent de celui qui est présenté dans les schémas de ce manuel. Toutefois, la conception globale est la même. Veuillez lire les informations concernant son fonctionnement. Ce réfrigérateur est conçu uniquement pour un usage domestique.
- Page 56 Sécurité Pour les enfants l'intérieur et de se faire mal en cas de chute de l'appareil. Éloignez les enfants du réfrigérateur lors de l'ouverture et de la fermeture des portes. pas être effectués par les enfants sans supervision. Attention AVERTISSEMENT : Le réfrigérateur doit être déconnecté de la source d'alimentation électrique avant toute tentative d'installation d'accessoire.
- Page 57 Pour les utilisateurs Ne débranchez jamais la fiche en tirant le câble d'alimentation. Il faut toujours tenir la fiche pour l'enlever de la prise Le câble d'alimentation ne doit pas être placé sous le réfrigérateur ou les pieds. Lorsque le réfrigérateur est éloigné...
- Page 58 Transport et disposition de votre réfrigérateur Transport Tenir droit et éviter les pressions et les vibrations pendant le transport. Évitez de former un angle dépassant 45 degrés lors du transport. Évitez que la porte ou la partie supérieure subisse une grande pression pendant le transport, dans le cas contraire, elle pourrait se déformer.
-
Page 59: Nettoyage Et Entretien
Nettoyage et entretien Entretien et nettoyage de réparation du réfrigérateur Nettoyez régulièrement la poussière l'arrière du réfrigérateur et la terre. Nettoyez régulièrement l'espace intérieur du réfrigérateur pour éviter toute odeur désagréable. Avant le nettoyage, débranchez la fiche et utilisez des tissus doux ainsi que des détergents neutres. Nettoyez avec de l'eau propre. - Page 60 Description du produit réfrigérateur 2. Porte gauche du compartiment du 7. Poignée du tiroir réfrigérateur 8. Machine à glaçon manuelle 3. Porte supérieure du compartiment 9. Pelle à glaçons congélateur 10. Plaque de partition pour tiroir de la partie 4. Porte inférieure pour compartiment inférieure du congélateur congélateur 11.
- Page 61 1. Porte gauche du compartiment du 15. Couvercle du conduit d'air réfrigérateur 16. Couvercle pour conduit d'air 2. Tablette coulissante en porte à faux 17. Étagère en porte à faux rabbatable 3. Rabat de porte étanche 18. Ampoule latérale d u réfrigérateur 4.
- Page 62 Installation Enlevez tous les matériaux d’emballage avant de commencer à utiliser le nouveau réfrigérateur. Il s’agit entre autres de la base en mousse et du ruban adhésif qui maintiennent les accessoires du réfrigérateur à l’intérieur et à l’extérieur. Nettoyez les parties intérieure et extérieure du réfrigérateur avec un tissu mouillé...
- Page 63 Astuces: La température intérieure pourrait prendre Commencer à utiliser un certain temps pour atteindre l'équilibre si la Avant de commencer à utiliser, vous devez avoir température de réglage est changée ou si d'autres une bonne connaissance de toutes les précautions aliments sont mis dans le réfrigérateur.
- Page 64 Compartiment réfrigérateur Bien que la température de réglage de l'appareil Réglage de l'étagère en porte à faux puisse maintenir l'ensemble du compartiment Extrémité supérieure réfrigérateur à une température variant entre 2~8C, elle n'arrive pas à préserver la fraîcheur des aliments pendant longtemps. Le compartiment Extrémité...
- Page 65 Suggestions d'aliments à Suggestions d'aliments à sauvegarder sauvegarder dans le compartiment dans le compartiment congélateur 1. Le tiroir supérieur du congélateur pourrait être réfrigérateur utilisé pour stocker le poisson, la viande, la crème... 1. Les aliments de blé cuits, les boîtes de 2.
- Page 66 Enlèvement et installation du tiroir Butée arrière pour tiroir inférieur inférieur du congélateur 1. Enlevez premièrement le tiroir inférieur du congélateur. partition du tiroir inférieur du congélateur à l'aide d'un tournevis et retirez la plaque de partition. 3. Enlevez la butée inférieure du tiroir inférieur tel qu'indiqué...
- Page 67 Grand tiroir Crochet Le grand tiroir possède une charge maximale de 10kg. Retirer et installer le grand tiroir Boîte 1. Retirer le grand tiroir ; à tiroir Glissière 2. Trouver le crochet sur les côtés gauche et droite du fond du tiroir (représenté sur la figure). 3.
- Page 68 Poignées de la porte Vis à tête cylindrique Instructions d'assemblage de la poignée de la poignée du réfrigérateur: 1. Retirez premièrement les vis de réglage du réfrigérateur, utilisez ensuite le tournevis cru- ciforme pour ajuster la vis de la porte. Serrez Poignée de la porte d u r é...
- Page 69 Effectuer des petits réglages entre les portes Rappelez-vous qu'il est nécessaire que le réfrigérateur soit stable pour un meilleur réglage des portes. Si vous avez besoin d'aide, veuillez consulter la section précédente portant sur la mise à niveau du réfrigérateur Lorsque la porte gauche est inférieure à la porte droite (gauche). Lorsque la porte droite est inférieure à...
- Page 70 Machine à glaçons INSTRUCTIONS 1- Lorsque le réfrigérateur est utilisé pour la première fois, attendez au moins 20 minutes avant de démarrer la machine à glaçons. La machine à glaçons est capable de produire environ 1.2 à 1,7 kg (2,5 à 3,75 lbs) de glace en 24 heures, dépendamment de la température du compartiment congélateur, de la température ambiante, de la fréquence de l’ouverture/fermeture de la porte et d’autres conditions de travail.
- Page 72 Introduction des fonctions de votre réfrigérateur 13 15 17 14 16 1. Panneau de contrôle du 3. Mode économie d'énergie 5. Machine à glaçons réfrigérateur 6. Verrouillage enfant Mode automatique Panneau de contrôle du congélateur 7. Icône du mode de 12.Icône de verrouillage 17.Icône d'arrêt : Renvoie à...
- Page 73 Introduction des fonctions de votre réfrigérateur Mode économie d'énergie Entrée: Appuyez sur la touche 5, l'icône 10 s'allume. Choisissez le mode d'économie d'énergie pour mett- re le réfrigérateur en marche. Le mode précédent sera supprimé. Quitter: Pour entrer dans d'autres modes, appuyez sur la touche 2 ou 4 pour régler la température, appuyez sur la touche 5.
- Page 74 Solutions aux problèmes Veuillez lire attentivement ce qui suit avant de nous contacter pour un problème de réparation : Cause probable / Inspections d'éléments Occurrence L'appareil ne fonctionne pas La tension est-elle trop faible ? La température serait réglée à un degré très élevé (réduire la température si nécessaire) ? Grande quantité...
Need help?
Do you have a question about the FM36CDFDS1 and is the answer not in the manual?
Questions and answers