Advertisement
Quick Links
Advertisement

Related Manuals for QHYCCD QHY16200A


Summary of Contents for QHYCCD QHY16200A
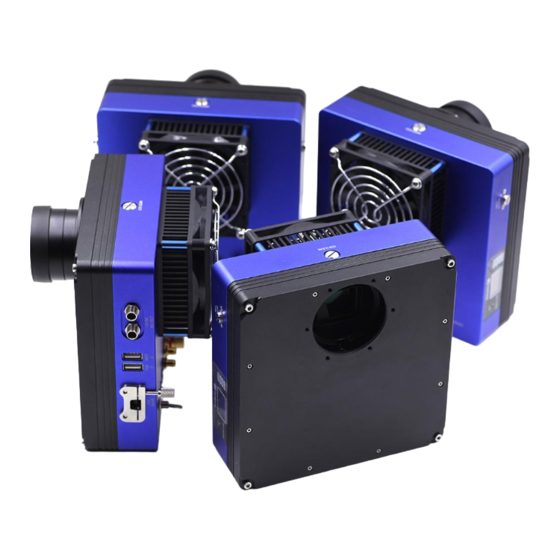
- Page 1 All-in-one COLDMOS Astronomy Camera QHY16200A User’s Manual Rev. 1.0...
-
Page 2: Package Contents
QHY16200A This document is an online document. You may save this PDF file or print it out. QHYCCD reserves the right to change this user manual without prior notice. Package Contents Please confirm that the package contains the following items:... - Page 3 QHY16200A Table of Contents 01 Software Installation 02 Filter installation 03 Use QHY16200A in EZCAP_QT 04 Use QHY16200A on ASCOM platform 05 Use QHY16200A in FireCapture Peripheral Ports on QHY16200A 07 FAQ 08 Camera Maintenance 09 Specifications 10 Mechanical Dimensions...
-
Page 4: Software Installation
Note that when you run its driver setup program, you will be prompted to install camera driver, network card driver, and FTDI Serial port driver. Since IC16200A and QHY16200A use the same system driver and there's no network card in the QHY16200A, the network driver is actually no use. -
Page 5: Usb Cable
QHY16200A Note that after you downloading and installing the new drivers by using this software, be sure to pull the USB cable out and then plug it in to enable the new drivers. - Page 6 4. Install the top cap. Now we have finished installing filters, we are going to introduce how to use QHY16200A in EZCAP_QT, MAXIMDL, and Sequence Generator Pro.
- Page 7 03 Use QHY16200A in EZCAP_QT EZCAP_QT is the software developed by QHYCCD. This software has the basic capture function for QHYCCD deep sky cameras. You can use this QHY16200A camera with its built-in filter wheel in this software. 1. Install EZCAP_QT 2.
- Page 8 TEC, you can select "TEC OFF". If you just want to set the TEC power but not the temperature. You can select "Manual" and then set the percent of the TEC power. The CCD of QHY16200A is very big, so it takes a while to achieve the target temperature. Be patient while you are waiting.
- Page 9 7. In EZCAP_QT there is a planner for image tasking. You can capture a series images by using the table below. 8. Typical QHY16200A Dark/Flat/Calibrated Images with Grade2 sensor This is a typical Dark Frame at 300sec exposure, -15C, gain=0. Part of the image. 1:1 zoom...
- Page 10 QHY16200A Stretch to background level Stretch to Max Range A typical 10sec 4*4binning Dark Frame with all the region of the image. The vertical blank banding on the right of the image is the overscan area. The overscan area is important for overscan calibration.
- Page 11 QHY16200A...
- Page 12 ASCOM connection and does not support the ASCOM VIDEO connection. Please note that QHY16200A always transfers maximum bit depth by ASCOM to make the best DSO imaging performance. The image format is 16bit width and patch zero on low bit.
- Page 13 QHY16200A Normally, you can set the gain=1 and offset=10 to start. Keep clicking "Okay" to return to Camera Control window. The following instructions are going to show you how to configure the built-in filter wheel in MAXIMDL. Click "Setup Filter" in the Camera Control window.
- Page 14 QHY16200A In the window shown below, you can set up your filter wheel.
- Page 15 QHY16200A Keep clicking "OK" to return to the Camera Control window. Click "Connect"...
- Page 16 QHY16200A...
- Page 17 Open sequencer by clicking the button in the red rectangle as shown in the picture below. If you've connected QHY16200A to your PC before click that red button. The red button will turn to green as shown in the picture below.
- Page 18 QHY16200A The next step is going to configure the built-in filter wheel. Before you select QHYCCD Filter wheel as the filter and click the red connect button, you should also make sure you've downloaded and installed the ASCOM Filters Plug for the built-in filter wheel, you've plugged in the 12V power supply cable, and the initialization of filter wheel has been finished.
- Page 19 QHY16200A For example, you can change the filter names to Lum, Red, Green, Blue, and Ha as you installed them this way. Then you make schedule events to take turns to use these filters as shown in the following picture.
- Page 20 QHY16200A...
- Page 21 By default, it will be installed in the "Documents" folder. After it was installed successfully, navigate to "Document folder", and you will find its installation folder as shown below. Enter that folder and run "FireCapture.exe", then select QHYCCD camera. And after the loading, you will see the image on FireCapture like shown below.
- Page 22 QHY16200A 06 Peripheral Ports on QHY16200A Note that the camera used in the picture above isn’t QHY16200A, it is QHY16803A. They have the same peripheral ports. Serial ports QHY16200A provides two serial ports, which are connected to the built-in USB hub through FTDI USB to Serial chip.
- Page 23 If you have no experience about it, please consult professional electrician. Caution: Never connect the grounding port to any electrical socket or outlet, otherwise, electrical shock may happen. Note that the camera used in the picture above isn’t QHY16200A, it is QHY16803A. They have the same peripheral ports.
-
Page 24: Usb Hub Bypass Board
QHY16200A 12V power ports These two ports are connected in parallel, so you can either one of these two as power input port and use the other one as a power output port for other devices that need 12V power supply. - Page 25 CCD, and you may damage the internal circuit when you open the camera. QHYCCD provides CCD clean service. The cleaning fee is 100 USD per time and it doesn't include the shipping cost. If you really want to clean it on your own, you can follow the instructions below.
- Page 26 QHY16200A You need to prepare the tools by yourself to open the camera.
- Page 27 QHY16200A Remove all the screws on front of the camera case and remove the front case...
- Page 28 QHY16200A You will see two screws to fix the filter wheel case (the middle layer of the camera). Unscrew them.
- Page 29 QHY16200A You will see the power PCB board. Remove the two screw of the power PCB board...
- Page 30 QHY16200A Remove the three cable carefully. Please use a film to protect the CCD chamber optic window.
- Page 31 QHY16200A The CCD chamber is connecting with the silicone gel tube socket by a rubber pipe. Remove the two screw for the silicone gel socket.
- Page 32 QHY16200A Remove the four screw for the CCD chamber. There is totally eight screws for the CCD chamber. Only remove the four screws pointed by the red arrows in this picture.
- Page 33 QHY16200A Now the CCD chamber is removed. The CCD sensor can be clean here.
- Page 34 (like the DLSR sensor clean tools) 3. How to protect the cooler in QHY16200A? The cooler in QHY16200A can lower the CCD temperature to a value that's almost 40 degrees centigrade below the ambient temperature. So you need to be careful to avoid thermal shock, which refers to when the cooler's temperature rises or fall dramatically, the cooler is subjected to strong internal stress due to contraction principle.
-
Page 35: Specifications
QHY16200A 4. What's small display on the camera for? The OLED display is used for display certain formation related to the shooting. It is directly driven by application program. So it may display different information or doesn't display anything at all based on different application programs. Currently all application program don't support this display, please wait for latest application program that supports this display. - Page 36 OAG-M and QHY16200M. If you are using other guider. We are not guarantee the back focus is suitable for them due to the very short back focus of the QHY16200A. The thickness of QHYOAG-M is 10mm and the M53 adapter is 3mm. So the totally back focus addon is 13mm.
-
Page 37: Camera Maintenance
If the environment humidity is very high, the optic window of the CCD chamber may get dew. The QHY16200A has the build-in heat board on this optic window to heat the optic window to avoid it. In most conditions it can take effect. - Page 38 QHY16200A 9 Specifications CCD Sensor APS-H 16.2mega CCD sensor Standard Grade Effective Pixels 4540(H)*3630(V), 16mega pixels Pixel Size 6.0um*6.0um Effective Area 27.0mm(H)*21.6mm(V), APS-H format Readout Type Full Frame CCD, Progressive Scan FullWell Typical 41ke 16bit Readout Noise Typical 10 e System Gain 0.7e/adu...
-
Page 39: Mechanical Dimensions
QHY16200A 10 Mechanical Dimensions Back Focus: 33.5mm to 34mm. This distance has includes the distance from CCD chip to CCD surface. - Page 40 QHY16200A...
- Page 41 QHY16200A When connected with the OAG-M. The back focus is 33.5/34 +13=46.5mm/47mm...
-
Page 42: Revision History
QHY16200A 11 Revision history Date of change Revision Content of change January 11, First edition 2017...
Need help?
Do you have a question about the QHY16200A and is the answer not in the manual?
Questions and answers