Table of Contents
Advertisement
Available languages
Available languages
ATTACH YOUR RECEIPT HERE
Serial Number ________________________________ Purchase Date _________________________________
Questions, problems, missing parts? Before returning to your retailer, call our
customer service department at 1-877-447-4768, 8:30 a.m. – 4:30 p.m. CST,
Monday – Friday or log on to customerservice@ghpgroupinc.com.
70-10-585
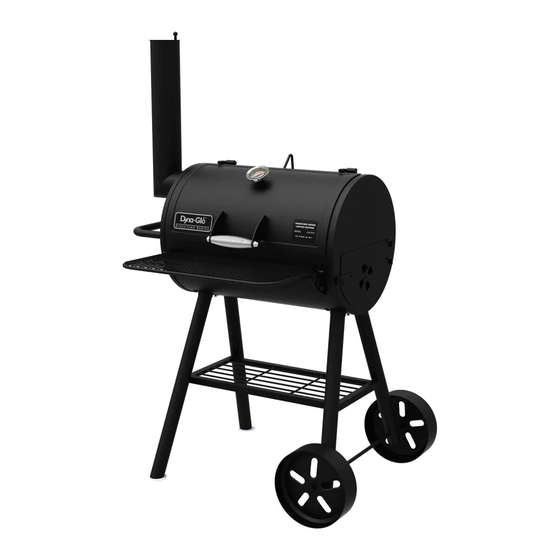
Barrel Charcoal Grill
1
Heavy-Duty
MODEL #DGSS675CB-D /
DGSS675CB
Français p. 19
Español p. 37
Rev. 12/1/16
Advertisement
Chapters
Table of Contents

Related Manuals for Dyna-Glo DGSS675CB-D


Summary of Contents for Dyna-Glo DGSS675CB-D
- Page 1 Heavy-Duty Barrel Charcoal Grill MODEL #DGSS675CB-D / DGSS675CB Français p. 19 Español p. 37 ATTACH YOUR RECEIPT HERE Serial Number ________________________________ Purchase Date _________________________________ Questions, problems, missing parts? Before returning to your retailer, call our customer service department at 1-877-447-4768, 8:30 a.m. – 4:30 p.m. CST, Monday –...
-
Page 2: Table Of Contents
TABLE OF CONTENTS Safety Information ........................2 Package Contents ........................4 Hardware Contents ........................5 Preparation ..........................5 Assembly Instructions ........................ 6 Operation Instructions ......................... 14 Care and Maintenance ........................ 15 Warranty ............................16 Replacement Parts List ......................17 SAFETY INFORMATION Please read and understand this entire manual before attempting to assemble, operate, or install the product. - Page 3 SAFETY INFORMATION • Use caution when assembling and operating this unit to avoid cuts and scrapes from edges. • DO NOT use this product in a manner other than its intended purpose. It is NOT intended for commercial use. It is NOT intended to be installed or used in or on a recreational vehicle and/or boats.
-
Page 4: Package Contents
PACKAGE CONTENTS PART DESCRIPTION QUANTITY PART DESCRIPTION QUANTITY Access Door Latch Left Leg - Front / Rear Side Access Door Front Shelf Side Damper Plate Bottom Shelf Grill Body Wheels Lid Assembly Grease Cup Support Cooking Grates Wheel Axle Charcoal Grates Right Leg - Front / Rear Smoke Stack Damper Shelf Bracket - Left... -
Page 5: Hardware Contents
HARDWARE CONTENTS M6 x 12 M6 Nut M6 Flat M12 Nut M6 Lock Nut M6 x 14 M5 x 13 M5 Nut Bolt Washer Bolt Bolt Qty. 31 Qty. 28 Qty. 16 Qty. 2 Qty. 1 Qty. 1 Qty. 1 Qty. -
Page 6: Assembly Instructions
ASSEMBLY INSTRUCTIONS CAUTION: This unit is HEAVY! Do not attempt to handle this unit without assistance! Remove the pre-installed bolt and washer from Pre-installed the left lid hinge on the grill body (D) and slide the Hardware lid (E) off the grill body hinges. Attach the left front leg (M) and right front leg (S) using four M6 x 12 bolts (AA), four M6 nuts (BB) and four M6 flat washers (CC) per leg. - Page 7 ASSEMBLY INSTRUCTIONS Before attaching the rear legs, insert the bottom shelf (O) posts into the holes located on all four legs. With the bottom shelf (O) securely in place, attach the left rear leg (M) and right rear leg (S) using four M6 x 12 bolts (AA), four M6 nuts (BB) and four M6 flat washers (CC), per leg.
- Page 8 ASSEMBLY INSTRUCTIONS Attach side handle (L) to the left side of the grill body (D) using four M6 x 12 bolts (AA) and four M6 nuts (BB). Hardware Used M6 x 12mm Bolt M6 Nut Place the smoke stack gasket (K) between the grill body (D) and the smoke stack (I) and attach using four M6 x 12 bolts (AA) and four M6 nuts (BB).
- Page 9 ASSEMBLY INSTRUCTIONS Attach the smoke stack damper (H) using the pre-installed spring and nut. Insert the end of the grease cup support (Q) into the hole located on the bottom of the smoker body (D). Thread the support through the hole until the support is hanging as shown.
- Page 10 ASSEMBLY INSTRUCTIONS Attach the right shelf bracket (U) to the grill body (D), using two M6 x 12 bolts (AA) and two M6 nuts (BB), and insert the shelf support wire into the bracket, as shown. Insert the shelf supports into the left shelf bracket (T), before securing the bracket with two M6 x 12 bolts (AA) and two M6 nuts (BB).
- Page 11 ASSEMBLY INSTRUCTIONS Attach the lid assembly (E) to the hinges on the Pre-installed Hardware grill body (D) using the pre-installed bolt and washer. Attach the side damper plate (C) to the inside of the the access door (B) using one M6 x 12 bolt (AA) and one M6 lock nut (EE).
- Page 12 ASSEMBLY INSTRUCTIONS Screw one M6 x 14 shoulder bolt (FF) into the grill body (D). Attach the access door (B) to the grill body (D) by sliding the hinge rods into the hinge openings on the grill body (D). Latch the access door (B) by pivoting the door latch (A) onto the M6 x 14 bolt on the grill body (D).
- Page 13 Attach the offset support bracket (V) to the right front and right rear leg (S) using two M6 x 12 bolts (AA). Note: This bracket is used to support Dyna-Glo smoker box model DGSS287CB-D (Sold Separately) Hardware Used M6 x 12mm...
-
Page 14: Operation Instructions
OPERATING INSTRUCTIONS BEFORE FIRST USE Remove all hangings or plastic straps, if present. It is important to "season" your grill, prior to cooking food. Seasoning seals the paint and interior of your smoker to enhance flavoring, durability and overall performance. To season your grill, simply use it as you normally would without adding food. -
Page 15: Care And Maintenance
CARE AND MAINTENANCE AFTER USE SAFETY AND MAINTENANCE WARNING • Use caution when lifting and moving the unit to avoid strain injuries. Two people are recommended to lift or move the unit. • DO NOT store the unit near gasoline or other combustible liquids or where combustible vapors may be present. -
Page 16: Warranty
This warranty gives you specific legal rights, and you may have other rights that vary from state to state. GHP Group Inc. 6440 W. Howard Street Niles, IL, USA 60714-3302 Item name: Heavy-Duty Barrel Charcoal Grill Model #: DGSS675CB / DGSS675CB-D... -
Page 17: Replacement Parts List
REPLACEMENT PARTS LIST For replacement parts, call our customer service department at 1-877-447-4768, 8:30 a.m. - 4:30 p.m. CST, Monday - Friday or log on to customerservice@ghpgroupinc.com. PART DESCRIPTION PART # PART DESCRIPTION PART # Side Access Front Shelf 70-01-566 Bottom Shelf 70-01-559 Door Latch... - Page 18 REPLACEMENT PARTS LIST 70-10-585 Printed in China...
- Page 19 Barbecue au charbon haute-capacité cylindrique MODÈLE N DGSS675CB-D/ DGSS675CB Français p. 19 Español p. 37 AGRAFEZ VOTRE FACTURE ICI Numéro de série ________________________________ Date d’achat _________________________________ Des questions, des problèmes, des pièces manquantes? Avant de retourner chez votre détaillant, appelez notre service à la clientèle au 1 877 447-4768, entre 8 h 30 et 16 h 30 (HNC), du lundi au vendredi ou écrivez à...
-
Page 20: Informations Relatives À La Sécurité
TABLE DES MATIÈRES Informations relatives à la sécurité ..................... 20 Contenu de l’emballage ......................22 Quincaillerie fournie ........................23 Préparation ..........................23 Instructions d’assemblage ......................24 Instructions de fonctionnement ....................32 Entretien et maintenance ......................33 Garantie ............................34 Liste des pièces de rechange ....................35 INFORMATIONS RELATIVES À... - Page 21 INFORMATIONS RELATIVES À LA SÉCURITÉ • N’entreposez PAS l’appareil près d’essence ou d’autres liquides combustibles, ni dans des endroits où des vapeurs combustibles peuvent être présentes. • Ne rangez et n’utilisez PAS le produit dans un endroit accessible aux enfants ou aux animaux domestiques.
-
Page 22: Contenu De L'emballage
CONTENU DE L’EMBALLAGE PIÈCE DESCRIPTION QUANTITÉ PIÈCE DESCRIPTION QUANTITÉ Loquet de la porte d’accès Pied gauche – avant/arrière Porte d’accès latérale Tablette avant Registre latéral Tablette inférieure Bâti du barbecue Roues Couvercle Support du récupérateur Grilles de cuisson de graisse Grilles à... -
Page 23: Quincaillerie Fournie
QUINCAILLERIE FOURNIE Boulon Écrou M6 Rondelle Écrou M12 Écrou de Boulon Boulon Écrou M5 M6 x 12 mm plate M6 blocage M6 M6 x 14 mm M5 x 13 mm Qté 31 Qté 28 Qté 16 Qté 2 Qté 1 Qté... -
Page 24: Instructions D'assemblage
INSTRUCTIONS D’ASSEMBLAGE MISE EN GARDE : Cet appareil est LOURD. Ne tentez pas de le manipuler sans aide! Retirez le boulon et la rondelle préinstallés sur Quincaillerie la charnière gauche du couvercle du bâti du préinstallée barbecue (D) et glissez le couvercle (E) hors des charnières du bâti du barbecue. - Page 25 INSTRUCTIONS D’ASSEMBLAGE Avant de fixer les pieds arrière, insérez les tenons de la tablette inférieure (O) dans les trous situés sur les quatre (4) pieds. Une fois la tablette inférieure (O) bien en place, fixez les pieds arrière gauche (M) et droit (S) à l’aide de quatre (4) boulons M6 x 12 mm (AA), de quatre (4) écrous M6 (BB) et de quatre (4) rondelles plates M6 (CC) par pied.
- Page 26 INSTRUCTIONS D’ASSEMBLAGE Fixez la poignée latérale (L) au côté gauche du bâti du barbecue (D) à l’aide de quatre (4) boulons M6 x 12 mm (AA) et de quatre (4) écrous M6 (BB). Matériel utilisé Boulon M6 x 12 mm Écrou M6 Placez le joint de la cheminée (K) entre le bâti du barbecue (D) et la cheminée (I) et fixez le tout à...
- Page 27 INSTRUCTIONS D’ASSEMBLAGE Fixez le clapet d’aération de la cheminée (H) à l’aide du ressort et de l’écrou préinstallés. Insérez l’extrémité du support du récupérateur de graisse (Q) dans le trou situé au fond du bâti du barbecue (D). Faites glisser le support dans le trou jusqu’à...
- Page 28 INSTRUCTIONS D’ASSEMBLAGE Fixez le support de tablette de droite (U) au bâti du barbecue (D) à l’aide de deux (2) boulons M6 x 12 mm (AA) et de deux (2) écrous M6 (BB). Insérez les tiges de la tablette dans le support comme illustré.
- Page 29 INSTRUCTIONS D’ASSEMBLAGE Fixez le couvercle (E) aux charnières du bâti Quincaillerie préinstallée du barbecue (D) à l’aide du boulon et de la rondelle préinstallés. Fixez le registre latéral (C) à l’intérieur de la porte d’accès (B) à l’aide d’un (1) boulon M6 x 12 mm (AA) et d’un (1) écrou de blocage M6 (EE).
- Page 30 INSTRUCTIONS D’ASSEMBLAGE Vissez un (1) boulon à épaulement M6 x 14 mm (FF) dans le bâti du barbecue (D). Fixez la porte d’accès (B) au bâti du barbecue (D) en faisant glisser les tiges de la charnière dans les trous de la charnière du bâti du barbecue (D).
- Page 31 (V) aux pieds avant et arrière droit (S) à l’aide de deux (2) boulons M6 x 12 mm (AA). Remarque : Ce support sert à soutenir la chambre de combustion du fumoir décalé Dyna-Glo DGSS287CB-D (vendu séparément). Matériel utilisé Boulon M6 x 12 mm...
-
Page 32: Instructions De Fonctionnement
INSTRUCTIONS DE FONCTIONNEMENT AVANT LA PREMIÈRE UTILISATION Retirez tous les emballages et toutes les attaches de plastique, le cas échéant. Avant la cuisson des aliments, il est important de culotter le barbecue. Le culottage permet de sceller la peinture et l’intérieur de l’appareil pour améliorer le goût des aliments, en plus d’augmenter la durabilité... -
Page 33: Entretien Et Maintenance
à l’aide de gants résistants à la chaleur, de même qu’à l’aide de pinces en métal ou d’une pelle à cendres Dyna-Glo (en option) ou autre. Placez les cendres dans du papier d’aluminium. Trempez- les complètement dans l’eau avant de les jeter dans un contenant incombustible. -
Page 34: Garantie
GHP Group, Inc. 6440 W. Howard St. Niles, IL, États-Unis 60714-3302 Nom de l’article : Barbecue au charbon haute-capacité cylindrique de modèle : DGSS675CB/DGSS675CB-D... -
Page 35: Liste Des Pièces De Rechange
Support du récupérateur de graisse 70-01-554 (sans le couvercle) 70-01-531 Couvercle (sans Axe de roue 70-01-513 Pied droit – avant/ l’insigne Dyna-Glo et la jauge de température) 70-01-601 arrière (1) 70-01-555 Support de tablette Grille de cuisson (1) 70-01-599 avant – gauche 70-01-590 Grille à... - Page 36 LISTE DES PIÈCES DE RECHANGE 70-10-585 Imprimé en Chine...
- Page 37 Resistente parrilla de tambor a carbón MODELO N.° DGSS675CB-D / DGSS675CB Français p. 19 Español p. 37 ADJUNTE SU RECIBO AQUÍ Número de serie ________________________________ Fecha de compra _____________________________ ¿Dudas, problemas, piezas faltantes? Antes de volver a la tienda, llame a nuestro Departamento de Atención al Cliente al 1-877-447-4768, de lunes a viernes de 8:30 a...
-
Page 38: Información De Seguridad
CONTENIDO Información de seguridad ......................38 Contenido del paquete ........................ 40 Herramientas y tornillería......................41 Preparación ..........................41 Instrucciones de ensamblaje ...................... 42 Instrucciones de funcionamiento ....................50 Cuidado y mantenimiento ......................51 Garantía ............................52 Lista de piezas de repuesto ....................... 53 INFORMACIÓN DE SEGURIDAD Lea el manual entero atentamente antes de intentar ensamblar, poner en funcionamiento o instalar el producto. - Page 39 INFORMACIÓN DE SEGURIDAD • NO utilice este producto con una finalidad para la que no fue diseñado. NO está diseñada para uso comercial. NO está diseñada para ser instalada o utilizada en interiores ni sobre casas rodantes o embarcaciones. • NO guarde esta unidad cerca de gasolina u otros líquidos combustibles o donde podría haber otros vapores combustibles.
-
Page 40: Contenido Del Paquete
CONTENIDO DEL PAQUETE PIEZA DESCRIPCIÓN CANTIDAD PIEZA DESCRIPCIÓN CANTIDAD Cerrojo de puerta lateral Pata izquierda - Frontal/trasera Puerta de acceso lateral Estante frontal Plato regulador lateral Estante inferior Estructura de la parrilla Ruedas Conjunto de la tapa Soporte de la grasera Rejilla para cocinar Eje de las ruedas Rejillas para carbón... -
Page 41: Herramientas Y Tornillería
HERRAMIENTAS Y TORNILLERÍA Perno Tuerca Arandela Tuerca Contratuerca Perno Perno Tuerca M5 M6 × 12 plana M6 M6 × 14 M5 × 13 Cant. 31 Cant. 28 Cant. 16 Cant. 1 Cant. 1 Cant. 1 Cant. 1 Cant. 2 PREPARACIÓN Antes de comenzar a ensamblar el producto, asegúrese de tener todas las piezas. -
Page 42: Instrucciones De Ensamblaje
INSTRUCCIONES DE ENSAMBLAJE PRECAUCIÓN: Esta unidad es PESADA. No intente manipular esta unidad sin ayuda. Quite el perno y la arandela preinstalados de la Tornillería bisagra izquierda de la tapa de la estructura de la preinstalada parrilla (D) y deslice la tapa (E) hacia afuera de las bisagras de la estructura de la parrilla. - Page 43 INSTRUCCIONES DE ENSAMBLAJE Antes de colocar las patas traseras, inserte los pasantes del estante inferior (O) en los orificios ubicados en las cuatro patas. Con el estante inferior (O) colocado firmemente en su lugar, fije la pata trasera izquierda (M) y la pata trasera derecha (S) utilizando cuatro pernos M6 ×...
- Page 44 INSTRUCCIONES DE ENSAMBLAJE Instale la manija lateral (L) en el lado izquierdo de la estructura de la parrilla (D) utilizando cuatro pernos M6 × 12 (AA) y cuatro tuercas M6 (BB). Herramientas y tornillería utilizadas Perno × 4 M6 × 12 mm Tuerca M6 ×...
- Page 45 INSTRUCCIONES DE ENSAMBLAJE Coloque el regulador de tiro de la chimenea (H) utilizando el resorte y la tuerca preinstalados. Inserte el extremo del soporte de la grasera (Q) en el orificio ubicado en la parte inferior de la estructura del ahumador (D). Enrosque el soporte en el orificio hasta que quede colgando como se muestra.
- Page 46 INSTRUCCIONES DE ENSAMBLAJE Fije la abrazadera derecha del estante (U) a la estructura de la parrilla (D) utilizando dos pernos M6 × 12 (AA) y dos tuercas M6 (BB), e inserte el soporte del estante en la abrazadera, como se muestra.
- Page 47 INSTRUCCIONES DE ENSAMBLAJE Fije el conjunto de la tapa (E) a las bisagras de la Tornillería preinstalada estructura de la parrilla (D) utilizando el perno y la arandela preinstalados. Fije el plato regulador de tiro lateral (C) a la parte interior de la puerta de acceso (B) utilizando un perno M6 ×...
- Page 48 INSTRUCCIONES DE ENSAMBLAJE Atornille un perno de tope M6 x 14 (FF) en la estructura de la parrilla (D). Fije la puerta de acceso (B) a la estructura de la parrilla (D) deslizando las varillas de la bisagra dentro de las aberturas de la bisagra en la estructura de la parrilla (D).
- Page 49 (V) a la pata frontal derecha y la pata trasera derecha (S) utilizando dos pernos M6 × 12 (AA). Nota: Esta abrazadera se utiliza para sostener el ahumador Dyna-Glo modelo DGSS287CB-D (se vende por separado). Herramientas y tornillería utilizadas Perno ×...
-
Page 50: Instrucciones De Funcionamiento
INSTRUCCIONES DE FUNCIONAMIENTO ANTES DE UTILIZAR LA UNIDAD POR PRIMERA VEZ Quite todas las presillas o las fajas de plástico, si están presentes. Es importante "curar" la parrilla antes de cocinar alimentos. Este proceso sella la pintura y el interior del ahumador para mejorar el sabor, la durabilidad y el rendimiento en general. -
Page 51: Cuidado Y Mantenimiento
CUIDADO Y MANTENIMIENTO SEGURIDAD Y MANTENIMIENTO DESPUÉS DEL USO ADVERTENCIA • Tenga precaución al levantar y mover la unidad para evitar lesiones por esfuerzo. Se recomienda levantar o mover la unidad entre dos personas. • NO guarde la unidad cerca de gasolina u otros líquidos combustibles o donde podría haber vapores combustibles. -
Page 52: Garantía
Esta garantía otorga derechos legales específicos, y podría haber otros derechos aplicables según el estado. GHP Group Inc. 6440 W. Howard Street Niles, IL, EE. UU. 60714-3302 Nombre del artículo: Resistente parrilla de tambor a carbón N.º de modelo: DGSS675CB/DGSS675CB-D... -
Page 53: Lista De Piezas De Repuesto
LISTA DE PIEZAS DE REPUESTO Para obtener piezas de repuesto, llame a nuestro Departamento de Atención al Cliente al 1-877-447-4768, de lunes a viernes de 8:30 a 16:30 (hora central estándar), o escriba a customerservice@ghpgroupinc.com. PIEZA DESCRIPCIÓN N.º DE PIEZA PIEZA DESCRIPCIÓN N.º... - Page 54 LISTA DE PIEZAS DE REPUESTO 70-10-585 Impreso en China...
Need help?
Do you have a question about the DGSS675CB-D and is the answer not in the manual?
Questions and answers