
Related Manuals for Audio Analogue VIVACE DAC

Summary of Contents for Audio Analogue VIVACE DAC
- Page 1 AUDIO ANALOGUE VIVACE DAC D/A CONVERTER OWNER’S MANUAL MANUALE D’ISTRUZIONI Manual rev 1.0...
- Page 3 Power supply: a toroidal transformer is used with secondary stages dedicated to each part. The analog power supply has been realized using all of Audio Analogue‘s strategies to reduce any interference and kill even the smallest of noise from all of its components.
- Page 4 Sezione DAC: il VIVACE DAC usa il DAC PCM1795 della Texas Instruments, un DAC a 32 bit che può arrivare fino a 200KHz di frequenza di campionamento. Si tratta di un DAC Advanced Segment ad altissime prestazioni con uscita in corrente.
- Page 5 INTRODUCTION AF Group srl, AUDIO ANALOGUE distributor, does not take any responsibilities in the following cases: Whenever the operational procedures related to the use and the maintenance of the equipment as described in this manual are not respected. Whenever damages to the equipment occur because of fixing and modifications made form non-authorized staff or because of normal deterioration of the system.
- Page 6 PREMESSA AF Group srl, distributore AUDIO ANALOGUE, non accetta responsabilità nei casi in cui: Le procedure operative di utilizzo e manutenzione dell’apparato descritte nel manuale non siano rispettate. I danni si verifichino in seguito a riparazioni o modifiche dell’apparato eseguite da personale non autorizzato o a seguito di normale deterioramento dell’apparato.
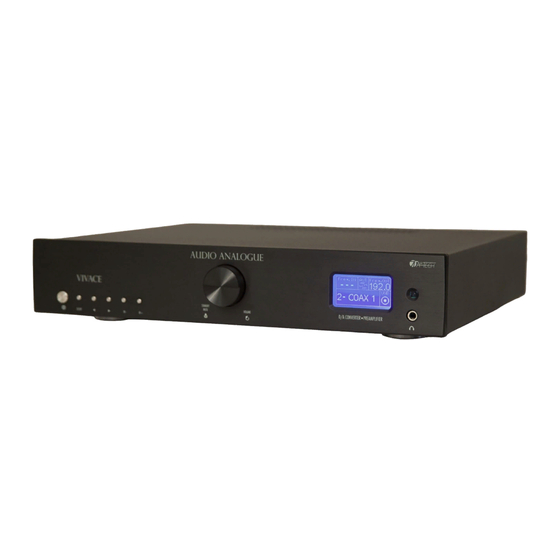
- Page 7 Front panel Power Switch: When in Off position the main voltage is disconnected from the unit. Setup: Actives the Setup ◄ left cursor: enabled only to navigate in the Setup Menu. ► right cursor: enabled only to navigate in the Setup Menu. IN- : pushing the button increases the selected input to the next.
- Page 8 Back Panel Pre outputs (See Notes on PRE Output). Unbalanced analog outputs (See Notes on Unbalanced Output). Balanced right analog output (See Notes on Balanced Output). Balanced Left analog output. AES-EBU digital input (See Notes on AES-EBU Digital input). SPDIF coaxial digital inputs (See Notes on Digital Coaxial input). SPDIF coaxial digital output.
- Page 9 Remote DAC functions • : it changes the selected source. • : it changes the selected source. • MUTE : it activates/de-activates the mute function this feature is enabled only when the Pre Output is selected or the headphone is inserted!!) •...
- Page 10 Please use only high-quality cords with gold plated connectors. At last, check the main switch is in OFF position and then plug the power cord into the VIVACE DAC inlet and into the wall outlet.
- Page 11 Connection examples / Esempi di connessioni Connection via Trigger and Unbalanced connection. VIVACE DAC Fortissimo Integrated Amplifier Collegamento con Trigger e Connessione in Sbilanciato. VIVACE DAC Fortissimo Intergrated Amplifier Right Channel Left Channel settanta settanta Back View Visuale Posteriore Connection via Trigger and Balanced connection.
- Page 12 Powering up the VIVACE DAC When you plug the VIVACE DAC into the power outlet and turn on the power switch on frontal panel the blue led on the front panel turns on showing the unit is connected to the main voltage. Then the unit is in standby mode. To exit the Standby mode and entering the normal operation mode push the Volume Knob (Standby) on the front panel or the “STANDBY DAC”...
- Page 13 Standby mode You can put the VIVACE DAC in standby mode pressing the “STANDBY DAC” button on the remote or keeping the Volume Knob (StandBY) on the front panel pushed for some seconds. When in Stand by Mode the Trigger Output voltage is set to zero and so turns off the connected unit.
- Page 14 "- - -" message is shown on the high left display area while if the signal is sutiable to be converted and managed by the VIVACE DAC the value of the Input Sample Frequency is shown on the display. Compressed digital signal are not accepted.
- Page 15 Notes on the USB connection The USB connection permits you to connect the Hi-Fi system to the PC or MAC. In this way the PC/MAC sees the VIVACE DAC as its audio board and everything which is played on the PC/MAC is reproduced by the VIVACE DAC. This opens up a wide spread of possibilities which we think will be soon appreciated by every, also “old style”, audiophile:...
- Page 16 Software you can use with the VIVACE DAC: As an audio player you can use almost any playback software with the VIVACE DAC to reproduce the audio signal on your PC or MAC. For example: iTunes, Windows Media Player, Foobar2000.
- Page 17 Note sulla connessione USB La connessione USB permette di collegare l’impianto Hi-Fi al PC o al MAC. In questo modo il PC/MAC vede il VIVACE DAC come la sua scheda audio. Pertanto, qualunque segnale audio sul PC/MAC, verrà riprodotto dal VIVACE DAC. Questo approccio apre nuove e innumerevoli possibilità, che saranno sicuramente apprezzate anche dagli audiofili “vecchio stile”.
- Page 18 Note on USB audio mode The VIVACE DAC can play the USB audio streaming in two different mode: adaptive and asynchrounous. This two modes differs for the way the clock is derived. To play the audio streaming transmitted by the PC/MAC is necessary to extract the audio data from the stream and give them to the digital to analog converter with a proper clock for the conversion.
- Page 19 EBU input, 3 SPDIF Coaxial inputs, 4 TOSLINK optical inputs and USBDAC, we have decided to permits the user to choose a different output sample frequency selection criterion for each input. This means the user can set the VIVACE DAC choosing the best setting for each kind of input according to the expected input sample frequency.
- Page 20 Working modes The VIVACE DAC display is diveded into 5 different areas showing all the information about the unit settings and the working mode enabled at the moment.
- Page 21 How entering the menu To enter the menu press the “SETUP” switch on frontal panel or on the remote. When you enter the menu the icon: will be shown in the right down part of the display. To scroll the menu options use the ◄ and ►cursor switches on the remote. Use the “SETUP”...
- Page 22 Frequency Mode Sub Menu / Sotto Menu Freuency Mode Entering this submenu you can choose the sample output frequency selection criterion for the input selected at the time you entered the setup. The possible criterions are: direct, automatic (Auto), custom. Press “SETUP” to enter the submenu.
- Page 23 SELECT OUTPUT Sub Menu / Sotto Menu SELECT OUTPUT Entering this submenu you can choose which output enable. The possible outputs are: General or Specific. Press “SETUP” on the remote to enter the submenu. Entrando in questo sottomenu si può scegliere fra due modalità di selezione della uscite: General o Specific.
- Page 24 Ad esempio se Foobar2000 è attivo e in riproduzione è necessario fermare la riproduzione e chiudere il programma Foobar2000 prima di confermare il cambio di modalità sul VIVACE DAC!! Pressing “SETUP” on the remote enables Asynchrounous mode exits the setup menu and returns the unit to the normal operation mode.
- Page 25 Premendo il tasto “SETUP” sul telecomando si abilitano il Sharp roll-off (come caratteristica del filtro digitale, si esce dal menu di setup e si ritorna al normale funzionamento dell'apparecchio. ◄ ► Premere i tasti cursore per scorrere le varie opzioni. Pressing “SETUP”...
- Page 26 The scale is organized with 79 steps of 1dB each. La scala è organizzata in 79 passi da 1dB ciascuno Pressing “SETUP” exits the submenu and comes back to the main menu setup without memorizing any values. Premendo “SETUP” si esce dal sottomenu e si ritorna al menu di setup principale senza memorizzare alcun parametro.
- Page 27 Pressing “SETUP” on the remote disables the Auto Power Off feature, exits the setup menu and returns the unit to the normal operation mode. ◄ ► Use the switches to scroll the different options. Premendo il tasto “SETUP” sul telecomando si disabilita la funzione di Auto Spegnimento, si esce dal menu di setup e si ritorna al normale funzionamento dell'apparecchio.
- Page 28 Analog Balanced Stereo, Analog Outputs Unbalanced stereo, Headphones output, SPDIF COAXIAL OUTPUT Trigger Out 12V DC Control Control connection ASC100 Audio Analogue multiproduct Remote remote Display Brightness Mode: High, Low, dark-mode Analog Balanced (XLR) output voltage Differential signal, 0dBFS 4.5Vrms...
- Page 29 The unit is on but there is no Contact your Audio Analogue retailer for fuse check sound and substitution If the suggested remedies should not work or the problem is not shown in the list above, please contact your local Audio Analogue retailer. RICERCA GUASTI Sintomo Causa Rimedio Togliere l’apparecchio dallo stato di stand-by...
- Page 30 If this product is used for business purposes and you want to discard it: Attenzione: il dispositivo è contrassegnato da questo Please contact your Audio Analogue dealer who will inform you about the take-back and recycling. Small products (and simbolo,...
- Page 32 Audio Analogue Distributed by: AF GROUP srl www.audioanalogue.com info@afgroupsrl.com...
Need help?
Do you have a question about the VIVACE DAC and is the answer not in the manual?
Questions and answers