Sony PCV-RX640 Service Manual

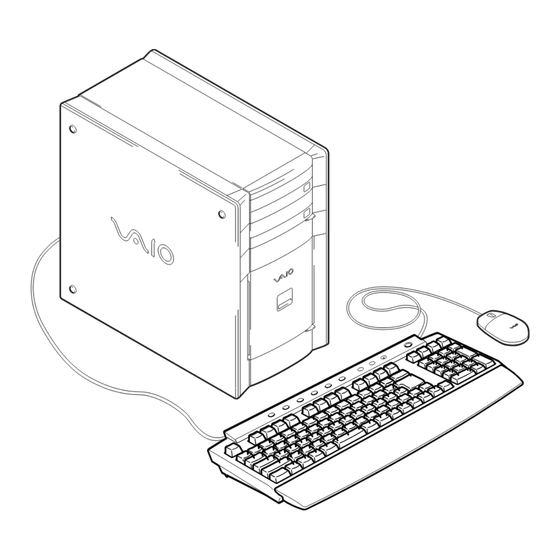
Personal computer vaio
Hide thumbs Also See for PCV-RX640:

Advertisement

PCV-RX6 __ Series
SERVICE MANUAL
Ver. 4-2002F
Revision History
Lineup: PCV-RX640
PCV-RX671
PCV-RX650
PCV-RX672
PCV-RX660
PCV-RX681
PCV-RX670
PCV-RX682
PCV-RX680G
PCV-RX651
PCV-RX690G
PCV-RX641
PCV-RX600E
PCV-RX600N
Model-name
PCV-RX690G
P4 2.2GHz
CPU
M/B
(EE)
Memory
std/max
512MB/1024MB
Slot 1
512MB
Slot 2
(256MB CTO)
HDD
Bay 1
120GB
Bay 2
-
Opt.Device
Upper
DVD-RW
Lower
DVD-ROM
Expansion Card
(Top)
Slot4 (AGP)
VGA Card
Slot3 (PCI)
-
Slot2 (PCI)
MPEG ( ENX-17 )
(Bottom) Slot1 (PCI)
Modem
a
MemoryStick
OS
Win XP Home
Model-name
PCV-RX671
CPU
P4 2.0AGHz
M/B
(AN)
Memory
std/max
512MB/1024MB
Slot 1
512MB
Slot 2
-
HDD
Bay 1
120GB
-
Bay 2
Opt.Device
Upper
DVD-RW
Lower
CD-ROM
Expansion Card
(Top)
Slot4 (AGP)
VGA Card
Slot3 (PCI)
-
Slot2 (PCI)
-
(Bottom) Slot1 (PCI)
Modem
MemoryStick
a
OS
Win XP Home
9-874-333-04
Specifications
PCV-RX680G
PCV-RX670
P4 1.8GHz
P4 2.0AGHz
(AN)
(AN)
512MB/1024MB
512MB/1024MB
512MB
512MB
None
None
120GB
80GB
-
-
DVD-RW
DVD-RW
CD-ROM
CD-ROM
VGA Card
VGA Card
-
-
MPEG ( ENX-17 )
-
Modem
Modem
a
a
Win XP Home
Win XP Home
PCV-RX672
PCV-RX640
P4 1.6GHz / 1.8GHz / 2GHz /
Cel 1.3GHz
P4 2.0AGHz
(AN)
(BI)
512MB/1024MB
256MB/512MB
512MB
256MB
-
-
120GB
60GB
-
-
DVD-RW
DVD-ROM
DVD-ROM
CD-RW
VGA Card
VGA Card
-
-
-
-
Modem
Modem
a
Win XP Home
Win XP Home
For American Area
PCV-RX660
PCV-RX650
P4 1.8GHz
P4 1.6GHz
(AN)
(AN)
512MB/1024MB
512MB/1024MB
256MB/512MB
256MB / 512MB
256MB/None
256MB / None
80GB
80GB
-
-
DVD-ROM
DVD-ROM
CD-RW
CD-RW
VGA Card
VGA Card
-
-
-
-
Modem
Modem
a
a
Win XP Home
Win XP Home
PCV-RX600E
PCV-RX600N
P4 1.6GHz / 1.8GHz / 2GHz /
2.2GHz(NW)
2.2GHz(NW)
(EE)
(AN)
1024MB max
1024MB max
256MB / 512MB
256MB / 512MB
None / 256MB / 512MB
60GB / 80GB / 120GB
60GB / 80GB / 120GB
None / 120GB
None / 120GB
DVD-RW / DVD-ROM
DVD-RW / DVD-ROM
DVD-ROM / CD-RW
DVD-ROM / CD-RW
VGA Card
VGA Card
-
-
None / MPEG ( ENX-17 )
Modem
Modem
a
a
Win XP Home
Win XP Home / Win XP Professional
CTO Model
CTO Model
PERSONAL COMPUTER VAIO
US Model
Canadian Model
PCV-RX681
PCV-RX682
P4 2.2GHz
P4 2.2GHz
(AN)
(AN)
1024MB/1024MB
1024MB/1024MB
512MB
512MB
512MB
512MB
120GB
120GB
-
-
DVD-RW
DVD-RW
CD-ROM
DVD-ROM
VGA Card
VGA Card
-
-
-
-
Modem
Modem
a
a
Win XP Home
Win XP Home
PCV-RX651
PCV-RX641
P4 1.7GHz
Cel 1.3GHz
(AN)
(BI)
256MB/1024MB
256MB/512MB
256MB
256MB
-
-
80GB
40GB
-
-
DVD-ROM
CD-RW
CD-RW
-
VGA Card
VGA Card
-
-
-
-
Modem
Modem
×
a
Win XP Home
Win XP Home
S400

Advertisement

Table of Contents
loading

Summary of Contents for Sony PCV-RX640

  • Page 1 PCV-RX6 __ Series SERVICE MANUAL For American Area US Model Ver. 4-2002F Canadian Model Revision History Lineup: PCV-RX640 PCV-RX671 PCV-RX650 PCV-RX672 S400 PCV-RX660 PCV-RX681 PCV-RX670 PCV-RX682 PCV-RX680G PCV-RX651 PCV-RX690G PCV-RX641 PCV-RX600E PCV-RX600N Specifications Model-name PCV-RX690G PCV-RX680G PCV-RX670 PCV-RX660 PCV-RX650 PCV-RX681 PCV-RX682 P4 2.2GHz...
  • Page 2 Information in this document is subject to change without notice. CAUTION Danger of explosion if battery is incorrectly replaced. Sony, VAIO and CLIE are trademarks or registered trademarks of Sony. Microsoft, Windows, Windows Media, Outlook, Bookshelf Replace only with the same or equivalent type and other Microsoft products are trademarks or registered trademarks recommended by the manufacturer.
  • Page 3: Table Of Contents

    TABLE OF CONTENTS OPERATION PROGRAMS FOR SERVICE ............3-1. General ..............DISASSEMBLY 3-2. PC-Doctor Starting Method ........3-3. intel815E-B Video Diag Starting Method ....2-1. Flow Chart ..............2-2. Top Panel Section ............ SERVICE INFORMATION 2-3. Left Panel Section ............ 2-4.
  • Page 4: Disassembly

    SECTION 2 DISASSEMBLY 2-1. FLOW CHART PANEL ASS’Y DVD-ROM, TOP PANEL PANEL ASS’Y RIGHT (UPPER) DVD-RW, (LOWER) (U) SECTION PANEL (FOR 2 BAY) CD-RW, P2-2 P2-7 P2-8 P2-8 CD-ROM P2-3 CNX-138 BOARD P2-9 LEFT PANEL CNX-137 SWX-66 SECTION BOARD BOARD P2-9 P2-2 P2-10...
  • Page 5: Top Panel Section

    2-2. TOP PANEL SECTION 2 Remove the top panel section in the direction of arrow A . 1 two claws 2-3. LEFT PANEL SECTION 1 Pull thelever. 2 Remove the left panel section in the direction of arrow A . Confidential PCV-RX6__Series (AM)
  • Page 6: Dvd-Rom, Dvd-Rw, Cd-Rw, Cd-Rom

    2-4. DVD-ROM, DVD-RW, CD-RW, CD-ROM 2 harness (IDE CD/DVD) 1 power connector 5 Remove the CD holder ass’y in the direction of arrow A . 4 harness (IDE CD/DVD) 7 DVD-ROM DVD-RW 3 power connector 9 Remove the drive adaptor in the direction of arrow C .
  • Page 7: Switching Power

    2-5. SWITCHING POWER (1-468-417-72) 2 Push the lever. 3 bracket power supply ass’y 5 three screws (No.6-32UNC) 1 screw (No.6-32UNC) 4 Disconnect respective power connectors on the 6 switching power mother board, DVD-ROM, CD-RW, FDD and HDD. (1-468-601-14) 2 Push the lever 3 bracket power supply ass’y 5 three screws (No.6-32UNC)
  • Page 8: Hdd

    2-6. 3 Push the lever. 5 two screws (SW) (No.6-32UNC) 1 harness (IDE/ATA) 4 HDD bracket ass’y 5 two screws (SW) (No.6-32UNC) 6 HDD 2 power connector 2-7. PCI SLOT PANEL 2 PCI slot panel 1 screw (SW) (No.6-32UNC) 3 screw (SW) (No.6-32UNC) 4 PCI slot panel 6 PCI slot panel...
  • Page 9: Mounted Pwb Enx-15

    2-8. VGA CARD 1 screw (SW) (No.6-32UNC) 3 VGA card 2 Push the clip. 2-9. MOUNTED PWB ENX-15 PC12 4 Remove the mounted PWB ENX-15 in the direction of arrow A . 3 screw (SW) (No.6-32UNC) 1 harness (audio) 2 harness (audio) Confidential PCV-RX6__Series (AM)
  • Page 10: Modem Card

    2-10. MODEM CARD PCI3 1 screw (SW) (No.6-32UNC) 2 modem card 2-11. PANEL ASS’Y (UPPER) (FOR 2 BAY) 3 two claws 4 panel ass’y (upper) (for 2 bay) 2 two claws 1 Open the door (FDD) ass’y. Confidential PCV-RX6__Series (AM)
  • Page 11: Panel Ass'y (Lower) (U)

    2-12. PANEL ASS’Y (LOWER) (U) 3 two claws 4 Remove the front panel ass’y (lower) (U) in the direction of arrow A . 2 two claws 1 two claws 2-13. RIGHT PANEL 2 Remove the right panel in the direction of arrow A . 1 two claws Confidential PCV-RX6__Series (AM)
  • Page 12: Cnx-138 Board

    2-14. CNX-138 BOARD 4 two screws (SW) (No.6-32UNC) 2 harness (USB/LU) 1 harness 5 CNX-138 board (1394) 3 Remove the bracket AV ass’y in the direction of arrow A . 2-15. CNX-137 BOARD 5 three screws (SW) (No.6-32UNC) 3 harness (USB/LU) 2 harness (1394)
  • Page 13: Swx-66 Board

    2-16. SWX-66 BOARD 1 harness (SW/LED) 4 LED shield 2 screws (SW) (No.6-32UNC) 3 SWX-66 board 2-17. FDD 3 Push the lever. 4 Remove the FDD bracket ass’y in the direction of arrow A . 1 harness (FDD) 2 harness 5 two screws (PWH3 ×...
  • Page 14: Cnx-169/Ifx-185 Board

    2-18. CNX-169/IFX-185 BOARD 1 two screws (SW) (No.6-32UNC) 3 CNX-169/ IFX-185 board 2 claw Confidential PCV-RX6__Series (AM) 2-11...
  • Page 15: Memory

    2-19. MEMORY (DIMM) 1 Open two clips. 2 memory (DIMM) × 2 1 Open two clips. Note 1: In opening the clips, hold lightly the top of the memories with your fingers to prevent a drop. Note 2: In removing the memories, always start from the one having largest bank number.
  • Page 16 (DDR) 1 Open two clips. 2 memory (DDR) × 2 1 Open two clips. Note 1: In opening the clips, hold lightly the top of the memories with your fingers to prevent a drop. Note 2: In removing the memories, always start from the one having largest bank number.
  • Page 17: Cpu

    2-20. CPU 1 harness 4 Elect the lever in the direction of arrow A . 2 clip 5 CPU 3 DC fan (with heat sink) 1 harness 2 clip 5 CPU 3 DC fan (with heat sink) 4 Elect the lever in the direction of arrow A .
  • Page 18: Cpu Installation

    • CPU INSTALLATION Note : When heat sink is removed from CPU, install new ones after thermal diffusion grease is wiped off and silicon compound is applied to the place shown in the figure. Thermal diffusion grease : silicon compound (G-765) 90G Amount to apply : 0.1 g (as the same size as the tip of a match) (Celeron) 0.5 g (as the same size as the tip of a match) (Pentium 4)
  • Page 19: Mother Board

    2-21. MOTHER BOARD 1 harness (1394) 7 harness (MS, SIO) 2 harness (IDE CD/DVD) 3 harness 4 harness (IDE/ATA) (FDD) 5 harness (USB/LU) 6 harness (SW/LED) 9 Remove the mother board to direction of arrow A . 8 eight screws (SW) (No.6-32UNC) Confidential PCV-RX6__Series (AM)
  • Page 20: Programs For Service

    SECTION 3 PROGRAM FOR SERVICE 3-1. General DISKETTE TEST FDD is tested. As the read/write operation is performed to the floppy disk, The Diagnostic Programs for Service are available with the fol- set the DOS formatted 1.44M disk without the write protec- lowing three kinds.
  • Page 21: Service Information

    SECTION 4 SERVICE INFORMATION 4-1. JUMPER SETTING ON HARD DISK DRIVE The hard disk drive of service parts can be used without changing factory jumper setting, when it was replaced for service. Capacity Part No. Maker Code Memo (formatted) A-8110-897-A Seagate ST340810A 40 GB...
  • Page 22: Frame Harness

    SECTION 5 FRAME HARNESS 5-1. CONNECTOR LIST MOTHER BOARD (BI) PGA370 socket Internal connector Coppermine-128k, Coppermine-256K , Tualatin-128K, Tualatin-256K supported Power supply Connector location on MB See the frame harness daigram 20pin ATX t ype connector. Connector location on MB See the frame harness daigram Pin assignments: PCI Slot x3...
  • Page 23 CD audio I/O header 4 pin standard 2mm single line header for CD Audio signal input 20 pin standard 2.5mm dual line header for LED/Switch unit Connector location on MB See the frame harness daigram Connector location on MB See the frame harness daigram Pin assignments: Pin assignments: Signal Name...
  • Page 24 Line In pin assignments: IEEE1394 Rear connector Signal Name 6 pin standard IEEE1394 Rear connector. Sleeve Ground Connector location on MB See the frame harness daigram Audio Left In Pin assignments: Ring Audio Right In Signal Name VP (Power ) Microphone In pin assignments: Ground Signal Name...
  • Page 25: Mother Board (An)

    MOTHER BOARD (AN) 2-1 Internal connector CD audio Power supply 4 pin standard 2mm single line header for CD Audio signal input 20 pin ATX type connector. Connector location on MB See the frame harness diagram Pin assignments: Connector location on MB See the frame harness diagram Signal Name 4 pin ATX12V type connector.
  • Page 26 USB/LAN I/O header One USB connectors for external USB devices (Support the stacked connector) 20 pin standard 2.5mm dual line header for LED/Switch unit One 10/100Base-T connector Connector location on MB See the frame harness diagram Pin assignments: Connector location on MB See the frame harness diagram Pin assignments: Signal Name...
  • Page 27: Mother Board (Ee)

    MOTHER BOARD (EE) 3-1 Internal connector IEEE1394 access header x2 Power supply 8 pin standard 2.5mm single line header for IEEE1394 Front connector. Connector location on MB See the frame harness diagram 20 pin ATX type connector. Pin assignments: Connector location on MB See the frame harness diagram Signal Name Shell Ground...
  • Page 28 USB/LAN One USB connectors for external USB devices (Support the stacked connector) One 10/100Base-T connector Connector location on MB See the frame harness diagram Pin assignments: Signal Name Signal Name ACTLEDP LANP8 ACTLEDN LANP8 LILEDP USBVCC1 LILEDN USBP1- TXPCON UCBP1+ TXNCON RXPCON LANP5...
  • Page 29 MEMO Confidential PCV-RX6__Series (AM)
  • Page 30: Frame Harness Diagram And Jumper Setting Of Mother Board

    5-2. FRAME HARNESS DIAGRAM AND JUMPER SETTING OF MOTHER BOARD i.LINK S400 1394HEAD3 4 pin USB Rear Harness (1394) Rear Panel SOCKET CNX-138 BOARD 1394HEAD2 (Front Connector) (Not Installed*) MOTHER BOARD (BI) MOUSE KEYBOARD TUSL-LV NETWORK LINK MOTHER BOARD (BI) TUSL-LV HEATSINK WITH FAN PRINTER...
  • Page 31 i.LINK S400 4 pin USB 1394HEAD3 Rear Harness (1394) MONITOR VGA CARD CNX-138 BOARD Rear Panel (Front Connector) MOTHER BOARD (AN) MOUSE KEYBOARD SOCKET P4B-LM VIDEO 2 INPUT i.LINK S VIDEO VIDEO USB X2 NETWORK S400 LINK 4 pin USB LINE CNX-137 BOARD CN11...
  • Page 32 VIDEO 2 INPUT i.LINK S VIDEO VIDEO S400 1394HEAD3 4 pin USB Rear Harness (1394) VGA CARD LINE MONITOR Rear Panel CNX-137 BOARD CN11 (Front Connector) MOTHER BOARD (EE) MOUSE KEYBOARD P4T-LE SOCKET USB X2 NETWORK LINK Harness (AUDIO) AUX_CON OPTICAL Harness (AUDIO)
  • Page 33: Repair Parts List

    SECTION 6 REPAIR PARTS LIST NOTE: • The parts listed here are for service, and therefore they may be different The components identified by from the parts shown in circuit diagrams or used in the set. mark 0 or dotted line with mark •...
  • Page 34: Exploded Views And Parts List (Mother Board (An) Assy)

    6-2. EXPLODED VIEWS AND PARTS LIST (MOTHER BOARD (AN) ASSY) CNX-138 CNX-137 Confidential PCV-RX6__Series (AM)
  • Page 35: Exploded Views And Parts List (Mother Board (Ee) Assy)

    6-3. EXPLODED VIEWS AND PARTS LIST (MOTHER BOARD (EE) ASSY) Confidential PCV-RX6_ _Series (AM)
  • Page 36: Accessories And Parts List

    MEMO 6-4. ACCESSORIES AND PARTS LIST POWER CORD (1) CONVERSION CONNECTOR (VIDEO CONNECTING) (2) ANTENNA CABLE (1) i. LINK CABLE (1) VIDEO CABLE (1) KEYBOARD (1) REMOTE COMMANDER (1) MOUSE (1) RAY-CATCHER UNIT (1) AUDIO CABLE (1) AC ADAPTOR (1) SPEAKER UNIT (1) MODEM CABLE (1) Confidential...
  • Page 37 Ref.No. Part No. Description RX690G RX682 RX681 RX680G RX672 RX671 RX670 RX660 RX651 RX650 RX641 RX640 RX600E RX600N 4-648-912-02 PANEL, LEFT 4-648-912-41 PANEL, LEFT X-4624-140-1 LEFT CHASSIS ASSY 1-468-417-72 POWER, SWITCHING 1-468-601-14 POWER UNIT X-4624-060-1 BRACKET PS (280W) ASSY X-4624-061-1 BRACKET PS (150W) ASSY 4-635-795-01 SCREW (NO.6-32UNC)
  • Page 38 CRIMM (YODA) 4-648-884-11 PANEL, BLANK A-8067-057-A IFX-185 MOUNTED PWB A-8067-157-A CNX-169 MOUNTED PWB 4-657-321-21 ADAPTOR (SONY), DRIVE z z z z z z z z 4-657-322-21 ADAPTOR (PIONEER), DRIVE z z z z z z z z 4-657-322-21 ADAPTOR (PIONEER), DRIVE...
  • Page 39 ACCESSORIES & PACEKING MATEIRALS ****************************************************** Ref.No. Part No. Description RX690G RX682 RX681 RX680G RX672 RX671 RX670 RX660 RX651 RX650 RX641 RX640 RX600E RX600N 4-662-040-11 USER GUIDE 4-662-043-11 GETTING STARTED GUIDE (RX) 1-777-786-11 CORD, AC 1-777-801-21 CORD, CONNECTION (F TYPE RF) 1-777-802-21 CORD, CONNECTION (VIDEO) 1-772-704-71...
  • Page 40: Pcv-Rx6

    PCV-RX600E PCV-RX600N : Additional Model This manual and the constituent data may not be replicated, copied nor reprinted in whole or in part without prior written authorization of Sony Corporation. Sony Corporation English 2002F0500-1 © 2002 Sony Corporation – 50 –...
  • Page 41 Revision History Suffix Ver. Date Contents QM No. Ver. 1 2002.01.17 First Edition ––– Ver. 2 2002.02.18 (Model Lineup) FIT-D2002_001 Ver. 3 2002.03.08 (Model Lineup) FIT-D2002_003 Ver. 4 2002.06.11 (Model Lineup) FIT-D2002_024 <Remarks> [Confidential] PCV-RX6_ _Series (AM)

Table of Contents