Table of Contents
Advertisement
Advertisement
Table of Contents

Subscribe to Our Youtube Channel
Related Manuals for Mood Media MULTIPLAY 7200


Summary of Contents for Mood Media MULTIPLAY 7200
- Page 1 MULTIPLAY 7200® Instructions for use...
-
Page 2: Table Of Contents
CONTENTS Introduction ......................2 Precautions to take before using .................. 3 Unpacking ........................ 3 Description and illustration ..................5 Zoning ........................6 Switching on ......................7 Using the display’s keys ..................... 8 Stopping the MP 7200® ..................... 8 The serial number...................... 8 Menu functions of the MP 7200®... -
Page 3: Introduction
Introduction The MultiPlay 7200®, developed by our teams of R&D engineers , is a digital musical broadcast program player. The MP7000® is the technological synthesis of 50 years of experience and of tried and tested know-how. Of a unique industrial technology, it intelligently operates 24 hours a day without any human intervention. -
Page 4: Precautions To Take Before Using
IMPORTANT! Before operating this equipment, please attentively read these user instructions. The responsibility of MOOD MEDIA cannot be committed in case of eventual damages due to inappropriate use or non compliant with the user manual. Keep these instructions for further reference. -
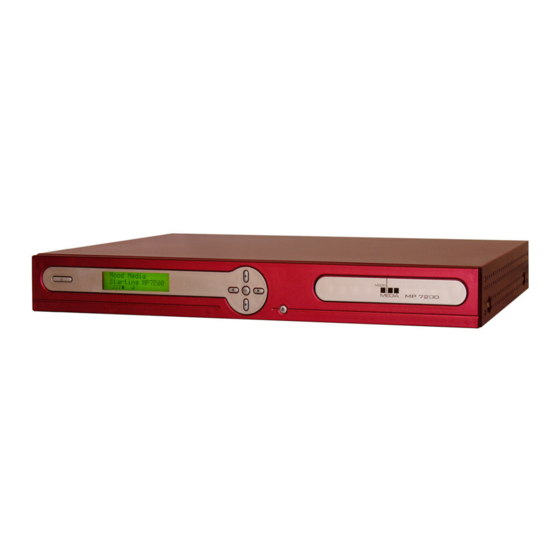
Page 5: Description And Illustration
Description and illustration Connection to the electric supply network PRECAUTION To avoid risks of electrocution, only use the electric cable that was supplied. Plug the cable into the mains socket. Connect the electric plug in a correctly grounded mains socket. Important Before plugging in, it is imperative to switch off your amplifier (sound equipment). -
Page 6: Zoning
Zoning Connection to your amplifier (1 zone): a - Connect the audio cable’s plug to the audio output (audio out 1) of your MP7000®. b – Depending on your amplifier, you will find an “AUX” or “TUNER” input on which to connect the MP7000®... -
Page 7: Switching On
Switching on Press the ON/OFF key. The music starts after a few seconds. The default setting of the MP7000® is programmed to switch on automatically at 5:30 a.m. and to switch off at 10:30 p.m. In case of starting of the MP7000® with the ON/OFF key, the appliance switches off after a few moments if the switching on was done out of the times defined in the "Power Time"... -
Page 8: Using The Display's Keys
See the "MUSIC" menu page 12 (1a) or page 14 (2a). The serial number The serial number is located under the Multiplay 7200®. MP7200® user instructions... -
Page 9: Menu Functions Of The Mp 7200
Menu functions of the MP 7200® The MultiPlay 7200® proposes a range of functions allowing you to personalize it according to your needs. These functions are gathered in menus and submenus. List of the menu’s functions MUSIC 3) Local messages... -
Page 10: Selection Of The Zone
Selection of the zone When your appliance is in zoning mode, that is to say it plays different musicale atmospheres on several zones, before any handling the display asks, the zone to parameter. Press the central "OK" key. 11/08/2003 18:32 The display shows "Audio choice - Zone 1". -
Page 11: Music
MUSIC This menu allows: Selecting and instantly playing a musical program. Creating an identical musical scenario every day of the week per time slots. Selecting the broadcasting times. Selecting and broadcasting a different musical scenario every day of the week. “MUSIC”... -
Page 12: Immediate Broadcast Of A Program (Select Day: Immediately)
1) Immediate broadcast of a program (Select day: immediately) This function allows selecting and immediately broadcasting a program. This programming is only valid during the period defined in the "Power Time" i.e. the times of beginning and end of broadcasting. When the appliance restarts, it takes up the scenario that you have previously established. -
Page 13: 2B: Time Slots
Or if you wish to select several programs at the same time, refer Programs beginning with a P. are to 2d. programs pre-defined by Mood Media. The display then shows "Select day - Exit". Confirm by pressing "OK". Select day... -
Page 14: 2E: Save Selection
by pressing "OK". Here, a title of the "Atmosphere" program will be Select music followed by a title of the "VIP" program and again “Atmosphere” at the 11:30 – 12:15 time slot. Renew the procedure, for all the time slots that you wish to create. 2e: Save selection = to save your scenario. -
Page 15: 3C: Select Program
With the arrow keys select the pre-defined sequence for the time Programs beginning with P. are slot. Confirm by pressing "OK". programs pre-defined by Mood Media. The display then shows "Select day - Exit". Confirm by pressing "OK". Select day... -
Page 16: 3E: Save Selection
3e: Save selection Save selection = to save your scenario. New P. After having validated the last time slot, the display shows "Save selection" Press "OK" again to validate. Your selection is saved. 3f: Rename = to name the program that you just created. Rename Morning The display shows "Rename –... -
Page 17: Events
EVENTS This menu allows: selecting a specific program and choosing its broadcasting frequency. defining the parameters of the broadcast during a chosen period of time and a time slot. Flowchart of the "EVENTS" menu EVENTS Select music Frequency Beginning of the event End of the event Time slot How to access the "EVENTS"... - Page 18 a) The display shows "Events - GO". Events Press "OK" to access this menu. < > b) The display then shows "Select music". Select the desired program with ◄/▲/▼/►. the arrow keys Select music For example, a Christmas program. Christmas Press "OK"...
-
Page 19: Messages
III. MESSAGES This menu allows: Listening to a message via the internal speaker, without interrupting the broadcasting on the loudspeakers network. Consulting the broadcasting scenario of sound messages (out of personal messages). Recording one’s own messages with a mike and scheduling them. Setting the parameters of pre-recorded messages opening / closing. -
Page 20: Listen To Messages
1) Listen to messages This function allows listening, with the internal speaker, to messages found on the appliance without interrupting the broadcasting. Steps 1 + 2 (page 19) Listen to messages < > a) The display shows "Listen to messages – GO". Press the central "OK"... -
Page 21: Local Messages
3) Local messages This function allows recording, setting the parameters of and broadcasting your own messages. Important: the microphone should be connected and in “off” position when starting the MP7200®. 3a: Recording one or several messages Local messages Steps 1 + 2 + 3 (page 19) <... -
Page 22: 3B: Consulting Recorded Messages
f) The display then shows " Select action - Listen to msg". Press "OK" to hear the message again. g) With the arrow keys ◄/▲/▼/► you can select several actions that you Select action validate by pressing "OK": Do nothing "Do nothing": the message is simply recorded. - Page 23 select the message you wish to consult. For example, "July special offer". Press the central "OK" key to validate. Select message c) The display then shows the length of the message. Here, the recording length is 22 seconds. July special offer Press the central "OK"...
-
Page 24: Open/Close Messages
4) Open/Close messages This function allows adjusting the opening and closing messages according to your daily timetable of morning, noon and evening. Messages: Pre-opening will be broadcast 10 minutes before the opening, Opening will be broadcast 2 minutes after the opening … and Closing will be broadcast 5 minutes before closing. - Page 25 Select day If your opening and closing timetables are not Exit the same every day of the week, follow the procedure below: Open/Close Msg < > Steps 1 + 2 (page 19) a) The display shows "Open/Close Msg - GO". Press the central "OK"...
-
Page 26: Settings
SETTINGS This menu allows: Setting the sound volume of the music and messages. Setting the system date and time. Automatically reduce the system’s sound volume for example at night. Locking the use of the appliance with a password. Flowchart of the "SETTINGS" menu SETTINGS Music volume Messages volume... -
Page 27: Music Volume
1) Music volume This function allows of setting the general volume of the MP7200®. Steps 1 + 2 (page 26) Music volume a) The display shows "Volume music - GO". < > Press the central "OK" key to reach this submenu. b) The display shows a dashed line on which a # is found. -
Page 28: Date / Time
3) Date / Time This function allows setting the time and of modifying the date. Date/Time Steps 1 + 2 + 3 (page 26) < > a) The display shows "Date/Time - GO". Press the central "OK" key to reach this submenu. -
Page 29: Lcd Password
5) LCD Password This function allows locking your appliance with a password that will be requested before any handling. Steps 1 + 2 + 3 (page 26) LCD Password < > a) The display shows "LCD Password - GO". Press the central "OK" key to reach this submenu. -
Page 30: Maintenance
MAINTENANCE This menu allows: Consulting the list of updates. Erasing non used or outdated programs. Consulting information relative to the appliance. Flowchart of the "MAINTENANCE" menu MAINTENANCE Status List of updates and updating via the SAS Programs not used Serial number Uptime More info…... -
Page 31: Status
1) Status 1a. List of updates = to consulter the list of updates that were already made. If an update is missing, the figure at the lower right of the display flickers. The list will indicate what update is missing. Steps 1 + 2 (page 30) Status a) The display shows "Status - GO". -
Page 32: 1C: Non Used Programs
1c: Non used programs = to suppress programs. Comment: You can only suppress the programs that you created yourself and that are not presently used in the music menu. Steps 1 + 2 + 3 + 4 (page 30) Non used prog. <... -
Page 33: 1F: More Info (Memory, Capacity
= to define, at the installation the system language. the number of zones. the number of messages to record per zone (Local). the network parameters. identification in relation to SAS. This password is known by Mood Media. MP7200® user instructions... -
Page 34: Updating By Dvd-Rom
• Never use chemical products such as aerosols for discs or antistatic liquids or solvents to clean CDs. • The CDs should be stored in their box after use so as to avoid serious scratches. WARNING: This appliance was designed to read only DVD-ROMs made by Mood Media. Never insert other DVD-ROMs. MP7200® user instructions... -
Page 35: Troubleshooting
Control the volume button. connections) + 130 mm in front (player After these checks, if there is still no trap) = 460 mm. sound, call the Mood Media customer department. The MP7000® can be inserted in a 19” rack with brackets (not supplied). - Page 36 MOOD MEDIA Rd 307 78810 Feucherolles France hotline@moodmedia.fr MP7200® user instructions...
Need help?
Do you have a question about the MULTIPLAY 7200 and is the answer not in the manual?
Questions and answers