Table of Contents
Advertisement
This device complies with Part 15 of the FCC Rules.
Operation is subject to the following two conditions:
(1) this device may not cause harmful interference, and
(2) this device must accept any interference received, including interference that may cause
undesired operation.
CAUTION
"Apparatus shall not be exposed to dripping or splashing and no objects filled with
liquids, such as vases, shall be placed on the apparatus."
"Keep the unit away from flower vases, tubs, sinks, etc. If liquids are spilled into the
unit, serious damage could occur."
"Plug in a location that the user should easily be operated"
IMPORTANT SAFETY INSTRUCTIONS
01) Read these instructions.
02) Keep these instructions.
03) Heed all warnings.
04) Follow all instructions.
05) Do not use this apparatus near water.
06) Clean only with a dry cloth.
07) Do not block any of the ventilation openings. Install in accordance with the
manufacturer's instructions.
08) Do not install near any heat sources such as radiators, heat registers, stoves, or
other apparatus (including amplifiers) that produce heat.
09) Do not defeat the safety purpose of the polarized or grounding type plug.
09)
A polarized plug has two blades with one wider than the other.
09)
A grounding type plug has two blades and a third grounding prong.
09)
The wide blade or the third prong is provided for your safety.
09)
When the provided plug does not fit into your outlet, consult an electrician for
replacement of the obsolete outlet.
10) Protect the power cord from being walked on or pinched particularly at plugs,
convenience receptacles, and the point where they exit from the apparatus.
11) Only use the attachments/accessories specified by the manufacturer.
12) Use only with a cart, stand, tripod, bracket, or table specified by the
manufacturer, or sold with the apparatus. When a cart is used, use
caution when moving the cart/apparatus combination to avoid injury
from tip-over.
13) Unplug this apparatus during lightning storms or when unused for long periods of
time.
14) Refer all servicing to qualified service personnel.
09)
Servicing is required when the apparatus has been damaged in any way, such as
power supply cord or plug is damaged, liquid has been spilled or objects have
fallen into the apparatus, the apparatus has been exposed to rain or moisture,
does not operate normally, or has been dropped.
Advertisement
Table of Contents

Related Manuals for RSQ HD 787


Summary of Contents for RSQ HD 787
-
Page 1: Important Safety Instructions
This device complies with Part 15 of the FCC Rules. Operation is subject to the following two conditions: (1) this device may not cause harmful interference, and (2) this device must accept any interference received, including interference that may cause undesired operation. - Page 2 SAFETY INFORMATION CAUTION INVISIBLE LASER RADIATION WHEN OPEN AND INTERLOCKS DEFEATED. DO NOT STARE INTO BEAM. VORSICHT! UNSICHTBARE LASERSTRAHLUNG; WENN ABDECKUNG GEÖFFNET UND The lightning flash with arrowhead SICHERHEITSVERRIEGLUNG ÜBERBRÜCKT; NICHT IN DEN STRAHL BLICKEN. symbol, within an equilateral triangle, VARNING OSYNLIG LASERSTRÅLNING NÅR DENNA DEL ÄR ÖPPNAD OCH SPÄRR ÄR URKOPPLAD.
-
Page 3: Table Of Contents
No fingers or other objects inside Touching internal parts of this unit is dangerous, and may cause serious damage to the unit. Do Contents not attempt to disassemble the unit. Do not put any foreign object on the disc tray. Keep away from water and magnets. -
Page 4: Getting Started
Getting Started 1.1 Features Contents Karaoke Function You can enjoy home karaoke with one Hard disc which includes China, Vietnam and pop 6. Initial Setting songs and designed with high quality Video and Audio. 6.1 DVD Initial settings / General settings 6.2 DVD Initial settings / Speaker settings DVD Player Function DVD which stands for Digital Versatile Disc or Digital Video Disc is a storage media can be... -
Page 5: Accessories
1.1 Features 1.2 Accessories 10bit Video D/A Converter The unit adopts 10bit video D/A convert technology to reproduce the highest video quality. Check and identify the supplied Remote Control Unit : 1 It is not like the exist 8bit circuit, 10bit circuit convert the standard 8bit component signal to 10 accessories bit signal and replays same as the original one. -
Page 6: Cautions And Attentions
Cautions and Attentions 2.1 When Install Danger Do use 110V to 220V power outlet only. Point of notice for safety If not, it may cause fire, electric leakage or electric shock. Prohibition To utilize the unit as a safe and properly and to precaution the risk or physical damage, please read this manual carefully and follow the instructions. -
Page 7: When Utilizing
2.2 When Utilizing 2.2 When Utilizing Warning Caution Do not pour the water into the product or avoid the product from the wet. It may cause Do not move the product from the cold to hot area. The unit will be malfunctioned due fire, electric leakage or electric shocks. -
Page 8: When Cleaning
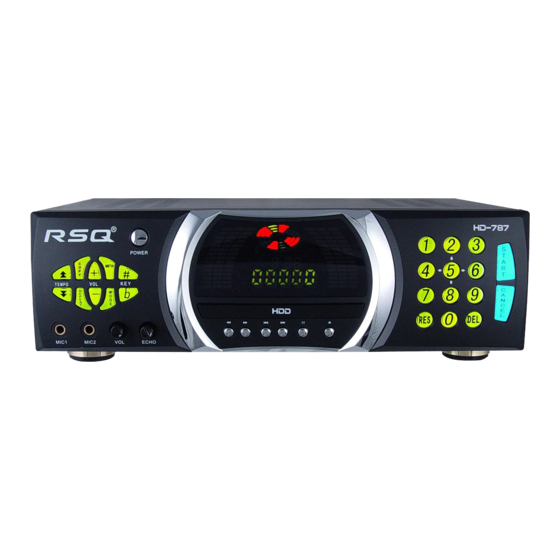
Installation of HD-787 and Explanation of Each Parts 2.3 When Cleaning 3.1 Name of Each Part When you clean the exterior of the unit, Do not use water, gasoline, benzene or Front Panel thinner. Also do not spray Insecticide around the unit. Forced 18 19 Clean the interior of the unit in every year and consult with your distributor for cleaning. - Page 9 3.1 Name of Each Part 3.1 Name of Each Part Front Panel Rear Panel 1 11 Delete button MPX button It is for canceling the reserved songs. Use to select the audio output(left, right and If you want to cancel the reserved song, press the stereo).
- Page 10 3.1 Name of Each Part 3.1 Name of Each Part Remote Controller Remote Controller Power button Keypad/Zoom button Volume button This button converts standby mode and power on. You can adjust the volume up / down. Karaoke : To search the titles of song or singer by virtual keypad.
- Page 11 3.1 Name of Each Part 3.1 Name of Each Part Remote Controller Remote Controller Repeat button Video Output button Karaoke : There are four kinds of modes. This button is used for changing video output. (NTSC/PAL) Tempo button Karaoke : Used for changing the tempo of the DVD : Press this button while the disc is being song.
- Page 12 3.1 Name of Each Part 3.1 Name of Each Part Remote Controller FND Display Elasped Time It displays the elapsed playing time DVD title or Video CD track in Hour and Min. Title/Chapter & Song numbers It displays the title/chapter & Song numbers of the disc which is running. Microphone/Music Level Meter It displays the levels of the microphone/music volume.
-
Page 13: Basic Connection
3.2 Basic Connection 3.2 Basic Connection Note : 1. During DVD play, the TV volume may be a lower level than TV broadcasts, In this case, adjusts the Ensure that the power switch of other equipment be connected is set to off before commencing connection. volume to the desired level. -
Page 14: Optional Audio Connection
3.2 Basic Connection 3.3 Optional Audio Connection Connecting to the Amplifier has 5.1ch Input Connecting to a Decoder with Dolby Digital Processing When DVDs recorded in Dolby Digital are played, Dolby Digital bitstream is output from player’s OPTICAL digital audio output connector. When the player is connected to a Dolby Digital decoder you can enjoy theater quality audio in your home. -
Page 15: Usage Of Remote Controller
3.3 Optional Audio Connection 3.4 Usage of Remote Controller Optional Digital Audio Output Battery Installation When connecting the optical digital audio cable Insert the batteries after make sure the correct (+) and (-) polarities as illustrated as below. Connect the terminal and cable exactly Connecting the audio output from the unit’s optical digital audio output connector Lifetime of batteries Disc... - Page 16 3.4 Usage of Remote Controller 3.4 Usage of Remote Controller Remote Controller Operating Range Warning The remote controller unit should be with in 7m (23feet) and operating angle should be with in 60 degree at the front of the remote control sensor The operating distance can be varied with the brightness of the room.
-
Page 17: Microphone Connection
Playing Discs 3.5 Microphone Connection 4.1 Inserting a Disc Connect the Microphone Playing a DVD Video Disc You can connect the microphone with 6.3mm stereo plug at the front side. You will recognize DVD Video discs by the logo. Depending on the material on the disc (a movie, video You can connect a wireless microphone at the rear side. -
Page 18: Basic Operations
4.1 Inserting a Disc 4.2 Basic Operations Note : SEARCH, STEP, SLOW, and using disc menu functions may lead to the trembled screen display with some discs. Inserting a Disc Press OPEN/CLOSE on the front of the player. The disc tray opens. Basic Play Lay your chosen disc in the tray, label side up. - Page 19 4.2 Basic Operations 4.2 Basic Operations Search Forward or Backward Once you insert the MP3 Disc in the tray, smart navigation starts to operate automatically. To search forward or backward through the disc, press during play. • Search begins, and sound is muted. Disc Play To return to play, press PLAY button.
-
Page 20: Karaoke
Karaoke The karaoke player plays contained contents, copied songs in HDD and karaoke disc like CDG and 5.2 Karaoke Operations NEO+G. 5.1 Basic Operation Microphone (Volume) Control • The function controls Microphone Volume. • By turning the Microphone Volume Controller clockwise on the front side of main body, the voice gets Play louder. -
Page 21: Special Operations
5.2 Karaoke Operations 5.3 Special Operations Repeat Song Listing Function The mode includes One Song, Repeat One, Repeat All, Random. The function “Song List” enables easy search for desired song from the disc. Choose desired mode. • You can change the item in the selected index by pressing( , ), ( , ) button. •... - Page 22 5.3 Special Operations 5.3 Special Operations Song listing by title Virtual keypad Press the title button to display song list by title. Press the keypad button to use the virtual keypad. (Screen of song list by title) You can enter the character by pressing enter and direction button. If Press the play button, the song is played.
-
Page 23: Initial Setting
Initial Setting 5.3 Special Operations 6.1 DVD Initial settings/General settings Press SETUP button in stopped or playback state. Select a desired setting by pressing or buttons Point out the SETUP by or buttons and press Karaoke Setup ENTER button. and press ENTER button to apply it. The function is only available with HDD Karaoke mode. -
Page 24: Dvd Initial Settings/Speaker Settings
6.2 DVD Initial settings/Speaker settings 6.3 DVD Initial settings/Audio settings Press SETUP button in stopped or playback state. Press SETUP button in stopped or playback state. Select a desired setting by pressing or buttons Select a desired setting by pressing or buttons Point out the SETUP by or buttons and press... -
Page 25: Dvd Initial Settings/Karaoke Settings
6.4 DVD Initial settings/Karaoke settings 6.5 DVD Initial settings/Basic conditions Press SETUP button in stopped or playback state. Press SETUP button in stopped or playback state. Select a desired setting by pressing buttons Select a desired setting by pressing buttons Point out the SETUP by buttons and press Point out the SETUP by... -
Page 26: For Your Reference
For Your Reference 7.1 Trouble shooting 7.1 Trouble shooting Before requesting service for this unit, check the chart below for a possible cause of the problem you are Symptom ( DVD ) Remedy experiencing. Some simple checks or a minor adjustment on your part may eliminate the problem and restore proper operation. -
Page 27: Specifications
Specifications Classification Description System Karaoke Player CDG, NEO+G Compatible Discs Video CD 1.1 Video CD 2.0 (PBC Function) SVCD Audio CD, MP3 CD Input Terminal 10mV(600 ), 2EA Video Out Terminal 1Vp - p(75 ) 1Vp - p(75 ) S-VHS Output Terminal Video 0.286Vp - p(75 )
Need help?
Do you have a question about the HD 787 and is the answer not in the manual?
Questions and answers