Table of Contents
Advertisement
Quick Links
使用說明書
HOW TO USE
日立多門電冰箱
REFRIGERATOR-FREEZER
家庭用 For household use
R-D6800S
型號
Model
R-D6800H
R-D6800M
R-D6800N
● 購買後初次使用時。
初次使用時,庫內冷卻可能需要約 4 小時至 24 小時以上。
● 請遵守可容納食物的高度及食品之間空開間隙儲放。
過分塞堵食物,會造成食品及袋子被門夾住關不緊,製冷效率低、不能製冰等。
● It takes time to cool for the first time.
It may take more than 4 ~ 24 hours to fully cool.
● Make sure that no food protrudes beyond the storage height limit of
each compartment, and allow clearance between each food in each
compartment.
Otherwise, food and/or package may not be stored in each compartment properly, and as
a result, the door may not be closed completely. It may cause the refrigerator not to cool
sufficiently and/or not to make ice.
R-D6200S
R-D6200H
R-D6200M
R-D6200N
日本製
Made in Japan
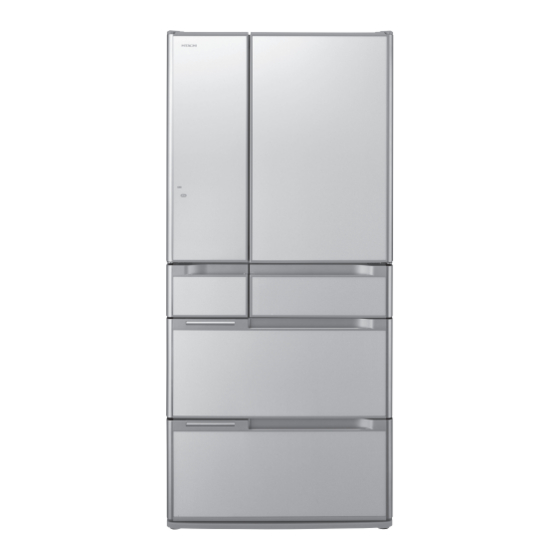
6 doors
六門
10, 11 頁
Pg.48, 52
R-D6800XS
R-D6800XH
R-D6800XM
R-D6800XN
非常感謝您購買日立電冰箱。
此電冰箱僅供家庭使用,請勿使用於商業用途和儲存食品以外
的目的上。
請詳閱本使用說明書,以確保正確使用。
使用前請務必詳閱「安全上之注意事項」 。
請妥善保管本使用說明書與保証書,當將電冰箱交給他人在別的
場所使用時,以及交給回收工場時,請將本使用說明書隨電冰箱
一同轉交。
Thank you very much for purchasing a Hitachi Refrigerator.
This refrigerator is designed for home use only.
Do not use this refrigerator for the business use and/or any
purpose other than storing food.
Please read this operation manual carefully and ensure you use
the appliance correctly. In particular, be sure to read the "Safety
Suggestions" section of this operation manual before use.
Please keep this operation manual along with your guarantee
card.
Hand over this operation manual together with the refrigerator
when the refrigerator is passed to a third party and used in a
different location, or when it is sent to a recycling plant.
Pg.42, 43
只限在新加坡 ・ 香港 ・ 馬來西亞 ・
印度尼西亞 ・ 越南使用
For use in Singapore, Hong Kong,
Malaysia, Indonesia and Vietnam only.
16, 20 頁
Advertisement
Chapters
Table of Contents


Need help?
Do you have a question about the R-D6800S and is the answer not in the manual?
Questions and answers