Mars PS-101B Installation, Operation & Maintanance Manual
Portable room air conditioner
Hide thumbs
Also See for PS-101B:
- Owner's manual (18 pages) ,
- Owner's manual & installation manual (24 pages)
Table of Contents
Advertisement
Quick Links
Installation, Operation
& Maintenance Manual
Portable Room Air Conditioner
PS-81B
PS-101B
Thank you for purchasing our Portable Air Conditioner.
Before using your air conditioner, please read this instruction
manual carefully and keep it for future reference.
READ AND SAVE THESE INSTRUCTIONS!
517.787.2100 • www.marsdelivers.com
Advertisement
Table of Contents

Related Manuals for Mars PS-101B


Summary of Contents for Mars PS-101B
- Page 1 Installation, Operation & Maintenance Manual Portable Room Air Conditioner PS-81B PS-101B Thank you for purchasing our Portable Air Conditioner. Before using your air conditioner, please read this instruction manual carefully and keep it for future reference. READ AND SAVE THESE INSTRUCTIONS!
-
Page 2: Table Of Contents
Installation, Operation & Maintenance Manual - PS-81B / PS-101B Contents Preparation ............................. 3 Safety Precautions ......................... 4 Cautions ............................5 Installation ............................6 Operation ............................12 Maintenance ..........................16 Fault Diagnosis ..........................17 Design and Compliance Notes ...................... 18 European Disposal ........................19... -
Page 3: Preparation
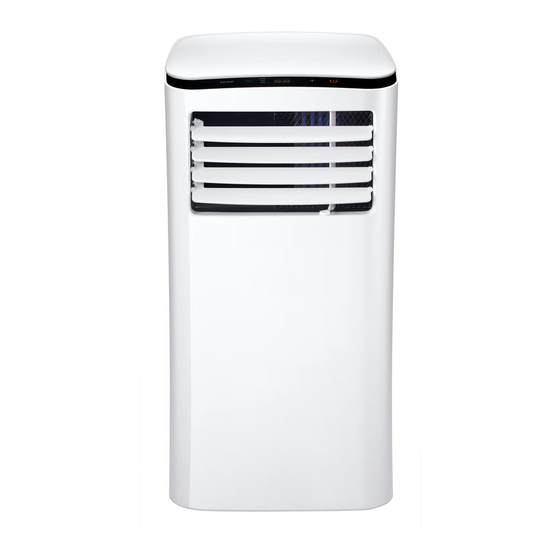
Installation, Operation & Maintenance Manual - PS-81B / PS-101B Preparation Preparation Control panel remote Signal receptor Horizontal louver control lever (adjust manually) vertical louver control lever (adjust manually) panel Caster F r o n t Handle (both sides) Air filter... -
Page 4: Safety Precautions
Installation, Operation & Maintenance Manual - PS-81B / PS-101B Safety Precautions • DO NOT install the unit in a location Please read through these instructions before that may be exposed to combustible you start the installation process. Improper gas, as this could cause fire. -
Page 5: Cautions
Installation, Operation & Maintenance Manual - PS-81B / PS-101B Cautions • Do not run the cord under carpeting. Do • This appliance can be used by children not cover cord with throw rugs, runners, from 8 years and above and people with or similar coverings. -
Page 6: Installation
Installation, Operation & Maintenance Manual - PS-81B / PS-101B Installation Choosing the Right Location Note About Fluorinated Gases • This air-conditioning unit is a hermetically sealed unit that contains fluorinated gases. For specific information on the type of gas and the amount, please refer to the relevant label on the unit itself. - Page 7 Installation, Operation & Maintenance Manual - PS-81B / PS-101B Installation Tools Needed • Medium Philips screwdriver • Tape measure or ruler • Knife or scissors • Saw (optional, to shorten window adaptor for narrow windows) Accessories Your Window Installation Kit fits windows 67.5-123cm(26.5-48”) and can be shortened for smaller windows.
- Page 8 Installation, Operation & Maintenance Manual - PS-81B / PS-101B Installation Window Installation Kit Step One: Preparing the Exhaust Hose assembly Press the exhaust hose into the window slider adaptor and unit adaptor, clamp with elastic buckles of the adaptors. Exhaust hose...
- Page 9 Installation, Operation & Maintenance Manual - PS-81B / PS-101B Installation Note: Once the Exhaust Hose assembly and Adjustable Window Slider are prepared, choose from one of the following two installation methods. Type 1: Hung Window Installation Foam seal B (Adhesive type-shorter)
- Page 10 Installation, Operation & Maintenance Manual - PS-81B / PS-101B Installation Insert the window slider adaptor into the hole of the window slider. Type 2: Sliding Window Installation Foam seal B (Adhesive type-shorter) Window slider B (if required) Foam seal A...
- Page 11 Installation, Operation & Maintenance Manual - PS-81B / PS-101B Installation Insert the window slider adaptor into the hole of the window slider. Note: To ensure proper function, DO NOT overextend or bend the hose. Make sure that there is no obstacle around the air outlet of the exhaust hose (in the range of 500mm) so the exhaust system works properly.
-
Page 12: Operation
Installation, Operation & Maintenance Manual - PS-81B / PS-101B Operation MODE button Power button Selects the appropriate operating Power switch on/off. mode. Each time you press the button, a mode is selected in a sequence that LED display goes from COOL, FAN and DRY. The... - Page 13 Installation, Operation & Maintenance Manual - PS-81B / PS-101B Operation Operation Instructions COOL operation Other features • Press the "MODE" button until the SLEEP/ECO operation "COOL" indicator light comes on. • This feature can be activated • Press the ADJUST buttons "+" or from the remote control ONLY.
- Page 14 Installation, Operation & Maintenance Manual - PS-81B / PS-101B Operation • Ensure the louver is fully opened towards the unit and press the Follow under heating operation. Me/Temp Sensing button. The remote display is actual temperature at its • Keep the louver fully opened location.
- Page 15 Installation, Operation & Maintenance Manual - PS-81B / PS-101B Operation • When the water level of the bottom tray reaches a predetermined level, the unit beeps 8 times, the digital display area shows "P1". At this time the air conditioning/ dehumidification process will immediately stop.
-
Page 16: Maintenance
Installation, Operation & Maintenance Manual - PS-81B / PS-101B Maintenance • The water collection tray should Safety Precautions be drained immediately after P1 • Always unplug the unit before error occurs, and before cleaning or servicing. storage to prevent mold. -
Page 17: Fault Diagnosis
Installation, Operation & Maintenance Manual - PS-81B / PS-101B Fault Diagnosis Please check the machine according to the following form before asking for maintenance: Problem Troubleshooting Possible Cause The Water Collection Tray is full. Turn off the unit, drain the water... -
Page 18: Design And Compliance Notes
Installation, Operation & Maintenance Manual - PS-81B / PS-101B Design and Compliance Notes Design Notice In order to ensure the optimal performance of our products, the design specifications of the unit and remote control are subject to change without prior notice. -
Page 19: European Disposal
Installation, Operation & Maintenance Manual - PS-81B / PS-101B European Disposal When using this dehumidifier in the European countries, the following information must be followed: DISPOSAL: Do not dispose this product as unsorted municipal waste. Collection of such waste separately for special treatment is necessary. - Page 20 LIMITED ONE (1) YEAR PARTS AND LABOR EXPRESS WARRANTY first year, labor to diagnose and replace the defective part is not covered by MARS warrants all parts of the Portable Room Air Conditioner to be free from this Limited Express Warranty. If for any reason the replacement part/product...
- Page 21 Installation, Operation & Maintenance Manual - PS-81B / PS-101B THIS PAGE INTENTIONALLY LEFT BLANK...
- Page 22 1900 Wellworth Ave. • Jackson, MI 49203 • 517.787.2100 • www.marsdelivers.com 04/2017...
Need help?
Do you have a question about the PS-101B and is the answer not in the manual?
Questions and answers