Table of Contents
Advertisement
Quick Links
Advertisement
Table of Contents

Summary of Contents for STIGO Stigo
- Page 1 STIGO SCOOTER USER MANUAL www.stigobike.com...
-
Page 3: Table Of Contents
5. OPENING THE BOX ........................5 6. MIRROR ASSEMBLY (NOT APPLICABLE TO ALL MODELS) ............ 5 7. STIGO SCOOTER DETAILS ......................6 8. STIGO SCOOTER DISPLAY DETAILS ..................7 9. HOW TO UNFOLD version 1 ....................8 HOW TO UNFOLD version 2 ....................9 10. -
Page 4: Box
To the extent permitted by law, any liability that may be incurred as a result of the use of a product manufactured by or sold under a license granted by Stigo Ltd is limited to the cost of repairing or replacing the failed product or component at the discretion of Stigo Ltd and does not extend to any loss or damage which may be caused as a consequence of misuse or failure of the products. -
Page 5: Opening The Box
Inspect the contents of the box for scratches in the paint, etc. that may have occurred during shipping. Because the Stigo was 99% assembled and packed at the factory (besides the mirror), there should not be any problems, even if the box has a few scratches or dents. -
Page 6: Stigo Scooter Details
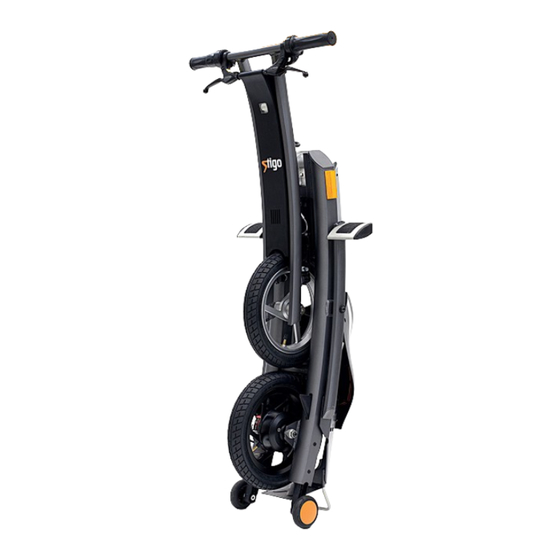
7. STIGO SCOOTER DETAILS Back opening/closing lever Front brake Front opening/closing lever Light Accelerator Horn ON/OFF switch Frame number. Starts with V6G Horn switch Kickstand Mirror Motor Rear brake Transportation wheels... -
Page 7: Stigo Scooter Display Details
8. STIGO SCOOTER DISPLAY DETAILS ON/OFF and charging indicator Speed Error code Speed unit Battery level... -
Page 8: How To Unfold Version 1
9. HOW TO UNFOLD version 1 Hold the Stigo in an upright position. Lower the Stigo to get a clear view of the front opening lever in front of the Stigo. Push down the front opening lever with your thumb. -
Page 9: How To Unfold Version 2
HOW TO UNFOLD version 2 Hold the Stigo in an upright position. Lower the Stigo to get a clear view of the front opening lever in front of the Stigo. Push down the front opening lever with your thumb. Tilt the Stigo and bring the handlebar upwards until your hear the CLICK, which locks the mechanism. -
Page 10: How To Fold
10. HOW TO FOLD Place your hand on the back opening lever. Pull up the back opening lever and push down the seat. Push down the seat until you hear the CLICK, which locks the mechanism. Grip tightly on the carrying handle and place your thumb on the front opening lever to push the lever down. -
Page 11: Starting A Stigo
11. STARTING A STIGO The Stigo scooter is twist grip throttle operated. To move forward, twist the throttle (located on the right handle) backwards, towards you. You control the throttle by twisting it from its resting position. The more you twist, the faster the vehicle will go. The further the throttle is from its resting position, the more power is delivered to the motor to accelerate. -
Page 12: Charging A Stigo
Remove the rubber cover of the charging plug on the Stigo scooter. Plug the charger into the Stigo scooter. Observe the red light on the charger, which indicates the charging. The green light on the charger lights when the batteries of the Stigo scooter are full. Remove the charger. -
Page 13: Pre-Ride Instructions
See if the lights in the front and rear are operating properly. Press the brakes to see if the brake light is working. Please do not use the Stigo if you believe that it is not functioning properly or it might be damaged in any way. -
Page 14: Kickstand
Plug the charger into a standard 100-240 V wall outlet. Check to ensure that the LED light on the charger lights up. The LED light on the charger will turn from red to green once the Stigo is fully charged. Unplug the charger from the outlet and do so promptly after the charge is complete. -
Page 15: Frame And Frame Number
14.4 FRAME AND FRAME NUMBER There is a unique frame number (identifier) on each Stigo. One is on the headset and one on the frame. The frame number is required when you need to make a warranty claim. The Stigo frame is made of 6061 aluminium. It is covered with several layers of bicycle paint and varnish. -
Page 16: Tyres
Stigo are not designed for slippery conditions. It is not recommended to use the product in rain or wet conditions. If the Stigo gets wet, dry it within 10-15 minutes with a clean and dry soft cloth. -
Page 17: Warranty
The Stigo scooter is intended for use on flat, dry surfaces, such as pavement or level ground, that are without loose debris, such as sand, leaves, rocks or gravel. Wet, slippery, bumpy, uneven or rough surfaces may impair traction and contribute to possible accidents. -
Page 18: Service
For your records, save your original sales receipt with this manual. 17. SERVICE Please follow the servicing intervals in order to maintain the validity of your Stigo scooter warranty. Service interval Done by... - Page 20 BEAUTIFUL RIDE www.stigobike.com...

Need help?
Do you have a question about the Stigo and is the answer not in the manual?
Questions and answers