Table of Contents
Advertisement
Advertisement
Table of Contents

Related Manuals for ELNA ARTISTIC PRESS

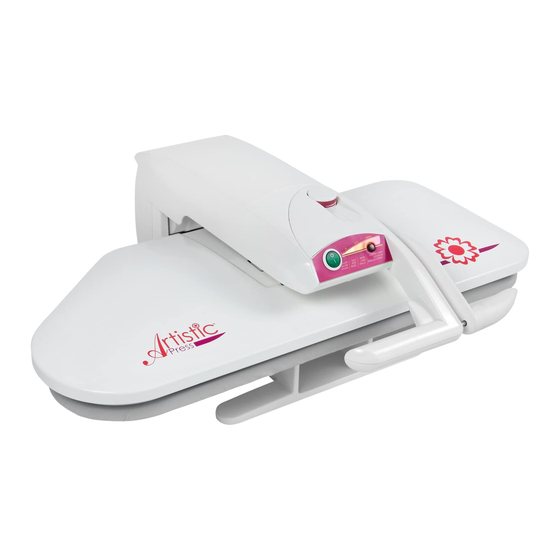
Summary of Contents for ELNA ARTISTIC PRESS
- Page 1 SERVICE MANUAL ARTISTIC PRESS...
-
Page 2: Table Of Contents
TABLE OF CONTENTS GENERAL INFORMATION Dismantling – Assembling – Adjusting ...............3 Malfunction ........................3 Maintenance of the Heating Shoe................3 Locking the press ......................3 Mains Lead........................3 UPPER HANDLE COVER Dismantling......................4;5 MOVABLE HANDLE Dismantling/Reassembling ..................6 HEATING SHOE Dismantling/Reassembling ..................7 THERMOSTAT Dismantling/Reassembling ..................8 THERMOSENSOR – THERMOFUSE – THERMOREGULATOR Dismantling/Reassembling 230-240 Volts..............9 Dismantling/Reassembling 120 Volts.................9 HEATING ELEMENTS... -
Page 3: General Information
(Elna part no. 802450-22). To do so, first turn the press upside down so that the cleaning product applied to the shoe does not drip onto the ironing board cover. -
Page 4: Upper Handle Cover
UPPER HANDLE COVER Dismantling Disconnect the mains lead and close the press. Set up the press in its vertical position. Remove the 2 screw caps (B) with a needle or small pin. Unscrew the 4 screws (C). Keep the press in its vertical position. Unscrew the two screws (A) from under the pressure arm. - Page 5 Unscrew the 2 screws (A) from the control panel. Unscrew the 2 screws (A). Remove the upper handle cover by lifting it up.
-
Page 6: Dismantling
MOVABLE HANDLE ISMANTLING Dismantle the upper handle cover; see page 4;5. Put the press in its closed position. Keep the press closed. Compress the pressure arm by putting a small nail (B) into the hole (C). Open the press and fit a gauge of 100[mm] of height in the middle. -
Page 7: Heating Shoe
HEATING SHOE ISMANTLING Dismantle the upper handle cover; see page 4;5. Disconnect the brown (A), blue (B), black (D) and earth wire (C) coming from inside the heating shoe. Keep the press in its closed position. Unscrew the two nuts (A) and take out the springs (B). -
Page 8: Thermostat
THERMOSTAT ISMANTLING Remove the upper handle cover, see page 4;5. Dismantle the heating shoe; see page 7. To remove the heating shoe cover, unscrew the screw (A). Remove the cover by lifting the backside first and push it towards you. This will disengage the 2 fingers located under the cover. -
Page 9: Thermosensor - Thermofuse - Thermoregulator Dismantling/Reassembling 230-240 Volts
THERMOSENSOR – THERMOFUSE - THERMOREGULATOR ISMANTLING Dismantle the upper handle cover; see page 4;5. Dismantle the heating shoe; see page 7. To remove the heating shoe cover, unscrew the screw (A). Remove the cover by lifting the backside first and push it towards you. -
Page 10: Heating Elements
HEATING ELEMENTS ISMANTLING Dismantle the upper handle cover; see page 4;5. Dismantle the heating shoe; see page 7. To remove the heating shoe cover, unscrew the screw (A). Remove the cover by lifting the backside and pushing it towards you. This will disengage the 2 fingers located under the cover. -
Page 11: Adjustments
ADJUSTMENTS LIGNING THE EATING Close the press slowly with the fixed handle. The heating shoe and the wooden board should be parallel to each other. If they are not parallel, follow the instructions in step 4. Correct and adjust the alignment of the heating shoe as follows. ... -
Page 12: Electrical Repairs
ELECTRICAL REPAIRS Safety Recommendations For safety reasons, please pay special attention to the following recommendations. Electrical safety for the press is ensured by the use of an earth (grounding) connection. Therefore, the press should only be used with a mains lead (extension) and a wall plug provided with earthing. -
Page 13: Checking The Insulation
ELECTRICAL REPAIRS Checking the Earthing (Grounding) Place the press in its open position, and connect the mains lead to the press. Be sure to use the mains lead supplied with the press. The earthing (grounding) should be checked at four places with an ohmmeter. The resistance should measure less than 1 Ohm. -
Page 14: Electrical Problems
ELECTRICAL REPAIRS Electrical Problems Press does not heat or heats poorly. Mains Lead: check by changing or using an ohmmeter (phase neutral – earthing) whether the mains lead of the press is defective. Connector Base: unscrew the connector base and check the connections. Heating Elements: thermo-fuse / thermo-regulator (120V) Use the ohmmeter with connectors 3 and 9. -
Page 15: Press Is Too Hot Or Does Not Stop Heating
ELECTRICAL REPAIRS Thermostat Dismantle the upper handle cover and heating shoe; see page 4;5;7. Check if the ON/OFF button functions properly. Check to make sure that all connectors have a solid contact. Check the fixation of the thermostat. Make sure the thermostat click on angle ... -
Page 16: Wiring Diagram 120 Volts
WIRING DIAGRAM 120 VOLTS a= Connector base d/e= Heating element g= Thermostat b= Connector f= Thermo-fuse h= Thermostat light c= Circuit board f1= Thermo-regulator i= ON/OFF switch... -
Page 17: 230-240 Volts
WIRING DIAGRAM 230 VOLTS a= Connector base d/e= Heating element h= Thermostat light b= Connector f= Thermo-fuse i= ON/OFF switch c= Circuit board g= Thermostat...
Need help?
Do you have a question about the ARTISTIC PRESS and is the answer not in the manual?
Questions and answers