Table of Contents
Advertisement
Quick Links
Advertisement
Table of Contents
Troubleshooting

Summary of Contents for AMP EFI MS3Pro
- Page 1 1st Gen MS3Pro 1st Gen User Manual Manual Version 1.202, Firmware Version 1.5.0...
-
Page 2: Table Of Contents
1.2.1.3 MS3Pro Plug and Play ........13... - Page 3 5.1 Connecting the MS3Pro to your laptop ........
- Page 4 5.3.26 GM 7X ..........92 AMP EFI MS3Pro manual version 1.202, firmware 1.5.0, 4/21/2017...
- Page 5 Setting the TPSdot/MAPdot Threshold Levels ..... . . 118 AMP EFI MS3Pro manual version 1.202, firmware 1.5.0, 4/21/2017 Page 5...
- Page 6 7.1.4 Engine state settings ......... 128 7.1.4.1 How the MS3Pro uses engine states ......129 7.1.4.2 Tuning engine states .
- Page 7 7.3.8 Knock sensor parameters ........174 AMP EFI MS3Pro manual version 1.202, firmware 1.5.0, 4/21/2017...
- Page 8 7.6.2.2 Closed loop specific settings ....... 203 AMP EFI MS3Pro manual version 1.202, firmware 1.5.0, 4/21/2017...
- Page 9 7.8.1.1 Analogue linear input ........229 7.8.1.2 Digital pulse input to MS3Pro ....... 229 Wheel mounted .
- Page 10 7.10.1.3 Digital I/O ......... . 261 AMP EFI MS3Pro manual version 1.202, firmware 1.5.0, 4/21/2017...
- Page 11 8.6.1 TunerStudio firmware loader ........301 AMP EFI MS3Pro manual version 1.202, firmware 1.5.0, 4/21/2017...
-
Page 12: Introduction
Congratulations on your purchase of an MS3Pro! The MS3Pro is a standalone engine management system capable of running sequential fuel injection on up to 12 cylinder engines. This manual covers the original MS3Pro ECU.. The MS3Pro is manufactured by AMP EFI, a branch of Hoffmann Innovations, LLC. -
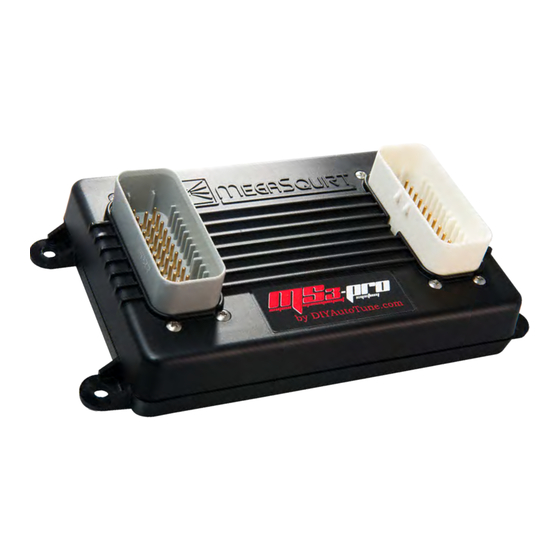
Page 13: Ms3Pro Module
fits within the stock ECU housing. 1.2.1.3 MS3Pro Plug and Play The MS3Pro PNP is a line of vehicle specific plug and play ECUs using the MS3Pro at their core. The exact feature set and pinout will depend on the application. All models offer peak and hold injector drivers for the main fuel outputs. -
Page 14: Wiring Harness
1.3.3 Ignition coils AMP EFI sells several ignition coils as well. The IGN-1A has a built in ignition module and can be wired directly to the MS3Pro. All other coils require the QuadSpark or other external ignition module when used with MS3Pro. -
Page 15: High Side Driver Module
1.3.7 Peak and hold driver module The original MS3Pro injector outputs are set up to run high impedance injectors. If you need to run low impedance injectors, use our external peak and hold driver module. This module connects in between the injector outputs and the injectors, and uses current sensing to limit the injector current. -
Page 16: Installing The Software
Both TunerStudio and MegaLogViewer have registered versions. To unlock the registered version, use the serial number code on your MS3Pro. This appears on a label on the underside of the box as well as on a tag on the back of the MS3Pro. -
Page 17: Creating A Project
Selecting “New Project” from the File menu opens a wizard to create a new project. It will bring up a screen like the one below. At this point, you will want to have the MS3Pro powered up (see section 4 for wiring details) and connected to the laptop with either the USB or RS232 cable. - Page 18 4. TCP/IP - WiFi Driver. Use with WiFi to serial adapters. Specify which driver you will use at the top of this screen. MS3Pro normally communicates at a 112500 baud rate. After clicking Next, TunerStudio’s final project setup screen lets you select a gauge display.
-
Page 19: Tunerstudio Main Screen
• There is a second set of tabs at the bottom of the gauge cluster that allows you to set up multiple, separate gauge clusters. Click on the rectangular icon to create a new cluster. AMP EFI MS3Pro manual version 1.202, firmware 1.5.0, 4/21/2017 Page 19... -
Page 20: Loading And Saving Tunes
The File -> Save Tune As command will fetch the tune from the ECU and save it to a file. If you have just connected to an MS3Pro and do not have a copy of the tune, we strongly recommend saving a copy as soon as you connect. - Page 21 • Trim tables (requires wideband to be installed in individual header pipes • Warmup enrichment TunerStudio’s Help file has a detailed write up on how to use this feature. AMP EFI MS3Pro manual version 1.202, firmware 1.5.0, 4/21/2017 Page 21...
-
Page 22: Ms3Pro Hardware
3.1 Overview The MS3Pro is a full standalone ECU with everything you need to run sequential fuel injection on up to 12 cylinders. This ECU is based on the previous MegaSquirt-III design and runs similar code, but we’ve miniaturized the system to fit into a smaller package, and put it in a waterproof enclosure with high current, vibration resistant AMPSEAL... -
Page 23: Inputs
Our strategy for heat management is simple: You don’t need to dissipate heat if you don’t make heat in the first place. The MS3Pro uses a power supply optimized for high efficiency, and if you want to use circuits that generate large amounts of heat like peak and hold injector drivers, they can be ordered as an external box. -
Page 24: Temperature Inputs
TPS. If your engine does not have a suitable TPS, you should connect this input to the sensor return. Leaving this input free disconnected can give a false high TPS reading and cause the MS3Pro to trigger flood clear mode when starting. -
Page 25: Knock Input
3 MS3PRO HARDWARE 3.2.7 Knock input The MS3Pro employs a DSP based knock sensor interface chip. This can use either one or two knock sensors, and incorporates a built in, software adjustable bandpass filter. The interface allows you to adjust the triggering threshold as a function of RPM and detect knock only at specific crank angles so as to filter out noise occurring... -
Page 26: Ignition Outputs
3.3.2 Ignition outputs The MS3Pro uses 5 volt, logic level ignition outputs with a high side driver circuit. These will drive most factory ignition modules and coils with built in ignitors. For use with coils that lack built in ignition modules, we recommend the QuadSpark external ignition module. -
Page 27: High Current Outputs
Note: Any device connected to these outputs must be set up so that it is powered off when the ECU is shut down. Relays or solenoids connected to these outputs can back feed power into the MS3Pro if the relay coil or solenoid winding receives power with the key on. -
Page 28: Maintenance Inside The Case
• Third party CAN enabled wideband O sensor controllers 3.5 Maintenance inside the case The MS3Pro has several parts designed to be easy to repair in the unlikely event that the user needs to service the ECU. 3.5.1 Changing the fuses The MS3Pro uses two replaceable fuses. -
Page 29: Replacing The Sd Card
3.5.2 Replacing the SD card The SD card stores the MS3Pro’s data logs. This can be swapped out for a larger card if needed. The card simply slides in until the retaining pin in the side of the SD holder moves out. You do not need to push the card to eject it - simply pull it out. -
Page 30: Wiring
You will also want to make sure the 12 volt power wire is clean. We recommend using one power wire from the battery for the MS3Pro EFI main relay, and a separate power wire to power the relay for the injectors, fuel pump, and ignition system for maximum noise reduction. - Page 31 ** RS232 connections are brought to their own Weather Pack 4 pin connector and do not go into the main harness. AMP EFI MS3Pro manual version 1.202, firmware 1.5.0, 4/21/2017 Page 31...
-
Page 32: Wiring Diagram
4.2 Wiring diagram These show the basic connections - power, ground, fuel, ignition, idle control, and basic sensors. Other optional inputs and outputs are covered in their respective sections. AMP EFI MS3Pro manual version 1.202, firmware 1.5.0, 4/21/2017 Page 32... - Page 33 4.2 Wiring diagram 4 WIRING AMP EFI MS3Pro manual version 1.202, firmware 1.5.0, 4/21/2017 Page 33...
- Page 34 4.2 Wiring diagram 4 WIRING AMP EFI MS3Pro manual version 1.202, firmware 1.5.0, 4/21/2017 Page 34...
- Page 35 4.2 Wiring diagram 4 WIRING AMP EFI MS3Pro manual version 1.202, firmware 1.5.0, 4/21/2017 Page 35...
-
Page 36: Engine Position Sensors
CKP and the one at cam speed is the CMP. • On a GM Optispark and most Nissan optical cam sensors, the MS3Pro normally uses a ring with one slot per cylinder for primary engine operation. There is a ring of 360 slits that is used for cranking and operation at very low RPM. -
Page 37: Points Triggering And Points Replacement Devices
1K resistor from the signal wire to the power wire. If it is at zero volts in one state and bounces up to at least 5 volts in the other state, it doesn’t need a pull up resistor. The MS3Pro package includes two 1K resistors in blue sealed tubing with blue wire leads. -
Page 38: Map Sensors
The reference voltage connects to the MS3Pro’s VREF pin, and the ground pin to the sensor ground wire. For a voltage based MAP sensor, connect the signal pin to the MS3Pro’s MAP input wire. An additional MAP sensor may be used to measure barometric pressure on one of the spare analog inputs. -
Page 39: Mass Air Flow Sensors
• Signal GND should connect to MS3Pro sensor ground. If the sensor has only one ground, it’s sensor ground. • If the sensor uses a terminal called Power GND, this should connect to the same point as the MS3Pro power grounds. -
Page 40: Ford 5 Pin Rectangular Connector Maf
The MS3Pro can accept input from a narrow band O sensor directly; simply wire the narrow band sensor signal to the O2 input wire on the MS3Pro. Narrow band O sensors may have from one to four wires. Here is what to do with the wires depending on the type. -
Page 41: Knock Sensors
MS3Pro sensor ground wire. Do not connect any wires labeled “serial output”, “digital output” or similar to the MS3Pro, or connect any other sort of wideband ground to the MS3Pro. Here is a list of what wire to use with common wideband controllers. -
Page 42: Generic On/Off Switches
4.4.9 Other sensors You can connect any 0 to 5 volt analog signal to the Analog In inputs. The MS3Pro software can use these for data logging or other functions. -
Page 43: Quadspark Ignition Module
The coils on GM’s LS series engines are a popular choice as they are readily available, inexpensive, powerful, and have a built in ignition module. They can be wired directly to the MS3Pro. LS1 and LS2 coils use different connector... -
Page 44: Vw Pencil Coils
Many of these are intended for an unusually high current signal instead of a logic level output. To use one of these boxes, connect the Tach Out wire on the MS3Pro to the ignition box’s points trigger. The MSD 6A box used a white wire for this input, and most other CDI boxes have followed their lead. -
Page 45: Common Firing Orders
4.6 Ignition outputs 4 WIRING 4.6.6 Common firing orders AMP EFI MS3Pro manual version 1.202, firmware 1.5.0, 4/21/2017 Page 45... -
Page 46: Iac Valves
4.7 IAC valves IAC stands for Idle Air Control. These valves work like a small throttle under ECU control to allow the MS3Pro to adjust idle speed. Sometimes you will see these called an ISC valve, for Idle Speed Control, or BAC, for Bypass Air Control. - Page 47 first coil again with the opposite polarity of the first time the rotor will rotate a little more, and so on. The MS3Pro controller applies pulses in a particular sequence to the four wires to produce rotation. Each pulse results in specific amount of rotation of the motor .
-
Page 48: Pwm Iac Valves
Two coil IAC valves have three wires. One terminal is for 12 volt switched power; the other two connect to the MS3Pro PWM outputs, one of which should be PWM / Idle Out 1 (you can specify in the software which output closes the valve and which opens it). -
Page 49: On/Off Iac Valves
Do not wire a fuel pump directly to the MS3Pro. Also, do not wire the fuel pump relay coil in such a way that it receives 12 volts with the key off, as this power can backfeed into the MS3Pro and cause it to stay powered up when the ignition is turned off. -
Page 50: Grounding Notes
16 on the white connector and all the power grounds on the gray connector to the battery negative terminal. It is less than ideal, but still acceptable in most cases, to ground the MS3Pro to the engine block or cylinder head. -
Page 51: Setting Up A Basic Configuration
10. At this point, you’re ready to start setting up the MS3Pro to run your engine. The first rule of tuning is that you do not want to tune from a blank file. You can either connect to the MS3Pro and retrieve the tune on it (this is done automatically) or open an existing tune file, but be careful if you see this... -
Page 52: Basic Engine Constants
5 SETTING UP A BASIC CONFIGURATION We recommend that you do not have the ignition coils hooked up while doing a basic setup on the MS3Pro. During the setup stage, you will define what type of ignition hardware that you are using, but if the ignition you have doesn’t work with the default settings, you may overheat your ignition module and damage it before you are done... - Page 53 • Engine Size and Injector Size are used for MAF fueling and the Required Fuel calculator. • Main fuel outputs - This should be set to “Injector A, B...” Fuel for all normal MS3Pro installs. This is included to allow you to check tune files imported from standard MS3s. It can be set to use only injector I and J, but this is mostly to maintain compatibility with MS3 V3.0 / V3.57 tune files.
-
Page 54: Ignition Settings
Note that to use semi-sequential or sequential injection, you will need to select a spark mode that supports se- quential injection. See ignition settings for more details. • Angle Specifies - The MS3Pro has a tunable injector timing table, and this setting determines how the MS3Pro interprets that table. - Page 55 Note that some modes in the chart below can be run without a cam sensor, but if the cam sensor is omitted, the engine will not be able to run sequential injection or coil on plug. AMP EFI MS3Pro manual version 1.202, firmware 1.5.0, 4/21/2017 Page 55...
- Page 56 Fuel injected Harley-Davidson V-twins Miata 36-2 Flyin’ Miata aftermarket trigger Daihatsu 12+1 Daihatsu EF-SE and other coil on plug 3 cylinders Subaru 36-2-2-2 Subaru engines with variable valve timing (AVCS) AMP EFI MS3Pro manual version 1.202, firmware 1.5.0, 4/21/2017 Page 56...
- Page 57 So if you were using a Hall effect sensor where the voltage dropped from 12 to 0 volts, the MS3Pro will see this as a rising edge instead of a falling one. If using the Digital Frequency In pins for cam input, the signal on the Digital Frequency In pins is not inverted.
- Page 58 – Single coil - just one coil or spark output. e.g. single coil, TFI, HEI, EDIS. EDIS actually has multiple coils, but there is only one output from the MS3Pro to the EDIS module, so it uses the “Single Coil”...
- Page 59 • Cranking dwell - specifies the base coil dwell time during cranking before battery correction is applied. • Cranking advance - The MS3Pro uses a fixed timing angle while cranking, specified here. • Toyota Multiplex - Used for Toyota DLI distributorless ignitions. Known applications include the 7M-GTE and Japanese market 4A-GZE.
-
Page 60: Basic Trigger
The crank angle at which the tach input triggers is of importance and needs to be configured in the MS3Pro. It can be really helpful to install timing tape on your crank pulley or temporarily mark on a range of angles. For best spark control, there are some optimal and some disallowed crank angles. -
Page 61: Ford Tfi Distributors
These are still set up as basic trigger, but you will set “TFI Signature PIP” under Ford TFI Options. Set “Ignition Input Capture” to “Falling Edge” and Spark Output to “Going High”. AMP EFI MS3Pro manual version 1.202, firmware 1.5.0, 4/21/2017 Page 61... -
Page 62: Gm Hei
The tach output, on the other hand, will provide ground, so it is used to trigger the MSD box. For an MSD 6AL or similar box, connect the MSD white wire to the MS3Pro tach output pin. -
Page 63: Fuel Only
5.3.3 Fuel only When the MS3Pro is not controlling ignition, you will need to send it a tach signal on the CKP In white wire. The MS3Pro Ultimate adds an optoisolated input to trigger off the negative terminal of the coil - note that this is not available with the original MS3Pro or the MS3Pro EVO. - Page 64 • 60-2 on crank plus single tooth cam sensor - Bosch Motronic systems with sequential injection or distributor- less ignition • 60-2 on crank plus four tooth cam sensor - Bosch Motronic or GM 58X systems with variable valve timing AMP EFI MS3Pro manual version 1.202, firmware 1.5.0, 4/21/2017 Page 64...
-
Page 65: Terminology Notes
5.3.4.2 Wheel naming There does not appear to be universal agreement on the way to name wheels among manufacturers. In the MS3Pro documentation, we use a standard where a minus sign indicates missing teeth, a slash indicates a separate wheel, and a plus indicates a tooth added to the same wheel. Here are some examples of how this naming convention works. -
Page 66: Existing
There are two main categories of install - Existing and Retrofit. 5.3.4.4 Existing In this cases where you are fitting MS3Pro to an engine already fitted with a trigger wheel, your main task is to wire up the sensor(s), determine the tooth #1 angle and wire up your coil(s). It should not normally be necessary to alter the engine. - Page 67 A different way of looking at the same phasing. Turn your engine so that tooth #1 aligns with the sensor. Read off the tooth#1 angle from timing marks/tape on the crank pulley. AMP EFI MS3Pro manual version 1.202, firmware 1.5.0, 4/21/2017 Page 67...
-
Page 68: A Note About Vr Sensors And Missing Tooth Wheels
Cam triggering is less accurate than crank triggering due to timing belt or chain stretch. The MS3Pro code benefits from a reasonable number of teeth (hence 36 or 60) for best ignition timing accuracy. Low tooth count wheels such as 8-1 are not advised. -
Page 69: Missing Tooth Crank Wheel And Single Tooth Cam Wheel
For a hall type sensors you need to ensure that the edge you choose matches up with the phasing as below. To confirm correct cam sensor phasing proceed as follows. First, set your engine at TDC compression #1. AMP EFI MS3Pro manual version 1.202, firmware 1.5.0, 4/21/2017 Page 69... - Page 70 However, the cam sensor can be at any angle except having the active edge aligned in the tooth gap. AMP EFI MS3Pro manual version 1.202, firmware 1.5.0, 4/21/2017 Page 70...
-
Page 71: Missing Tooth Crank Wheel And Polled (50/50 Or Half Moon) Cam Wheel
The MS3Pro first checks for a missing tooth in the crank wheel sensor, then checks the voltage coming from the cam signal to determine if the cylinder is on the compression or exhaust stroke, without waiting for the cam sensor to reach an edge. - Page 72 Now rotate the engine backwards to tooth #1. The cam sensor should be roughly in the middle of win- dow/tooth/vane. With the cam sensor powered and connected to the MS3Pro, measure the output voltage. When AMP EFI MS3Pro manual version 1.202, firmware 1.5.0, 4/21/2017...
- Page 73 ~0V here requires the HIGH setting and a voltage of ~5V here requires the LOW setting, as the MS3Pro input conditioner inverts the signal. Now rotate the engine backwards a full revolution. The cam sensor will be opposite that previous window/tooth/vane.
- Page 74 • Tooth #1 Angle (deg BTDC) = set as above • Main wheel speed = Crank wheel • Second trigger active on = Poll Level • Level for phase 1 = set as above AMP EFI MS3Pro manual version 1.202, firmware 1.5.0, 4/21/2017 Page 74...
-
Page 75: Missing Tooth Crank Wheel And Irregular Cam Wheel
(marked with a green arrow). Notice that the cam sensor signal is high for the entire length of this tooth, but low for the entire duration of the tooth on the rotation before it. AMP EFI MS3Pro manual version 1.202, firmware 1.5.0, 4/21/2017 Page 75... - Page 76 Next, we’ll zoom in on that arrow and count how many crank teeth after the missing tooth there are to the center of the tooth that we’re using for the cam sync. AMP EFI MS3Pro manual version 1.202, firmware 1.5.0, 4/21/2017 Page 76...
-
Page 77: Nippon Denso Cas
• Check at tooth #: 6 By checking the cam signal only on one specific tooth, we are able to make the MS3Pro run this engine sequentially without the need to modify the distributor trigger or write a custom wheel decoder. -
Page 78: Non-Missing Tooth Cam Wheel With Single-Tooth Cam
If they do happen at the same time, you can probably chose the triggering edges so the MS3Pro does not “see” the two edges at the same time. Here is how to set this one up. - Page 79 • Main wheel speed = Cam wheel • Second trigger active on = Set to make sure this does not overlap with main wheel • and every rotation of = Cam AMP EFI MS3Pro manual version 1.202, firmware 1.5.0, 4/21/2017 Page 79...
-
Page 80: Non-Missing Tooth Cam Wheel With Two Opposite Teeth On The Cam
5.3.4.14 Non-missing tooth cam wheel with one cam tooth per cylinder This arrangement is one of the variants used in Nippon Denso CAS. Three and four cylinder versions are known to exist. AMP EFI MS3Pro manual version 1.202, firmware 1.5.0, 4/21/2017 Page 80... -
Page 81: Non-Missing Tooth Crank Wheel With One Cam Tooth
Chrysler 318 and 360 Magnum, the Mazda KLDE, and some Toyota JZ engines. Also, it could be used to extend a simple distributor crank trigger to support sequential. Generally MS3Pro benefits from many crank teeth to improve ignition timing accuracy. However, with this wheel arrangement, you need to beware of trying to use too many teeth on the crank as there is a risk of the trigger inputs overlapping as the cam belt or chain stretches. - Page 82 First, set your engine at TDC compression #1. Now rotate the engine backwards until the cam sensor and tooth line up. If you rotated more than one turn, then add 360 to your tooth#1 angle. AMP EFI MS3Pro manual version 1.202, firmware 1.5.0, 4/21/2017 Page 82...
- Page 83 • Main wheel speed = Crank wheel • Second trigger active on = Set to make sure this does not overlap with main wheel • and every rotation of = Cam AMP EFI MS3Pro manual version 1.202, firmware 1.5.0, 4/21/2017 Page 83...
-
Page 84: Example Wheel Decoder Settings
Although there is an 18 tooth wheel on the crank, it connects to the factory ignition module. The MS3Pro will use the 6X signal from the ignition module plus the 1X cam signal for timing control and sequential injection. -
Page 85: Chrysler 318 / 360 Magnum V8
Some of these used Hall effect cam sensors and others used VR type ones, but engines without VVT all used a single tooth cam sensor. You may need to adjust the second trigger settings depending on the sensor type. AMP EFI MS3Pro manual version 1.202, firmware 1.5.0, 4/21/2017 Page 85... -
Page 86: Ford Coyote
The EDIS module itself handles all the decoding of the toothed wheel and sends one pulse per cylinder to the MS3Pro. The code optionally supports the use of a cam sensor in addition to the EDIS system and then supports sequential fuel. - Page 87 Use the following settings: • Spark mode: EDIS (EDIS Multispark can be used on some 4 cylinder modules, but this function only works if your module supports it.) • Trigger angle: 0 AMP EFI MS3Pro manual version 1.202, firmware 1.5.0, 4/21/2017 Page 87...
-
Page 88: Checking The Timing
firing each coil pair every crank revolution. However for sequential fuel it is necessary to use a cam sensor in addition so the MS3Pro knows what phase the engine is on. Most original cam sensors are 2 wire VR type, so only require a ground and the signal connecting to the MS3Pro. -
Page 89: Subaru 6/7
The number of teeth on the camshaft position sensor change with the number of cylinders; the MS3Pro will select the cam wheel based on the general setup information entered. The camshaft position sensor must be used if sequential injection or ignition is used, but the crank wheel can run the engine in semi-sequential and wasted spark. -
Page 90: 6G72
Caution: Early Miatas used a version of this CAS where the timing is 360 (crank) degrees off normal. On these cars, you will need to swap cylinders A-B with cylinders C-D in the wiring. AMP EFI MS3Pro manual version 1.202, firmware 1.5.0, 4/21/2017 Page 90... -
Page 91: Twin Trigger
Because of the nature of the VR sensor, it can trigger off either edge, depending on the wiring. Ignition input capture should be tried both ways and set to which one gives you the most stable signal. AMP EFI MS3Pro manual version 1.202, firmware 1.5.0, 4/21/2017 Page 91... -
Page 92: Suzuki Vitara 2.0
Used on the Nissan QR25DE and some other Nissan four cylinders with crank triggering. The crank wheel has 36 base teeth with two gaps two teeth wide. Supports fully sequential injection. 5.3.28 Honda RC51 Known applications include: • Honda RC51 AMP EFI MS3Pro manual version 1.202, firmware 1.5.0, 4/21/2017 Page 92... -
Page 93: Fiat 1.8 16V
The Optispark requires a fused 12V supply. This can be tapped into the same 12V supply as the MS3Pro. The Ground connection should be run to the sensor ground at the MS3Pro. The high and low resolution tach signals each require a 5 volt "pull up"... -
Page 94: Nissan Sr20
Ignition Input Capture needs to be set to Rising Edge for MS3Pro, and spark output needs to be set to Going High. -
Page 95: Honda Acura (V6)
Note - the Ti-VCT system used on the Coyote motors is considered a subset of Toothed Wheel with a special cam decoder instead of Zetec VCT mode. See the Coyote example under Toothed Wheel. AMP EFI MS3Pro manual version 1.202, firmware 1.5.0, 4/21/2017 Page 95... -
Page 96: Flywheel Tri-Tach
Both are Hall effect and require pull ups. Supports sequential injection, but as the MS3Pro has only eight ignition outputs, you will need to run wasted spark ignition. Factory Chrysler coils require external ignition modules such as the QuadSpark. Gen 1 mode is used for the 1995 and earlier, which had three teeth on the cam trigger, while the others use regular Viper V10 mode and have a one tooth cam trigger. -
Page 97: Hd32-2
• Open loop (warmup) - The valve opening amount is set as a function of coolant temperature, starting at an open value with the engine cold and closing the valve as it warms up. AMP EFI MS3Pro manual version 1.202, firmware 1.5.0, 4/21/2017 Page 97... -
Page 98: On / Off Settings
• Fast Idle Temperature - the solenoid opens below this temperature and closes above it. • Hysteresis - If the temperature drops below the opening temperature, it needs to drop by this additional amount before re-opening the valve to prevent the MS3Pro from pulsing the valve rapidly at the opening temperature. -
Page 99: Pwm Idle Valve Settings
– Always on: Applies full power to the last coil to move to prevent the valve from turning. This can make the valve and the drive circuit run hotter and makes the MS3Pro draw more current, but locks the valve in position. - Page 100 You’ll also want to set up a couple basics on how the MS3Pro uses the oxygen sensor. Go to Fuel Settings and select AFR / EGO Control. This will bring up the screen below.
-
Page 101: Tuning The Ms3Pro
6.1.1.1 Injector test mode The injector test mode can be used both to confirm the injectors are wired correctly and to use the MS3Pro as a controller for an injector test bench. If your injectors are fitted to the engine, you must not run the test mode with fuel pressure or you will fill your engine with fuel! Remove the fuse from your fuel pump... -
Page 102: Coil Test Mode
Note that with a PWM idle valve or a five or six wire stepper valve, you may need to run a temporary fused 12V supply to the valve if you normally take power from the fuel pump relay and are testing with the engine off. AMP EFI MS3Pro manual version 1.202, firmware 1.5.0, 4/21/2017 Page 102... -
Page 103: Testing A Stepper Iac Valve
• Problem: Valve vibrates when commanded to move, but does not actually turn. – One coil is wired backwards; swap wire 1A for 1B, or 2A for 2B. • Problem: Valve moves, but in opposite direction of intended. AMP EFI MS3Pro manual version 1.202, firmware 1.5.0, 4/21/2017 Page 103... -
Page 104: Testing A Pwm Iac Valve
Use a "2-stroke" setting for wasted-spark or wasted-COP if you have a dial-back light. With a coil-on-plug pencil type coil you will need to remove the coil from the engine and install a short length of regular spark plug wire from AMP EFI MS3Pro manual version 1.202, firmware 1.5.0, 4/21/2017 Page 104... -
Page 105: Starting The Engine
We recommend starting a data log as well. While the engine will usually start if you’ve gone through all the previous steps for setting up MS3Pro, sometimes you’ll need a couple more tweaks, and the data log can be very valuable if it comes to that. Go to the Data Logging menu, select Start Logging, and enter a name for your data log. -
Page 106: Setting Running Timing
• If it does not, then adjust your tooth#1 angle (trigger wheel) or trigger angle/offset (other spark modes.) • If the actual timing is more advanced than MS3Pro thinks, then increase the trigger angle/offset. If adjust- ments of more than 10 degrees are required, making the change, click Burn, turn the key off, and restart the engine. - Page 107 These tables are called 3D tables because they can be drawn as a shape in 3 dimensional space. The first dimension, the X axis, is pretty much always RPM for the 3D tables in MS3Pro. The Y axis is a load variable, usually expressed as a percent.
- Page 108 flash memory, and the close button closes the table. Note that changes to the cells will take effect as soon as you enter them, but if they are not burned to flash memory, the MS3Pro will not keep the changes after it shuts down.
-
Page 109: Tuning Fuel
- especially if you have very large injectors. The MS3Pro dead time system is found on the Fuel Settings -> Injector Dead-time. It allows for individual or grouped setting of these dead times. This will match up with the "Main fuel outputs setting" on the engine and sequential settings page. -
Page 110: Small Pulse Widths
Unless you have calibration data for your injectors measured on your MS3Pro, this feature should be left turned off. The X-axis of the curve is the MS3Pro pulsewidth (before deadtime is applied) and the Y-axis is the required injector pulsewidth (before deadtime) that the injector needs to approximate linearity. Most injectors observed exhibit an "S"... -
Page 111: Afr Table
13.5 at full throttle, while engines running forced induction may need to run as rich as the mid 11’s under boost. The Tools menu in the upper left hand corner lets you bring up an AFR table generator. AMP EFI MS3Pro manual version 1.202, firmware 1.5.0, 4/21/2017 Page 111... -
Page 112: Ve Table
Tuning the VE table involves enriching (by increasing the VE) or leaning (be decreasing VE) at each point in the VE table. Most of your driving will occur in a diagonal strip of the VE table, from low rpm, low kPa (i.e. idle) AMP EFI MS3Pro manual version 1.202, firmware 1.5.0, 4/21/2017 Page 112... -
Page 113: Ve Table Generator
6.3.5 Basic acceleration enrichment (AE) tuning MS3Pro has two options for basic acceleration enrichment, plus model based acceleration enrichment that we’ll discuss later. One is the time based accel enrichment setup. The other one behaves similar to an accelerator pump on a carburetor. -
Page 114: Main Accel Enrich Settings Menu
6.3 Tuning fuel 6 TUNING THE MS3PRO throttle in 1/2 second. The MAPdot is measured in kPa per second. MS3Pro can use either one, or a combination of the two, to trigger acceleration enrichment. 6.3.5.1 Main accel enrich settings menu This menu allows for several changes that affect both AE modes. -
Page 115: Time Based Ae
As with MAPdot threshold, this has similar trade-offs between setting it too sensitive and not sensitive enough. • Cold Accel multiplier %: This is applied whenever warmup enrichment is active. The MS3Pro applies the full amount of multiplier when coolant temperature is at -40 degrees. It tapers off in a linear fashion to zero when you reach the point on the warmup enrichment curve where WUE equals 100% and there is no enrichment. - Page 116 • End pulse width: The amount of pulse width at the end of the acceleration event, as a percentage of AMP EFI MS3Pro manual version 1.202, firmware 1.5.0, 4/21/2017 Page 116...
-
Page 117: Getting It Dialed In
• Cold Accel Adder: This is applied whenever warmup enrichment is active, and is added to the standard PW adder. The MS3Pro applies the full amount of added pulse width when coolant temperature is at the lowest temperature point in the warmup enrichment curve. It tapers off in a linear fashion to zero when you reach the point on the warmup enrichment curve where WUE equals 100% and there is no enrichment. -
Page 118: Map Based Or Tps Based Ae
Additional possibilities for noise to get in the TPS signal could be a bad sensor ground (be sure you’ve grounded it the MS3Pro sensor return wire), or a faulty TPS sensor. Similarly noise on the MAP signal could be electrical, but is more likely to actually be real movement in the manifold pressure, at least at the source you’re grabbing the vacuum signal from, meaning the... -
Page 119: Startup / Warmup Fueling
Here is the sequence that MS3Pro fueling goes through while starting. 1. When the key is on, the MS3Pro will turn the fuel pump on for 2 seconds and fire one priming pulse to clear air for the lines. (You can disable this feature by setting the priming pulse to zero.) 2. -
Page 120: Priming Pulse
You can set the pulse width as a function of coolant temperature. 6.3.6.3 Afterstart (ASE) percentage This is a curve of percentage multiplier versus time. The MS3Pro will apply the full amount immediately after RPM climbs past cranking RPM and then taper it off linearly through the ASE taper time. -
Page 121: Tuning Spark
We’ll take some time here to explain how to tune your MS3Pro for a smooth idle.The first key may surprise many novice tuners: The idle control settings are not the most important thing to adjust to get a smooth idle. -
Page 122: Correct Fuel
RPM amplify itself into an idle speed that cycles up and down rapidly. Too much timing can be trouble. If the timing at your regular idle speed already puts you at the most power AMP EFI MS3Pro manual version 1.202, firmware 1.5.0, 4/21/2017 Page 122... -
Page 123: Correct Airflow
Closed loop mode tries to maintain a target idle speed. We’ll cover closed loop idle tuning and several of the MS3Pro’s other idle control features, such as increasing the idle speed when the A/C or cooling fan come on, under the Additional Items. -
Page 124: Additional Items: Beyond Basic Fuel And Ignition Control
7 Additional items: Beyond basic fuel and ignition control The MS3Pro will control a lot more than basic fuel and ignition. In this section, we’ll cover what else the MS3Pro can do, one menu screen at a time. We’ll skip the menu screens that were set up in sections 5 and 6, and cover the rest here. -
Page 125: Map Sensor Settings
• 2nd MAP port - enables a secondary voltage MAP sensor and selects where it is wired. If using two MAP sensors, the MS3Pro compares both MAP sensors and uses the lower one as the reading for the engine. 7.1.1.3 General Sensor Settings The MegaView was an add on display device from the DIY line of MegaSquirt products, although the availability of inexpensive Android tablets has eliminated most demand for it. -
Page 126: Rev Limiter
7.1.2 Rev Limiter MS3Pro allows for fuel or spark based rev limiting. You can also allow the rev limit to change as a function of coolant, so as to set it low before the engine warms up, or even drop the rev limit if you overheat. -
Page 127: Coolant Temp Limiter
• Progressive Fuel Cut - If this is turned off, the fuel cut applies abruptly when you reach the hard limit. If this setting is on, the MS3Pro will shut off fuel to one cylinder at the soft rev limit and ramp this up to cutting all cylinders at the hard limit. -
Page 128: Shift Light
The shift light will need switched 12 volt power on one end and the MS3Pro will supply ground. The light needs to be wired so it does not receive power with the key off. The stepper outputs are an exception. -
Page 129: How The Ms3Pro Uses Engine States
• Use VSS - Allows using the speed sensor to trigger closed loop idle and other idle related functions. • VSS threshold - If using VSS is turned on, the MS3Pro will not use closed loop idle, idle advance, or idle VE above this speed. -
Page 130: Tuning Engine States
• The RPMdot rate needs to be below the fast deceleration threshold (if the engine is slowing that fast, it is likely that the engine is in neutral and RPM is dropping rapidly, so the MS3Pro will turn on fueling to prevent the fuel cut from stalling the engine) and below the fast acceleration threshold (which clearly is not an overrun condition). -
Page 131: Fan Control
Many cars have enough airflow at cruising speed to not need an electric fan at that point, so you can shut it off to save power. The MS3Pro outputs can drive a relay; don’t wire them to the fan directly. -
Page 132: Torque Converter Lockup
• VSS shutoff enable - turning this on allows the MS3Pro to shut off the fan based on vehicle speed since at higher speeds the air flow through the radiator is often sufficient without the fan. Requires VSS input enabled under Speed and Gear Sensors. -
Page 133: Alternator Control
• Activation delay - wait this long after conditions are met before locking up. The MS3Pro can drive a 5A solenoid with a high current output, or up to 3A with a PWM output. If you need more current, you will need to use a relay. - Page 134 • Control frequency - What frequency is used to pulse the output in open loop duty or closed loop field control mode. • Warning lamp output - If this output is enabled, the MS3Pro will trigger it if the voltage drops below the target voltage minus the warn on voltage difference setting.
-
Page 135: Ford Alternators
Chrysler eventually integrated the voltage regulator control into the ECU, but did not change the alternator construction itself. The result is that you can control even 1960s AMP EFI MS3Pro manual version 1.202, firmware 1.5.0, 4/21/2017 Page 135... -
Page 136: Miata Alternators
7 ADDITIONAL ITEMS: BEYOND BASIC FUEL AND IGNITION CONTROL era Chrysler alternators with the MS3Pro - or if you happen to be low on available pins, you can run a computer controlled Chrysler alternator with a 1970s era electronic voltage regulator. -
Page 137: Simple Installation
1K resistor, with the other end of the resistor wired to a switched 12 volt source. Then you also connect the “L” terminal to an unused high current or PWM output, allowing the MS3Pro to ground this pin and shut off the alternator. -
Page 138: Honda Alternators
This can help with smoother startup. Simply wire the alternator “C” terminal to an unused high current or PWM output, allowing the MS3Pro to ground this pin and switch the alternator to low output mode. -
Page 139: Map Sample Settings
The number is a multiplier, so that 100% indicates to use normal fueling. The barometer reading is whatever the MS3Pro is currently using for correction. If you have enabled a barometric pressure sensor, the reading will change in real time. If you are using the initial MAP reading for barometric pressure, it will display the MAP reading it sampled when the MS3Pro initially powered up. -
Page 140: Event Average
MAP sampling will occur in order to get a repeatable reading. Here is a MAP log from a 1 cylinder 4-stroke engine. AMP EFI MS3Pro manual version 1.202, firmware 1.5.0, 4/21/2017 Page 140... - Page 141 70.5 The MS3Pro is sampling the MAP reading on both the intake stroke and the power stroke; the intake strokes have a low MAP reading, but the pressure on the power stroke is nearly atmospheric. This results in the MAP bouncing around between 70 and 98 resulting in unpredictable tuning.
-
Page 142: Itb Load Settings
(below %Baro switchpoint) is tuned using Speed-Density based tuning. The region of greatest TPS change (above %Baro switchpoint) will be tuned using Alpha-N based tuning. This is exactly the same technique used in the blended tuning, just applied within a single table. AMP EFI MS3Pro manual version 1.202, firmware 1.5.0, 4/21/2017 Page 142... -
Page 143: Itb Load Tps Switch Point Curve
MAP value of 0kpa would use the 0% ITB load bin and a MAP value of just less than %Baro switchpoint would use the VE value just below the 60% ITB Load value on the VE table. AMP EFI MS3Pro manual version 1.202, firmware 1.5.0, 4/21/2017 Page 143... -
Page 144: Itb Load Calculation In Alpha-N Mode
TPS value of 55% would yield an ITB Load value of 80% and the VE bin for 80% ITB Load would be used. In this same example, a TPS value of 10% would use the 60% ITB Load bin on the VE table and 100% TPS would use the 100% ITB Load bin. AMP EFI MS3Pro manual version 1.202, firmware 1.5.0, 4/21/2017 Page 144... -
Page 145: Tuning For Idle Air Control
MAF has its own quirks and can suffer from reversion effects (particularly on "cammy" engines) where the air flow gets measured twice. The MS3Pro implementation of MAF consists of the following main elements: • Engine and injector parameters •... - Page 146 7 ADDITIONAL ITEMS: BEYOND BASIC FUEL AND IGNITION CONTROL The MS3Pro will need all these numbers to be entered correctly, as it calculates the required pulse width to hit target air/fuel ratios, instead of using something along the lines of “send X pulse width at Y RPM and Z air flow meter volts.”...
-
Page 147: More About Frequency Based Mafs
MAF volts as the Y-axis on other tables, it would mean that only a very narrow band of the table was used, and tuning would suffer. So instead of that, the code calculates a synthesized load value called AMP EFI MS3Pro manual version 1.202, firmware 1.5.0, 4/21/2017 Page 147... -
Page 148: Tuning
When using the older MAF implementation, you will enter the MAF calibration curve under Tools -> Calibrate MAF Table. This curve is a percentage trim to correct the curve loaded from the Tools menu. AMP EFI MS3Pro manual version 1.202, firmware 1.5.0, 4/21/2017 Page 148... -
Page 149: Maf / Mat Correction Table
This tab allows you to monitor real time data from the ECU. The “Summary” tab gives line graphs over time of the more commonly used channels, while All Output Channels gives a numerical readout of more channels. AMP EFI MS3Pro manual version 1.202, firmware 1.5.0, 4/21/2017 Page 149... -
Page 150: Feature List Showing I/O Pins
This allows you to display all the pins in use. You can use this to check what wire does what function, or check if you have accidentally assigned one pin to multiple functions. Features not in use are grayed out. 7.1.18 I/O Pins Showing Useage AMP EFI MS3Pro manual version 1.202, firmware 1.5.0, 4/21/2017 Page 150... -
Page 151: Expansion I/O Pins List / Usage
100% will reduce fueling to less than the base fueling. This is ordinarily an undesirable thing to do, so the MS3Pro will lock you out of this. However, LPG and gaseous fuels often use an evaporator or expansion device heated by engine coolant. When the engine is cold, the evaporator delivers colder, denser fuel than normal, which may require reducing warmup enrichment below 100%. -
Page 152: Secondary Injector Timing Table
RPM when the primary set of injectors would otherwise reach their maximum operational duty cycle. The MS3Pro’s staged injection function supports staging equally between the primary injectors and secondary injectors during staged operation as well as staging completely to the secondary set of injectors. - Page 153 – Use Inj A -H if possible - Use the standard outputs A through H. The second stage is fully sequential with this setting. Can be used for up to four cylinders. AMP EFI MS3Pro manual version 1.202, firmware 1.5.0, 4/21/2017 Page 153...
- Page 154 • Secondary staging hysteresis (units) - This setting is used with the secondary staging threshold setting to determine when staged injection will shut off. This setting is not available unless a second staging parameter is enabled. AMP EFI MS3Pro manual version 1.202, firmware 1.5.0, 4/21/2017 Page 154...
-
Page 155: Tuning Staged Injection
If enabling the grad- ual transition feature still does not get rid of the brief lean spot after staging is engaged, it is recommended that table-based staging is used. AMP EFI MS3Pro manual version 1.202, firmware 1.5.0, 4/21/2017 Page 155... -
Page 156: Fuel Sensor Settings (Flex)
• Sensor port - where the sensor is connected. A GM flex fuel sensor typically has pin A as ground, B as 12 volt supply, and C to the MS3Pro Digital Switched In 1. Note that Digital Switched In 1 is currently the only supported port. -
Page 157: Over Run Fuel Cut
7.2.5 Over Run Fuel Cut The MS3Pro not only allows you to cut off fuel while coasting; it also allows retarding spark timing at this point, and gradually phasing the fuel cut in and out to make for a smoother transition. Overrun fuel cut relies partially on engine state settings to determine if the engine is in overrun mode. -
Page 158: Afr / Ego Control
• Use EGO Delay Table - You can select how often the EGO correction is updated based on either the number of ignition events or by using a 12 x 12 table that determines how often to update the correction as a function of RPM and engine load. AMP EFI MS3Pro manual version 1.202, firmware 1.5.0, 4/21/2017 Page 158... -
Page 159: Ego Ports
– Narrowband - Sensor in use is a narrowband sensor. – Wideband - Sensor in use is a wideband sensor. • Number of Sensors - This setting is used to select the number of oxygen sensors in use by the MS3Pro. Up to 12 sensors can be configured. -
Page 160: Simple Algorithm With Narrowband Sensor
3. Controller Auth - This is the maximum percentage of fuel change the MS3Pro can make as a result of O sensor feedback. When first tuning the engine, this should be set to 20% or higher. Care must be taken to watch how the algorithm is correcting. -
Page 161: Ego Authority Table
7 ADDITIONAL ITEMS: BEYOND BASIC FUEL AND IGNITION CONTROL 7.2.8 EGO Authority Table This table allows you to specify the maximum correction that the MS3Pro can apply as a result of O sensor feedback as a function of RPM and load, in percent. To enable using this table, set “Use Authority Table” in AFR / EGO Control to On. -
Page 162: Cylinder Trim Tables
In operation, if you trip the shutdown, the engine will suddenly die. While this will be irritating, hopefully it is less so than the engine rebuild you might have needed. 7.2.11 Cylinder trim tables These tables act like miniature VE tables and are added to each individual cylinder. AMP EFI MS3Pro manual version 1.202, firmware 1.5.0, 4/21/2017 Page 162... -
Page 163: Sequenced Batch Fire
7.2.13 Fuel pump and pressure MS3Pro can both control fuel pump pressure and correct based on fuel temperature and pressure. PWM fuel pump control requires using a solid state relay or other fuel pump control module to supply power to the fuel pump. - Page 164 – Open-Loop PWM: Used for pump speed control in combination with a regulator. The table on the right hand side controls fuel pump duty as a function of RPM and fuel load. – Closed loop PWM: The MS3Pro uses a fuel pressure sensor to target a specific pressure. Can be used in an unregulated, returnless setup.
-
Page 165: Fuel Pressure Safety
• Pressure sensor input - enables a fuel pressure sensor signal. Required if using closed loop PWM. Used for correction on other modes. • Sensor type - MS3Pro supports many different fuel pressure sensor types. – Gauge - The sensor is referenced to atmospheric pressure, and read zero with no fuel pressure. With a vacuum referenced regulator, the reported pressure will drop under vacuum and increase under boost. -
Page 166: Dwell Table
This feature allows the timing to be retarded at higher MAT readings for greater engine safety. AMP EFI MS3Pro manual version 1.202, firmware 1.5.0, 4/21/2017 Page 166... -
Page 167: Noise Filtering
7.3.6 Noise filtering The noise filtering menu allows the MS3Pro to detect and ignore pulses on the crank and cam position inputs caused by electrical noise. In the simplest form of a fuel-only controller with a tach signal from the coil negative, the "ringing" of the coil may cause apparent rpm spikes. - Page 168 If the wiring or sensor isn’t perfect, and the signal becomes noisy, the CPU will see a signal like this instead: There are several strategies the MS3Pro has to filter this out, which you enable from the Noise Filtering screen.
- Page 169 VR sensors with a common ground. This setting checks the status of the CKP input when it detects a signal on the CMP line. If the MS3Pro has received a pulse from the CKP signal and the CMP signal at the same time, it considers the CMP signal to be a piece of noise induced by the CKP signal, and ignores the CMP signal.
-
Page 170: Examples
25% less than the measured value at maximum RPM to avoid filtering out real pulses. Be careful when using this setting with high revving engines with high tooth count trigger wheels. If you see the MS3Pro failing to detect real teeth at high RPM, decrease this number. -
Page 171: Knock Sensor Settings
7 ADDITIONAL ITEMS: BEYOND BASIC FUEL AND IGNITION CONTROL • Distributor type pickup, such as HEI, TFI, or EDIS (although the last is not a distributor, the MS3Pro will see a similar signal.). Noise filtering is often useful here. A typical setting would be crank tach period masking with 1ms and 30%. -
Page 172: Knock Sensor Settings
Note that it may be necessary to change the sensor location if you cannot isolate engine noise while allowing MS3Pro to identify knock. If you choose to drill and tap your block, choose a thick area of the block with a boss that is at least ¾" (19 mm) thick. -
Page 173: Detection
• Ignore During Launch / Flatshift: Flat shift or launch rev limiting with a spark cut can cause enough noise to cause false knock readings on some engines. This setting disables detection when the launch or flat shift rev limiter is active. AMP EFI MS3Pro manual version 1.202, firmware 1.5.0, 4/21/2017 Page 173... -
Page 174: Retarding
The curve will need to be set empirically by examining datalogs of knock% when operating the engine under safe conditions. 7.3.8 Knock sensor parameters This screen is used with the internal knock processing. AMP EFI MS3Pro manual version 1.202, firmware 1.5.0, 4/21/2017 Page 174... -
Page 175: Knock Window Settings
The defaults reflect that knock events start around top dead center on most engines. 7.3.10 Knock coolant scaling This screen is used with both internal and analog knock sensing modes. AMP EFI MS3Pro manual version 1.202, firmware 1.5.0, 4/21/2017 Page 175... -
Page 176: Rotary Settings
7.3.11 Rotary settings The MS3Pro supports Wankel rotary engines with a leading and trailing spark plug split. Versions supported include Mazda’s RX-7 FC, FD, and RX8 ignition types, as well as 3 and 4 rotor engines with coil on plug. To enable this screen, “Engine Stroke”... -
Page 177: Fd Mode
• Spark E Trailing coil B • Spark F Trailing coil C Fuel wiring: • Inj A Primary injector A • Inj B Primary injector B • Inj C Primary injector C AMP EFI MS3Pro manual version 1.202, firmware 1.5.0, 4/21/2017 Page 177... -
Page 178: Rotor
This allows you to specify the split in degrees between leading and trailing sparks. Positive numbers mean the trailing is later. Negative means that trailing is fired before leading. AMP EFI MS3Pro manual version 1.202, firmware 1.5.0, 4/21/2017 Page 178... -
Page 179: Cylinder Trim Tables
Cranking Pulse Width, Priming Pulse, Afterstart Enrichment, and Warmup Enrich- ment. Here, we’ll cover the startup and idle control that was not covered there, and revisit a few settings in more detail. AMP EFI MS3Pro manual version 1.202, firmware 1.5.0, 4/21/2017 Page 179... -
Page 180: Cranking / Startup Settings
7.4.1 Cranking / startup settings • Cranking RPM - On the initial start, the MS3Pro will run in batch fire on the cranking pulse width settings until RPM rises above this threshold, or if the RPM falls below this threshold within 5 seconds of starting. Set this value higher than the engine can reach while being just driven by the starter. -
Page 181: Cranking Taper Curve
7.4.4 Idle control The MS3Pro firmware has several methods for controlling idle speed, besides the “not run any sort of ECU control, and just use a set screw to hold the throttle open” method. They were introduced in section 5.4, but we will cover them again in more detail. -
Page 182: On/Off Valve
• Algorithm – Open-loop (warmup): The MS3Pro commands how far to open the valve as a function of coolant tem- perature. Note that on/off valves are always open loop, so this setting is grayed out when an on/off valve is selected. -
Page 183: Pwm Idle Valve Settings
This screen gives how much IAC valve opening to apply when the engine is cranking as a function of temper- ature. A larger value means more opening. PWM valves go from zero to 100% duty, while stepper valves allow specifying how many steps to use. AMP EFI MS3Pro manual version 1.202, firmware 1.5.0, 4/21/2017 Page 183... -
Page 184: Idle Warmup Duty / Steps
7.4.7 Closed loop idle settings Closed loop idle lets the MS3Pro target a set idle speed instead of opening the IAC valve a set amount. This is used for compensating for changing engine loads. It should not be used to fix a roving or hunting idle at steady load - you need to get the idle tuned so it is stable in warmup mode under constant load first, if you find the idle is... - Page 185 • Use last value or table - If “Use last value” is selected, the MS3Pro will start with the value it last used to obtain the target RPM when closed loop idle re-engages. If set to “use table,” when the closed loop idle engages, it will select the initial idle opening from the Closed Loop Idle Initial Value table.
-
Page 186: Tuning Closed Loop Idle
7 ADDITIONAL ITEMS: BEYOND BASIC FUEL AND IGNITION CONTROL • PID ramp to target time - Once PID engages, the MS3Pro will gradually move the target value from the current RPM to the target speed.This can be used to help larger P-values be used, making it easier to tune PID to catch sudden drops in idle speed. - Page 187 PID algorithm engages, a higher P gain can be set without causing oscillation. 4. Tune the Derivative (D) gain - For most users, use of the D gain should not be necessary. It substantially dampens the response of the loop. AMP EFI MS3Pro manual version 1.202, firmware 1.5.0, 4/21/2017 Page 187...
-
Page 188: Closed Loop Idle Target Curve
7.4.8 Closed loop idle target curve This screen is used when running closed loop idle. It lets you specify the target RPM as a function of coolant temperature. 7.4.9 Closed loop idle initial values AMP EFI MS3Pro manual version 1.202, firmware 1.5.0, 4/21/2017 Page 188... -
Page 189: Pwm Idle Voltage Compensation
7 ADDITIONAL ITEMS: BEYOND BASIC FUEL AND IGNITION CONTROL If you are using closed loop idle with the initial value table selected, the MS3Pro uses this to look up the initial duty cycle when closed loop idle control engages. The X-axis specifies what target RPM, and the Y-axis is either coolant or air temperature, as determined by the closed loop settings screen. -
Page 190: Air Conditioning Idle Up
• Idle-up output - This uses an output pin to activate the A/C compressor and/or condenser fan. • Idle-up input - This is the input used to tell the MS3Pro that the air conditioning is on or needs to be turned •... -
Page 191: Idle Advance Settings
7 ADDITIONAL ITEMS: BEYOND BASIC FUEL AND IGNITION CONTROL • TPS shutoff % - If using TPS shutoff, MS3Pro turns off the A/C output above this TPS opening value. • TPS hysteresis - Once the TPS based A/C shutoff has engaged, the TPS needs to fall this amount below the TPS shutoff value to turn the A/C back on. -
Page 192: Idle Advance Tuning
This screen is available when you have enabled closed loop idle and Idle RPM Timing Correction. The RPM delta number is the difference between the target RPM and the actual RPM. This curve is added to the ignition AMP EFI MS3Pro manual version 1.202, firmware 1.5.0, 4/21/2017 Page 192... -
Page 193: Idle Ve Settings
The upper idle VE table is used for running off the main fuel table in place of VE table 1. The lower idle VE table is normally inactive, and is only used when using dual fuel mode with an alternate AFR table. AMP EFI MS3Pro manual version 1.202, firmware 1.5.0, 4/21/2017 Page 193... -
Page 194: Accel Enrich
The EAE algorithm tracks the various quantities and adjusts the amount of fuel injected accordingly, but does so based on several adjustment curves and settings. The following curves are what you’ll use to tune it. AMP EFI MS3Pro manual version 1.202, firmware 1.5.0, 4/21/2017 Page 194... -
Page 195: Adheres To Walls Coefficient
(about 10x smaller) than the Adhere-to-walls coefficients. It also typically increases with load - while the vacuum can help fuel vaporize, the added mass flow can help pull the fuel off. AMP EFI MS3Pro manual version 1.202, firmware 1.5.0, 4/21/2017 Page 195... -
Page 196: Eae Adhere-To-Walls Rpm Correction
Sucked-from-walls curve to be increased or decreased based on RPM. The increased flow rate at higher RPM tends to pull more fuel off the walls as well as preventing as much of it from sticking in the first place. 7.5.2.5 EAE Adhere-to-walls CLT correction AMP EFI MS3Pro manual version 1.202, firmware 1.5.0, 4/21/2017 Page 196... -
Page 197: Eae Sucked-From-Walls Clt Correction
10. Shut off the engine, and allow it to cool completely. 11. Start the engine; as the coolant temperature increases, adjust the EAE Adhere-to-walls CLT correction and EAE Sucked-from-walls CLT correction curves so that response and AFR are stable. AMP EFI MS3Pro manual version 1.202, firmware 1.5.0, 4/21/2017 Page 197... -
Page 198: X-Tau Acceleration Enrichment
A port injected engine with small intake runners and injectors targeted on the intake valves will be on the low side of the scale. A throttle body injection intake will be on the high side. AMP EFI MS3Pro manual version 1.202, firmware 1.5.0, 4/21/2017 Page 198... -
Page 199: Puddling) Temp Correction Factors
X-Tau Decel tables are used. If MAPdot is in between, a blend of the 2 tables is used. Note that these are in negative kPa (i.e., put 40 if you want the threshold to be at -40 kPa/sec). AMP EFI MS3Pro manual version 1.202, firmware 1.5.0, 4/21/2017 Page 199... -
Page 200: X-Tau Tuning Tips
figure out the boost target. • Open-Loop Dome Control - The MS3Pro uses a pressure sensor in the wastegate dome and a closed loop algorithm to specify a target pressure in the wastegate dome. The ECU does not attempt to target a particular MAP sensor reading. - Page 201 7 ADDITIONAL ITEMS: BEYOND BASIC FUEL AND IGNITION CONTROL The AMP EFI boost solenoid can be used with either a one or a two port wastegate. This diagram shows how to plumb it in single solenoid mode. As a rule of thumb, the single solenoid mode can reach boost pressures approximately double the pressure allowed by the wastegate spring on its own.
-
Page 202: Boost Control Settings
• Closed Duty - This setting controls the lowest allowed reported duty. Normally, this should be 0%. • Open Duty - This setting controls the highest allowed reported duty. Normally, this should be 100%. AMP EFI MS3Pro manual version 1.202, firmware 1.5.0, 4/21/2017 Page 202... -
Page 203: Closed Loop Specific Settings
• Boost Control Lower CLT Threshold - To prevent running maximum boost before the engine is warmed up, the MS3Pro will run minimum boost until you reach this temperature, at which point the boost control turns • Algorithm - If using single solenoid mode, open loop 7.6.2.2 Closed loop specific settings Enabling the closed-loop boost control algorithm enables the following... -
Page 204: Overboost Protection
Remember, overboost protection is not telling the MS3Pro “I would prefer my boost level stays below this setting;” it is more like, “Shut down my engine at once if the boost gets this high!” And the MS3Pro will react with that same level of urgency. -
Page 205: Other Boost Control Settings
You can also allow it to switch tables based on gear by selecting “Gear-based”. • Boost Table Switching Gear - If boost table switching is set to gear based, the MS3Pro will switch to the second boost table when you shift into this gear and above. -
Page 206: Boost Control Bias Duty Table
7.6.5 Boost control bias duty table This is a feed-forward table. The MS3Pro first looks to the closed loop target table to see what boost target to use, then goes to this table to look up what duty cycle to start with at what RPM and target boost level. The X axis is the engine RPM, while the Y axis is the target boost level. -
Page 207: Boost Control Vs Speed
• Boost control enabled - allows a second solenoid output using the second set of boost tables. • Boost control pin - specifies which output to use for the second solenoid. AMP EFI MS3Pro manual version 1.202, firmware 1.5.0, 4/21/2017 Page 207... -
Page 208: Wastegate Dome Pressure Control Settings
MS3Pro can use to reach a given boost target. • Enable test mode - If this is set, the MS3Pro will activate the solenoids and attempt to fill the solenoid dome to the target pressure. The engine must not be running to use test mode. -
Page 209: Dome Bias Table
Anti-lag is a combination of features you can use to keep the turbo spooled while shifting, beyond the basic flat shift rev limiter. The MS3Pro has several strategies it can use to dump extra fuel into the exhaust and increase exhaust gas temperatures under these conditions. - Page 210 All anti-lag variations require an input switch to arm the system. When active, the anti-lag system will add fuel and retard timing to a number specified by the ALS tables. You can also allow the MS3Pro to use the following additional strategies when the anti-lag is active: •...
-
Page 211: Turbo Anti-Lag Tables
• Time between activations - This is used to prevent a brief sensor reading out of the anti-lag range from resetting the anti-lag timer. The MS3Pro treats any set of activation conditions in this time block as a single activation, even if it briefly comes out of the TPS or other conditions that would activate anti-lag. -
Page 212: Als Roving Idle Fuel Cut
• Added fuel %age - The amount of extra fuel to add when anti-lag is active. • ALS timing - This is a timing table in absolute numbers which the MS3Pro will use when anti-lag is active. As the MS3Pro specifies timing with BTDC numbers being positive, negative numbers indicate to retard the timing to after top dead center. - Page 213 The MS3Pro uses a missing tooth wheel (or otherwise irregular pattern) on the crankshaft compared to a sensor on the moving cam to determine camshaft position, and uses this to adjust the solenoid duty cycle.
- Page 214 • Test duty - the PWM duty cycle to be applied to the chosen VVT output under test. • Control Interval - Synced to Cam adjusts the duty cycle each time the MS3Pro updates its data on the cam position, which usually gives the best response. Timed mode adjusts the duty cycle once per specified timed interval.
-
Page 215: Vvt Intake And Exhaust Tables
In place of the angle target table, an on/off table is used. In this table, set 100 for cells where VVT should be active and 0 for cell where it should be inactive. Do not use other values. AMP EFI MS3Pro manual version 1.202, firmware 1.5.0, 4/21/2017 Page 215... -
Page 216: Example Scenarios
For many installs a single fuel table is all that is required. New users are strongly advised to start with a single table. MS3Pro offers a number of methods of switching and blending between tables. These methods can be used to effectively extend the basic table size, for better tunability with different fuel algorithms (e.g. low vs high rpms), for dual fuels, or for different fuel mixes. -
Page 217: Fuel Blending And Switching Types
VE2 can be used a tweak to VE1 to add a 4th dimension to the fuel table e.g. including a throttle component in a speed-density tune. 100% in the secondary table means no change, 102% means add 2% etc. AMP EFI MS3Pro manual version 1.202, firmware 1.5.0, 4/21/2017 Page 217... -
Page 218: Fuel Settings
These are partially set in the Basic / Load Settings and partially set in the Table Choices menu. 7.7.0.3 Fuel settings AMP EFI MS3Pro manual version 1.202, firmware 1.5.0, 4/21/2017 Page 218... -
Page 219: Single Algorithm, Single Table
VE3. In-between, proportions of table will be used. It is very important to tune each table individually - trying to retune with a partial blend is likely to result in confusion or failure. AMP EFI MS3Pro manual version 1.202, firmware 1.5.0, 4/21/2017 Page 219... -
Page 220: Dual Table
Spk1 or Spk3 depending on the blend input and curve (2). The tables could be blended based on ethanol percentage in the fuel from a flex-fuel sensor. AMP EFI MS3Pro manual version 1.202, firmware 1.5.0, 4/21/2017 Page 220... -
Page 221: Single Table
Single algorithm with table switching In the above screen shot, the MS3Pro is set to switch the spark tables at 5000 RPM. You can also set the switching to kPa or throttle position, or use a physical switch. AMP EFI MS3Pro manual version 1.202, firmware 1.5.0, 4/21/2017... -
Page 222: Single Algorithm With Table Blending
Spk1 = 0-100kPa and Spk2 = 100-400kPa with the same primary and secondary algorithm selected. In the above screen shot, it’s being used to extend tables. Secondary algorithm blended table AMP EFI MS3Pro manual version 1.202, firmware 1.5.0, 4/21/2017 Page 222... -
Page 223: Afr Blending And Switching Types
The target AFR is then be used for closed loop EGO or for Incorporate AFR. Note that even in "Dual Table" mode, only a single AFR target number is in use at one time. Both channels will target the same number if closed AMP EFI MS3Pro manual version 1.202, firmware 1.5.0, 4/21/2017 Page 223... -
Page 224: Boost Table Switching
You can switch a wide variety of tables, not just VE and spark. Since fuels have different rates of evaporation and different amounts of sticking to walls, you can also change cranking settings, warmup and afterstart enrichment, and acceleration enrichment as well. AMP EFI MS3Pro manual version 1.202, firmware 1.5.0, 4/21/2017 Page 224... - Page 225 • Req Fuel Switching - Allows you to use a hardware input to change the base pulse width number. The MS3Pro will use the lower number when the switch is active and the higher number when the switch is off.
-
Page 226: Temperature Adjustment
This screen is enabled for the secondary fuel in the dual fuel menu. This curve gives a percentage multiplier that is applied to the fueling as a function of temperature. AMP EFI MS3Pro manual version 1.202, firmware 1.5.0, 4/21/2017 Page 226... -
Page 227: Pressure Adjustment
7.7.6 Blend curve menus The MS3Pro has six blend curves for blending multiple tables. Each curve has a specific function. 1. Blend curve 1 blends between a primary and secondary fuel algorithm (VE1 and VE2). 2. Blend curve 2 blends between a primary and secondary spark algorithm (Ignition 1 and Ignition 2). -
Page 228: Advanced Engine
7.8.1 Speed and gear sensors The vehicle speed sensors (VSS) allow one or two wheel speeds to be monitored. The MS3Pro allows one or two speed sensors, with the second one being used to measure wheel slip for traction control. The inputs read from either a wheel/axle mounted pickup or a perhaps pickup that is part of the transmission. -
Page 229: Analogue Linear Input
Set the analogue sensor input channel, the full scale speed, and the smoothing lag factor. 7.8.1.2 Digital pulse input to MS3Pro This is most easily achieved with a hall-type sensor applied to one of the frequency or switched digital inputs. Analogue sensor should be set to Off and the 0-5V input pin specified as the Input. -
Page 230: Speed Value From A Remote Can Device
Analogue sensor should be set to Off and CANVSS specified as the Input. Set scaler% and lag factor. Internally, MS3Pro stores speed in units of 0.1 ms-1 (meters per second). To convert from a remote device using mph, a scaler of 46% would apply. Configure the CANVSS offset/table/id through the CAN menus. -
Page 231: Shaft Speed Sensors
MS3Pro: • An amplified that converts the signal to a 0-5 volt reading which you can connect to an MS3Pro analog input • A CAN enabled thermocouple interface like the CAN-EGT input module that transmits the data over the CAN AMP EFI MS3Pro manual version 1.202, firmware 1.5.0, 4/21/2017... -
Page 232: Generic Sensor Inputs
Output Ports. The analogue inputs are in the 0-5V range and are internally converted with a 10bit ADC (Analogue to Digital Convertor), giving 1024 steps. Typical uses include: • Pre- and post- intercooler pressure and temperature • Fuel pressure AMP EFI MS3Pro manual version 1.202, firmware 1.5.0, 4/21/2017 Page 232... -
Page 233: Source
• Suspension travel The MS3Pro has three built in 0-5 volt inputs. You can also bring analog sensors in over the CAN bus. If you’re using a potentiometer input, the exact resistance range of the potentiometer is not important as long as it does not draw too much current. -
Page 234: 5V Value
The accelerometer input allows for a user-supplied one, two or three axis accelerometer to be connected to the MS3Pro and datalogged. It may be connected to any of the spare analogue inputs or remotely via a CAN. The accelerometer is calibration to +/-1g for convenience, but internally the code uses SI measurement units (m per second squared) so accelerometer acceleration can be compared to vss measured acceleration. -
Page 235: Collecting Calibration Data
• Physically move and rotate the accelerometer until it gives the minimum reading on that gauge. Write it down. AMP EFI MS3Pro manual version 1.202, firmware 1.5.0, 4/21/2017 Page 235... -
Page 236: Traction Control Settings
The MS3Pro offers several strategies for traction control: • VSS Slip %: The MS3Pro compares a speed sensor on the driving wheels to one on the non-driven wheels, and reduces power if the driving wheel speed exceeds the non-driven wheel speed by a specified amount. -
Page 237: Traction Control Settings
• Light output - The MS3Pro can trigger an output pin to switch on a light when traction control is active. • Minimum TPS - Specifies the minimum throttle position below which traction control is not applied. -
Page 238: Traction Control - Perfect Run Vss
• The MS3Pro can use the average or highest value across all four wheels. This can be used for perfect run VSS mode on all wheel drive vehicles, or compared to a high speed GPS speedometer input for % slip based control. -
Page 239: Traction Control - Perfect Run Rpm
7.8.9 Traction control - External % slip input Allows you to specify the maximum slip percent to allow as function of the amount of input from an external adjustment knob. AMP EFI MS3Pro manual version 1.202, firmware 1.5.0, 4/21/2017 Page 239... -
Page 240: Traction Control Reactions
7.8.10 Traction control reactions This screen lets you specify what actions to take if traction control is active. The MS3Pro can be set to take more action the longer the traction control is active. The slip number is different based on the method used. -
Page 241: Basic Launch Control / Flat Shift Settings
• Launch hard limit - when the launch conditions are met, above this rpm the hard limiter methods are used • Soft Limit Zone - When the RPM is this far below the launch hard limit, the MS3Pro will apply spark retard, and if spark cut is used, it will begin to phase in a partial spark cut. -
Page 242: Variable Launch Settings
• Timed retard after launch - Allows you to set a spark retard that is active immediately after launch. The MS3Pro will then use a time based curve to put the timing back in. Use this to reduce power if you have wheelspin, but are running in a racing series that doesn’t allow traction control. -
Page 243: Transbrake And Throttle Stop
• Delay - The time, in seconds, between releasing the transbrake input and releasing the transbrake. • Turbo Staging Button - Press this button, and the MS3Pro will pulse the trans brake off and on, allowing the car to creep forward while building boost. -
Page 244: Step / Burnout Limiter
• 3 step input - Allows you to turn this feature off or specify an input pin to activate the 3 step. • Soft Limit Retard To - the absolute timing to retard to. AMP EFI MS3Pro manual version 1.202, firmware 1.5.0, 4/21/2017 Page 244... -
Page 245: Line Lock Staging
Line lock staging automates brake release on a car with a line lock. The MS3Pro will engage the line lock using the selected output when you trigger the button input with a momentary switch. -
Page 246: Sequential Shift Cut
• Limiter method - Allows using a fuel and/or spark cut for speed based launch. The RPM limit and amount of spark retard is taken from the curve at the right. • Retard to - The absolute timing to use when at the rev limit. Below the rev limit, the MS3Pro uses the green curve for timing retard. - Page 247 • Mode – Button - The shift cut is activated by an external button. – Auto - The MS3Pro controls the shifting using preset RPM points. Pressing the button will force an upshift. • Button input - Select the channel for the switch to activate the shift cut. Usually, this button is in the shifter mechanism itself.
-
Page 248: Nitrous System
Systems designed to work with OEM engine management sometimes do this by increasing fuel pressure, which does not give accurate fuel increase across the rev range, but with MS3Pro, we can directly increase the injector pulse width instead. The nitrous enters through a nozzle typically located upstream of the throttle body. -
Page 249: Nitrous Settings
• Fuel solenoid frequency - Allows specifying a separate frequency for the fuel solenoid. • AFR safety uses AFR2 targets - Allows optional AFR safety system to use alternate AFR targets when nitrous is active. AMP EFI MS3Pro manual version 1.202, firmware 1.5.0, 4/21/2017 Page 249... - Page 250 • Fuel adder percent calc - When using progressive nitrous in a time based or VSS based mode, the added fuel also needs to be scaled based on RPM. The MS3Pro will scale the “additional fuel PW” settings based on either the nitrous duty cycle table or a separate fuel percentage table. For example, if the additional fuel pulse width at minimum RPM is 6 ms, and the percentage table gives 75%, the added fuel pulse width will be cut back to 4.5 ms.
-
Page 251: Nitrous - Time Based Progressive
7.8.16 Nitrous - time based progressive This requires the use of the MS3Pro launch control system and the time is measured from the release of launch. This is only really of use in drag racing. This allows you to specify the amount of nitrous duty cycle, fuel (in raw pulse width numbers), and timing retard (in degrees) for both stages of a progressive nitrous system. -
Page 252: Nitrous - Rpm Based Progressive
MS3Pro can use a level switch to check this.) The MS3Pro system can control a pump via a relay when conditions are met and map the duty cycle of a water valve on a 3D map of duty vs MAP vs RPM. The valve may either be fast acting (runs at injector speed) or a slow speed similar to a boost solenoid. -
Page 253: High Power Time Enrichment
• MAT > - enable when MAT is above this value • Low fluid level input - This allows using a level switch on an input pin connected to the MS3Pro. The switch must be wired so it grounds the input when the fluid level is OK and un-grounds the input when the fluid falls below an unsafe level. -
Page 254: Oil Pressure
7.8.21 Oil Pressure The MS3Pro can monitor oil pressure and trigger a smart warning light. This feature can also be used to trigger the check engine light. Setting the minimum pressure to more than zero on startup will ensure that the oil pressure warning light turns on when you turn the key on, so you can make sure it is working. -
Page 255: Pit Lane Limiter
• Low pressure triggers engine shutdown and Time allowed at low pressure - If the oil pressure falls below the minimum pressure for longer than the allowed maximum time in seconds, the MS3Pro will shut down the engine in the same way as specified on the AFR Safety screen. -
Page 256: Programmable On/Off Outputs 1
Note that if you’re using one of these outputs for another function, you don’t want to enable it here. For example, if you’re using PWM / Idle Out 1 for idle control, don’t enable it here. Enabling it here will tell the MS3Pro that you’re trying to use PWM / Idle Out 1 as some sort of on/off output at the same time, and the MS3Pro will report a configuration error. -
Page 257: Threshold
This screen works in the same way as the first programmable on/off outputs, but is used to trigger outputs on remote CAN devices and loop conditions. Loop outputs behave as if you have “looped” a wire from an MS3Pro output pin back into one of its own input pins to use it to trigger an external device such as a table switching input or three step rev limiter - except you don’t have to use up any real pins. -
Page 258: Loop Conditions
(on/off.) PWM is a method that pulses an output on and off, the on-time percentage (duty) is variable, this allows a valve to "float" in-between closed and open for variable flow rates. AMP EFI MS3Pro manual version 1.202, firmware 1.5.0, 4/21/2017 Page 258... -
Page 259: Generic Closed Loop Outputs
Sensors" menu. 7.8.26 Generic Closed Loop outputs The MS3Pro has several predefined closed loop functions, such as idle speed, fuel pressure, and boost control. For other functions that can use closed loop, the MS3Pro has a generic function. AMP EFI MS3Pro manual version 1.202, firmware 1.5.0, 4/21/2017... -
Page 260: Tuning Maps
You will only need to set this up if the MS3Pro is using the CAN network for data acquisition or to control remote outputs. -
Page 261: Base Data
Each device on the CAN network has its own unique ID, with the number zero reserved for the master device. You may connect up to 14 extra devices to the MS3Pro, so remote CAN ID numbers can be from 1 to 14. -
Page 262: Pwm Outputs
• Offset - the offset number in the remote table 7.10.2 CAN broadcasting This if for interfacing with simple gauge circuits that need the MS3Pro to actively send out information at regular intervals. You can specify how often to transmit this information. Currently, the MS3Pro can broadcast RPM or AMP EFI MS3Pro manual version 1.202, firmware 1.5.0, 4/21/2017... -
Page 263: Can Broadcast Testing
Pick an appropriate rate for the data within the group; there is no benefit in transmitting slow changing data at a high rate. AMP EFI MS3Pro manual version 1.202, firmware 1.5.0, 4/21/2017 Page 263... -
Page 264: Can Receiving
7.10 CAN bus / Testmodes 7 ADDITIONAL ITEMS: BEYOND BASIC FUEL AND IGNITION CONTROL 7.10.5 CAN receiving Allows MS3Pro to receive certain types of CAN data. Consult the documentation for your CAN device as to how to configure this. 7.10.6 CAN VSS, gear These settings are for third party CAN enabled devices that provide the MS3Pro with speed, or gear information. -
Page 265: Real Time Clock
7 ADDITIONAL ITEMS: BEYOND BASIC FUEL AND IGNITION CONTROL • Innovate Motorsports serial data is not supported directly, but you can connect an Innovate Motorsports serial data chain to a CAN-EGT module or third party devices sold by JBPerf that translate this data into MS3Pro 29 bit CAN. -
Page 266: Io Box Settings
7 ADDITIONAL ITEMS: BEYOND BASIC FUEL AND IGNITION CONTROL • Enable real time clock - You may set this to “On-board” to use the MS3Pro’s internal clock, or “CAN” to use an external, CAN enabled device such as a GPS module. -
Page 267: 11Check Engine Light
7.10.11 Check Engine Light The MS3Pro has a sensor validation system that can sanity check the sensor inputs. If the sensor appears to be malfunctioning, then it can switch on a Check Engine light. Additionally, limited operating strategies (limp modes) can be enabled. - Page 268 • Minimum ADC - minimum valid ADC reading for the EGO1 input • Maximum ADC - maximum valid ADC reading for the EGO1 input • Minimum Fluctuation - minimum fluctuation during smooth running AMP EFI MS3Pro manual version 1.202, firmware 1.5.0, 4/21/2017 Page 268...
-
Page 269: 1Check Engine Codes
• 10: Flex fuel sensor fault • 11: MAF sensor fault • 12: Knock sensor fault • 13: Cam sensor fault, engine still has sync but is running in semi-sequential AMP EFI MS3Pro manual version 1.202, firmware 1.5.0, 4/21/2017 Page 269... -
Page 270: 12Limp Mode
• CLT sensor failure: Approximates a coolant sensor reading based on time after start. Note - It’s a good idea to set the warmed up value to a point high enough to turn your cooling fan on, if the MS3Pro is controlling the fans. -
Page 271: 13Fallback Map Table
7.10.13 Fallback MAP table In the event of a MAP sensor failure, the MS3Pro can use a synthesized MAP value based on TPS and Rpm. This will be less accurate than the real MAP reading, but the aim is to allow some driveability in the absence of a real sensor reading before the root cause failure is fixed. -
Page 272: 14Output Test Mode - Inj / Spark
4. Choose your dwell time in milliseconds. Start low. e.g. 2.5ms. 5. If your coils are powered via the fuel pump relay as is recommended, set the fuel pump to On. AMP EFI MS3Pro manual version 1.202, firmware 1.5.0, 4/21/2017 Page 272... -
Page 273: 3Injectors
8. The number of injections gauge will count down and stop at zero. 9. To stop testing sooner, click Stop. When you have finished using the test mode, close the test mode window and power off the MS3Pro. If you disconnected you fuel pump, reconnect it now. - Page 274 7 ADDITIONAL ITEMS: BEYOND BASIC FUEL AND IGNITION CONTROL connected. It is, however, very useful for testing outputs with a multimeter if you are not able to fire the coils and need to check your wiring. AMP EFI MS3Pro manual version 1.202, firmware 1.5.0, 4/21/2017 Page 274...
-
Page 275: 16Output Test Mode - Idle Valve
12V supply to the valve if you normally take power from the fuel pump relay and are testing with the engine off. You need to have enabled idle control before this is available. AMP EFI MS3Pro manual version 1.202, firmware 1.5.0, 4/21/2017 Page 275... -
Page 276: 17Injector Sequence Testing
You can make an engine running full sequential drop down to semi sequential or batch fire, or make an engine running semi sequential swap to batch fire. AMP EFI MS3Pro manual version 1.202, firmware 1.5.0, 4/21/2017 Page 276... -
Page 277: 18Inj / Spk Disabling Test Mode
Looking for a dead cylinder? Instead of unplugging the injectors or coils to check for a cylinder that’s not working, the MS3Pro lets you shut down individual cylinders through TunerStudio. Note that you need enough inputs for full sequential operation to allow for disabling cylinders. Click the cylinder buttons to disable the coil or injector associated with that cylinder. -
Page 278: 20Long Term Fuel Trim
7.10.20 Long term fuel trim The MS3Pro can store a long term trim table to flash memory, based on oxygen sensor feedback. Enables the long-term fuel trim. This is intended to automatically make minor corrections in fueling after the engine is fully tuned. -
Page 279: 21Throttle Control (Dbw)
ECU needs the trim to be burned to flash. • Total change before burning - In timed write mode, the MS3Pro will automatically burn the trim table to flash if it changes by this large a percentage. In button mode, this will turn on the LED indicator. -
Page 280: Troubleshooting And Data Logging
Check where the MS3Pro is getting power from a clean source - ideally, you’ll want it to be powered off the battery, with no devices that draw significant current getting power from the same feed. Many resets come not from EMI / RFI interference, but from something like an ignition coil or fuel pump injecting voltage spikes into the power feed. -
Page 281: Gps Logging With A Laptop
8.2.2 Data logging with the SD card The MS3Pro comes with an SD card built in for internal logging. The standard 8 gigabyte SD card can hold several days’ worth of continuous running data even at the fastest logging speeds. If you do manage to fill up the SD card, it will overwrite the lowest numbered files first. - Page 282 If the log file is filled, a new file is started. If you turn off the power to the MS3Pro (which is safe to do during a log) the log will be there and will show full size. When the log file is extracted, the unused part of the allocated file will be ignored.
-
Page 283: Downloading Sd Data Logs
The Browse / Import SD Card option on the Data Logging menu brings up the following screen. The screen shot above shows the menu without a MS3Pro connected. If you have data logs on the SD card, they will appear in the list at the right hand side. Click the green “down arrow” button to save the selected logs to your computer. -
Page 284: Data Log Fields
8.3.2 Complete list of fields These are the fields you can read with an MS3Pro on its own. Some of these fields are only logged if the appro- priate settings requiring its use are enabled. CAN expansion devices may add more fields; see the documentation for your CAN device if you are using one. - Page 285 • Dwell: The ignition dwell (charge) time on the main spark outputs. Note that if using an ignition module that controls dwell (such as a Ford EDIS, MSD ignition, or some Ford or Bosch ignition modules), the MS3Pro will not report actual dwell time; it will instead report the length of the pulse it is sending to the module.
- Page 286 MS3Pro. • GPS Course: The course/heading from external GPS. • GPS Latitude: Latitude degrees from external GPS. (Combination of degrees, minutes, seconds as one decimal number.) AMP EFI MS3Pro manual version 1.202, firmware 1.5.0, 4/21/2017 Page 286...
- Page 287 • Lost sync reason: A technical reason code for why the ECU lost synchronization with the tach input. See section 8.4.1 for an explanation of the numbers. • MAF: The air-flow in g/sec calculated from the MAF sensor. AMP EFI MS3Pro manual version 1.202, firmware 1.5.0, 4/21/2017 Page 287...
- Page 288 12V in Port K Internal Digital Internal Tach out switched in Port MJ Internal Stepper Knock Knock Knock Knock Stepper out Stepper out enable interface interface interface interface AMP EFI MS3Pro manual version 1.202, firmware 1.5.0, 4/21/2017 Page 288...
- Page 289 • SD card status: Bitfield indicating current status of SD card datalogging system. • SecL: A built in clock that counts up seconds since the MS3Pro was last turned on. If this suddenly resets to zero, you probably have a power connection problem.
- Page 290 Status 7 Limp home Check A/C on Knock VVT4 error VVT3 error VVT2 error VVT1 error mode engine light detected Status 8 AMP EFI MS3Pro manual version 1.202, firmware 1.5.0, 4/21/2017 Page 290...
-
Page 291: Tooth / Trigger Logger And Troubleshooting Rpm Issues
8.4 Tooth / trigger logger and troubleshooting RPM issues Certain conditions such as electrical noise can cause the MS3Pro to lose sync with the engine position. This is called a sync loss event or a sync error. Common symptoms of this include: •... -
Page 292: Lost Sync Numbers
8.4.1 Lost sync numbers The MS3Pro can report several different lost sync reasons in the data logs. Most of these simply show that there’s a problem and don’t particularly pinpoint where it is, but some are more specific than others. In particular, if you get Lost Sync Reason 11 or 17 in a specific RPM band, try changing the ignition input capture and /or second trigger... - Page 293 • Excessively rich mixture causing misfire • Excessively lean mixture causing misfire Having ruled out all those possible causes, you should enable some noise filtering. See the noise filtering settings, section 7.3.5. AMP EFI MS3Pro manual version 1.202, firmware 1.5.0, 4/21/2017 Page 293...
-
Page 294: Using The Diagnostic Logger
It does not give you a voltage reading directly, but it will show you the state of the crank or cam signal, either on or off, as it reaches the MS3Pro’s processor. Use this to troubleshoot issues with the MS3Pro’s RPM input. There are several different modes. -
Page 295: Trigger Logger
(due to noise) it shows the tooth pattern that led up to the loss of synchronization. This allows you to pinpoint the problem without searching for the needle in the haystack as would be the case trawling through AMP EFI MS3Pro manual version 1.202, firmware 1.5.0, 4/21/2017 Page 295... -
Page 296: Example Logs
The same trigger setup, but at running speed. Note that the time on the teeth smooths out and the effect of the compression is much smaller. Composite log of the same engine running. AMP EFI MS3Pro manual version 1.202, firmware 1.5.0, 4/21/2017 Page 296... - Page 297 VR sensor wires and return input capture setting to Rising. Composite log of a Nippon Denso ignition with a 24 tooth cam wheel (on the crank input channel) and a 1 tooth cam wheel. AMP EFI MS3Pro manual version 1.202, firmware 1.5.0, 4/21/2017 Page 297...
-
Page 298: Engine Logger
A good way to check if this may be an issue without opening the case is to check if you have 5 volts on the VREF wire with the MS3Pro powered up. If either internal fuse is blown, you will see 0 volts on this wire. - Page 299 If you DO NOT see "Ports" listed in the devices, then you do not have any ports setup. This would usually indicate either your forgot to plug in your USB-serial cable to the MS3Pro, or there is a driver problem. Usually the best solution to the driver problem is to unplug the cable, uninstall the driver, and then re-install the driver.
-
Page 300: Linux Drivers
Ensure that the COM port number is 9 or less. If not, change it - TunerStudio can find higher numbered ports, but it will take longer to detect an MS3Pro on a high numbered port. It is usually safe to ignore any Windows warning about ports being in use unless you really do have a physical serial port or built-in modem. -
Page 301: Loading Firmware
This can often enable loading firmware to an MS3Pro when nothing else seems to work. To use the boot jumper, open the MS3Pro case and insert a paper clip across the two holes marked Boot (if there is nothing in the holes) or short the two pins in the boot jumper with an alligator clip or pull off jumper (if your MS3Pro has a two pin header installed at this location). - Page 302 Following the onscreen prompts will allow you to load firmware to your MS3Pro. Note that in some cases TunerStudio can load firmware even if it is otherwise unable to communicate with the MS3Pro by any other means. The first step is that TunerStudio will prompt you to back up your project. This is optional, but it will make sure you have a backup of your tune before you reload firmware.
- Page 303 A message level of 1 is fine for most installs. The higher levels of detail are only needed for debugging problems. Scanning ports automatically is usually your easiest option, but it is slightly faster if you specify what COM port to use. AMP EFI MS3Pro manual version 1.202, firmware 1.5.0, 4/21/2017 Page 303...
- Page 304 8.6 Loading or upgrading firmware 8 TROUBLESHOOTING AND DATA LOGGING At this point, specify a file name of ms3pro.s19 and press Enter. Preserving these settings can take somewhat longer. After this, the loader will give you a summary of your requests before loading firmware:...
- Page 305 1 > /sys/bus/usb-serial/devices/ttyUSB0/latency If you get a permissions problem trying to run the file, you likely need to make it executable (e.g. chmod a+x ms3loader_linux32bit or through your graphical interface.) AMP EFI MS3Pro manual version 1.202, firmware 1.5.0, 4/21/2017 Page 305...
Need help?
Do you have a question about the MS3Pro and is the answer not in the manual?
Questions and answers