Table of Contents
Advertisement
Quick Links
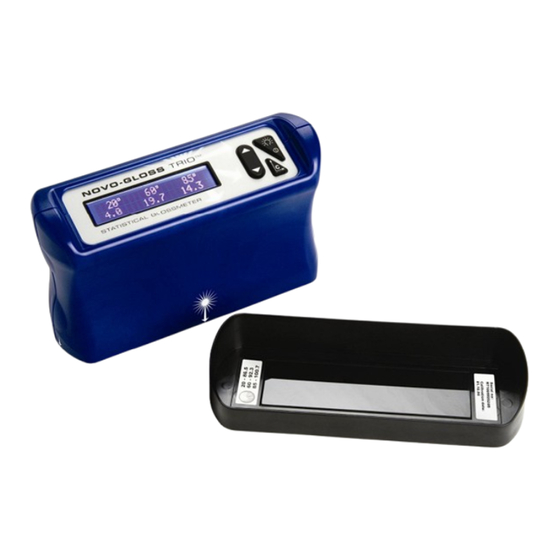
Novo-Gloss Trio Manual
Rhopoint Instruments Ltd.
Novo-Gloss Trio Operation Manual
Information in this document is subject to change without notice.
© 2006 Rhopoint Instrumentation Ltd. All Rights Reserved.
TM
TM
TM
Novo-Gloss Trio, Novo-Shade Duo
, Novo-Soft
, Novo-Gloss
,
TM
TM
TM
Novo-Gloss Lite
, Novo-Curve
and Rhopoint
are either registered
trademarks or trademarks of Rhopoint Instrumentation Ltd. in the UK
and other countries.
Other product and company names mentioned herein may be
trademarks of their respective owner
Rhopoint Instruments Ltd.
12 Beeching Road,
Bexhill-on-Sea,
TN39 3LG
United Kingdom
Tel: +44 (0)1424 214291
Fax: +44 (0)1424 730600
Email:
sales@rhopointinstruments.com
Web Site:
www.rhopointinstruments.com
Revision C
March 2010
DRD5100-001
- 1 -
Advertisement
Table of Contents

Related Manuals for Rhopoint Instruments Novo-Gloss Trio

Summary of Contents for Rhopoint Instruments Novo-Gloss Trio
- Page 1 Novo-Gloss Trio Manual Rhopoint Instruments Ltd. Novo-Gloss Trio Operation Manual Information in this document is subject to change without notice. © 2006 Rhopoint Instrumentation Ltd. All Rights Reserved. Novo-Gloss Trio, Novo-Shade Duo , Novo-Soft , Novo-Gloss Novo-Gloss Lite , Novo-Curve...
-
Page 2: Table Of Contents
Read/select key Scroll up/down Angle change/calibrate/cancel Measuring Gloss Check the calibration Positioning the Novo-Gloss Trio Take a single reading Using the move and read feature Calibration Inspection and Tile Care Inspecting and cleaning the optics Inspecting and cleaning the calibration tile... -
Page 3: Accessories
On-line measurement data-cable Power The Novo-Gloss Trio is powered with 4 x AA dry cell batteries. To install or replace the batteries remove the battery panel by unscrewing the two screws. Insert the new cells in the battery cartridge and place in the battery compartment, replace the lid and replace the screws. -
Page 4: Scroll Up/Down
( s e e p a g e 6 ) . Place the instrument in the calibration holder. Positioning the Novo-Gloss Trio When the instrument is placed on a sample the aperture is hidden, the centre of the measurement area can be pinpointed by the intersection of the arrows marked on the front of the instrument case with those on the side. -
Page 5: Take A Single Reading
To assess the rest of the sample continue to HOLD the Press and HOLD the “READ” READ/SELECT key and carefully slide the Novo-Gloss Trio to key to take a continuous gloss measurement. the area to be inspected. -
Page 6: Calibration
Novo-Gloss Trio Manual Calibration Zero Gloss Calibration For improved stability and accuracy the Novo-Gloss Trio is supplied with the Zero calibration feature switched on. During calibration the instrument will prompt “Sample Zero Ref”, at this point the instrument should be placed on the enclosed zero reference foam and the “Read”... -
Page 7: Definition Of Terms Used In Statistics Mode
Rhopoint supply a range of gloss, semi-gloss and matt tiles to suit all applications. To calibrate the Novo-Gloss Trio using a purchased tile, the calibration value in the instrument memory must be adjusted to match the assigned value of the new tile. -
Page 8: Change Calibration Value Via Novo-Soft
7 of this manual. Full instructions are contained in the software help files. Customising the Novo-Gloss Trio via the hidden set up menu Use the following key combination to access the Novo-Gloss Trio set up menu;... -
Page 9: Connecting To A Pc
Novo-Gloss Trio Manual CONNECTING TO A PC Install the software Place the Novo-Soft mini-cd in the drive of a compatible PC. Depending on the settings of your PC the Novo-Soft Installation program should automatically start, alternatively double click on the Novo-Softinstall.exe icon in the relevant CD drive. - Page 10 Novo-Gloss Trio Manual Click ‘search removable media’ then click ‘next’. The PC should find the driver and install it from the disc. Click ‘finish’. The PC will detect another new hardware component, follow the above steps again. - 10 -...
-
Page 11: Connecting The Instrument
Novo-Gloss Trio Manual Your Novo-Gloss Trio is now installed and ready to use. Connect the instrument Connect the instrument to a USB port on your PC with the supplied data cable. In the ‘Set-Up’ menu ensure that the ‘high speed coms’ box is ticked. -
Page 12: Declaration Of Conformity
Novo-Gloss Trio Manual EC Declaration of Conformity Rhopoint Instruments Ltd, Beeching Road, Bexhill on Sea, East Sussex, TN39 3LG Declare under our sole responsibility that the product Novo-Gloss Trio To which this declaration relates is in conformity with the following standards...
Need help?
Do you have a question about the Novo-Gloss Trio and is the answer not in the manual?
Questions and answers