Table of Contents
Advertisement
Quick Links
Advertisement
Table of Contents

Related Manuals for Data Video SE-650


Summary of Contents for Data Video SE-650
-
Page 2: Table Of Contents
Table of Contents FCC COMPLIANCE STATEMENT ......................5 WARNINGS AND PRECAUTIONS ......................5 WARRANTY ............................6 ..........................6 TANDARD ARRANTY ..........................6 ARRANTY DISPOSAL ............................6 CHAPTER 1 INTRODUCTION ......................7 ............................7 EATURES ..........................8 YSTEM IAGRAM CHAPTER 2 CONNECTIONS AND CONTROLS ..................9 ............................ - Page 3 ............................23 3.5.1 Logo Image ..........................23 3.5.2 Logo Control ........................... 23 3.5.3 Logo Source (Logo Src) ......................23 3.5.4 Fill Source ..........................24 3.5.5 Mask ............................24 ............................24 TILLS 3.6.1 Load Still..........................24 3.6.2 Save Still ..........................25 3.6.3 Grab Still ..........................
- Page 4 2: F ....................... 37 PPENDIX IRMWARE PGRADE 3: F ....................38 PPENDIX REQUENTLY SKED UESTIONS 4: D .......................... 39 PPENDIX IMENSIONS 5: S ........................40 PPENDIX PECIFICATIONS SERVICE AND SUPPORT ........................41 Disclaimer of Product & Services The information offered in this instruction manual is intended as a guide only. At all times, Datavideo Technologies will try to give correct, complete and suitable information.
-
Page 5: Fcc Compliance Statement
FCC Compliance Statement This device complies with part 15 of the FCC rules. Operation is subject to the following two conditions: (1) This device may not cause harmful interference, and (2) This device must accept any interference received, including interference that may cause undesired operation. -
Page 6: Warranty
Warranty Standard Warranty • Datavideo equipment is guaranteed against any manufacturing defects for one year from the date of purchase. • The original purchase invoice or other documentary evidence should be supplied at the time of any request for repair under warranty. •... -
Page 7: Chapter 1 Introduction
It offers two HD SDI and two HDMI inputs. Output options include one user assignable HD SDI, two HDMI outputs. The SE-650 also features an audio mixer with microphone and unbalance RCA audio inputs; more features include Chroma Keyer, Luma Keyer, PIP, Wipe Generator, Still stores and Tally. -
Page 8: System Diagram
1.2 System Diagram... -
Page 9: Chapter 2 Connections And Controls
The SE-650 provides two HD-SDI video input channels for connecting HD-SDI video sources. HD-SDI Video Output 1 The SE-650 provides an HD-SDI video output channels which can be connected to HD-SDI video display. HDMI Video Output 1-2 The SE-650 provides two HDMI video output channels which can be connected to HDMI video display. - Page 10 Datavideo peripheral devices such as ITC-100, ITC-200, AM-100 or other monitor models, allowing the peripheral device to communicate with the SE-650 or send tally signal to be displayed on the monitor. MIC IN – CH1/CH2 Two Channels of unbalanced MIC input.
-
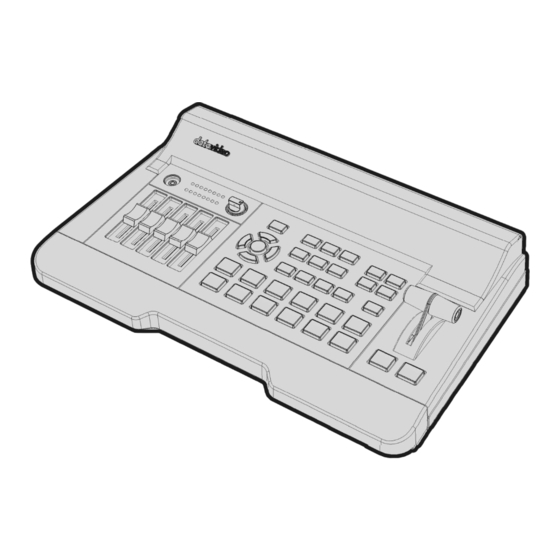
Page 11: Front Panel
Power Switch Power switch ON/OFF DC IN DC in socket connects the supplied 12V / 19W PSU. The connection can be secured by screwing the outer fastening ring of the DC In plug to the socket. 2.2 Front Panel Volume Control Switcher Transition PIP/Keyer... -
Page 12: Transition Effects
The white represents the current Program image and the black represents the WIPE-IN image. There are a total of 2 WIPE presets offered on the SE-650; the WIPE buttons allow the user to make a selection directly from the control panel for the first 2 and remaining 30 WIPE effects are selectable from the menu (Start). - Page 13 Wipe transition effect selection, border and position can be configured in the OSD menu (Start). Note: When WIPE and MIX buttons are enabled at the same time, the SE-650 enters the Clip Transition mode. PIP/Keyer PIP Enable/Disable buttons Picture in Picture puts the selected Sub Video Source in a window on the Main Program view, with control over window size and placement.
- Page 14 Keyer Enable/Disable buttons KEYER PGM: Enables the key (Chroma / Luma / Linear) on multiview and PGM output KEYER PVW: Enables Keyer on PVW and multiview outputs. Press and hold this button until the Preview Source row starts to flash and then select Keyer KEY or FILL sources from the Preview Source row.
-
Page 15: Volume Control
Program Source Row Pressing the number buttons along the PROGRAM row selects a video source for the PGM view. BKG button: Pressing the BKG button will switch the background to the Matte background or color bars. Still button: Pressing the STILL button will switch the Main Program view to a still picture, which can be selected in the OSD menu. - Page 16 Audio Meters LED style meters, which show the signal strength at the Main Program Audio Output. The signal measured is determined by the level set with the Master slider. The LEDs turn red at +10 dB to indicate clipping distortion. Audio Volume (dBV) LED Color...
-
Page 17: Chapter 3 Osd Menu
3.1.2 Type The SE-650 provides three major types of transition effect, which are MIX, WIPE and Clip. Please note in addition to selecting the transition effect on the OSD menu, you are also allowed to press the MIX button, WIPE button or press MIX and WIPE buttons at the same time to enable the respective transition effects. -
Page 18: Border
Zero value positions the wipe center at the screen center. 3.1.6 Matte The user can configure the Matte by adjusting Luma, Saturation and Hue in this sub-option. 3.2 Keyer Keyer of the SE-650 provides the user with the capability of image keying. Advanced mode options Keyer Keyer... -
Page 19: Key Source
Lift adjusts the dark/black areas of the key image. Gain adjusts the light/white areas of the key image. Opac adjusts the transparency of the overall foreground key image. 3.2.3 Key Source This sub-option allows the user to assign the key source; various options are listed below: •... -
Page 20: Mask
K Fgnd (Key Foreground): Key Foreground adjusts the performance of the chroma key in light or white areas. Apply more Key Foreground if the light areas are becoming too transparent. K Bgnd (Key Background): Key Background adjusts the performance of the chroma key in dark or black areas. -
Page 21: Position
3.3.1 Position The user can adjust the position of the PIP screen by adjusting values of X, Y and SIZE, where X is the horizontal position, Y is the vertical position and Size is the PIP screen size. Horizontal Position (X) Positive value moves the PIP window to the right. -
Page 22: P-In-P Source
3.4.1 P-In-P Source This sub-option allows the user to assign the P-In-P source; various options are listed below: • Bars • Matte – Set in Start/Matte • Freeze • Still 1 • Still 2 • Input 4 • Input 3 •... -
Page 23: Mask
3.4.5 Mask The Mask feature shrinks the camera image by removing the borders from the final image. This feature allows the user to configure the Mask in chroma or full mode. • Left – Left sets the left edge of the P-in-P keyer mask. •... -
Page 24: Fill Source
• Input 4 • Input 3 • Input 2 • Input 1 • Black 3.5.4 Fill Source Source from the list below. Select the Fill • Bars • Matte – Set in Start/Matte • Freeze • Still 1 • Still 2 •... -
Page 25: Save Still
• Still 1 • Still 2 • Input 4 • Input 3 • Input 2 • Input 1 Select “Load” to load the still image to the determined destination. Image Preview is available below the “Load Still” row. “Image Preview – 1” allows the user to preview the previous image, “Image Preview”... -
Page 26: User Mems
Once “Load” is pressed, the selected clip will be loaded into the Still 2 window and replace the previously displayed video or image. Note: The SE-650 comes with pre-loaded clip files. The SE-650 also allows the user to import customized clip files. It is recommended to use 32-bit with Alpha png format. -
Page 27: Input 1-4
Advanced mode options Inputs Input 1 Black 0 White 100 Chrom Input 2 Black 0 White 100 Chrom Input 3 Black 0 White 100 Chrom Input 4 Black 0 White 100 Chrom Freeze Live 2 Live 3 Live Live Crosspoint Input 1 2 Input 2 3 Input 3... -
Page 28: Audio
In this sub-option, you can turn ON/OFF the embedded audio component at the SDI-out and HDMI- out. Mode (Off/Analog): The SE-650 can only accept external audio using the analogue RCA inputs on the rear panel. By changing the Mode sub-option from Analogue to OFF will mute the incoming RCA audio. -
Page 29: Multiviewer
In the “Setup” menu, the user can change the resolution, switch between full and simplified menu versions, reset the SE-650 to its Factory Default values, adjust the menu preferences, enable/disable Auto Save, choose the preferred OSD menu language, upgrade firmware and view the current firmware versions (Interface, Mainboard and Keyboard). -
Page 30: Auto Save
1: Background 50% Transparent (buttons not Transparent) 2: All Menu 50% Transparent Menu Size The menu size options are: 1. Normal 2. Small (1080i Mode) 3. Large (720p Mode) Menu Position Menu Position gives the user ability to select several positions for the Menu area on the Screen. The current options are Centre, Top, Left, Right and Bottom. -
Page 31: Chapter 4 Applications
4.2 Logo Insertion The SE-650 allows the user to place a logo on the video by enabling the logo feature. First of all, create a 1920x1080 (16:9) logo against a black or white background on a laptop. Once the logo is created, please follow the steps outlined as follows to insert the logo layer. -
Page 32: Loading Still Images
4.3 Loading still images The SE-650 allows the user to load still images saved on the machine to the Multiview screen. Please follow the steps outlined below to load the still picture. 1. Press the MENU button to open the OSD menu on the Multiview display. -
Page 33: Loading The Clip For Stinger Transition Effect
4.5 Importing the Clip for Stinger Transition Effect from the PC On the SE-650, you will be able to add a clip between sources. Besides using the existing clips on the machine, you are also allowed to import your own clip (a series of bmp/png files) to the SE-650 from the PC on the SE-1200 MU User Interface. - Page 34 650 and the PC has been successfully established, you will be able to see the network information of your switcher. Select Import-Export from the yellow menu options. To import a clip from the computer into the SE-650, select Import Clip.
- Page 35 Caution: The PC Control App can now do the conversion from bmp/png/jpg to SE-1200 MU format .pic files. All you need is to give the PC control APP a starting file location and it will give the PC control APP an idea where to start linking all images up into a sequential animation file. Importing Clips Select “Import Clip”...
-
Page 36: Chapter 5: Appendices
Chapter 5: Appendices Appendix 1: Tally Outputs The SE-650 has a D-sub 15 pin female tally output port. These connections provide bi-colour tally information to a number of other Datavideo products, such as the ITC-100 eight channel talkback system and the TLM range of LCD Monitors. The ports are open collector ports and as such do not provide power to tally light circuits. - Page 37 Appendix 2: Firmware Upgrade Datavideo usually releases new firmware containing new features or reported bug fixes from time to time. Customers can either download the SE-650 firmware as they wish or contact their local dealer or reseller for assistance. This section outlines the firmware upgrade process which should take approximately 10 minutes to complete.
- Page 38 Appendix 3: Frequently-Asked Questions This section describes problems that you may encounter while using SE-650. If you have any questions, please refer to related sections and follow all suggested solutions. If problem still exists, please contact your distributor or the service center.
- Page 39 Appendix 4: Dimensions All measurements in millimeters (mm)
-
Page 40: Audio Mixer
Appendix 5: Specifications Interfaces 4 sets of input Video Inputs 2 x HDMI 2 x HD-SDI 2 x HDMI (HDMI 1 is user assignable / HDMI 2 is Multiview) Video Outputs 1 x HD-SDI (User assignable) 1 x Stereo RCA (L/R) Audio Inputs 2 x Mono Microphone De-embedded Digital Audio (2 CH) - Page 41 Service and Support...
Need help?
Do you have a question about the SE-650 and is the answer not in the manual?
Questions and answers