Speakerbus iD 712 User Manual
Deskstation
Hide thumbs
Also See for iD 712:
- Quick start manual (2 pages) ,
- Quick start manual (2 pages) ,
- User manual (64 pages)
Table of Contents
Advertisement
Quick Links
Advertisement
Table of Contents

Related Manuals for Speakerbus iD 712


Summary of Contents for Speakerbus iD 712
-
Page 1: User Guide
712 Deskstation User Guide Reordering Info: UG712/R7 (iD712 V2.320) Sep 2016... - Page 2 Speakerbus reserves the right to make changes to the products described in this document without notice. Speakerbus Technology Limited does not assume any liability that may occur due to the use or application of the product(s) describes herein. Revision History...
-
Page 3: Table Of Contents
About this Guide ................ 8 Using this Guide ..................... 8 What Features can I use? ................8 Further Help ..................... 8 Getting Help with Speakerbus System ..............8 In All Cases ......................8 Deskstation Diagnostics ..................9 Related Manuals ....................9 Software Version ..................... - Page 4 712 User Guide Receiving a Call when Intercom Automatic Call-back is enabled .... 21 Receiving a Call when Call Forward is enabled ......... 21 Mute Microphone During Call ..............22 Adjust the Volume ..................22 Adjust Volume during Point to Point/Group Call/Broadcast ........22 Return to Home Screen ................
- Page 5 Global Muting ....................40 Programming Speed Dials ............41 Adding Speed Dials ..................41 Moving Speed Dials ..................42 Deleting Speed Dials ..................43 User Settings ................44 Re-synchronising the iD 712 Deskstation ..........44 Logging Off ....................45 User Preferences ..................45...
- Page 6 712 User Guide Environment Settings ..................... 45 Handset Mode Settings ..................46 Call Settings ................47 Call Forward ....................47 Call Preferences .................... 47 Intercom Automatic Call-back ................47 Announcement Tone Volume ............... 48 Engineering Tools ..............49 Ping Tool ......................49 Trace Route ....................
- Page 7 712 User Guide Operational Environment ..................58 Storage Environment .................... 58 Safety and Compliance ............60 Deskstation ....................60 CE Mark ......................60 Class I Pluggable Equipment Type A ............60 Declaration of Conformity ................60 FCC Statement ....................60 Warnings ......................
-
Page 8: About This Guide
About this Guide Using this Guide This guide is revision 7 and describes how to operate the iD 712 Deskstation. To check the software release of your system, contact your System Administrator. Before operating this deskstation, please read these instructions carefully. -
Page 9: Deskstation Diagnostics
“what information would I need to solve this problem?” Deskstation Diagnostics Please supply the following from the Deskstation: ● Speakerbus Log files for the period around the problem (please refer to the User ● Guides for instructions on how to use the Send Logs feature). Note perform a send ●... -
Page 10: Conventions
712 User Guide Conventions It is possible to complete functions on the iD 712 Deskstation using both ▲ ▼ numbers or the navigation and OK keys. Take for example the Main directory. The Call Register option can be selected by either pressing the number 3 key ▲... -
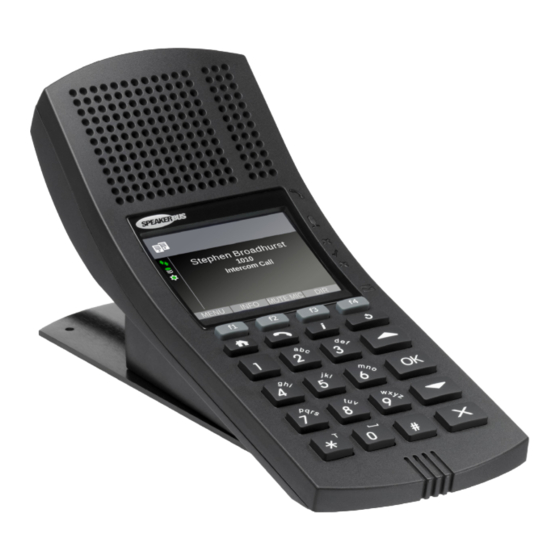
Page 11: Id 712 Elements
712 Elements Front View Description Extended Description Speaker Single Speaker Screen The iD 712 Deskstation’s display. f1, f2, f3 & f4 - These are Fixed Function ● the soft Keys. For more Keys information, see Soft Keys on page 16. -
Page 12: Rear View
Includes a variety of icons which are fully explained on page LEDs Rear View Description Extended Description Gooseneck Used to attached a range of Speakerbus microphones. Microphone Socket Ethernet Network 100 Base T Ethernet Interface. Handset / Handset / Headset Port. Headset Port... -
Page 13: Icons And Led Indicators
712 User Guide Icons and LED Indicators Status Icons Status icons are located on the left hand side of the screen. The icons from top to bottom are Network status, iCMS status and iCS status. They can be in one of four states as described below. -
Page 14: Ics Status
712 User Guide iCS Status State State Description Explanation Registration Registration and Multicast Control Channel complete connection are successful. Partial registration Primary registration connection has failed Or failure Device is disconnected from the Multicast Control Channel. Registration failure Unable to complete registration... -
Page 15: Call Register Icons
712 User Guide Call Register Icons Below details icons displayed within the Call Register. For more information on the call register, see Call Register on page 25. State State Description Explanation Incoming Call Call received on deskstation. Outgoing Call Call made on deskstation. -
Page 16: Led Indicators (Continued)
● f4 - (DIR) displays directories (or hoot voice services on non iCS hoot platforms). Menus The iD 712 Deskstation contains three menus: Main, Program and Preferences & Tools. Main Menu The Main menu consists of the following options:... -
Page 17: Program Menu
712 User Guide ● Call Info - Displays call information during active calls. For more information, see Call Information on page 24. ● Directories - Contains a list of directories including access to speed dial screens. For more information, see Directories on page 27. -
Page 18: Preferences & Tools
712 User Guide Preferences & Tools The Preferences & Tools menu consists of the following options: ● User Settings - This option is used to: re- synchronise the unit, log out of the unit, set the user preferences and the annouce tone volume. -
Page 19: General Features
712 User Guide General Features Logging On To log onto an iD 712 Deskstation: 1. First ensure the screen displays Station Logged Out. The only other screen that can possibly be displayed when a deskstation is logged out is the Information screen. If this screen displayed press either the OK or Back key to return to the Station Logged Out screen. -
Page 20: After You Have Logged On
Status Icons on page 13. Logging Off To log off the iD 712 Deskstation: 1. Press f1 (MENU) to display the Main menu. 2. Press f4 (NEXT>) twice to display Preferences & Tools. -
Page 21: Receiving A Call
When Intercom Call Automatic Call-back is enabled and a call is received when the iD 712 is already engaged on a call, a notification is displayed on the screen for a few seconds. This notification states the name and dial number of the user attempting to call. -
Page 22: Mute Microphone During Call
Receiving a Call when Call Forward is enabled When call forward is enabled on an iD 712, calls made to it are sent to the number set in the call forward settings. For more information, see Call Forward on page 47. -
Page 23: Privacy Mode
712 User Guide Privacy Mode Activate Privacy Mode To activate privacy mode: 1. Press f1 (MENU) to display the Main menu. 2. Using ▲ and ▼, highlight Intercom Privacy and press OK. The privacy icon is displayed in the icon side bar. -
Page 24: Call Information
712 User Guide Call Information The Call Info option is located in the Main menu, and becomes active during a call. Highlighting Call Info and pressing OK opens the Call Info screen. The information on the Call Info screen is explained below. -
Page 25: Device Information
712 User Guide Device Information Device Information is viewed by completing the following steps: 1. Press f1 (MENU) to display the Main menu. 2. Using ▲ and ▼, highlight Device Information and press OK. The Device Information options are briefly described below: ●... -
Page 26: Iselector
712 User Guide Pressing f3 (CALLS) on the idle screen displays a list of all received, placed and missed intercom calls Checking Missed Calls To check missed calls: 1. Press f1 (MENU) to display the Main menu. 2. Using ▲ and ▼, highlight Call Register and press OK. -
Page 27: Directories
712 User Guide Directories Directories The Directory lists are contained within the Directories menu and can be viewed by pressing: 1. f1 (MENU) to display the Main menu. 2. Ensure Directories is highlighted and press the OK key. 3. Use ▲ and ▼ and the OK key to select the appropriate directory. -
Page 28: Displaying A User's/Groups Dial Number
712 User Guide The illustration above is an example of the Global directory search facility. Displaying a user’s/groups Dial Number Displaying a user’s/group’s Dial Number from the Global, Personal or Group Call Directory To display a user’s/group’s dial number: 1. -
Page 29: Adding Contacts To Personal Directory
712 User Guide Adding Contacts to Personal Directory Adding Contacts from Global Directory to Personal Directory To add a contact to the personal directory: 1. Press f1 (MENU) to display the Main menu. 2. Ensure Directories is highlighted and press OK. - Page 30 712 User Guide 5. Select f1 (YES) to confirm you would like to delete the contact from the personal directory.
-
Page 31: Point To Point Calls
712 User Guide Point to Point Calls Making a Point to Point Call Making a call to another deskstation is known as a point to point call. A point to point call can be made using the key pad or Directories options. -
Page 32: Making A Point To Point Call Using The Location Directory
712 User Guide This displays the Global / Personal Directory. 4. Using ▲ and ▼, highlight the appropriate contact and press OK. 5. Talk when call is connected. ● Pressing f4 (DIR) provides a shortcut to the Global Directory. -
Page 33: User Busy
712 User Guide User Busy The message “User Busy” and “Call Failed” is displayed on an intercom screen, when the party it is attempting to connect to is engaged on another call. Muting Microphone During Point to Point Call To mute the microphone during a point to point call: 1. -
Page 34: Group Calls
712 User Guide Group Calls The iD 712 supports the following types of group calls: Mixing Group Calls, Standard Group Call, Answerback to Owner Group Call. A lock can be applied to each mentioned group call type (using Supervisor). Initiating a group call which is locked is no different to the above mentioned group call types. -
Page 35: Standard Group Call
712 User Guide ● Locked Group Call - Initiating a group call which is locked is no different to making a standard, mixing or answerback to owner group call. The only difference is that other than the group call initiator, members cannot adjust their deskstation volume during the group call and are unable to leave the call. -
Page 36: Mixing Group Call
712 User Guide Mixing Group Call Making a Mixing Group Call using the Key Pad To make a mixing group call using the key pad: 1. Dial the group call number using the key pad. 2. Talk when group call is connected. -
Page 37: Making An Answerback To Owner Group Call Using Speed Dial
712 User Guide 1. Dial the group call number using the key pad. 2. Make request when call is connected. 3. When finished press the *T key and wait for answer. If no one responds to the request within twenty seconds the group call is ended. -
Page 38: Talking On A Group Call
712 User Guide Talking on a Group Call To talk to on a group call: 1. Simply talk if you initiated the group call Press *T (if applicable) and talk when the voice path is open. Only the group call initiator (chairperson), not the remaining group call members, can talk on a locked group call. -
Page 39: Voice Services
(ARD). The iD 712 Deskstation supports only hoot services. As previously mentioned the iD 712 Deskstation can run on a non iCS hoot platform. The following features and functions are prevented on this platform: ● The SIP registration icon is completely removed from the status icons. -
Page 40: Talking Back To A Hoot Service
It is best described using an example. Take, for example, a speaker channel that is monitored by several local and remote iD 712 units. If a local iD 712 changes the channel state from monitor to talk the speaker channel is muted on the other local iD 712s. -
Page 41: Programming Speed Dials
712 User Guide Programming Speed Dials The iD 712 Deskstation contains four speed dial pages. Each page can accomodate eight speed dials. A speed dial can be either a point to point or group call. Speed dial page numbers are indicated by quarters. One quarter indicates speed dial page one, two quarters speed dial page two, three speed dial page three and four speed dial page four. -
Page 42: Moving Speed Dials
712 User Guide Using the illustration below as an example pressing key pad number 1 will add Dwaine Chambers to speed dial position 1. Moving Speed Dials To move a speed dial: 1. Press f1 (MENU) to display the Main menu. -
Page 43: Deleting Speed Dials
712 User Guide Deleting Speed Dials To delete a speed dial: 1. Press f1 (MENU) to display the Main menu. 2. Press f4 (NEXT>) to display the Program menu. 3. Using the ▲ and ▼ navigation keys highlight Speed Dials and press OK. -
Page 44: User Settings
User Settings Re-synchronising the iD 712 Deskstation There are occasions when the iD 712 Deskstation needs to re-sychronised, in order to be in synchronisation with the iCMS server. For example, to update changes made on the deskstation through the iManager management application. -
Page 45: Logging Off
● Trader 2 - This setting does not remove background sound during a call at the far end when an iD 712 caller is not talking. The far end caller will hear all background noise when the iD 712 caller stops speaking. -
Page 46: Handset Mode Settings
AGC to an acceptable level. Similarly, if an iD 712 caller talks quietly, the sound level heard at the far end is gradually increased to an acceptable level. -
Page 47: Call Settings
712 User Guide Call Settings Call Forward This feature when enabled redirects a point to point call to another point to call destination. To set up call forward: 1. Press f1 (MENU) to display the Main menu. 2. Press f4 (NEXT>) twice to display Preferences & Tools. -
Page 48: Announcement Tone Volume
712 User Guide an iD 712 call the first intercom number it received when it is engaged on a call. To enable Intercom Automatic Call-back: Press f1 (MENU) to display the Main menu. 2. Press f4 (NEXT>) twice to display Preferences & Tools. -
Page 49: Engineering Tools
712 User Guide Engineering Tools When accessing the engineering tools menu for the first time, an authorisation screen is displayed. You will be required to type the administration password before proceeding any further. Ping Tool The Ping tool is used to test whether an IP address or fully qualified domain name can be reached over the network. -
Page 50: Configure Network
712 User Guide 1. Press f1 (MENU) to display Main. 2. Press f4 (NEXT>) twice to display Preferences & Tools. 3. Using ▲ and ▼, highlight Engineering Tools and press OK. This displays Engineering Tools. If this is the first time the Engineering Tools option is being used an Admin Login screen is displayed. -
Page 51: Device Ip Address Settings
Setting used to configure a static primary IP address for the iD 712 to connect to iCMS. If no IP address (0.0.0.0) is set then the iD 712 will use either DHCP or DHCP and DNS to locate the iCMS. Please refer to the appendix section within the iCMS Administrator’s Guide for more information. -
Page 52: Icms Server Settings
● Secondary IP - This option is not currently supported. ● Port - This option allows one to set the port address. If the Primary IP address (0.0.0.0) is not set then the iD 712 will use either DHCP or DHCP and DNS to locate the iCMS. -
Page 53: Network Settings
100 mbps half duplex and 10 mbps full duplex. It is essential that this setting matches the setting used on the network equipment the iD 712 is connecting to. ● SNMP Mode - This option can be set to either On or Off. When set to On the following options will not be active: SNMP IP and SNMP Public String. -
Page 54: Log Settings
If you typed a valid TFTP IP address the screen will display information similar to what is displayed in the illustration below. Log Settings Speakerbus may require logs for technical support purposes. They will provide guidance on which logs to enable. This option contains various log settings for diagnostic purposes. The logs are sent to a TFTP server when the Send Logs option is used. -
Page 55: Factory Defaults
It should only be changed from Slow to Details when investigating issues. Factory Defaults The factory default option will take the iD 712 Deskstation back to the factory default settings. To take the iD 712 Deskstation back to its factory default settings: 1. -
Page 56: Microphones, Handsets And Headsets
● Cardiod Microphone – This microphone allows you to talk approximately 8 inches away from the microphone. ● Open Microphone - This is in-built and part of the iD 712 unit. ● Cardiod and Open Microphones are not suitable in a all environments. - Page 57 712 User Guide To mute handset during a call: 1. First ensure the call is connected. 2. Press the handset button to change deskstation state from microphone and speaker to handset / headset. The handset LED is lit green and the open microphone LED are turned off.
-
Page 58: Technical Specifications
Cable Requirements ● Ethernet Interface ● Cable: Minimum Category 5e UTP. Maximum length 100m. ● Connector: RJ-45 System Management System management through Speakerbus Supervisor and/or iManager software. Recommended Input Devices Handset ● Speakerbus momentary latching noise cancelling handset Recommended Microphones ●... - Page 59 712 User Guide ● Humidity: 10% - 95 % RH...
-
Page 60: Safety And Compliance
Power over Ethernet AC adapter. Speakerbus Part Number - iD POE. The iD 712 has been certified to meet IEC 60950-1 and is provided with a Class 1 pluggable PSU as part of this approval. This type of PSU requires an earthed mains socket-outlet. -
Page 61: Ordering Information And Accessories
712 User Guide Ordering Information and Accessories Deskstation Deskstation Model Sales Code iD 712 iD 712 Handset Deskstation Model Sales Code Momentary Handset SE HSETM Microphones Deskstation Model Sales Code Close Talking Noise Cancelling 52-09-021 Microphone 550mm, 8.5 Diameter Cardiod Microphone 550mm, 8.5... -
Page 62: Index
712 User Guide Index redial 21 broadcast. See hoot safety 57 soft keys 16 call register 23 speed dials adding speed dials 40 deleting speed dials 42 directories 26 moving speed dials 41 display dial number 27 technical specifications 55... - Page 64 © Speakerbus Technology Limited 2016 Registered Office: Ground Floor, Hanover House, Britannia Road, Queens Gate, Waltham Cross, Hertfordshire, EN8 7TF Registered in England No: 04415859...
Need help?
Do you have a question about the iD 712 and is the answer not in the manual?
Questions and answers