
Related Manuals for DENT-X ROTOGRAPH PLUS

Summary of Contents for DENT-X ROTOGRAPH PLUS
- Page 1 ROTOGRAPH PLUS ROTOGRAPH PLUS ROTOGRAPH PLUS ROTOGRAPH PLUS (120V version) (120V version) (120V version) (120V version) Service manual Service manual Service manual Service manual Release 4 December 2006 (Rev. 0)
-
Page 2: Table Of Contents
SERVICE MANUAL Contents Contents INTRODUCTION 1.1 Icons appearing in the manual ............1-1 SAFETY INFORMATION 2.1 Warnings ..................... 2-2 2.2 Environmental risk and disposal ............2-3 2.3 Symbols used ..................2-4 DESCRIPTION 3.1 Identification labels ................3-1 3.2 Description ..................3-3 TECHNICAL FEATURES 4.1 Standards and regulation .............. - Page 3 9.1 Key to general diagram of the Rotograph Plus........9-2 10. SPARE PARTS 10-1 This publication can only be reproduced, transmitted, transcribed, or translated into any human or computer language with the written consent of DENT-X. This manual in English is the original version. RTG PLUS (120V) (Rev. 0)
-
Page 4: Introduction
The manual may not reflect changes to the product not impacting service operations. ROTOGRAPH PLUS, by DENT-X, is a radiological device which allows to carry out radiological examinations of the dento maxillo facial complex. ROTOGRAPH PLUS is available in the following version: For PANORAMIC examination only (ST version) •... - Page 5 SERVICE MANUAL Introduction THIS PAGE IS INTENTIONALLY LEFT BLANK RTG PLUS (120V) (Rev. 0)
-
Page 6: Safety Information
X-ray generators. Villa Sistemi Medicali or DENT-X shall not be responsible for: • any use of the ROTOGRAPH PLUS different from that for which it has been designed, • any damage to the equipment, the operator or the patient caused either by incorrect installation and maintenance not compliant with the procedures contained in the relevant user’s and installation... -
Page 7: Warnings
3 meters away from the ROTOGRAPH PLUS and be powered via an independent electric line. ROTOGRAPH PLUS must be switched off during the entire period of use of ESU (Electro Surgery Units) units or similar equipment. -
Page 8: Environmental Risk And Disposal
SERVICE MANUAL Safety information Although the X-ray dosage supplied by dental radiology appliances is on average low and distributed over a relatively small surface, the operator must take the necessary precautions and/or follow the safety procedures for both himself and the patient during an exposure. We recommend that the X-ray activation always be commanded from an X-ray protected area via remote control. -
Page 9: Symbols Used
SERVICE MANUAL Safety information Symbols used Symbols used Symbols used Symbols used Symbol Description Equipment with Type B applied parts (according to IEC 601-1) A number of machine parts contain materials and liquids that upon completion of the machine’s life cycle must be disposed of at recovery centers established by the local health units Alternating Current... -
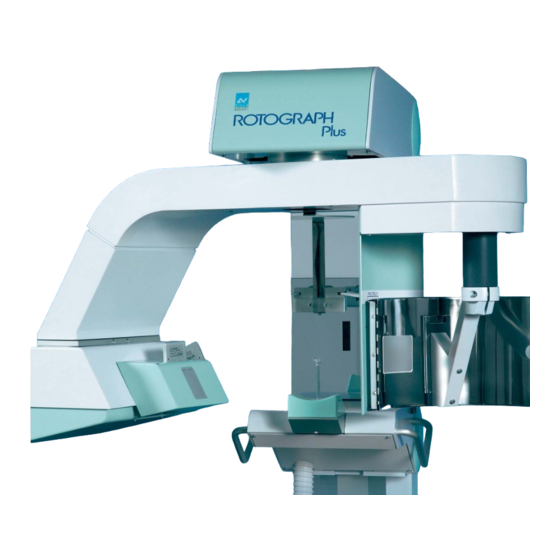
Page 10: Description
Identification labels Identification labels Identification labels Identification labels ROTOGRAPH PLUS is labeled with a set of labels identifying different components according to the requirements of the international standards. The following picture shows the position of the different labels: (Rev. 0) - Page 11 SERVICE MANUAL Description ROTOGRAPH PLUS WARNING label ETL certification label label Tubehead label Collimator label Diaphgram label Diaphgram label (not present on “ST” version) (not present on “ST” version) Remote control label CEPH device label RTG PLUS (120V) (Rev. 0)
- Page 12 (please refer to the specific chapter of this manual). ROTOGRAPH PLUS is controlled by a soft touch console and equipped with an alphanumeric digital display for a clear indication of the working parameters and operative messages. The operative cycle is entirely run...
- Page 13 The good quality of the image does not exclusively depend on ROTOGRAPH PLUS but a great importance is to be given to the film developer; and dark room techniques. Therefore, it is necessary: to perform developer maintenance as indicated by the manufacturer •...
-
Page 14: Technical Features
4. 4. 4. 4. TECHNICAL FEATURES TECHNICAL FEATURES TECHNICAL FEATURES TECHNICAL FEATURES General characteristics Equipment ROTOGRAPH PLUS Manufacturer VILLA SISTEMI MEDICALI Buccinasco (MI) Italy Class Class II according to 21 CFR sub-chapter J. Class I with type B applied parts according to IEC. - Page 15 SERVICE MANUAL Technical features General characteristics Exposure time (Cephalometric) 0.2 ÷ 3s in 19 position (see note 1) ± 10ms for times ≤ 0.33s0 Exposure time accuracy (CEPH) ± 3 % for times ≥ 0.33s Reference current time product (CEPH) 3 mAs @ 70% of the max power Exposure interval (CEPH) Film size (CEPH)
- Page 16 SERVICE MANUAL Technical features X-ray tube features Manufacturer CEI – Bologna Italy Type CEI OPX/105 Focus 0.5 IEC 336 Inherent filtration 0.5 mm Al eq. Anode tilt 5° Anode material Tungsten Nominal voltage 105 kVp Filament maximum current Filament maximum voltage Anode thermal capacity 30 kJ Weight of apparatus and parts...
-
Page 17: Standards And Regulation
SERVICE MANUAL Technical features Standards and regulation Standards and regulation Standards and regulation Standards and regulation The ROTOGRAPH PLUS equipment is manufactured according to the following standards: 21 CFR subchapter J General safety: IEC 601-1 IEC 601-1-1 IEC 601-2-7 IEC 601-2-28... -
Page 18: X-Ray Tubehead Curves
SERVICE MANUAL Technical features X X X X - - - - ray tubehead curves ray tubehead curves ray tubehead curves ray tubehead curves 4.2.1 4.2.1 4.2.1 4.2.1 Tube "CEI Tube "CEI - - - - OPX/105" (0.5x0.5) Tube "CEI Tube "CEI OPX/105"... - Page 19 SERVICE MANUAL Technical features Cooling curve of tubehead E(KJ) m in RTG PLUS (120V) (Rev. 0)
-
Page 20: Technical Factors Measuring Method
SERVICE MANUAL Technical features Technical factors measuring method Technical factors measuring method Technical factors measuring method Technical factors measuring method The peak tube potential is directly measured with a non invasive kVp-meter, accuracy ±3kVp. When performing the measurement, make sure that measuring probe is completely covered by the X-ray beam. A direct measurement of the high voltage can only be carried out by specialized technicians in a suitable testing laboratory as it requires disassembling of the tubehead. -
Page 21: Overall Dimension
SERVICE MANUAL Technical features Overall dimension Overall dimension Overall dimension Overall dimension Figure 4-1: ROTOGRAPH PLUS overall dimension RTG PLUS (120V) (Rev. 0) -
Page 22: Pre-Installation
The room pre-installation requirements for a successful installation are: • a minimum room ceiling height of 8 ft (2,5 mt) and an area to accept ROTOGRAPH PLUS with its different configuration as showed on drawings in Figure 5-1 and Figure 5-2. •... -
Page 23: Electrical Requirements
AWG 16 (1,5mm²). Grounding of this equipment must meet any standards in force. NOTE: The ROTOGRAPH PLUS IS PROVIDED with connections for remote control and signalling device to be placed at the entrance of the X-ray room with the following meanings: •... -
Page 24: Environmental Condition
Unpacking Unpacking Unpacking Unpacking ROTOGRAPH PLUS is shipped packed in two cartons when the unit is CEPH ready and three cartons when the Ceph (Teleradiography) device is included. Dimensions, net weight, gross weight and the packing contents are listed in the following table:... -
Page 25: Space Requirements
SERVICE MANUAL Pre-installation Space requirements Space requirements Space requirements Space requirements 5.4.1 5.4.1 5.4.1 5.4.1 PAN versions PAN versions PAN versions PAN versions Figure 5-1 RTG PLUS (120V) (Rev. 0) -
Page 26: Ceph Version
SERVICE MANUAL Pre-installation 5.4.2 5.4.2 5.4.2 5.4.2 CEPH version CEPH version CEPH version CEPH version Figure 5-2 (Rev. 0) RTG PLUS (120V) - Page 27 SERVICE MANUAL Pre-installation THIS PAGE IS INTENTIONALLY LEFT BLANK RTG PLUS (120V) (Rev. 0)
-
Page 28: Installation
INSTALLATION INSTALLATION INSTALLATION NOTE: ROTOGRAPH PLUS is dispatched preassembled in groups. The mechanical assembly consists exclusively in assembling these groups together. Calibration of the ball bearing, brakes and eventual tightening torques is factory preset before delivery; any intervention on these parts, besides not being necessary, can cause malfunction. -
Page 29: Panoramic Version With Legs
SERVICE MANUAL Installation Panoramic version with legs Panoramic version with legs Panoramic version with legs Panoramic version with legs After unpacking the components, proceed to assemble in the following order: 1. Rest the column on two wooden blocks with the guide turned upwards. - Page 30 SERVICE MANUAL Installation 6. Align the motor group sliding bearings (110 pounds - 50kg) with the appropriate guides. Remove the motor group upper stop pin and insert the unit (Figure 6-5), allowing only the last ten inches to extend from column. Care must be taken not to scratch the column. 7.
- Page 31 SERVICE MANUAL Installation 9. Keep the ropes under tension by acting on the pulley support and, checking that the ropes do not come out of their guides, by acting on the slider push the whole assembly until the pulley unit is inserted in its housing on the upper part of the column.
- Page 32 Figure 6-9 and connecting X1 and X7 connectors in the control panel lower and upper part. 17. Check the perpendicularity of ROTOGRAPH PLUS adjusting the 4 levelling screws located under the legs and assemble the support with the appropriate clamp.
- Page 33 SERVICE MANUAL Installation 19. Turn on the main switch on the control box and proceed to calibrations as described in chapter 7. Interlock signals connector Tubehead connector X15: Connector for signalling lamp and command protocols Fuse 10A T Fuse 1A F Supply cable Figure 6-9 RTG PLUS (120V)
-
Page 34: Panoramic Version - Wall Mounted (No Legs)
SERVICE MANUAL Installation Panoramic version Panoramic version - - - - wall mounted (no legs) Panoramic version Panoramic version wall mounted (no legs) wall mounted (no legs) wall mounted (no legs) After having unpacked the components proceed to assemble in the following order: 1. - Page 35 SERVICE MANUAL Installation 5. Put the column back on the floor, resting it on the wooden blocks, and remove the wall bracket. Figure 6-11 RTG PLUS (120V) (Rev. 0)
- Page 36 SERVICE MANUAL Installation 6. Drill wall and floor at the marks made previously. Figure 6-12 NOTE: To fasten the wall bracket to masonrywe recommend expanding metal dowels with a screw diam. 8mm while for the base plate it will be sufficient dowels with screw diam.6mm.
- Page 37 SERVICE MANUAL Installation 7. Continue the assembly of the whole unit starting from point 6.1.3 , when reaching point 6.1.8. it will be necessary to reassemble the wall bracket ; before carring out the final fastening, check again by means of a level the column stand perpendicularity to the floor. 8.
-
Page 38: Panoramic Version With Ceph
CEPH n with CEPH To install ROTOGRAPH PLUS in the version with CEPH device proceed as indicated in paragraph 6.1. steps 1 to 17 and 6.2. steps 1 to 7 according to its being with or without legs, bearing in mind that for both versions the wall security fastening has to be executed (see previous paragraph 6.2) and that the counterweights to be inserted are of the "B"... -
Page 39: Converting From "Ceph" Configuration To "Prepared For Ceph
“Prepared “Prepared for CEPH” for CEPH” In case you have a ROTOGRAPH PLUS in the “CEPH” configuration, it is possible to return to the “prepared for CEPH” configuration (without Ceph arm) by following the next procedure: NOTE: Ask for “kit ROTOGRAPH PLUS prepared” cod. 66088425. -
Page 40: Checkout And Adjustments
AND CHECKED DURING THE FINAL TESTING IN THE FACTORY. ANY CHANGES TO THE DEFAULT SETTING MAY ONLY BE CARRIED OUT BY A DENT-X TECHNICIAN OR BY EXPRESSELY AUTHORISED THIRD PARTIES. ANY CHANGES MADE BY UNAUTHORISED PEOPLE WILL VOID ANY MANUFACTURER'S RESPONSIBILITY AS TO THE CORRECT OPERATION AND SAFETY OF THIS EQUIPMENT. -
Page 41: Set-Up
SERVICE MANUAL Checkout and adjustment Set- - - - up This chapter explains how to enter same special routines (set-up mode) that allow to carry out adjustment / settings on the unit. 7.2.1 7.2.1 7.2.1 7.2.1 Activation of the set Activation of the set Activation of the set Activation of the set- - - - up programs... -
Page 42: Modification Of The Values Of The "Software Dip-Switches
SERVICE MANUAL Checkout and adjustments 7.2.2 7.2.2 7.2.2 7.2.2 Modification of the values of the "Software DIP Modification of the values of the "Software DIP- - - - Switches" Modification of the values of the "Software DIP Modification of the values of the "Software DIP Switches"... - Page 43 SERVICE MANUAL Checkout and adjustment S3: Display A Display A Display AC line voltage Display A C line voltage C line voltage C line voltage When the display indicates "S3 OFF", press "s" (39) to change it to ON (S3 ON). Now press "R"...
- Page 44 SERVICE MANUAL Checkout and adjustments S6: Cephalometric device (not applicable to PAN or ST version) Cephalometric device (not applicable to PAN or ST version) Cephalometric device (not applicable to PAN or ST version) Cephalometric device (not applicable to PAN or ST version) It is OFF when the machine is preset for CEPH;...
- Page 45 SERVICE MANUAL Checkout and adjustment SA: Tubehead angular position Tubehead angular position Tubehead angular position Tubehead angular position When the display indicates "SA OFF", press "s" (39) to change this function to ON (SA ON). You will thus be able to display the tubehead angular position during the set-up phase only.
-
Page 46: Non-Volatile Memory Reset
SERVICE MANUAL Checkout and adjustments 7.2.3 7.2.3 7.2.3 7.2.3 Non- - - - volatile memory reset volatile memory reset volatile memory reset volatile memory reset Press "R" (32). The system will emit a long beep. Press "R" again to confirm the reset of the default parameters in the non-volatile memory. After pressing "R"... -
Page 47: Potentiometer Replacement/Calibration
SERVICE MANUAL Checkout and adjustment 7.2.4 7.2.4 7.2.4 7.2.4 Potentiometer replacement/calibration Potentiometer replacement/calibration Potentiometer replacement/calibration Potentiometer replacement/calibration The procedure here after described, allows to store into the system non- volatile memory the resistance values of the potentiometer (then converted by the A to D Converter) when the tube-head is in the starting position (0°) and final position (245°). - Page 48 SERVICE MANUAL Checkout and adjustments 4. Depending on the value of the potentiometer, adjust it to read between pins 2 and 3 (see next Figure) a value of 350Ω±10 (for 5kΩ potentiometer), 700Ω±20 (for a 10kΩ potentiometer) or 1400Ω±30 (for a 20kΩ potentiometer). 5.
- Page 49 SERVICE MANUAL Checkout and adjustment 19. Press the "s" (39) key to change to SA ON. 20. Press the "R" (32) key: the display will show A (means angle)= 000.0°. 21. Pressing and holding "T" (31) key, perform a test rotation and check that, during the rotation, the display will show a value increasing smoothly and constantly corresponding to actual angular position of the rotating arm;...
-
Page 50: Checking And Adjusting The Ac Voltage
SERVICE MANUAL Checkout and adjustments WARNING: DURING INSTALLATION, IT IS RECOMMENDED TO RECHECK THE LINE VOLTAGE AND TUBE CURRENT AS DESCRIBED IN THE FOLLOWING PARAGRAPHS. Checking and adjusting the AC voltage Checking and adjusting the AC voltage Checking and adjusting the AC voltage Checking and adjusting the AC voltage 1. -
Page 51: Check Of Line Voltage Regulation
SERVICE MANUAL Checkout and adjustment 7.3.1 7.3.1 7.3.1 7.3.1 Check of line voltage regulation Check of line voltage regulation Check of line voltage regulation Check of line voltage regulation WARNING: The following test implies X-ray emission; please follow all measures envisaged by local safety regulations. -
Page 52: Checking The Output Current (Ma)
SERVICE MANUAL Checkout and adjustments Checking the output current (mA) Checking the output current (mA) Checking the output current (mA) Checking the output current (mA) WARNING: The followings tests (7.4.1 and 7.4.2) implies X-ray emission; please follow all measures envisaged by local safety regulations. NOTE: The output current can be checked both with the arm rotating or in stopped. - Page 53 SERVICE MANUAL Checkout and adjustment 5. Press the X-ray button and check that the voltage is 10V ± 1V. If not, adjust the R2 resistor collar of the board A1; moving the cursor to the top, the anodic current value will increase, moving to the bottom will decrease.
-
Page 54: Checking And Centering Adjustment Of The X-Ray Beam
ROTOGRAPH PLUS does not usually require adjustment of the X-ray beam. However, if necessary, follow the instructions provided in the next paragraph to adjust the X-ray beam. WARNING: The followings test implies X-ray emission; please follow all measures envisaged by local safety regulations. -
Page 55: Alignment Of The X-Ray Beam For The Panoramic Mode
SERVICE MANUAL Checkout and adjustment 7.5.1 7.5.1 7.5.1 7.5.1 Alignment of the X Alignment of the X Alignment of the X Alignment of the X- - - - ray beam for the PANORAMIC mode ray beam for the PANORAMIC mode ray beam for the PANORAMIC mode ray beam for the PANORAMIC mode To check alignment of the X-ray beam in the Panoramic mode proceed as... - Page 56 SERVICE MANUAL Checkout and adjustments C1. In case of horizontal regulation for Ceph predisposed units, release screws "105" (see Figure 7-2) and rotate the tubehead in the desired direction. Make an exposure and if OK screw-in the screws. C2. In case of horizontal regulation for ST units, the cover of the arm supporting the tubehead has to be removed, release the 2 grubs "104"...
- Page 57 SERVICE MANUAL Checkout and adjustment Figure 7-3 7-18 RTG PLUS (120V) (Rev. 0)
-
Page 58: Centering Of The X-Ray Beam For The Ceph Mode
SERVICE MANUAL Checkout and adjustments 7.5.2 7.5.2 7.5.2 7.5.2 Centering of the X Centering of the X- - - - ray beam for the CEPH mode Centering of the X Centering of the X ray beam for the CEPH mode ray beam for the CEPH mode ray beam for the CEPH mode To check the alignment of the X-ray beam in the Teleradiography mode... - Page 59 SERVICE MANUAL Checkout and adjustment FORMATS IN CENTIMETERS 18x24 18x24 24x18 30x24 24x30 24x30 Diaphragme sizes symm asymm asymm symm symm asymm Film sizes 18x24 24x30 Film nominal size 178x238 298x238 238x298 X-ray beam height 215÷235 160÷175 235÷215 215÷235 X-ray beam width 160÷175 215÷235 295÷270...
-
Page 60: Adjustment Of The Soft Tissue Filter For Cephalometric Teleradiography
SERVICE MANUAL Checkout and adjustments 7.5.3 7.5.3 7.5.3 7.5.3 Adjustment of the soft tissue filter for CEPHALOMETRIC Adjustment of the soft tissue filter for CEPHALOMETRIC Adjustment of the soft tissue filter for CEPHALOMETRIC Adjustment of the soft tissue filter for CEPHALOMETRIC teleradiography teleradiography teleradiography... -
Page 61: Adjustment Of Patient's Auricular Aperture Centering Rings In Latero-Lateral Cephalometric Teleradiography
SERVICE MANUAL Checkout and adjustment 7.5.4 7.5.4 7.5.4 7.5.4 Adjustment of patient's auricular aperture cent Adjustment of patient's auricular aperture cent Adjustment of patient's auricular aperture cent Adjustment of patient's auricular aperture centering rings ering rings ering rings ering rings in latero in latero in latero... -
Page 62: Projection Of Horizontal Non-Concentric Ear Centering Circles
SERVICE MANUAL Checkout and adjustments 7.5.4.1 7.5.4.1 7.5.4.1 7.5.4.1 Projection of Horizontal Non Projection of Horizontal Non- - - - Concentric Ear Centering Circles Projection of Horizontal Non Projection of Horizontal Non Concentric Ear Centering Circles Concentric Ear Centering Circles Concentric Ear Centering Circles Release the screws fixing the positioning sphere "A"... -
Page 63: Projection Of Vertically Non-Concentric Ear Centering Circles
SERVICE MANUAL Checkout and adjustment 7.5.4.2 7.5.4.2 7.5.4.2 7.5.4.2 Projection of Vertically Non Projection of Vertically Non Projection of Vertically Non Projection of Vertically Non- - - - Concentric Ear Center Concentric Ear Center Concentric Ear Center Concentric Ear Centering Circles ing Circles ing Circles ing Circles... -
Page 64: Angle (A
SERVICE MANUAL Checkout and adjustments Angle (A…) and Time (T…) control Angle (A…) and Time (T…) control Angle (A…) and Time (T…) control Angle (A…) and Time (T…) control Enter the set-up procedure as described in the paragraph 7.2, up to the password input. - Page 65 SERVICE MANUAL Checkout and adjustment T T T T MJ2 function (30), Adult MJ2 function (30), Adult MJ2 function (30), Adult MJ2 function (30), Adult- - - - Child (33 or 34) Child (33 or 34) Child (33 or 34) Child (33 or 34) •...
-
Page 66: Changing Angles And Times
SERVICE MANUAL Checkout and adjustments Changing angles and times Changing angles and times Changing angles and times Changing angles and times The S5 function allows to change the default angles and times for any function and size. In particular, you can change the X-ray emission start (A2) or end (A5) angles, the deceleration (A3) or acceleration (A4) ramp start angles or the duration of the four TMJ exposures by simply using the procedure here after described for the parameters you want to... -
Page 67: Pan-Adult
SERVICE MANUAL Checkout and adjustment 7.7.1 7.7.1 7.7.1 7.7.1 PAN- - - - ADULT ADULT ADULT ADULT 1. Select the Pan function (27) and Adult size (33) on the remote control. 2. Press "T" (31) and release it immediately to display "T 020" (heating time, cannot be changed). - Page 68 SERVICE MANUAL Checkout and adjustments NOTE: If you change one of the two values (A3) or (A4), it is recommended to change also the other one of a corresponding opposite amount so as to obtain a symmetrical exposure (see following diagram). A3 →...
-
Page 69: Pan-Child
SERVICE MANUAL Checkout and adjustment 7.7.2 7.7.2 7.7.2 7.7.2 PAN- - - - CHILD CHILD CHILD CHILD In the Pan (27), Child (34) function, the possible adjustments are similar to those described for the Adult size, but the central area deceleration function is optional and the activation of such function is carried out by selecting S9 OFF (see description of S9 function on paragraph 7.2.2). - Page 70 SERVICE MANUAL Checkout and adjustments Figure 7-8 7-31 (Rev. 0) RTG PLUS (120V)
-
Page 71: Tmj1 And Tmj2 - Adult And Child
SERVICE MANUAL Checkout and adjustment 7.7.3 7.7.3 7.7.3 7.7.3 TMJ1 and TMJ2 TMJ1 and TMJ2 TMJ1 and TMJ2 TMJ1 and TMJ2 - - - - ADULT and CHILD ADULT and CHILD ADULT and CHILD ADULT and CHILD WARNING: IN THIS FUNCTION, THE WIDTH OF THE BANDS MUST CORRESPOND TO THE SIZES INDICATED IN FIGURE 7-9 AND FIGURE 7-10, THAT IS 61mm FOR ADULTS AND 51mm FOR CHILDREN. - Page 72 SERVICE MANUAL Checkout and adjustments Figure 7-9 7-33 (Rev. 0) RTG PLUS (120V)
- Page 73 SERVICE MANUAL Checkout and adjustment TMJ2 TMJ2 TMJ2 TMJ2 To switch from TMJ1 to TMJ2 data control, use the "R" button, select the TMJ2 function and bring the cassette tray from the Pan/TMJ1 position to the TMJ2 position by turning the reeded handle 13 (see Figure 7-12) counterclockwise.
- Page 74 SERVICE MANUAL Checkout and adjustments 61mm▒1 61mm▒1 51mm▒1 51mm▒1 Figure 7-10 7-35 (Rev. 0) RTG PLUS (120V)
-
Page 75: Verification Of Panoramic Centering And Symmetry
SERVICE MANUAL Checkout and adjustment 7.7.4 7.7.4 7.7.4 7.7.4 Verification of Panoramic centering and symmetry Verification of Panoramic centering and symmetry Verification of Panoramic centering and symmetry Verification of Panoramic centering and symmetry 1. Place the centering tool (P/N 54089021) on the chin rest and a filter of about 6 mm Al on the slot of the Cassette holder. - Page 76 SERVICE MANUAL Checkout and adjustments 5. If the symmetry verification is not met, before proceeding to the regulation described here below, verify with the user the symmetry of the last real panoramic images obtained on the unit and check also with the user their acceptability.
-
Page 77: Message On The Display Of Remote Control
ROTOGRAPH PLUS is entirely run by a microprocessor that, besides setting the exposure parameters and correcting the main voltage fluctuation, signals by mean of messages on the display the different conditions of the system and the eventual anomalies and procedural mistake. - Page 78 SERVICE MANUAL Checkout and adjustments Message displayed Cause What to do CEPH modality not CEPH control button 28 pressed Press the button of enabled when the unit is not equipped another examination with this feature (ST version) (NOT CEPH) TMJ modality not TMJ examination has been Press the button of enabled...
-
Page 79: Line Voltage Too High / Too Low
X10 on Power board (A1) is properly inserted and not damaged; if needed replace it. NOTE: DENT-X is not responsible of making sure that the supplied line voltage is within the specified range. 7-40 RTG PLUS (120V) -
Page 80: Impossible To Regulate The Line Voltage
SERVICE MANUAL Checkout and adjustments 7.8.2 7.8.2 7.8.2 7.8.2 Impossible to regulate the line voltage Impossible to regulate the line voltage Impossible to regulate the line voltage Impossible to regulate the line voltage This message is caused by too large line fluctuation during the preheating time after having pressed the X-ray button. -
Page 81: Memory Data Corrupted. Call Technical Assistance
SERVICE MANUAL Checkout and adjustment 7.8.3 7.8.3 7.8.3 7.8.3 Memory data corrupted. Call Technical Assistance Memory data corrupted. Call Technical Assistance Memory data corrupted. Call Technical Assistance Memory data corrupted. Call Technical Assistance With the system on and this failure message displayed operate in sequence on the small size push button (37), child (34) and TMJ1 (29) (as per the SET-UP mode) wait 5 sec.: the operating condition should be restored. -
Page 82: Out Of Order N°1! Call Technical Assistance
SERVICE MANUAL Checkout and adjustments 7.8.5 7.8.5 7.8.5 7.8.5 Out of Order N°1! Call Technical Assistance t of Order N°1! Call Technical Assistance t of Order N°1! Call Technical Assistance t of Order N°1! Call Technical Assistance This message can be displayed on two different conditions, due to a fault of the potentiometer used to control angular position of the rotating arm. -
Page 83: Checking (Safety) Hardware Timers
SERVICE MANUAL Checkout and adjustment Checking (safety) hardware timers Checking (safety) hardware timers Checking (safety) hardware timers Checking (safety) hardware timers WARNING: The following test implies X-ray emission; please follow all measures envisaged by local safety regulations. 1. Enter the SET-UP program (see paragraph 7.2). Then press "s" (39), then button "T"... -
Page 84: System Reconfiguration After Testings
SERVICE MANUAL Checkout and adjustments 7.10 7.10 7.10 7.10 System reconfiguration after testings System reconfiguration after testings System reconfiguration after testings System reconfiguration after testings After checking the various modes, set them (SO-SA) in the starting conditions, i.e. in the conditions reported in the “Final Test Table” (see the last page of the User’s Manual), with the exception of those modes whose modifications are considered to be necessary. - Page 85 SERVICE MANUAL Checkout and adjustment THIS PAGE IS INTENTIONALLY LEFT BLANK 7-46 RTG PLUS (120V) (Rev. 0)
- Page 86 SERVICE MANUAL Checkout and adjustments Figure 7-12: Stand "PANORAMIC" chin support Slit assembly Bite Block Rotating arm Tubehead Film cassette support Tube rotation release-lever for Film cassette panoramic-ceph position Arm locking pin Horizontal light beam height control knob Centering mirror Light cross beam button Skull/Temple clamp support Chin support TMJ, SINUS.
- Page 87 SERVICE MANUAL Checkout and adjustments Figure 7-13: Remote control Panoramic mode Selection Medium Size Selection CEPH mode Selection Small Size Selection TMJ1 mode Selection kV Selection TMJ2 mode Selection Push-button Multifunctional Test mode ("dead man" button) Decrease kVangles or times(CEPH) RESET ("dead man"...
- Page 88 SERVICE MANUAL Checkout and adjustments Figure 7-14: Skull-clamp unit for cephalometry Cassette support unit Skull-clamp unit rod Nose-rest unit Handle for arm positioning according to the patient tallness Frankfurt plane reference line Break button Scale referred to nose, for Skull clamp unit rod with repetition of exposure reference line for Frankfurt plane Nose-rest rod...
-
Page 89: Maintenance
SERVICE MANUAL Maintenance 8. 8. 8. 8. MAINTENANCE MAINTENANCE MAINTENANCE MAINTENANCE As for all the electrical devices, in addition to proper use this unit also requires periodical checks and maintenance. This precautions will insure a safe and efficient performance of the device. The preventive maintenance consists of checks that can be carried out directly by the operator or by the authorized service personnel. - Page 90 SERVICE MANUAL Maintenance Interval Type of check Ref. and method Every 6 Check of display function Visual check months Check the centering of the X-ray beam See paragraph 7.5 Verification of centering and symmetry See paragraph 7.7.4 of panoramic Check the mA setting (after 400 See paragraph 7.4 exposures) Check to ensure that no oil is leakage...
-
Page 91: Schematics And Drawings
SERVICE MANUAL Schematics and drawings 9. 9. 9. 9. SCHEMATICS AND DRAWI SCHEMATICS AND DRAWINGS SCHEMATICS AND DRAWI SCHEMATICS AND DRAWI 1. Control Box layout 2. General diagram (Std version) 3. General diagram (ST version) 4. Layout Power Supply PCB A1 5. -
Page 92: Key To General Diagram Of The Rotograph Plus
SERVICE MANUAL Schematics and drawings Key to general diagram of the Rotograph Plus Key to general diagram of the Rotograph Plus Key to general diagram of the Rotograph Plus Key to general diagram of the Rotograph Plus Power Supply P.C.Board CPU P.C.Board... - Page 93 SERVICE MANUAL Schematics and drawings RTG PLUS Control Box layout Code 72087540 - Rev. 3 Page 1 of 1 (Rev. 0) RTG PLUS (120V)
- Page 94 SERVICE MANUAL Schematics and drawings RTG PLUS General diagram Code 39089301 - Rev. 2 Page 1 of 5 (Rev. 0) RTG PLUS (120V)
- Page 95 SERVICE MANUAL Schematics and drawings RTG PLUS General diagram Code 39089301 - Rev. 2 Page 2 of 5 (Rev. 0) RTG PLUS (120V)
- Page 96 SERVICE MANUAL Schematics and drawings RTG PLUS General diagram Code 39089301 - Rev. 2 Page 3 of 5 (Rev. 0) RTG PLUS (120V)
- Page 97 SERVICE MANUAL Schematics and drawings RTG PLUS General diagram Code 39089301 - Rev. 2 Page 4 of 5 9-11 (Rev. 0) RTG PLUS (120V)
- Page 98 SERVICE MANUAL Schematics and drawings RTG PLUS General diagram Code 39089301 - Rev. 2 Page 5 of 5 9-13 (Rev. 0) RTG PLUS (120V)
- Page 99 SERVICE MANUAL Schematics and drawings RTG PLUS “ST” General diagram Code 39089302 - Rev. 2 Page 1 of 5 9-15 (Rev. 0) RTG PLUS (120V)
- Page 100 SERVICE MANUAL Schematics and drawings RTG PLUS “ST” General diagram Code 39089302 - Rev. 2 Page 2 of 5 9-17 (Rev. 0) RTG PLUS (120V)
- Page 101 SERVICE MANUAL Schematics and drawings RTG PLUS “ST” General diagram Code 39089302 - Rev. 2 Page 3 of 5 9-19 (Rev. 0) RTG PLUS (120V)
- Page 102 SERVICE MANUAL Schematics and drawings RTG PLUS “ST” General diagram Code 39089302 - Rev. 2 Page 4 of 5 9-21 (Rev. 0) RTG PLUS (120V)
- Page 103 SERVICE MANUAL Schematics and drawings RTG PLUS “ST” General diagram Code 39089302 - Rev. 2 Page 5 of 5 9-23 (Rev. 0) RTG PLUS (120V)
- Page 104 SERVICE MANUAL Schematics and drawings RTG PLUS Layout Power Supply PCB A1 Code 58087543 - Rev. 3 Page 1 of 1 9-25 (Rev. 0) RTG PLUS (120V)
- Page 105 SERVICE MANUAL Schematics and drawings RTG PLUS Circuit diagram Power Supply PCB A1 Code 39089310 - Rev. 2 Page 1 of 3 9-27 (Rev. 0) RTG PLUS (120V)
- Page 106 SERVICE MANUAL Schematics and drawings RTG PLUS Circuit diagram Power Supply PCB A1 Code 39089310 - Rev. 2 Page 2 of 3 9-29 (Rev. 0) RTG PLUS (120V)
- Page 107 SERVICE MANUAL Schematics and drawings RTG PLUS Circuit diagram Power Supply PCB A1 Code 39089310 - Rev. 2 Page 3 of 3 9-31 (Rev. 0) RTG PLUS (120V)
- Page 108 SERVICE MANUAL Schematics and drawings RTG PLUS Layout CPU PCB Code 58087550 - Rev. 4 Page 1 of 1 9-33 (Rev. 0) RTG PLUS (120V)
- Page 109 SERVICE MANUAL Schematics and drawings RTG PLUS Circuit diagram CPU PCB A2 Code 39089311 - Rev. 5 Page 1 of 6 9-35 (Rev. 0) RTG PLUS (120V)
- Page 110 SERVICE MANUAL Schematics and drawings RTG PLUS Circuit diagram CPU PCB A2 Code 39089311 - Rev. 5 Page 2 of 6 9-37 (Rev. 0) RTG PLUS (120V)
- Page 111 SERVICE MANUAL Schematics and drawings RTG PLUS Circuit diagram CPU PCB A2 Code 39089311 - Rev. 5 Page 3 of 6 9-39 (Rev. 0) RTG PLUS (120V)
- Page 112 SERVICE MANUAL Schematics and drawings RTG PLUS Circuit diagram CPU PCB A2 Code 39089311 - Rev. 5 Page 4 of 6 9-41 (Rev. 0) RTG PLUS (120V)
- Page 113 SERVICE MANUAL Schematics and drawings RTG PLUS Circuit diagram CPU PCB A2 Code 39089311 - Rev. 5 Page 5 of 6 9-43 (Rev. 0) RTG PLUS (120V)
- Page 114 SERVICE MANUAL Schematics and drawings RTG PLUS Circuit diagram CPU PCB A2 Code 39089311 - Rev. 5 Page 6 of 6 9-45 (Rev. 0) RTG PLUS (120V)
- Page 115 SERVICE MANUAL Schematics and drawings RTG PLUS Layout Remote Control PCB Code 39089315 - Rev. 1 Page 1 of 1 9-47 (Rev. 0) RTG PLUS (120V)
- Page 116 SERVICE MANUAL Schematics and drawings RTG PLUS Circuit diagram Remote Control PCB Code 39089138 - Rev. 2 Page 1 of 3 9-49 (Rev. 0) RTG PLUS (120V)
- Page 117 SERVICE MANUAL Schematics and drawings RTG PLUS Circuit diagram Remote Control PCB Code 39089138 - Rev. 2 Page 2 of 3 9-51 (Rev. 0) RTG PLUS (120V)
- Page 118 SERVICE MANUAL Schematics and drawings RTG PLUS Circuit diagram Remote Control PCB Code 39089138 - Rev. 2 Page 3 of 3 9-53 (Rev. 0) RTG PLUS (120V)
-
Page 119: Spare Parts
SERVICE MANUAL Spare Parts SPARE PARTS SPARE PARTS SPARE PARTS SPARE PARTS 1 1 1 1 - - - - STAND STAND STAND STAND 2 2 2 2 – – – – CONTROL BOX CONTROL BOX CONTROL BOX CONTROL BOX 3 3 3 3 –... - Page 120 SERVICE MANUAL Spare Parts 1 1 1 1 - - - - STAND STAND STAND STAND ETL std ETL std ETL std ETL std ETL “ST” ETL “ST” ETL “ST” ETL “ST” Ref. Ref. Order code Order code Description Description Ref.
- Page 121 SERVICE MANUAL Spare Parts 10-3 (Rev. 0) RTG PLUS (120V)
- Page 122 SERVICE MANUAL Spare Parts ETL std ETL std ETL std ETL std ETL “ST” L “ST” L “ST” L “ST” Ref. Ref. Ref. Ref. Order code Order code Order code Order code Description Description Description Description version version version version version version version...
- Page 123 SERVICE MANUAL Spare Parts 10-5 (Rev. 0) RTG PLUS (120V)
- Page 124 Order code Description Description Description Description version version version version version version version version 5408926500 Rotograph PLUS label 6608203500 Centering mirror 6208404100 Cassette Microswitch Assy 5808527600 Chin support PCB 6208526900 Brake pushbutton 6208525700 Pushbutton centering 6108201900 Centering movement knob 6608223000...
- Page 125 SERVICE MANUAL Spare Parts 10-7 (Rev. 0) RTG PLUS (120V)
- Page 126 SERVICE MANUAL Spare Parts 2 2 2 2 – – – – CONTROL BOX CONTROL BOX CONTROL BOX CONTROL BOX ETL std ETL std ETL std ETL std ETL “ST” ETL “ST” ETL “ST” ETL “ST” Ref. Ref. Order code Order code Description Description...
- Page 127 SERVICE MANUAL Spare Parts 10-9 (Rev. 0) RTG PLUS (120V)
- Page 128 SERVICE MANUAL Spare Parts 3 3 3 3 – – – – CEPH DEVICE CEPH DEVICE CEPH DEVICE CEPH DEVICE ETL std ETL std ETL std ETL std ETL “ST” ETL “ST” ETL “ST” ETL “ST” Ref. Ref. Order code Order code Description Description...
- Page 129 SERVICE MANUAL Spare Parts 10-11 (Rev. 0) RTG PLUS (120V)
- Page 130 SERVICE MANUAL Spare Parts 4 4 4 4 – – – – ACCESSORIES ACCESSORIES ACCESSORIES ACCESSORIES ETL std ETL std ETL std ETL std ETL “ST” ETL “ST” ETL “ST” ETL “ST” Ref. Ref. Order code Order code Description Description Ref.
- Page 131 SERVICE MANUAL Spare Parts 10-13 (Rev. 0) RTG PLUS (120V)
- Page 132 SERVICE MANUAL Spare Parts THIS PAGE IS INTENTIONALLY LEFT BLANK 10-14 RTG PLUS (120V) (Rev. 0)
- Page 133 Cod. 6908916900_Rev.0 Dent-X An AFP Imaging Company 250 Clearbrook Rd. Elmsford, NY 10523 Office - 914-592-6100 Fax - 914-592-6769...
Need help?
Do you have a question about the ROTOGRAPH PLUS and is the answer not in the manual?
Questions and answers