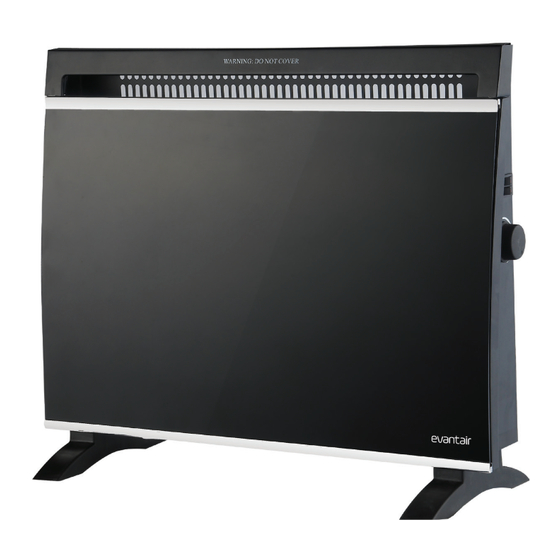
Summary of Contents for Evantair CH-06
- Page 1 1500W Convection Heater INSTRUCTION MANUAL MODEL: CH-06 AFTER SALES SUPPORT (AU) 1300 886 649 (NZ) 0800 836 761...
-
Page 2: Table Of Contents
Contents Important Safety Instructions Product Overview Getting Started Operating Instructions Other Useful Information 0800 422 274... -
Page 3: Important Safety Instructions
Important Safety Instructions Read this manual thoroughly before first use, even if you are familiar with this type of product. The safety precautions enclosed herein reduce the risk of fire, electric shock and injury when correctly adhered to. Make sure you understand all instructions and warnings. -
Page 4: Usage Conditions And Restrictions
Important Safety Instructions (Cont.) • After use: Always disconnect power when the heater is not in use and before cleaning, servicing or moving the heater. To disconnect the heater, switch it off and remove the plug from outlet. When disconnecting, grip the plug, do not pull on the cord. - Page 5 Important Safety Instructions (Cont.) • Usage restriction: This appliance is not intended for use by persons (includ- ing children) with reduced physical, sensory or mental capabilities, or lack of experience and knowledge, unless they have been given supervision or instruction concerning use of the appliance by a person responsible for their safety.
-
Page 6: Product Overview
Product Overview Parts of the Heater Air Outlet Curved, Tempered Glass Panel Power Level Switches I + II (each 750W Output) Adjustable Thermostat Stand Feet (to be assembled) Installation hardware (not shown) 10x Small Screws (for stand feet assembly, includes 2 spares) 5x Wall Plugs and Screws (for wall-mounting, includes 2 spares) 3x Wall-Mounting Brackets (affixed to the back of the heater) NOTE: Due to continued product improvement, images and illustrations in this manual... -
Page 7: Getting Started
Getting Started Unpacking • Carton: This product has been packaged to protect it against transportation damage. Unpack the appliance and keep the original packaging carton and materials in a safe place. It will help prevent any damage if the product needs to be transported in the future, and you can use it to store the appliance when it is not in use. - Page 8 Getting Started (Cont.) Stand Feet Assembly (for freestanding use) Before using the heater as a freestanding unit, you must attach the two stand feet so that the heater can safely stand in an upright position. • Place a soft towel on a table or benchtop and carefully place the heater on top, as pictured (Fig.
- Page 9 Getting Started (Cont.) Wall-Mounting IMPORTANT! • Only mount this heater onto a structurally sound, heat-resistant wall area that is strong enough to hold the weight of the heater. If in doubt, consult a builder. • These instructions are for wall-mounting the heater onto a masonry wall. Please obtain expert advice if you want to wall-mount it to another type of wall.
-
Page 10: Operating Instructions
Operating Instructions Using the Heater Before switching on the heater for the first time, check it again to be sure it is fully assembled and did not get damaged during wall-mounting or assembly. When turning your heater on for the first time it is normal for the heater to emit a ‘new heater’... -
Page 11: Thermostat Control
Operating Instructions (Cont.) Thermostat Control The heater has a thermostat which you can set to regulate the temperature and maintain it at the set level. • Turn the knob clockwise to the highest setting. The power indicator lights up. • When the room is comfortably warm, slowly rotate the knob anticlockwise (turn to the left) until the heater cycles off. -
Page 12: Other Useful Information
Other Useful Information Overheat Protection and Prevention This heater is equipped with an automatic thermal cut-off (overheat protection) which switches the heater off automatically in the event of abnormal overheating. While this features provides additional safety in case of overheating, first and foremost you should make sure to eliminate all potential reasons that can lead to overheating and create a fire risk. -
Page 13: Troubleshooting
Other Useful Information (Cont.) CAUTION! Always switch off and disconnect the appliance from the power supply before attempting any maintenance or cleaning the heater. Troubleshooting If your heater fails to operate, or you experience any other problem with the appliance, contact our after sales line for advice or to arrange a service. But before phoning for a service, please ensure that: •... -
Page 14: Technical Specifications
CAUTION! Do not attempt to open the heater and repair it yourself. Any repairs must be carried out by a qualified technician. Technical Specifications Model No CH-06 Rated Power 1250-1500W Rated Voltage 220-240V 50Hz... - Page 15 This page has been left blank intentionally. 0800 422 274...
- Page 16 Warranty We pride ourselves on producing a range of quality home appliances that are both packed with features and completely reliable. We are so confident in our products, we back them up with a 2 year warranty. Now you too can relax knowing that you are covered. Customer Helpline NZ: 0800 422 274 This Product is covered by a 2 year warranty when accompanied by proof of purchase.


Need help?
Do you have a question about the CH-06 and is the answer not in the manual?
Questions and answers