Table of Contents
Advertisement
Available languages
Available languages
Advertisement
Table of Contents

Related Manuals for Orla PX100


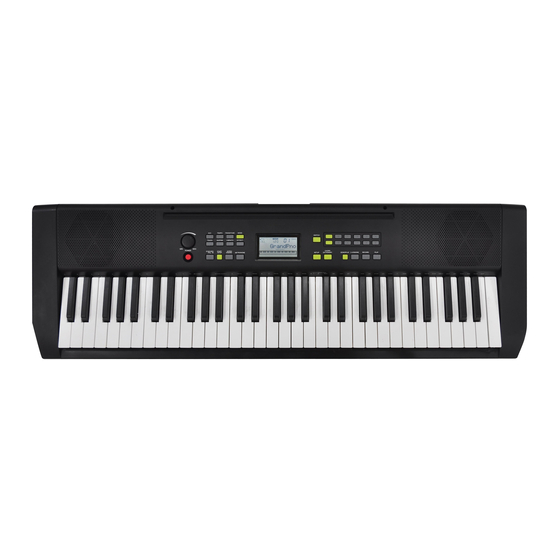
Summary of Contents for Orla PX100
- Page 1 The Sound of Italy PX100 Digital Keyboard User’s Manual...
- Page 3 SAFETY PRECAUTIONS AND INSTRUCTIONS WARNING Make sure that the voltage set is suitable for the instrument (the voltage is indicated next to the power inlet). When using electric products, always follow basic precautions, including the following: Read all of these instructions before using the product. To reduce the risk of injury, close supervision is necessary when the product is used near children.
- Page 4 Panel Contents 1. Power Button 17. Setup Button 2. Main Volume D 18. Chord Dictionary Button 3. ACC.Volume Button 19. Demo/Play Button 4. Tempo Button 20. 3 Steps Button Trans./Tune Button 21. Record Button 6. KBD.Mode Button 22. Play Button 7.
- Page 5 Panel Contents...
- Page 6 LCD Display LCD DISPLAY 1. VOICE/STYLE/DEMO STATUS 2. VOICE/STYLE/DEMO NUMBER OR FUNCTION VALUE ADJUSTMENT 3. TEMPO 4. BEAT INDICATOR 5. METRONOME 6. CHORD TYPE 7. CONTROLS: CHORD, SPLIT, DUAL, TOUCH, EFFECT, SUSTAIN, VIBRATO 8. VOICE 9. STYLE 10. SONG TEMPO VOICE STYLE SONG...
-
Page 7: Basic Operation
Basic Operation Turning On the Power 1. Ensure the keyboard is turned off when connecting and DC POWER disconnecting the power, and turn the volume control to the minimum level. 2. Connect the adaptor to the AC mains wall outlet and plug the cord into the keyboard, then turn the power on. - Page 8 Basic Operation Adjusting the Main Volume Use MASTER VOLUME control to adjust the volume to your desired level. Demo Play There are 10 preset demo songs and 100 learning songs that you can play individually. Here's how you can select and play the songs. 1.
-
Page 9: Select A Voice
Voices Your instrument has 129 (including 128 GM standard voices (patches 01~128)) voices that you can select and play. (See voice list: p36) Select a Voice numeric You can use [+] and [-] buttons or buttons to select the desired voices. 1~9 voice: press 01~09. - Page 10 Voices KBD.Mode Button Split Mode Your keyboard can be split into two sections, which means that different voices can be played by the left and right hands at the same time. Select a Split Voice Press the [KBD.MODE] button to enter the Split mode, the split voice number and name displays on the LCD message area.
- Page 11 Voices Select a Dual Voice Press the [KBD.MODE] button twice to enter the Dual Voice mode, the Dual voice number and name will display on the LCD message area. You can use the [+] and [-] buttons or the numeric buttons to select the desired dual voice number (01 through 129). Now, two different sounds can be played at the same time when pressing one key.
-
Page 12: Digital Effect
Effect Digital Effect This instrument has a high quality DSP (Digital Signal Processor) on board which adds added realism to the keyboard's sound. Reverb This function allows you to add reverb to the overall sound, thereby adding a spatial effect similar to natural room spaces, such as Hall, Stage, Room etc. -
Page 13: Transpose Button
Effect Transpose Button The Transpose function allows you to change the key of the instrument in semitone steps, up to a maximum setting of 12 semitones (a maximum of one octave up or down). Press the [TRANS./TUNE] button the LCD will display: TRANS, then you can use the [+] and [-] buttons or the numeric buttons... - Page 14 Effect Touch Button The touch function provides three different types of keyboard touch sensitivity that can be selected to match different playing styles. Press the [TOUCH] button. the LCD will display: FixTouch 100, then you can use the [+] touch sensitivity and [-] buttons or the numeric buttons to select the desired...
-
Page 15: Sustain Button
Effect Sustain Button The sustain function has the same effect as a damper pedal. Notes will linger on after the player has removed their fingers from the notes. Press the [SUSTAIN] button to enter Sustain function and its indicator light will be on. -
Page 16: Chord Button
Effect Press the [EFFECT] button again to exit the effect function and and its indicator icon will be invisible. Chord Button Press the [CHORD] button to enter the Chord function and its indicator icon will be invisible. The left hand side of the keyboard from the lowest note, and up to the split point is used to play the Auto Accompaniment. -
Page 17: Selecting A Style
Auto Accompaniment The keyboard has a total of 100accompaniment styles which can be used to provide Fully-orchestrated Auto Accompaniment. When the Auto Accompaniment function is turned on, this instrument creates fully-orchestrated rhythm , bass and chord accompaniment based on chord s that you play with the left hand, in the Auto Accompaniment section of the keyboard (i.e. - Page 18 Auto Accompaniment Starting a Style Immediate Start Press the [START/STOP] button to start the style. START TEMPO VOICE /STOP STYLE SONG CHORD TYPE dim 6 augsus4 CHORD SPLIT DUAL TOUCHEFFECTSUSTAIN VIBRATO Use Synchro Start Press the [SYNCHRO/FILL IN] button to enter the sync start "waiting" mode, then the accompaniment will start when you play the first chord on the auto accompaniment section of the keyboard.
- Page 19 Auto Accompaniment TEMPO VOICE SYNCHRO INTRO/ STYLE /FILL IN ENDING SONG CHORD TYPE dim 6 a u g s u s 4 CHORD SPLIT DUAL TOUCH EFFECT SUSTAIN VIBRATO Stopping the Style You can do this in one of two ways. Stop immediately START /STOP...
- Page 20 Auto Accompaniment Fill In Whilst a style is playing, pressing the [SYNCHRO/FILL IN] button will trigger a one measure/bar drum fill in pattern. After the fill in pattern the main style will resume. VOICE SYNCHRO TEMPO /FILL IN STYLE SONG CHORD TYPE dim 6 a u g s u s 4...
-
Page 21: Time Signature
Auto Accompaniment Metronome Metronome is a convenient feature for practice, and it can also provide a solid rhythmic guide when recording. The metronome sound can be alternately turned on and turned off by pressing the [METRONOME button. TEMPO VOICE STYLE METRONOME SONG CHORD TYPE... - Page 22 SETUP Press the [SETUP] button to enter the menu of function. The default option of the menu M.VOLUME . Press the [SETUP] button repeatedly to select the option to be set. Use [+] and [-] buttons to set the parameter. The option and the parameters are as follows: Option LCD Display Range...
- Page 23 SETUP Main Voice Volume In this function you can set the Main Voice Volume. Press the [SETUP] button to select M. Volume , then use [+] and [-] buttonso rthe numeric buttons to increase or decrease the value. Range: 0 ~127. (Default:127) TEMPO VOICE...
- Page 24 SETUP Dual Voice Volume This function allows you to set the Main Voice Volume. Press the [SETUP] button repeatedly to select D. Volume , then use [+] and [-] buttonso rthe numeric buttons to increase or decrease the value. Range: 0 ~127. (Default:100) TEMPO VOICE...
- Page 25 SETUP Split Voice Pan In this function you can set the stereo position of each orchestration part to create a board stereo image of your sound. Press the [SETUP] button repeatedly to select S. Pan , then use [+] and [-] buttons or the numeric buttons to set the pan value: From -64 to 63.
- Page 26 SETUP Main Voice Otave This function allows you to set the main voice octave. Press the [SETUP] button repeatedly to select M. Octave , then use [+] and [-] buttonso rthe numeric buttons to set the value. Range:-3~2. (Default:00) TEMPO VOICE STYLE SETUP...
- Page 27 SETUP Dual Voice Otave This function allows you to set the Dual voice octave. Press the [SETUP] button repeatedly to select D. Octave , then use [+] and [-] buttonso rthe numeric buttons to set the value. Range:-3~2. (Default:00) VOICE TEMPO STYLE SETUP...
- Page 28 SETUP Tick In this function you can change the time signature Press the [SETUP] button repeatedly to select Tick 4/4 , then use [+] and [-] buttons or the numeric buttons to select the time signature:2/2, 1/4, 2/4, 3/4, 4/4, 5/4, 6/4, 3/8 6/8, 7/8, 9/8, 12/8.
- Page 29 SETUP Reverb Press the [SETUP] button repeatedly to select Reverb , then use [+] and [-] buttons or the numeric buttons to set the value. Range: 0~8. (Default:02) TEMPO VOICE STYLE SETUP SONG CHORD TYPE dim 6 a u g s u s 4 CHORD SPLIT DUAL TOUCHEFFECTSUSTAIN VIBRATO...
-
Page 30: Chorus Depth
SETUP h orus Press the [SETUP] button repeatedly to select Chorus , then use [+] and [-] buttons or the numeric buttons to set the value. Range:0~8. (Default:00) VOICE TEMPO STYLE SONG SETUP CHORD TYPE dim 6 a u g s u s 4 CHORD SPLIT DUAL TOUCH EFFECT... - Page 31 SETUP EQ Bass This function allows you to set the EQ Bass for the voice. Press the [SETUP] button repeatedly to select EQ Bass , then use [+] and [-] buttons numeric buttons to adjust the value. Range: -6~6. (Default:00) TEMPO VOICE STYLE...
-
Page 32: Start Recording
SETUP Your instrument allows you to record and play back complete songs, including chord sequences created by using the Auto Accompaniment feature and melody. Record Start Recording Press the [RECORD] button, the LCD will display: Record. Then play any key on the keyboard to start recording. -
Page 33: Teaching Function
Teaching Function Your instrument has a teaching function which can teach a beginner how to play a song. There are three teaching steps for you to learn by playing the songs step by step. Learn 1 Press the [3 STEPS] button to select Lesson1R to enter the step one mode. When you play a key on the keyboard, the teaching song will be played note by note. - Page 34 Teaching Function Learn 3 Press the [3 STEPS] button repeatedly to select Lesson3R to enter the step three mode. You can play the song with the instrumentation playing. Now you can play this song by yourself. If you pause your playing for 5 seconds, the current learning LEFT/RIGHT melody will automatically play.
-
Page 35: Chord Dictionary
Chord Dictionary The Chord Dictionary function allows you to look up chords. When you want to quickly learn how to play a certain chord, the Dictionary function will help you to look up the individual notes of the chord. Press the [CHORD DICTIONARY] Button CHORD DICTIONARY Select the Chord Root... -
Page 36: Auto Accompaniment Fingering
Appendix Auto Accompaniment Fingering 1.Single Finger Mode SINGLE Finger Mode makes it simple to produce beautifully orchestrated accompaniment using major, seventh, minor and minor-seventh chords by pressing a minimum number of keys in the Auto Accompaniment section of the keyboard. The accompaniment produced is perfectly matched to the currently selected accompaniment style. -
Page 37: Fingered Mode
Appendix 6.Fingered Mode Fingered Mode is ideal if you already know how to play chords on a keyboard, since it allows you to supply your own chords for the Auto Accompaniment feature. The instrument will detect the following chord types: Example for C chords Name NormalVoicing... -
Page 38: Voice List
Appendix Voice List BANK VOICE NAME BANK VOICE NAME VOICE NAME BANK PROGRAM CHANGE PROGRAM CHANGE PROGRAM CHANGE Standard Drum... - Page 39 Appendix Style List STYLE NAME STYLE NAME STYLE NAME 8 BEAT LATIN DISCO MAMBO 8BEAT MODERN DISCO SALSA DISCO PARTY MERSEY BEAT BEGUINE SURF POP DISCO FEVER REGGAE NEWYORK DISCO ROCK SHUFFLE SWINGY REGGAE SWING&JAZZ BALLROOM 60'S ROCK BIG BAND FAST HARD ROCK DANCE BAND 8BEAT...
- Page 40 Troubleshooting Hints When the instrument is turned on or off, a This is normal and indicates that the instrument is receiving electrical power. Popping sound is temporarily produced. When using a mobile phone, noise is produced. To prevent this, turn off the mobile phone or use it Using a mobile phone in close proximity to the further away from the instrument.
-
Page 41: Specifications
Specifications 61 standard -size keys with touch sensitivity. Keyboards: Multi-function LCD display. Display: Note Polyphonic Polyphony: 129 PCM voices Voices: Volume, Sustain, Vibrato, Tune, Transpose, Octave Voice Control: Reverb (8 types), Reverb level, Reverb on/off Effect: Chorus (8 types), Chorus level, Chorus on/off BASS: [ - 6,+6], TREBLE: [-6,+6] Styles: Synchro, Start/stop, Intro/Ending, Acc. - Page 43 The Sound of Italy PX100 Digital Keyboard Manuale d’Uso...
- Page 45 ISTRUZIONI E MISURE DI SICUREZZA AVVISO IMPORTANTE Accertarsi che il voltaggio impostato sia adatto allo strumento (il voltaggio è indicato a fianco della presa di corrente. Quando si utilizza un'apparecchiatura elettrica, si devono sempre rispettare le basilari norme di sicurezza, tra cui: Leggere le istruzioni prima di utilizzare lo strumento.
- Page 46 ATTENZIONE Non modificare la spina fornita con lo strumento. Qualora non fosse adatta, far installare un'adeguata presa della corrente da un elettricista qualificato. DISPLAY MULTI-INFORMAZIONI I messaggi visualizzati sul Display multi-informazioni possono non corrispondere sempre alle pagine relative al display. Si tratta solamente di esempi delle numerose funzioni dello strumento. CLAUSOLA ESONERATIVA Le informazioni contenute in questo manuale sono state revisionate molto attentamente.
-
Page 47: Table Of Contents
INDICE PANNELLO DI CONTROLLO DISPLAY OPERAZIONI DI BASE Accendere lo strumento Presa cuffia Regolazione Volume generale Pulsante DEMO/PLAY VOICES – SUONI Selezione dei suoni Pulsante Voice/Style Pulsante KBD.Mode EFFECT – EFFETTI Effetti digitali Pulsante Tempo (per il controllo del tempo) Pulsante Traspose Pulsante Tune Pulsante Tuch... -
Page 48: Pannello Di Controllo
Pannello Frontale 1. Pulsante Power 2. Controllo del Volume Generale 3. Pulsante ACC.Volume 4. Pulsante Tempo 5. Pulsante Transp./Tune 6. Pulsante KBD.Mode 7. Pulsante Touch 8. Pulsante Sustain 9. Pulsante Effect 10. Pulsante Chord 11. Pulsante Synchro/Fill In 12. Pulsante Start/Stop 13. -
Page 49: Display
Pannello Frontale/Posteriore Display LCD 1. Voice / Style / Demo 2. Voice / Style / Numero Demo o Variazioni dei valori delle funzioni 3. Tempo 4. Indicatore Beat 5. Metronomo 6. Tipo di accordo 7. Controlli: accordo, split, dual, touch, effetti, sustain e vibrato 8. -
Page 50: Operazioni Di Base
OPERAZIONI DI BASE Accendere lo strumento 1. Assicurarsi che la tastiera sia spenta e che il volume sia al minimo, prima di collegarla alla rete. 2. Collegare l’alimentatore alla presa dicorrente e poi alla tastiera, a questo punto potete accendere la tastiera. 3. -
Page 51: Regolazione Volume Generale
Regolazione Volume Generale Usare la manopola di controllo del Volume generale per regolare a vostro piacimento il Volume dello strumento. Pulsante DEMO/PLAY Ci sono 10 brani demo preimpostati e 100 canzoni per il modo LEARNING. Ecco come è possibile selezionare e riprodurre i brani. 1. -
Page 52: Voices - Suoni
VOICES - SUONI Il vostro strumento dispone di 129 suoni. Da 1 a 128 sono i suoni del formato GM standard ed il numero 129 comprende i suoni del drum kit. (vedere Voice List a pag. ) Selezione dei suoni Premere i pulsanti numerici dallo [0] al [9] oppure usare i pulsanti [+] e [-] per selezionare il suono desiderato. -
Page 53: Pulsante Kbd.mode
Pulsante KBD. Mode 1) Modalità Split La vostra tastiera può essere splittata (divisa) in due sezioni, questo significa che si possono usare due suoni diversi, uno per la mano destra e uno per la mano sinistra. Seleziona una voce split Premere il pulsante [KBD.MODE] per accedere alla modalità... - Page 54 Selezione DUAL Voice Premere due volte il tasto [KBD.MODE] per entrare in modalità Dual Voice, il numero di Dual Voice e il nome verranno visualizzati sul display. È possibile utilizzare i pulsanti [+] e [-] o i pulsanti numerici per selezionare il numero di dual voice desiderato (da 01 a 129).
-
Page 55: Effect - Effetti
EFFETTI DIGITALI Questo strumento ha un DSP ( Digital Signal Processor) di alta qualità per la generazione degli effetti riverbero e chorus che aggiunge realismo al suono della tastiera . Reverb Questa funzione consente di aggiungere l’effetto di Riverbero al suono, aggiungendo così un effetto spaziale e naturale, come suonare in ambienti diversi Hall (grande sala), Stage (palcoscenico) e Room (stanza). -
Page 56: Pulsante Traspose
Pulsante TRANSPOSE La funzione Transpose permette di cambiare la tonalità naturale dello strumento (DO), fino ad un valore massimo di 12 semitoni (un massimo di un'ottava sopra o sotto il DO centrale). Premere il tasto [TRANS / TUNE.] Il display visualizza: TRANS, utilizzare [+] e [-] o i tasti numerici per selezionare il valore di trasposizione desiderato (-12 / +12). -
Page 57: Pulsante Tuch
Pulsante TOUCH La funzione “Touch” fornisce tre diversi tipi di sensibilità al tocco della tastiera, che possono essere selezionati a piacere. Premendo il pulsante [TOUCH] il display LCD visualizza: “FixTouch” (Valore Fisso) con valore 100. Fix Touch permette di fissare il volume del suono al livello preferito quando si suona senza la dinamica. -
Page 58: Pulsante Sustain
Pulsante SUSTAIN Questa funzione simula il pedale Damper del pianoforte acustico ed allunga il tempo di decadimento delle note suonate sulla tastiera. Premere il pulsante [SUSTAIN] per entrare nella funzione Sustain e il suo indicatore sarà acceso. Attiva la sezione Sustain ON per mantenere sostenute le note dopo che i tasti sono stati lasciati. -
Page 59: Pulsante Chord
Pulsante CHORD Premere il pulsante [CHORD] per entrare nella funzione Auto Accompagnamento e il suo indicatore sarà acceso. Quando la funzione [CHORD] viene selezionata, la tastiera si divide in due parti. La parte sinistra è viene usata per suonare gli accompagnamenti automatici, la parte destra per suonare la melodia. -
Page 60: Auto Accompaniment
ACCOMPAGNAMENTO AUTOMATICO La tastiera ha un totale di 100 stili che possono essere utilizzati per fornire un accompagnamento automatico. Quando la funzione di accompagnamento automatico è attiva, questo strumento crea un ritmo completo di arrangiamenti (percussioni, basso e di accordi) nella sezione Auto Accompaniment della tastiera (vale a dire tutti i tasti a sinistra del punto di spli). -
Page 61: Avviamento Immediato Di Uno Stile
Avvio immediato di uno stile. Premere il pulsante [START / STOP] per avviare lo stile. Avvio di uno stile con Synchro Start Premere il tasto [SYNCHRO / FILL IN] per entrare in modalità “Sync/Start”. Quando la funzione SYNCHRO è attivata, il ritmo prescelto inizia non appena si suona la prima nota con la mano sinistra lella pporzione della tastiera per l’accompagnamento ( a sinistra del punto di Split). -
Page 62: Intro/Ending Fermare Lo Stile
Stop immediato L'accompagnamento può essere interrotto in qualsiasi momento premendo il pulsante [START / STOP]. Stop con Ending Se si preme ENDING con il ritmo già in funzione, lo strumento esegue una variazione finale (ENDING) al termine della quale tutta la sezione ritmica si ferma automaticamente. -
Page 63: Fill In
FILL IN Produce una variazione tra due battute (BAR) del ritmo. Di solito viene usato per sottolineare la fine di una frase musicale. Volume dell’ Accompagnamento Il volume dell'accompagnamento automatico può essere regolato da 00 a 31. Premere il tasto [ACC.VOLUME], il display LCD visualizzerà: Acc.Vol. Quindi utilizzare i pulsanti [+] e [-] o i tasti numerici per aumentare o diminuire il valore. -
Page 64: Metronomo
Metronomo Il metronomo è una comoda funzione ed un grande aiuto quando si fa pratica in un esercizio musicale, e può anche fornire una guida ritmica durante la registrazione. Il metronomo può essere acceso o spento premendo il pulsante [METRONOME]. Selezione Metronomo Sono disponibili diversi tipi di Metronomo: 2/2, 1/4, 2/4, 3/4, 4/4, 5/4, 6/4, 3/8, 6/8, 7/8, 9/8 e 12/8. -
Page 65: Setup Parametri
SETUP Premere il tasto [SETUP] per accedere al menu delle funzioni. L'opzione di default del menu è M.Volume. Premere il tasto [SETUP] per selezionare l'opzione da impostare. Usare i pulsanti [+] e [-] per impostare il parametro. Le opzione e i parametri sono i seguenti: Opzioni LCD Display Range... - Page 66 VOLUME GENERALE È possibile selezionare il Volume massimo raggiungibile dallo strumento tramite il cursore volume. Premere il pulsante [SETUP] per selezionare “M.Volume”, usare i pulsanti [+] e [-] o i tastini numerici per aumentare o diminuire il valore del volume. Il valore varia da 0 (min) a 127 (max). Volume della Sezione Split Questa funzione permette di regolare il volume della sezione Split dello strumento.
- Page 67 Dual Voice del Volume Questa funzione consente di impostare il volume della sezione Dual dello strumento. Premere il tasto [SETUP] per selezionare “D. Volume”, quindi usare i pulsanti [+] e [-] o i tasti numerici, per aumentare o diminuire il valore. Il valore varia da 0 (min) a 127 (max). Effetto Generale PAN In questa pagina è...
- Page 68 PAN della Sezione Split In questa pagina è possibile impostare l'effetto stereo Panoramic per i suoni della sezione Split. Premere ripetutamente il tasto [SETUP] per selezionare “S. Pan”, quindi usare i pulsanti [+] e [-] o i tasti numerici per impostare il valore di Pan. Range da -64 (suono tutto a sinistra) a +63 (suono tutto a destra).
- Page 69 Cambio Ottava Questa funzione permette di cambiare l’Ottava naturale dello strumento. Premere il pulsante [SETUP] ripetutamente, per selezionare “M.Octave”, usare i pulsanti [+] e [-] oppure i tasti numerici per impostare il valore. È possibile cambiare l’ottava fino a – 3 ottave o a + 2 ottave.
- Page 70 Cambio Ottava sezione Dual Voice Questa funzione permette di cambiare l’Ottava naturale dello strumento alla sezione Dual Voice. Premere il pulsante [SETUP] ripetutamente, per selezionare “D.Octave”, usare i pulsanti [+] e [-] oppure i tasti numerici per impostare il valore. È possibile cambiare l’ottava fino a – 3 ottave o a + 2 ottave.
- Page 71 Tick - Metronomo In questa funzione è possibile cambiare il tempo del metronomo. Premere il pulsante [SETUP] fino a selizionare “Tick” 4/4, quindi usare i pulsanti [+] e [-] per selezionare l'indicazione del tempo: 2/2, 1/4, 2/4, 3/4, 4/4, 5/4, 6/4, 3/8, 6/8, 7/8, 9/8, 12/8. Split Point Consente di impostare il punto di split tra la mano sinistra e la mano destra, quando la tastiera è...
- Page 72 Riverbero Digitale Premere il pulsante [SETUP] per selezionare “Reverb”, quindi usare i pulsanti [+] e [-] oppure i tasti numerici per impostare il valore. Range: 0 ~ 8. (Default: 02) Nessun effetto riverbero viene prodotto quando si seleziona “00 Reverb” Profondità...
- Page 73 Chorus Premere ripetutamente il tasto [SETUP] per selezionare “Chorus”, quindi usare i pulsanti [+] e [-] oppure i tasti numerici per impostare il valore. Range: 0 ~ 8. (Default: 00) Nessun effetto chorus viene prodotto quando si seleziona “00 Chorus” Profondità...
- Page 74 EQ Bass Questa funzione consente di impostare l'EQ Bass del suono. Premere il pulsante [SETUP] per selezionare “EQ Bass”, quindi usare i pulsanti [+] e [-] oppure i tasti numerici per regolare il valore. Range: -6 ~ 6. (Default: 00) NOTA I numeri da -6 a -1 non possono essere selezionate dai tasti numerici.
-
Page 75: Recording
Song Recording Lo strumento consente di registrare e riprodurre canzoni complete, tra cui sequenze create utilizzando la funzione di accompagnamento automatico e melodia. Record - Avviare la registrazione Premere il pulsante [RECORD], il display LCD visualizzerà:“Record”. Premere un tasto qualsiasi della tastiera per avviare la registrazione. Interrompere la registrazione Premere nuovamente il pulsante [RECORD] per interrompere la registrazione, poi il display LCD visualizzerà:“Fine”... -
Page 76: Funzioni Learning
Funzione Learning. Lo strumento dispone di una divertente funzione “apprendimento” (Learning) per aiutare un principiante a suonare un breve brano. Ci sono tre fasi di “apprendimento” per imparare passo dopo passo. Learn 1 Premere il tasto [3 STEPS] per selezionare “Lesson1R” sul display per entrare nella fase 1. Premere quindi il tasto [DEMO/PLAY] ed sulla tastiera stilizzata sul display appare la prima nota che deve essere suonata. - Page 77 Learn 3 Premere ripetutamente il tasto [3 STEPS], selezionare “Lesson3R” per entrare nella 3. Premere il tasto [DEMO/PLAY] ed il brano inizierà a suonare. Il display indica le note da suonare. Display LCD Quando la funzione 3 Step Learning è attiva, il display LCD visualizza la posizione della nota che dovrebbe suonare.
-
Page 78: Dizionario Degli Accordi
CHORD DICTIONARY La funzione Chord Dictionary consente di verificare la composizione degli accordi. Quando si vuole imparare velocemente a suonare un certo accordo, la funzione Dictionary vi aiuterà a guardare le singole note dell'accordo. Premere il pulsante [CHORD DICTIONARY]. Selezione del tipo di accordo Premere il tipo di accordo che si desidera suonare sulla parte destra della tastiera. -
Page 79: Appendice
APPENDICE Accompagnamento automatic Modalità Single Finger La modalità Single Finger rende semplice produrre splendidi accompagnamenti orchestrali, utilizzando accordi maggiori, settima, minori e minori settima, premendo un numero minimo di tasti nella sezione Auto Accompaniment della tastiera. L'accompagnamento prodotto si abbina perfettamente allo stile di accompagnamento attualmente selezionato. -
Page 80: Diteggiatura Per L'auto Accompagnamento
Modalità Fingered La modalità Fingered è l'ideale se si sa già come suonare gli accordi su una tastiera, in quanto consente di fornire le proprie note alla funzione di accompagnamento automatico. Ricordare la corrispondenza delle note: C=DO, D=RE, D=MI, F=FA, G=SOL, A=LA, B=SI. Lo strumento è... -
Page 81: Sound List
Sound List Grand Piano Contrabass Fifths Brigth Piano Tremolo Strings Bass+Lead Electric Grand Pizzicato Strings New Age Honky Tonk Orchestral Harp Warm Pad El. Piano 1 Timpani Polisynth El. Piano 2 String Ensem. 1 Choir Harpsichord String Ensem. 2 Bowed Pad Clavinet Synth Strings 1 Metallic Pad... -
Page 82: Lista Degli Stili
LISTA DEGLI STILI STYLE NAME STYLE NAME STYLE NAME 8 BEAT DISCO LATIN 8BEAT MODERN 70’S DISCO M ERENGUE MERSEY BEAT LATIN DISCO BOSSANOVA SURF POP DISCO POP BOSSA ROCK SHUFFLE DISCO PARTY MAMBO 60’S ROCK DISCO FEVER SALSA HARD ROCK NEWYORK DISCO BEGUINE 8BEAT... -
Page 83: Consigli Per Risolvere I Problemi
CONSIGLI PER RISOLVERE I PROBLEM I Problema Soluzione -Quando lo strumento viene acceso o spento, si Questo è normale e indica che lo strumento sente uno schiocco. riceve alimentazione elettrica. -Quando si utilizza un telefono cellulare, viene Per evitare questo, spegnere il cellulare o usatelo prodotto un rumore. -
Page 84: Specifiche
RESET Se fosse necessario cancellare completamente la memoria interna (RAM), è possibile resettare lo strumento. 1 - Assicurarsi che lo strumento sia spento. 2 - Premere allo stesso momento i pulsanti [+] e [-]. 3 - Accendere lo strumento mentre si premono i pulsanti [+] e [-]. 4 - Il display mostrerà...
Need help?
Do you have a question about the PX100 and is the answer not in the manual?
Questions and answers