
Related Manuals for Temptime EDGE M-300


Summary of Contents for Temptime EDGE M-300
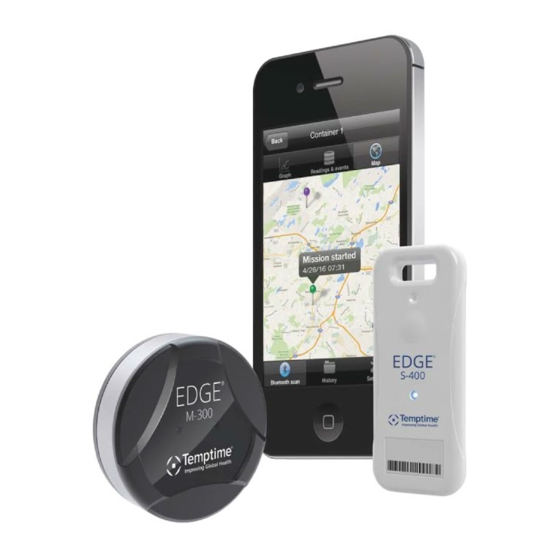
- Page 1 User Guide EDGE™ M-300, EDGE™ M-300-P and EDGE™ S-400 Modules and EDGEVue™ Mobile Application Sept 2016 • Rev 01...
- Page 2 Notices Battery warnings TEMPTIME EDGE™ M-300 and M-300-P modules contain a non-rechargeable lithium battery. Make sure you observe polarity (+/-) when inserting the battery into your module. Reversing polarity by inserting the battery incorrectly can cause the product to heat up and may lead to a battery liquid leak. Use only batteries recommended by TEMPTIME. Battery life is influenced by operating temperatures. Removing the battery...
- Page 3 TEMPTIME EDGE M-300 Series and TEMPTIME EDGE S-400 (Bluetooth component BLE112-A) are in conformity with the essential requirements and other relevant requirements of the R&TTE Directive (Radio and Telecommunications Terminal Equipment, 1999/5/EC). The products are compliant with the following standards and/or normative documents. • EMC (immunity only) EN 301 489-17 V.1.3.3 in accordance with EN 301 489-1 V1.8.1 • Radiated emissions EN 300 328 V1.7.1 • Safety EN60950-1:2006+A11:2009+A1:2010+A12:2011 KCC (Korea) TEMPTIME modules (Bluetooth component BLE112-A) are KCC certified with following certification number: • KCC-CRM-BGT-BLE112-A MIC (Japan) • This equipment contains specified radio equipment that has been certified to the Technical Regulation Conformity Certification under the Radio Law. R 209 – J00046...
- Page 4 © 2016 TEMPTIME All rights reserved. TEMPTIME, the TEMPTIME logo, TEMPTIME EDGE M- 300, M-300-P, EDGE S-400, EDGEVue and EDGECloud are the exclusive property of TEMPTIME. iPhone and iPad are trademarks of Apple, Inc., registered in the U.S and other countries. Android is a trademark of Google Inc. The Bluetooth® word mark and logos are owned by the Bluetooth® SIG, Inc. All other brands are the property of their respective owners. Specifications subject to change without notice. Smartphone or tablet device not included. Images are non-contractual.
-
Page 5: Table Of Contents
Contents About EDGE and EDGEVue 1.1. EDGEVue Functions 1.2. EDGEVue Software Specifications 1.3. EDGE Module Hardware Specifications How to Use: EDGE M-300 2.1. Battery Installation 2.2. Mounting 2.3. Activate Using the Magnet How to Use: EDGE S-400 3.1. Mounting (Optional) 3.2. Activate Using the Pushbutton Status Indicators Download and Install EDGEVue How to Use: EDGEVue and EDGECloud Scan screen Scan for nearby EDGE modules Configuring new missions What is a mission? Setting up EDGECloud access Assigning your EDGECloud account in EDGEVue Define general settings Selecting the start mode Setting high and low alarm limits Security: Password-protection Push mission data to EDGECloud Start the mission For EDGE S-400 only: Activating mission with a single button-press View a currently-running mission Save and send data from the current mission Look up data from previous missions Settings Monitoring with Watch Mode Requirements for using Watch Mode Watch Mode settings... - Page 6 FIGURES 1.1 EDGEVue Software Specifications 1.2 EDGE Module Specifications 2.1 EDGE M-300 LED Indicator 2.2 EDGE MX-300 Battery Installation 2.3 EDGE M-300 Battery Installation 2.4 EDGE M-300 Magnet 2.5 EDGE M-300 Mounting 2.6 EDGE M-300 on magnet 3.1 EDGE S-400 LED Indicator and Pushbutton 4.1 Status Indicators 4.2 EDGE M-300 Status Check with Magnet 5.1 QR Code Scan for App Download...
-
Page 7: About Edge And Edgevue
1. About EDGE and EDGEVue • This User Guide describes the EDGEVue application for iOS® and Android® platforms. • EDGEVue supports both EDGE M-300 Series and EDGE S- 400 modules. • All EDGEVue features are identical on the iOS® and Android® mobile platforms. EDGEVue Functions • Monitors temperature-sensitive goods during shipment and view temperature readings stored on your EDGE modules within wireless range • Programs high and low temperature limits, read frequency, and delays • Replicates data in secure Cloud storage* • Maps read locations using your device’s location services • Monitors temperature in packages, refrigerated trucks, laboratories, storage facilities, and more • Supports Bluetooth Smart (Bluetooth Low Energy), with a wireless range up to 50 meters (approximately 160 feet) * CSV file export to Dropbox™ or other supported remote storage services, or full-data access with EDGECloud™ service and EDGEVue PC desktop application. About EDGE and EDGEVue... -
Page 8: Edgevue Software Specifications
Figure 1.1 EDGEVue Software Specifications EDGE M-300 Series EDGE S-400 Series Description iPhone 5 or higher, iPad 3 or higher Supported mobile module Android 4.4 and higher (ARMv7 chipsets with platforms Bluetooth® Smart) Module detection Automatic when within Bluetooth® range Watch mode iOS & Android smartphones and tablets Immediate, delayed Datalogging start options When temperature reaches target value Magnet Button press Read interval 15 to 59 seconds, or 1 to 255 minutes Memory management Stop when full, or overwrite oldest readings Programmable limits High and low alarm limit values (with delay) Module name Customizable (up to 18 characters) Uses smartphone/tablet GPS features to track Geolocation read points with detailed information Reports in CSV format (MS Excel® readable) may Reports be sent by e-mail, with mission summary and history graph CSV format report to Dropbox™ or other supported storage services, Cloud storage full-data access with EDGECloud (EDGE S-400 Cloud access depends on model) Readings shown in GMT or user's local time, -Regional settings temperature values expressed in °C or °F... -
Page 9: Edge Module Specifications
Figure 1.2 EDGE Module Specifications Description EDGE M-300 Series EDGE S-400 Series Wireless connectivity Bluetooth® Smart Serial number Unique for every module -40 to +85°C, or -200 to +200°C Temperature range -5 to +40°C (w/external Pt100 sensor probe) Reading precision +/- 0.3°C Sensor resolution 0.01°C Wireless range Up to approximately 50 meters/160 ft. (LOS) User-replaceable Non-replaceable Battery type Lithium battery Lithium battery Battery life Up to about 48 weeks Up to about 12 weeks IP67 for EDGE M-300 or IP65 for EDGE M- Product protection index IP65 300-P (probe) Casing ABS / Aluminum ABS H: 81 mm (3.2 in.) Ø 50 mm (2 in.) W: 43.4 mm (1.4 in.) Dimensions D: 22 mm (0.87 in.) D: 8.2 mm (0.3 in.) Weight... -
Page 10: How To Use: Edge M-300
2. How to Use: EDGE M-300 Overview EDGE M-300 is a Bluetooth® Smart enabled module that records ambient temperature at regular intervals and stores the information in its memory. This type of module is also known as a datalogger. EDGE M-300 features a replaceable battery, and may be used multiple times. The EDGEVue application on a mobile device enables monitoring wirelessly via LED indicator Bluetooth at any time. Information may Figure 2.1 be uploaded to the Cloud. EDGE M-300 LED indicator EDGE M-300-P is an extended range model that uses an external temperature sensing probe. The EDGE M-300-P module and EDGEVue software operate identically for both EDGE M-300 and EDGE M-300-P Figure 2.2 EDGE M-300-P with external temperature sensing probe How to Use EDGE M-300... -
Page 11: Battery Installation
1. Battery installation EDGE M-300 has a replaceable battery. The battery must be installed before using EDGE M-300 for the first time. Figure 2.3 EDGE M-300 Battery Installation (-40°C to +85°C) Locate the Unscrew 3 battery - screws on the provided in the back of the product box. module (turn counter- clockwise). Remove the Place the screws. battery in the slot, matching polarity to the battery slot. Replace screws EDGE is ready (turn to use. clockwise). Ensure that the rubber seal is well seated. Replacement Battery: Contact Temptime for P/N 30-0200 How to Use EDGE M-300... - Page 12 Figure 2.4 EDGE M-300-P Battery Installation (-200 to +200°C, external probe) Locate the Unscrew the 3 battery - screws on the provided in the back of the EDGE product module (turn box. counter- clockwise). Remove the Place the screws. battery in the slot, with the plus sign (+) facing up. Replace screws EDGE is ready (turn to use. clockwise). Ensure that the rubber seal is well seated. Replacement Battery: Contact Temptime for P/N 30-0100 How to Use EDGE M-300...
-
Page 13: Mounting
2. Mounting EDGE M-300 includes a magnet with adhesive on one side. The magnet is used to: Deeper recessed ring indicates magnet STRONG side 1. mount the module onto a magnetic surface, and Ring near magnet 2. trigger selected actions. edge is magnet WEAK side The magnet has a “weak” and a “strong” Figure 2.5 EDGE M-300 magnet side. The metal ring is close to the edge on the “weak” side of the magnet. The deeper recessed ring on the opposite side indicates “strong” side. Mounting EDGE M-300 with the magnet The magnet can be used to mount EDGE on a metallic surface. Alternatively, screws can be used to mount EDGE on other types of surfaces. Simply place the module onto the magnet as shown below, with the strong side facing the module: Figure 2.6 Mounting EDGE M-300 on magnet How to Use EDGE M-300... -
Page 14: Activate Using The Magnet
3. Activate using the magnet A mission may be started by mounting the module on the magnet (typically screwed into a wall or placed onto a magnetic surface). This activation option must be enabled in EDGEVue è Set Up New Mission è Start mode è On contact with magnet. How to Use EDGE M-300... -
Page 15: How To Use: Edge S-400
3. How to use: EDGE S-400 EDGE S-400 is a Bluetooth® Smart enabled module that records ambient temperature at regular intervals and stores the information in its memory. Unlike EDGE M-300, EDGE S-400 is designed for shorter-term operation for shipping applications lasting about 3 months. The battery in EDGE S-400 is not Push-button replaceable. The EDGEVue application on a mobile device enables monitoring wirelessly via LED indicator Bluetooth at any time. You may also choose to upload the information to the Figure 3.1 Cloud where other people can access it. EDGE S-400 Pushbutton and LED indicator 1. Mounting (optional) EDGE S-400 has an adhesive strip that can be used to affix the module to a container. It also has a key hole that can be used to strap or tie the module to other objects. 2. Activate using the pushbutton One long press to start with default profile EDGE S-400 features a default profile, set to monitor a pre-configured temperature range of 2°C to 8°C, commonly used in cold-chain applications. The default profile logs the sensor temperature every 10 minutes. If no other specific settings are required, press the EDGE S-400 pushbutton for 3 seconds to activate datalogging and begin tracking temperature. A How to Use EDGE S-400... - Page 16 smartphone or tablet with EDGEVue installed can be used to view readings, as described later in this User Guide, Chapter 6. How to Use EDGE S-400...
-
Page 17: Status Indicators
4. Status indicators The color LED indicators on EDGE M-300 and EDGE S-400 indicate module status. LED indications are the same for both EDGE modules. Figure 4.1 LED Status Indicators Mission not programmed • Bluetooth activated, module l l l l l l l l ready to be programmed, or (Flashes 8x) currently connected via Bluetooth Mission programmed ( = flashing, fixed 3 seconds) Datalogging Datalogging not started started Everything is OK l l l l l l l l Currently OK (previous alarm n/a l l l l l l l l or sensor error) Sensor error l l l l l l l l Low battery l l l l l l l l l l l l l l l l Limit exceeded (within delay) l l l l l l l l Limit exceeded (delay exceeded) Status Indicators... -
Page 18: Edge M-300 Status Check With Magnet
This same behavior (LED indication) is obtained using the EDGEVue software, with the Blink LED to identify module function, described later). Figure 4.2 Check EDGE M-300 status LED by passing the magnet close to the module Status Indicators... -
Page 19: Download And Install Edgevue
5. Download and Install EDGEVue EDGEVue may be downloaded directly to an iOS or Android smartphone or tablet. After EDGEVue is installed, upgrade notifications will be automatically sent to the device. There are two ways to proceed with installation. Option A: Scan the QR code to access the TEMPTIME web page for links to iOS (App Store) and Android (Google Play) downloads 1. Scan the QR code provided on the back of the EDGE M-300 module or on the EDGE M-300 or EDGE S-400 packaging. This opens the page: www.temptimecorp.com/products/edgevue-app Figure 5.1 Scan the QR code to link to the EDGEVue download page on Temptime website 2. Choose the desired EDGEVue application link and proceed with the download via the appropriate online store. On the TEMPTIME site, you will also find EDGEVue PC, the Windows companion application for your mobile device. EDGEVue PC enables you to access EDGECloud to view data stored by your Cloud-enabled EDGE S-400 module or to manage the vouchers (cloud service access) used for EDGE M-300 modules, and view your module data. Download and Install EDGEVue... - Page 20 Option B: Access online stores directly iOS Android For iOS devices, go to the For Android devices, App Store icon go to the Play Store: Alternatively, install the Alternatively, open the Apple application via the Google App Store web site directly Play web site. and download the application. 1. Search for “EDGEVue” on the appropriate store page. 2. Select the TEMPTIME EDGEVue application to proceed with installation. 3. Log in to your account (or create one, if necessary) and follow the installation instructions. 4. When installation is complete, tap on the EDGEVue icon to open it. EDGEVue application icon Download and Install EDGEVue...
-
Page 21: How To Use: Edgevue And Edgecloud
6. How to Use: EDGEVue and EDGECloud The Scan screen The Scan screen appears when the application is opened. Tap on the colored zones to: 1. Scan the area for nearby EDGE modules (Bluetooth must be activated on the mobile device; if Bluetooth is not activated, follow prompts to turn it on). 2. Run EDGEVue in demonstration mode without actually connecting to any modules. 3. Enter your Cloud ID to use EDGECloud services (details in Setting up EDGEVue home screen (upon first start) EDGECloud Access, page 25) The four tabs along the bottom of the screen, Scan, History, Settings, and About, are present throughout the application, and are described in detail in the following sections. Note: The first time EDGEVue is launched, it requests authorization to access geolocation features. To include location details provided by the mobile device, geolocation access must be allowed. How to Use EDGEVue and EDGECloud... -
Page 22: Scan For Nearby Edge Modules
Scan for nearby EDGE modules On the Scan tab, tap the scan/refresh icon to discover and list the EDGE modules within range. The icon colors indicate: Green indicates a programmed module that has not exceeded limit values during the current mission (no alarms). Red indicates a programmed module on which one or more alarms have been detected during the current mission. Gray indicates an idle module (not running, Module list after scanning ready-to-use). Tap anywhere on one of these lines to manage the selected module, and to access further details or configure a new mission. The features on this screen are identical for EDGE S-400 and EDGE M-300 modules, though the EDGE image changes. How to Use EDGEVue and EDGECloud... - Page 23 Return to the home screen Press Back to return to the previous screen. Set up new mission Configure a new mission for the module. Show last recorded mission Shows data from the last mission recorded in module memory. Blink LED to identify module Activates the LED blinking function on module. This may be useful to identify a specific module, for example, if working with several modules. The LED blinks according to the module’s status (as described Accessing and configuring earlier in LED Status Indicators on your module page 17). Read current temperature Displays the ambient temperature where the module is located. How to Use EDGEVue and EDGECloud...
-
Page 24: Configuring New Missions
Configuring new missions To use your EDGE S-400 or EDGE M-300 module, you must activate a mission using EDGEVue. What is a mission? A mission is a set of configuration options that are used to manage your module. Mission parameters include: 1. A name for the module and how often temperature is read 2. How and when the module should begin tracking data (the startup mode) 3. High and low alarm limits 4. Whether or not data should be pushed to the Cloud 5. Whether or not to use a password to protect against unwanted stopping or reprogramming of a mission New EDGE S-400 modules may be started, only the very first time they are used, with a 3-second button press. This activates the module and starts datalogging with the default profile (see For EDGE S-400 only: Activating mission with a single button-press on page 34). How to Use EDGEVue and EDGECloud... -
Page 25: Setting Up Edgecloud Access
Setting up EDGECloud access How it works Mission data can be pushed by your smartphone or tablet from your EDGE S-400 or EDGE M-300 module to the EDGECloud service via your regular Internet connection (i.e. cellular or Wi-Fi). The data can then be accessed from computers running EDGEVue PC software. You can share mission data with other users over the Internet via the EDGEVue PC application. Mission data can be pushed to the cloud by your smartphone or tablet First, you must install the EDGEVue PC application and use it to create your company account to access to the EDGECloud and the different user accounts. These accounts are linked to your company account (EDGEVue PC application available free of charge on www.temptimecorp.com/products/edgevue-app. • For EDGE M-300 modules, you must enter a voucher number authorizing a specific number of modules for a specific period of time. • EDGE S-400 modules are purchased either with, or without, Cloud access. Please contact your sales representative for more information on Cloud access. How to Use EDGEVue and EDGECloud... - Page 26 For a given mission to be pushed to EDGECloud, you must provide a Cloud user account name in EDGEVue mobile, on the smartphone or tablet that is used to program the module. You must use the login information for an account linked to your company (yours or another account) to push mission data to the Cloud. Then, when the module is on a mission, other users with EDGEVue mobile installed on their mobile device can read your datalogger module, for example at intermediary locations during the mission. Those users do not have to configure anything in their smartphones or tablets. They simply remain “anonymous,” yet they can also push mission data to EDGECloud. As with programming, only mobile devices configured with a user account linked to your company account are allowed to stop a mission that has been pushed to the EDGECloud. How to Use EDGEVue and EDGECloud...
-
Page 27: Assigning Your Edgecloud Account In Edgevue
Assigning your EDGECloud account in EDGEVue Assign the EDGECloud account to your mobile device (one account per device) as follows: 1. In Settings è Cloud account, enter the same Email address and Password that were configured using EDGEVue PC for your Cloud account. 2. Tap on Assign 3. Proceed with Starting a new mission (next page). How to Use EDGEVue and EDGECloud... -
Page 28: Define General Settings
Defining general settings 1. From the Scan screen, tap to refresh the list of visible EDGE modules. Missions may be defined and started for modules with a gray icon or . Red or Green icons indicate that the module is already on a mission. Note: EDGE M-300 modules are always visible if the battery is installed. To activate an EDGE S-400 module, press the push-button on the front of the module (short press). The module remains active for 1 minute if EDGEVue General mission settings does not connect to it. 2. To select the module to be configured è Set up new mission 3. Complete the necessary information on the General tab (shown above). How to Use EDGEVue and EDGECloud... -
Page 29: Settings
Load a template Used to load a previously-saved mission template (if available) by tapping in the field and choosing a template name from the pull-down list. Module name Create a name for the module during the mission (up to 18 characters). This name is displayed throughout the application when referring to the module. Reading interval Set the temperature read and record frequency for the module sensor. Tap to choose values in minutes or seconds. Note: To activate Low/High delays in the Alarms tab, Reading interval must be set in minutes (see below). Datalogging in Up to 4,000 readings can be stored in module continuous loop memory. To continue datalogging after this limit is reached, the oldest readings can be overwritten by new readings by selecting Datalogging in continuous loop. Otherwise, datalogging stops when the limit of 4,000 readings is reached. Save as template On completion of establishing mission settings, select Save as template at the bottom of the screen if you want to save the current mission as a template for future use. How to Use EDGEVue and EDGECloud... -
Page 30: Selecting The Start Mode
Selecting the start mode There are several ways to start datalogging on your module. Adjust the following options in the Start mode tab as necessary. All options other than Immediately may be combined for use together. Immediately Datalogging begins when module programming is complete. Delayed for… Datalogging begins after the specified number of minutes (after mission has started). Tap in the field to change the number. Depending on your module: Mission start options EDGE M-300: On contact with magnet Datalogging will begin when the EDGE M-300 module comes into contact with its magnet. EDGE S-400: On button-press & hold Datalogging will begin when you press and hold the EDGE S-400 button for 3 seconds. Temperature below or Temperature above Datalogging will begin when module exceeds the specified temperature (high or low). This is useful for automatically starting datalogging when the module is to be placed in the environment to be monitored, such as in a cooler when it is ready for transportation. How to Use EDGEVue and EDGECloud... -
Page 31: Setting High And Low Alarm Limits
Setting high and low limits You may set high and low limits in the Alarms tab to ensure that the temperature in the monitored environment remains within a specific range. The default values in the fields show the module’s available temperature range. Tap on checkboxes to enable options and in fields to adjust settings. Low limit: the lowest acceptable temperature reading. High limit: the highest acceptable temperature reading. Low delay: how long the reading is High and low temperature lower than the Low limit (multiple of range limits the reading interval, in minutes only). High delay: How long the reading is higher than the High limit before triggering an alarm (multiple of the reading interval, in minutes only). Alarm condition indicated by red icon If an alarm occurs at any point after the start of the mission, the module icon changes color to show an alarm in the Scan list (unless Watch Mode is activated, as described in Monitoring with Watch Mode, page 41). How to Use EDGEVue and EDGECloud... -
Page 32: Security: Password-Protection
Password-protection On the Security tab, you may assign a password to prevent other users from stopping a module that is currently on a mission. Password required to stop mission: requires a user to enter the same password, entered here, to stop this mission after it has been started. Important: If you forget your password, please contact TEMPTIME technical support. Tap in the Password field to enter the Protecting module password. The checkbox to the right of mission with a password this field shows or hides the password characters. How to Use EDGEVue and EDGECloud... -
Page 33: Settings
Pushing mission data to EDGECloud To push module data to the Cloud during its mission, you must assign your EDGECloud ID and password in Settings. Dropbox and other supported services are described in the section Saving and sending data from the current mission. To push data to EDGECloud via your smartphone or tablet: 1. Tap on the Cloud tab 2. Select Use Cloud for this mission Data will be pushed by your mobile device to EDGECloud upon Data is pushed by your mobile device: mission start, read, and stop • When the module is programmed • When the module is read during the mission • When the mission ends Use the EDGEVue PC application for Windows to configure EDGECloud access and view module data from your computer. How to Use EDGEVue and EDGECloud... -
Page 34: Start The Mission
Starting the mission When you are done defining the various mission settings, you may save this configuration as a template for future use if you want (return to the General tab). Then tap on Done transmit your settings to the module. A confirmation message is displayed in EDGEVue and the module is displayed with a green or icon on the Home page (or red or if the module already has an alarm). For EDGE S-400 only: Activating mission with a single button-press If your EDGE S-400 module has never been programmed (i.e. fresh from the factory), you may start it by pressing the button for 3 seconds. This starts datalogging with the default profile of: Reading interval 10 minutes Range 2° to 8°C Hi / low alarms Active Recording mode Circular Note: If you do not modify the module’s mission parameters after stopping the mission with the mobile application, those parameters remain in module memory. You may re-start the exact same mission (with new temperature readings) by pressing and holding the button for three seconds. How to Use EDGEVue and EDGECloud... - Page 35 Viewing a currently-running mission General information When a module is activated and configured for a mission, you may view various details, save reports, or send information by e-mail or to and send or store information on supported Cloud storage services (remote “drives”). 1. Tap on the module name in the home screen è Show current mission. 2. General information about the mission is displayed. 3. You may tap on Stop to terminate the mission if appropriate. Access detailed information and maps Tap on Mission details for more Summary of current mission complete information regarding the module on its mission. How to Use EDGEVue and EDGECloud...
- Page 36 If the Use Cloud for this mission option was activated for the mission: 1. When you tap on Mission details, data is pushed by your smartphone or tablet to the Cloud before refreshing the screen. Any user, at any location, can push data to the Cloud, even if no Cloud account is assigned in that user’s EDGEVue application. This “anonymous” push enables people reading the module at remote locations to update the data on the Cloud without having to configure their application. 2. If you tap on Stop, the mobile application connects to the Cloud. The module must be linked to the same company account as your user Cloud account, and your Cloud account login and password must be configured in the application. If the smartphone or tablet is not connected to the Cloud, the mission will not be stopped. How to Use EDGEVue and EDGECloud...
-
Page 37: Settings
Graph Tap on the Graph tab to see a summary graph of the readings in the current mission. Zoom in by swiping diagonally (left to right) with your finger anywhere in the graph. Zoom out by swiping diagonally right to left. Data For a list of all the readings, events, and alarms related to the mission, tap on Data. Map If the option Location Services is enabled on your iPhone (Settings è Restrictions), the location is stored when EDGEVue reads the EDGE M-300 module. Tap on Map to view a Google Map showing the locations at which the EDGE M-300 module was programmed, read, and stopped. How to Use EDGEVue and EDGECloud... - Page 38 Saving and sending data from the current mission You may save or store data at any time during a mission by tapping on the icon. Save on device Saves up to five missions in your mobile device’s memory. If you save the current mission more than once, it is saved as a new file. Send by email Sends all stored readings in CSV format, along with the graph from the current mission, to an email address that you specify. This action requires email functionality and Internet (or Wi-Fi) access to be operational on your mobile device. Save to Dropbox Uploads all stored readings in CSV format, and the graph from the current mission, to the Dropbox account (or other supported service) you specify. For Dropbox: 1. After tapping on Save to Dropbox, enter your Dropbox login and password to link Dropbox with EDGEVue. 2. Tap to allow “EDGEVue to access files and folders in your Dropbox”. 3. Tap on Close if the browser window does not close automatically. 4. The file is generated and saved in your Dropbox space. How to Use EDGEVue and EDGECloud...
- Page 39 Looking up data from previous missions Tap on History to see stored information from EDGE S-400 and EDGE M-300 module missions. Tap on the desired mission to see complete details regarding that mission. How to Use EDGEVue and EDGECloud...
-
Page 40: Settings
Settings The Settings tab contains various options for configuring EDGEVue behavior. Temperature unit: choose to display values in Celsius (°C) or Fahrenheit (°F). Show data in GMT format: data is always stored using GMT time. This option lets you display the data with GMT time or the mobile device’s current local time. Show wireless signal strength: Enabling this option displays signal strength (in %) in the module list on the home screen. Prompt to save after viewing mission details: when viewing mission details (tap module in home screen è Show current mission è Mission details), current data is downloaded temporarily to your mobile device for display purposes. This option simply serves to ask whether you want to save mission data when you exit the Mission details screen. How to Use EDGEVue and EDGECloud... -
Page 41: Monitoring With Watch Mode
Monitoring with Watch Mode EDGEVue’s Watch Mode enables you to monitor EDGE modules on an ongoing basis, and upload the data to the Cloud automatically. When activated, Watch Mode displays the latest reading for all modules within range. Requirements for using Watch Mode 1. The module must be programmed, and datalogging must be active. Modules that are not on a mission do not monitor temperature and therefore are not concerned by Watch Mode 2. With an iOS mobile device, the EDGEVue application must remain in the foreground (it must be the active application). Android devices support applications running as background a background task. 3. Autolock must be turned off on your mobile device so that EDGEVue stays open in order to scan nearby modules. How to Use EDGEVue and EDGECloud... -
Page 42: Watch Mode Settings
Watch Mode settings Manual start: enables you to activate Watch Mode from the Scan tab. With this option selected, an ON/OFF button is displayed on the Scan screen. Slide the button to the right to activate Watch Mode ( ). Disabled: Watch Mode is disabled by default. Tap on Manual start to activate this function. With Watch Mode activated, the latest temperature reading is updated once per minute and displayed in the list on the Scan tab. When Watch Mode is activated, the colored icons on the Scan tab have a slightly different meaning than for “Discover mode.” Green indicates a programmed module, with datalogging started or not, whose last-read value has not exceeded its limit value (that is, currently not in an alarm state). Red indicates a programmed module, currently in an alarm state, whose last-read value has exceeded its limit value. If a delay was configured, it has been reached. EDGEVue plays an alarm sound once a minute, for several seconds, if the latest reading on one or more modules has exceeded an alarm limit. Grey indicates either a non-programmed module or one on which there was an error reading the sensor (i.e. the current reading is not available). The text beneath the module name shows the status (“Not started” or “Last reading: N/A”). How to Use EDGEVue and EDGECloud... - Page 43 Pushing readings to Cloud automatically If you selected Use Cloud for this mission, the latest readings in the module memory is uploaded to the Cloud at the interval you specify in Automatic Cloud push interval. Your mobile device must be connected to the Internet to push data to the cloud. It is not necessary to enter a valid Cloud user e-mail and password in Settings è Cloud account Testing the alarm sound You may test the alarm sound be tapping on the Test button. The alarm sounds for approximately 8 seconds, enabling you to adjust the volume as necessary. How to Use EDGEVue and EDGECloud...
-
Page 44: Appendix 1 - Opening A .Csv File With Msexcel
Appendix 1 – Opening a .CSV file with MS Excel EDGEVue can send data in .CSV format for use in MS Excel or other compatible spreadsheet software. To open a .CSV file generated by EDGEVue: 1. Save the file to your computer, then double-click on the file to open it in MS Excel. 2. Click on column “A” to select that column, then on the Data tab, select Text to columns. Appendix 1... - Page 45 3. Click on Delimited (default option) è Next 4. Leave Tab selected, click on Other, and enter a # character in the field. Appendix 1...
- Page 46 5. Click on Date (DMY is the default value) è Finish Appendix 1...
- Page 47 6. The CSV file is split into columns as shown below. Appendix 1...
-
Page 48: Appendix 2 - Edge M-300 Battery Life
Appendix 2 – EDGE M-300 Series battery life EDGE M-300 module battery life varies with the ambient temperature, and varies between the two available models, M-300 and M-300-P. Generally, batteries do not last as long in colder environments. EDGE M-300 (-40°C to +85°C) module Battery specifications: Type Number: ER ½ AA CEI designation: 14250 System: Primary Li-Thionyl Chloride / LiSOCI EDGE M-300-P (-200° to +200°C) module Battery specifications: Type Number: 6450 IEC designation: CR2450 System: Li-Manganese dioxide / Organic Electrolyte Appendix 2... -
Page 49: Appendix 3 - Advanced Module Settings
Appendix 3 – Advanced module settings Several advanced options are available from the Module details screen by tapping on the More button. Radio tools To see the module’s battery level, tap on Get Current. To reset the counter to 100% (only after replacing the battery in an EDGE M-300 module with a new one), tap on Reset. To see wireless signal strength or the module’s firmware version, tap on the appropriate Get Current buttons. Appendix 3... - Page 50 Settings You may view the current A and B calibration parameters of your module by tapping on Get current. To protect the module from unwanted programming, you may protect it with a password. 1. Tap on Enable to enter a password. 2. Tap on Disable to remove the password. Appendix 3...
- Page 51 Advanced You must contact technical support to use these options. They enable you to unblock and/or completely reset your EDGE M- 300/EDGE S-400 module. Appendix 3...
- Page 52 www.temptimecorp.com | support@temptimecorp.com Appendix 3...
Need help?
Do you have a question about the EDGE M-300 and is the answer not in the manual?
Questions and answers