Table of Contents
Advertisement
Advertisement
Table of Contents

Related Manuals for TP-Link RE350 AC1200


Summary of Contents for TP-Link RE350 AC1200
- Page 1 1910011680 REV 1.0.0...
- Page 2 Specifications are subject to change without notice. is a registered trademark of TP-LINK TECHNOLOGIES CO., LTD. Other brands and product names are trademarks or registered trademarks of their respective holders. No part of the specifications may be reproduced in any form or by any means or used to make any derivative such as translation, transformation, or adaptation without permission from TP-LINK TECHNOLOGIES CO.,...
- Page 3 Any changes or modifications not expressly approved by the party responsible for compliance could void the user’s authority to operate the equipment. Note: The manufacturer is not responsible for any radio or tv interference caused unauthorized modifications this equipment. Such This equipment has been tested and found to comply with the limits for a modifications could void the user’s authority to operate the equipment.
- Page 4 This device meets the EU requirements (1999/5/EC Article 3.1a) on the 1) The device for operation in the band 5150–5250 MHz is only for indoor limitation of exposure of the general public to electromagnetic fields by way use to reduce the potential for harmful interference to co-channel of health protection.
- Page 5 IC établies pour un environnement non contrô lé. Cet équipement doit être 2) Le gain maximal d'antenne permis pour les dispositifs avec antenne(s) installé et utilisé avec un minimum de 20cm de distance entre la source de amovible(s) utilisant les bandes 5250-5350 MHz et 5470-5725 MHz rayonnement et votre corps.
- Page 6 行清潔。 risk of electric shock and voiding the limited warranty. If you need service, please contact us. 注意防潮,請勿將水或其他液體潑灑到本產品上。 ● Avoid water and wet locations. ● 插槽與開口供通風使用,以確保本產品的操作可靠並防止過熱,請勿堵 ● For EU/EFTA, this product can be used in the following countries: 塞或覆蓋開口。 請勿將本產品置放於靠近熱源的地方。除非有正常的通風,否則不可放 ●...
- Page 7 TP-LINK TECHNOLOGIES CO., LTD For the following equipment: Person responsible for making this declaration: Product Description: AC1200 Wi-Fi Range Extender Model No.: RE350 Trademark: TP-LINK We declare under our own responsibility that the above product satisfies all the technical regulations applicable to the product within the scope of...
-
Page 8: Table Of Contents
Extend Another Network ............18 Introduction ................ 1 Customize the Extender’s SSID ..........20 Product Overview ..............1 Manage the Extender’s Wi-Fi Security Settings ..... 21 What can your Extender do ..........1 Change your Admin Account ..........21 Support for the 802.11ac wireless technology ..... 1 Block / Allow Network Access for Specific Clients .... -
Page 9: Introduction
The RE350 AC1200 Wi-Fi Range Extender is dedicated to Small Office/Home Office (SOHO) wireless network solutions. It will enlarge your existing wireless network and mobility within your wireless network while also allowing you to connect a wired device to a wireless environment. Increased mobility and the absence of cabling will be beneficial for your network. - Page 10 compatible with all IEEE 802.11n, IEEE 802.11a, IEEE 802.11b and IEEE 802.11g products. Complies with IEEE 802.11ac Provides multiple encryption security Types including: 64/128-bit WEP and WPA-PSK/WPA2-PSK Supports Built-in DHCP server Supports Firmware Upgrade Supports Web-based Management ...
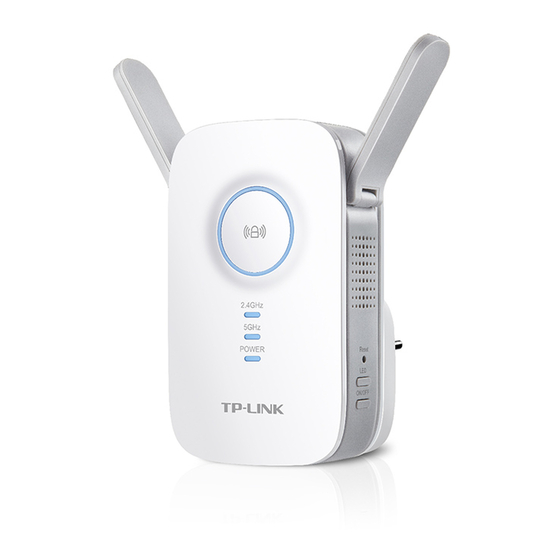
- Page 11 Power Button:You can press the Power button to turn on or off the Name Status Indication extender. Blinking WPS connection is in process. Ethernet Port: One 10/100/1000Mbps RJ45 Ethernet port is used to add wireless connectivity to an Ethernet-enabled device such as Internet TV, No active connection.
-
Page 12: Connect The Extender To The Internet
Please read this guide carefully before installing and using the device. The operating distance range of your wireless connection can vary significantly depending on the physical position of the wireless devices. Factors that can weaken signals by getting in the way of your network’s radio waves are metal appliances or obstructions and walls. -
Page 13: Using Your Web Browser
Less Interference - Choose a location away from Bluetooth devices and ● other household electronics, such as cordless phone, microwave, and baby monitor, etc., to minimize signal interference. WPS is an easier way to extend your host network. We recommend you to use this way if your host router has a WPS Place your extender in a well-ventilated place far from direct sunlight, ... - Page 14 Connect Press the WPS button on your router/AP. If the RE LED does not change from flashing to solid, please refer to Using your Web Browser. For more information about using WPS on your router, Some ISP gateways disable the WPS function by ...
-
Page 15: Connect To The Extender
Enjoy! The extender shares the same wireless network names (SSIDs) and wireless passwords as those of the host networks. Connect to the Extender Connecting via Ethernet Cable ● Power On Disable the Wi-Fi on your computer. Plug the extender into an electrical outlet near your router, and wait until the Power LED is lit and solid blue. - Page 16 TP-LINK_Extender_2.4GHz or _5GHz. Login Launch a web browser and type http://tplinkrepeater.net into the URL field and use admin (all lowercase) for both Username and Password to log in. For Mac OS X users: Unplug the Ethernet cable from your computer (if any). Configure Click the Wi-Fi icon on the top right corner of the screen, and connect to the extender’s network:...
- Page 17 then click Next. Select your router's 5GHz host network and enter the password, then click Next. If your router does not support 5GHz wireless network, please click Skip to continue. Connect the Extender to the Internet...
- Page 18 Either keep the same SSIDs as your host networks or create new names for the extended networks, then click Next. Verify your wireless settings and click Finish. The corresponding LEDs (2.4GHz and 5GHz) should turn on and stay solid. Relocate Plug the extender into an electrical outlet about halfway between your router (Host Network) and the Wi-Fi dead zone.
- Page 19 closer to the router to achieve a good (or better) signal quality. By default, the Ethernet port connects to the 5GHz wireless network. If you want the extender to connect to the 2.4GHz wireless network only, please follow the steps below to finish the settings: Enjoy! Both extended networks share the same Wi-Fi passwords as those of the host Launch a web browser and type in http://tplinkrepeater.net, and then go...
-
Page 20: Change The Working Mode To Ap
After rebooting, you may need to reconnect to the extender’s network and log in again. Connect the extender to your router Customize the SSID and Password (Optional) Power on the extender, and connect it to your router’s Ethernet port via an Go to Settings >... -
Page 21: Connect Your Devices To The Ap By Wps
Select WPA/WPA2 – Personal: alphabetic and numeric characters. Hexadecimal format is a combination of the numbers (0-9) and letters (A-F, a-f). Select the key type. 64-bit allows you to enter 10 hexadecimal digits or 5 ASCII characters into the Key Value field. 128-bit allows you to enter 26 hexadecimal digits or 13 ASCII characters into the Key Value field. - Page 22 Select PIN code at WPS Wizard section, enter the client’s WPS PIN go to Settings > Wireless > WPS page. code and click Connect. Enable the WPS function of the AP. Select Push Button at WPS Wizard section, and click Connect. “Connect successfully”...
- Page 23 On your client device, enter the AP’s PIN code. When the AP’s is solid on, the client device has successfully connected to the Connect the Extender to the Internet...
-
Page 24: View The Information Of The Extender
Launch a web browser and type in http://tplinkrepeater.net, then go to Settings > Status webpage. You can view the network connection in the Status webpage. The normal status. ● The extender is failed to connect to the wireless network of your router. ●... - Page 25 The extender is connected to the router unnormally. Maybe the ● gateway is set incorrectly in the Static IP. You can select “Obtain an IP address automatically” on the “LAN Settings” page. Launch a web browser and type in http://tplinkrepeater.net, and then go to Settings >...
-
Page 26: Manage The Extended Network And Security Settings
If you want to extend another network, you can refer to the following steps to finish it quickly. Launch a web browser and type in http://tplinkrepeater.net,and then go to Settings->Wireless->Connect to Network webpage. Enable Connect to 2.4GHz/5GHz Network. Then click Wireless Scanner to scan the network you want to extend. - Page 27 If the network you want to extend is on but not shown in Select the network you want to extend from the list. the list, please try by following the steps below. Move the extender closer to your router/ AP. Then ...
- Page 28 quality. Enjoy! The extender shares the same wireless network name (SSID) and wireless password as your host network. If you want to change the wireless network Customize the Extender’s SSID. name (SSID), please refer to On the Extended Network page, you can change or hide the wireless network name (SSID) of the extender, as well as enable or disable the wireless network of the extender.
-
Page 29: Manage The Extender's Wi-Fi Security Settings
Manage the Extender’s Wi-Fi Security Settings Change your Admin Account Launch a web browser and type in http://tplinkrepeater.net, then go to Settings->System Tools->Admin Account webpage. Create a new username and password as shown in the figure below. Extended 2.4GHz/5GHz: Enable or disable the 2.4GHz/5GHz host ... - Page 30 In the Online Devices list, you can view the information about the Click Save to save the settings. devices connected to the extender. For one device, you can click the icon to add the device to the blacklist. For several devices, select them and click Block to add them at the same time.
- Page 31 Device Name: Enter the device name. MAC Address: Enter the MAC address of the client device in XX-XX-XX-XX-XX-XX format (e.g. 00-11-22-33-44-AA). Click OK to save your settings. Whitelist Mode Only the devices in the Whitelist are allowed to connect to the extender. Launch a web browser and type in http://tplinkrepeater.net, then go to Settings->Wireless->...
-
Page 32: Change The Extender's Ip Address
Click the icon , and then you can modify the device name and mac ● address. Click the icon to remove one device from the list. For several devices, ● select them and click Delete to remove them at the same time. IP Address: Enter the IP address in dotted-decimal notation ... -
Page 33: Settings
To use the DHCP server function of the device, you should configure all computers in the LAN as "Obtain an IP Address automatically" mode. Settings Set the DHCP Server status to Auto (by default) ● When the DHCP Server is Auto, the extender automatically detects to find the devices enabling the DHCP Server. -
Page 34: View The Dhcp Client List
Disable DHCP Server MAC Address: The MAC address of the DHCP client. ● If the DHCP server of the extender is Off, please make sure the DHCP Assigned IP Address: The IP address that is allocated to the client ... -
Page 35: Manage The Extender
turn off the LEDs at the specific time LED Control can . The extender can still work normally after the LEDs are off. Launch a web browser and type in http://tplinkrepeater.net, and then go to Settings-> System Tools -> Time Settings webpage. Select the Time Zone of your location. - Page 36 You can view the firmware version and the software version. Search the latest firmware of your extender from the Support page at Backup and restore the configuration on the Backup & Restore page. www.tp-link.com. Then download the latest firmware upgrade file to your Backup Configurations computer. ●...
- Page 37 Restore Configurations ● Click Browse to locate and select your backup file. Click Restore and then YES to restore the extender. The restore process may take a few minutes to complete and the extender will automatically reboot itself when finished. Factory Restore will erase all settings that you have configured for the extender.
- Page 38 Launch a web browser and type in http://tplinkrepeater.net. Click Reboot on the top right corner to reboot the extender. Launch a web browser and type in http://tplinkrepeater.net. Click Logout on the top right corner to log out the management webpage You can also click the following buttons to apply the settings.
-
Page 39: Appendix
Name Status Common Default Settings Username admin Password admin IP Address 192.168.0.254 This chapter covers the following topics: Subnet Mask 255.255.255.0 Factory Defaults Troubleshooting Domain http://tplinkrepeater.net Specifications Wireless Glossary 2.4GHz: TP-LINK_Extender_2.4GHz SSID 5GHz: TP-LINK_Extender_5GHz Wireless Security Disabled Access Control Disabled... - Page 40 web-browser, enter the default domain http://tplinkrepeater.net in the address field and get logged in. If you are unable to log in, please RESET the device, and then use the default IP address to get into the web-based configuration page, reconfigure the device. T1.
- Page 41 Wireless router (or AP) and the terminal clients; so the transmission 11ac: up to 867Mbps time will be double-increased, while the speed will be decreased. TP-LINK 11n: up to 300Mbps recommends that you connect to the extender when your home network...
- Page 42 802.11n development process and promote a technology specification for Physical and Environment interoperability of next-generation wireless local area networking (WLAN) products. 0℃~40℃ (32℉~104℉) Working Temperature Access Point (Range Extender) A wireless LAN transceiver or "base ● 10% ~ 90% RH, Non-condensing station"...
- Page 43 using the IEEE 802.11 family of standards. WLAN (Wireless Local Area Network) - A group of computers and ● associated devices communicate with each other wirelessly, which network serving users are limited in a local area. WPA (Wi-Fi Protected Access) - WPA is a security technology for ●...