Table of Contents

Related Manuals for Elvox 46241.F16H

Summary of Contents for Elvox 46241.F16H
-
Page 1: Installation And Operation Manual
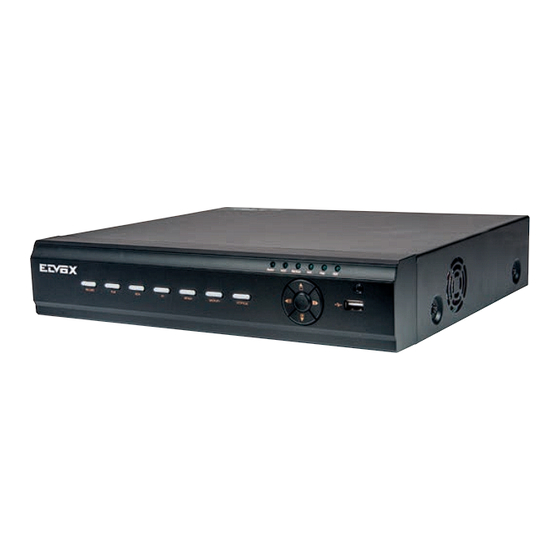
Manuale per il collegamento e l’uso Installation and operation manual 46241.F16H - 46241.F32H NVR 16 canali o 32 canali, H.265, con HDD da 2 TB 16- or 32-channel NVR , H.265, with 2 TB HDD... -
Page 2: Table Of Contents
Indice Introduzione ...........................................2 Riepilogo ..........................................2 Caratteristiche ........................................2 Descrizione del pannello anteriore ..................................3 Descrizione del pannello posteriore ..................................4 Collegamenti .........................................5 Guida all'utilizzo di base.......................................6 Avvio e spegnimento ......................................6 2.1.1 Avvio ..........................................6 2.1.2 Spegnimento ......................................6 Telecomando ..........................................6 Controllo del mouse .......................................7 Istruzioni di immissione testo ....................................7 Utilizzo pulsanti più... - Page 3 Gestione allarmi ..........................................37 Allarme Sensore ........................................37 Allarme di movimento ......................................37 9.2.1 Configurazione movimento ..................................37 9.2.2 Configurazione della gestione dell'allarme di movimento ........................38 Allarme di eccezione ......................................38 9.3.1 Impostazioni di gestione delle eccezioni ..............................38 9.3.2 Impostazioni offline IPC ...................................38 9.4 Notifica eventi allarme ......................................39 9.4.1 Uscita allarme ......................................39 9.4.2 E-mail (E-mail): ......................................39 9.4.3 Display ........................................39 9.4.4...
-
Page 4: Introduzione
1 Introduzione 1.1 Riepilogo Basata sulle tecnologie SOC e sui sistemi embedded più all'avanguardia del settore, questa serie di NVR adotta l'ultimo design di interfaccia utente e supporta la gestione intelligente delle telecamere IP e della ricerca per fascia oraria, delle registrazioni. Questa serie di NVR, di grande potenza e semplicità di utilizzo, è... -
Page 5: Descrizione Del Pannello Anteriore
• Supporto di ricerca, riproduzione e backup da remoto • Supporto di attivazione e disattivazione allarme manuale • Supporto di CVM-ELVOX per la gestione del dispositivo. • Supporto di funzione NAT e scansione di QRCode mediante telefono cellulare e PAD • Supporto di sorveglianza mobile mediante telefoni o PAD mediante iOS o Android OS... -
Page 6: Descrizione Del Pannello Posteriore
1.4 Descrizione del pannello posteriore In questa sezione prendiamo ad esempio soltanto una parte dei pannelli posteriore per presentare le loro interfacce e le loro connessioni. Le interfacce e le posizioni delle interfacce valgono solo come riferimento. Far riferimento all'apparecchiatura in dotazione. Nome Descrizioni ALARM OUT (USCITA ALLARME) Uscita del relè;... -
Page 7: Collegamenti
1.5 Collegamenti • Collegamenti video Video Output (Uscita video): Supporta uscita video VGA (dove prevista) e HDMI. È possibile collegare il monitor in maniera simultanea o indipendente mediante queste interfacce di uscita video. • Collegamenti audio Ingresso Audio: Connessione a microfono, pickup, ecc. Uscita audio: Connessione a cuffie, amplificatore o altri dispositivi di uscita audio. -
Page 8: Guida All'utilizzo Di Base
2 Guida all'utilizzo di base 2.1 Avvio e spegnimento Prima di collegare l'unità all'alimentazione, verificare che tutti i collegamenti siano stati eseguiti correttamente. Un corretto avvio e arresto è estremamente importante per la durata del dispositivo. 2.1.1 Avvio 1- Collegare il dispositivo di visualizzazione in uscita all'interfaccia VGA/HDMI del NVR. 2- Collegare il mouse e accendere. Il dispositivo si avvia e il LED di alimentazione diventa blu. 3- Comparirà... -
Page 9: Controllo Del Mouse
Pulsante Funzione REC (Registra) Consente di attivare manualmente la registrazione. Search Accede al modo di ricerca MENU Accede al menu Exit Esce dall'interfaccia corrente ENTER Conferma la scelta o l'impostazione Pulsante direzionale Sposta il cursore durante la configurazione. ZOOM Esegue lo zoom avanti. Nessuna funzione disponibile al momento Controlla la riproduzione. Play(Pause)/Stop/Previous Frame/Next Frame/Speed Down/ Speed Up (Play(Pausa)/Stop/Frame precedente/Frame successivo/Rallenta/Accelera) Multi... -
Page 10: Procedura Guidata E Interfaccia Principale
3 Procedura guidata e interfaccia principale 3.1 Procedura guidata per l'avvio Le icone del disco verranno visualizzate in alto nell'interfaccia di avvio. È possibile visualizzare il numero e lo stato di ciascun disco in maniera veloce e intuitiva attraverso queste icone ( : disco assente;... - Page 11 4- QRCode. È possibile scansionare il QRCode attraverso l’applicativo client installato nel telefono cellulare o nel PAD per accedere istantaneamente. Per maggiori dettagli vedere il paragrafo 12.1 Sorveglianza Client Mobile. 5- Aggiunta Telecamera. Fare clic su "Refresh" (Aggiorna) per aggiornare l'elenco delle telecamere IP online che si trovano nella stessa rete locale dell'NVR e fare clic per aggiungere la telecamera cercata. Fare clic su "Add All" (Aggiungi Tutto) per aggiungere le telecamere nell'elenco. Fare clic per eliminare la telecamera aggiunta. Fare clic su "Delete All" (Elimina tutto) per eliminare tutte le telecamere aggiunte.
-
Page 12: Interfaccia Principale
7- Impostazioni registrazione. Sono disponibili due modalità di registrazione: automatica e manuale. Automatica: Selezionare una modalità automatica nell'interfaccia come indicato di seguito, quindi fare clic sul pulsante "OK" per salvare le impostazioni. Per maggiori dettagli vedere 7.1.1 Configurazione modalità. Manuale: Impostare "Sensor Record" (Registrazione Sensore), "Motion Record" (Registrazione Movimento) e "Schedule Record" (Registrazione Programmazione) di ciascuna telecamera. Fare clic sul pulsante "OK" per salvare le impostazioni. Per maggiori dettagli vedere 7.1.1 Configurazione modalità. 3.2 Interfaccia principale 3.2.1 Spiegazione interfaccia principale I pulsanti nell'area 1 vengono spiegati nella tabella seguente. Pulsante Significato Pulsante Start. -
Page 13: Pannello Impostazioni
Pulsante Significato Pulsante permanenza (per maggiori dettagli vedere 5.2.2 Visualizzazione sequenza rapida e 5.2.4 Visualizzazione schema in sequenza). Fare clic per abilitare OSD; fare clic sull’icona per disattivare OSD. Fare clic su per impostare il tempo di riproduzione predefinito prima di iniziare la riproduzione istantanea (8.1 Riproduzione istantanea) oppure per passare all'interfaccia di riproduzione per le operazioni di riproduzione (8.2 Presentazione interfaccia di riproduzione);... -
Page 14: Funzioni Principali
Il pannello impostazioni è composto da sette moduli. Ogni modulo offre una serie di voci di funzionalità con i collegamenti per una maggiore comodità d'utilizzo. Come esempio, in questo caso viene selezionato il modulo Telecamera. Il modulo Telecamera offre link utili tra cui "Add Camera" (Aggiungi Telecamera), "Edit Camera" (Modifica telecamera), "Image Settings" (Impostazioni Immagini), "Motion" (Movimento) e "PTZ". Fare clic su Telecamera per passare all'interfaccia di gestione della telecamera come indicato di seguito. -
Page 15: Gestione Della Telecamera
4 Gestione della telecamera 4.1 Aggiunta/Modifica telecamera 4.1.1 Aggiunta Telecamera La rete dell'NVR deve essere impostata prima di aggiungere la telecamera IP (per maggiori dettagli vedere 11.1.1 Configurazione TCP/IPv4). Fare riferimento all’immagine seguente. Fare clic Add Camera (Aggiungi telecamera) nel pannello impostazioni o sul pulsante nell'angolo in alto a destra della finestra di anteprima per visualizzare la finestra "Add Camera" (Aggiungi telecamera), come illustrato in basso. È possibile aggiungere rapidamente o aggiungere manualmente la telecamera IP. • Aggiunta rapida Selezionare le telecamere e fare clic su "Add" (Aggiungi) per aggiungere le telecamere. Fare clic su per modificare l'indirizzo IP della telecamera, il nome utente, la password e così via. Fare clic su "Default password" (Password Predefinita) per impostare il nome utente e la password predefinita di ciascuna... -
Page 16: Aggiunta/Modifica Gruppo Telecamere
4.2 Aggiunta/Modifica gruppo telecamere 4.2.1 Aggiunta gruppo telecamere Fare clic su "Edit Camera Group" (Modifica Gruppo Telecamere) nell'interfaccia precedente per passare all'interfaccia come indicato di seguito. Fare clic su per visualizzare la finestra come indicato di seguito. Impostare il nome del gruppo e il tempo di permanenza (il tempo di permanenza della visualizzazione della sequenza del gruppo di telecamere) nella finestra. Selezionare le telecamere e fare clic su "Add" (Aggiungi) per aggiungerle al gruppo. Fare clic su per visualizzare le telecamere nel gruppo dopo avere effettuato l'aggiunta al gruppo. 4.2.2 Modifica gruppo telecamere Fare clic su per modificare le informazioni sul gruppo, tra cui il nome del gruppo e il tempo di permanenza. Fare clic su per eliminare il gruppo. -
Page 17: Introduzione Anteprima Live
5 Introduzione anteprima live 5.1 Introduzione all'interfaccia di anteprima La telecamera deve essere aggiunta subito dopo aver effettuato l'accesso al sistema (per maggiori informazioni vedere 4.1.1 Aggiunta telecamera). Fare riferimento all'interfaccia indicata di seguito, trascinare una telecamera dalla finestra di anteprima in un'altra finestra per invertire le finestre della telecamera. Fare clic sulla finestra di anteprima per visualizzare la barra degli strumenti come indicato nell'area 1; fare clic con il tasto destro sulla finestra di anteprima per visualizzare l'elenco menu. La barra degli strumenti e l’elenco menu sono presentati nella tabella seguente. Pulsante Elenco menu Significato... -
Page 18: Modalità Anteprima
5.2 Modalità anteprima 5.2.1 Anteprima per modalità display Imposta le diverse modalità dello schermo e le sequenze di visualizzazione delle telecamere come richiesto, quindi salvare le modalità di visualizzazione classificate per area di sorveglianza, priorità e così via. Fare riferimento all’immagine seguente. Fare doppio clic su una modalità di visualizzazione nell'elenco modalità di visualizzazione per vedere le immagini live in questa modalità. •... -
Page 19: Visualizzazione Gruppo Telecamere In Sequenza
5.2.3 Visualizzazione gruppo telecamere in sequenza È possibile avviare la visualizzazione del gruppo telecamere in sequenza se il gruppo telecamere è stato visualizzato (per maggiori dettagli vedere 4.2.1 Aggiunta Gruppo Telecamere). 1- Passare all'interfaccia di anteprima live, quindi selezionare una finestra della telecamera. 2- Fare doppio clic su un gruppo di telecamere sul lato destro dell'interfaccia. Le telecamere nel gruppo avvieranno la visualizzazione del gruppo di telecamere una alla volta nella finestra della telecamera selezionate. -
Page 20: Configurazione Anteprima Immagine
per avviare la visualizzazione dello schema in sequenza. Fare doppio clic sull'interfaccia di visualizzazione della sequenza per mettere in pausa la visualizzazione; fare doppio clic di nuovo per ripristinare la visualizzazione. Fare clic su per fermare la visualizzazione. 5.3 Configurazione anteprima immagine 5.3.1 Impostazioni OSD Fare clic su StartSettingsCameraImageOSD Settings (Start/Impostazioni/Telecamera/Immagine/Impostazioni OSD) per passare all'interfaccia come indicato di seguito. -
Page 21: Regolazione Immagine
5.3.4 Regolazione immagine Passare all'interfaccia di anteprima live e fare clic sul pulsante sulla barra degli strumenti sotto la finestra della telecamera per passare all'interfaccia di regolazione dell'immagine. • Regolazione immagine Selezionare la telecamera e fare clic su "Image Adjustment" (Regolazione Immagine) per passare alla scheda di regolazione dell'immagine. Fare riferimento all'immagine sopra. Trascinare il cursore per impostare i valori di luminosità, il contrasto, la saturazione, la tonalità della telecamera. Controllare la nitidezza, la dinamica ampia e riduzione disturbi, quindi trascinare il cursore per impostare il valore. Fare clic sul pulsante "Default" (Predefinito) per impostare questi parametri ai valori predefiniti. - Page 22 Le spiegazioni di questi parametri e pulsanti sono le seguenti: Pulsante/Parametro Significato Fare clic su per ampliare/ridurre lo zoom dell’immagine della telecamera. In caso di selezione della modalità manuale, il pulsante di messa a fuoco e "One Key Focus" e "Day/night mode switch Modalità di messa a fuoco autofocus" (Messa a fuoco rapida / Messa a fuoco automatica con selezionatore modalità giorno e notte)) sarà disponibile; in caso di selezione della modalità automatica, l'impostazione per l'intervallo di tempo sarà disponibile. Fare clic sui pulsanti per aumentare/ridurre la distanza focale.
-
Page 23: Ptz
6 PTZ 6.1 Introduzione interfaccia controllo PTZ È possibile movimentare l'IP dome o PTZ per mezzo dell’interfaccia per il controllo PTZ. Fare clic su sulla barra degli strumenti in fondo alla finestra di anteprima live per passare all'interfaccia di controllo PTZ come indicato di seguito. È... - Page 24 Fare riferimento all'immagine mostrata di seguito. Trascinare il mouse da C a D per visualizzare un rettangolo verde; l'area del rettangolo verrà ridotta. • Controllo 3D avanzato Fare doppio clic sul pulsante sinistro del mouse su qualsiasi area dell'immagine della telecamera; la dimensione dell'immagine verrà raddoppiata e centrata sul punto cliccato.
-
Page 25: Impostazioni Preset
1- Immettere il nome cruise nella finestra "Add Cruise" (Aggiungi Cruise), quindi fare clic su "Add Preset" (Aggiungi Preset) per visualizzare la finestra di aggiunta Preset (Prima di aggiungere i preset del cruise, aggiungere i preset della telecamera dome). 2- Nella finestra “Add Preset” (Aggiungi Preset), selezionare il nome, l'ora, la velocità, quindi fare clic sul pulsante "OK". 3- Nell finestra "Add Cruise" (Aggiungi Cruise), è possibile fare clic su per riselezionare la preimpostazione, quindi cambiare l'ora e la velocità. Fare clic per eliminare la preimpostazione. Fare clic sul pulsante "Add" (Aggiungi) per salvare il cruise. Fare clic su per avviare il cruise, quindi fare clic su per fermare il cruise nell'elenco cruise nella scheda operazioni cruise;... - Page 26 • Aggiunta cruise Fare clic su nell'elenco della telecamera sul lato destro dell'interfaccia per visualizzare le informazioni sul cruise della telecamera dome, quindi fare clic per aggiungere il cruise. Le operazioni della finestra "Add Cruise" (Aggiungi Cruise) sono simili a quelle dell'interfaccia di controllo PTZ; per maggiori dettagli vedere 6.1 Spiegazioni Interfaccia Controllo PTZ. •...
-
Page 27: Gestione Disco E Registrazione
7 Gestione disco e registrazione 7.1 Configurazione della registrazione 7.1.1 Configurazione modalità Formattare gli HDD prima della registrazione (per maggiori dettagli vedere 7.5 Gestione Disco). Fare clic su StartSettingsRecordMode Settings (Start/ Impostazioni/Registrazione/Impostazioni Modalità) per passare all'interfaccia impostazioni modalità. È possibile impostare l'ora di registrazione in "Manual Record Settings" (Impostazioni Registrazione Manuale), quindi fare clic sul pulsante "Apply" (Applica) per salvare le impostazioni. Esistono due modalità di registrazione: modalità automatica e modalità manuale. • Modalità automatica Registrazione movimento: La registrazione allarme movimento sarà... -
Page 28: Configurazione Avanzata
7.1.2 Configurazione avanzata Fare clic su StartSettingsRecordAdvanced (Start/Impostazioni/Registrazione/Avanzate) per passare all'interfaccia seguente. Abilitare o disabilitare la registrazione del ciclo (registrazione ciclo: i dati più vecchi di registrazione verranno sostituiti con i più nuovi quando i dischi sono pieni). Impostare il tempo di registrazione pre-allarme, il tempo di registrazione post-allarme, il tempo di scadenza delle registrazioni di ciascuna telecamera e fare clic su "Apply" (Applica) per salvare le impostazioni. -
Page 29: Impostazione Programmazioni
7.3 Impostazione Programmazioni 7.3.1 Aggiunta programmazione Fare clic su StartSettingsRecordRecord ScheduleEdit Schedules (Start/Impostazioni/Registrazione/Programmazione Registrazione/Modifica Programmazione) per passare all'interfaccia come indicato di seguito. “247”, “245” e “242” sono le programmazioni predefinite; non è possibile modificare o eliminare “247” mentre “245” e “242” possono essere modificate e eliminate. Fare clic sul nome programmazione per visualizzare le informazioni di programmazione dettagliate sul lato sinistro dell'interfaccia. Le sette righe corrispondono ai sette giorni della settimana, mentre ciascuna riga corrisponde alle 24 ore al giorno. -
Page 30: Configurazione Programmazione Registrazione
• Impostazione programmazione giorno Fare clic su e trascinare il cursore sulla scala del tempo per impostare il tempo di registrazione; fare clic su e trascinare il cursore sulla scala del tempo per eliminare l'area selezionata. È possibile impostare manualmente l'ora di inizio della registrazione e l'ora di fine. Fare clic su e fare clic su "Manual" (Manuale) su ciascun giorno per visualizzare una finestra come indicato di seguito. Impostare l'ora di inizio e l'ora di fine nella finestra, quindi fare clic su "OK" per salvare le impostazioni. Fare clic su "All" (Tutti) per impostare la registrazione tutti i giorni; fare clic su "Reverse" (Inverti) per invertire il tempo selezionato e non selezionato in un giorno; fare clic su "Clear All" (Cancella Tutto) per cancellare tutte l'area selezionata in un giorno. -
Page 31: Modo Registrazione
7.4 Modo registrazione 7.4.1 Registrazione manuale Primo metodo: Fare clic su sulla barra degli strumenti in basso nell'interfaccia di anteprima live per abilitare la registrazione della telecamera. Secondo metodo: Passare all'interfaccia di anteprima live quindi fare clic con il tasto destro sul menu "Manually Record On" (Attivazione Manuale Registrazione) nella finestra della telecamera oppure fare clic su sulla barra degli strumenti sotto la finestra della telecamera per avviare la registrazione. -
Page 32: Visualizzazione Dischi E Informazioni S.m.a.r.t
Ciascun gruppo può aggiungere i dischi e le telecamere da altri gruppi. Ciascun disco e telecamera possono essere aggiunti solo in un gruppo. Selezionare un gruppo di dischi, quindi fare clic su nella riga della telecamera o del disco per visualizzare una finestra. Selezionare i dischi o le telecamere nella finestra e fare clic su "Add" (Aggiungi). 7.5.2 Visualizzazione dischi e informazioni S.M.A.R.T. Fare clic su StartSettingsDiskView Disk Information (Start/Impostazioni/Disco/Visualizzazione Informazioni Disco) per visualizzare le informazioni sull'HDD; fare clic su “S.M.A.R.T. Information” (Informazioni S.M.A.R.T.) per visualizzare lo stato di lavoro dell'HDD. Fare riferimento all’immagine seguente. -
Page 33: Riproduzione E Backup
8 Riproduzione e backup 8.1 Riproduzione istantanea Fare clic sul pulsante sulla barra degli strumenti in fondo alla finestra di anteprima della telecamera per riprodurre la registrazione. Fare riferimento all’immagine seguente. Trascinare l’indicatore di stato della riproduzione per cambiare l’ora di riproduzione. È anche possibile fare clic sul menu di scelta rapida “Instant Playback” (Riproduzione istantanea) nella finestra della telecamera e poi impostare l’ora di riproduzione istantanea per riprodurre la registrazione. 8.2 Introduzione all’interfaccia di riproduzione Fare clic sul pulsante sulla barra degli strumenti in fondo all’interfaccia di anteprima istantanea o fare clic su Start... - Page 34 Pulsante Significato Fare clic sul pulsante per andare indietro di 30s e fare clic su per andare avanti di 30s. Pulsante Elenco/tag eventi. Fare clic per visualizzare la registrazione degli eventi di manuale/programmazione/sensore/movimento e le informazioni tag. Pulsante Backup. Trascinare il mouse sulla sequenza temporale per selezionare i periodi di tempo e le telecamere, quindi fare clic sul pulsante per eseguire il backup della registrazione.
-
Page 35: Ricerca E Riproduzione Registrazione
8.3 Ricerca e riproduzione registrazione 8.3.1 Ricerca e riproduzione per immagine time-slice 1- Fare clic su Start Search By Time-sliced Image (Start/Cerca immagine per intervallo di tempo) per passare alla scheda “By Time-sliced Image” (Immagine per intervallo temporale). Ci sono due modalità di visualizzazione: per tempo e per telecamera. Nella modalità di visualizzazione temporale è possibile vedere fino a 64 anteprime delle telecamere. Se il numero di anteprime è superiore a 64, le telecamere saranno inserite direttamente per nome, non per anteprima. possibile inserire fino a 196 nomi di telecamere. Se il numero di nomi telecamere è superiore a 196, la modalità di visualizzazione temporale sarà... -
Page 36: Ricerca E Riproduzione Per Tempo
8.3.2 Ricerca e riproduzione per tempo 1- Fare clic su StartSearchBy Time (Start/Cerca/Per tempo) per passare alla scheda “By Time” (Per tempo), come indicato di seguito. 2- Fare clic sul pulsante in fondo all’interfaccia per aggiungere la telecamera di riproduzione. È possibile aggiungere fino a 16 telecamere per la riproduzione. Fare clic su “Modify” (Modifica) in alto a destra della finestra della telecamera per cambiare telecamera e fare clic su “Clear” (Cancella) per rimuovere la telecamera. 3- Fare clic sulla finestra della telecamera per riprodurre la registrazione nella casella di riproduzione piccola a sinistra dell'inerfaccia. È possibile impostare la data in alto a sinistra dell’interfaccia, selezionare il tipo di evento e fare clic sulla sequenza temporale o sul pulsante sotto la sequenza temporale per impostare l’ora. La finestra della telecamera riprodurrà la registrazione in base all’ora e al tipo di evento impostati. -
Page 37: Ricerca E Riproduzione Per Tag
8.3.4 Ricerca e riproduzione per tag Solo aggiungendo i tag è possibile riprodurre la registrazione per ricerca di tag. Fare clic su StartPlayback (Start/Riproduzione) per passare all’interfaccia di riproduzione e fare clic sul pulsante in fondo alla finestra della telecamera per aggiungere tag quando si desidera contrassegnare il momento di riproduzione della telecamera selezionata. Fare clic su StartSearchTag Management (Start/Cerca/Gestione tag) per passare alla scheda “Tag Management” (Gestione tag). Fare clic sul pulsante nell’interfaccia per riprodurre la registrazione. -
Page 38: Backup Per Evento
8.4.2 Backup per evento 1- Fare clic su Start Backup By Event (Start/Backup/Per evento) per passare alla scheda “By Evento” (Per evento). 2- Fare clic sul pulsante per impostare l’ora di inizio e di fine in alto a sinistra dell’interfaccia. 3- Selezionare i tipi di eventi e le telecamere. 4- Fare clic sul pulsante per cercare la registrazione. I dati sulla registrazione ricercata saranno visualizzati nell’elenco. Fare clic pulsantenell’elenco per riprodurre la registrazione nella finestra di popup piccola della riproduzione. Fare clic sull'icona per eseguire il backup della registrazione. Selezionare i dati della registrazione o nella parte superiore dell’elenco e fare clic sul pulsante “Backup” per il backup dei dati di registrazione. -
Page 39: Gestione Allarmi
9 Gestione allarmi 9.1 Allarme Sensore Per completare tutte le impostazioni dell'allarme sensore, abilitare l'allarme sensore di ciascuna telecamera, quindi impostare la gestione allarme di ciascuna telecamera. 1- Fare clic su StartSettingsAlarm Sensor Alarm (Start/Impostazioni/Allarme/Allarme sensore) per passare all'interfaccia seguente. 2- Selezionare il tipo di allarme (NO o NC normalmente aperto o chiuso) secondo il tipo di attivazione del sensore. -
Page 40: Configurazione Della Gestione Dell'allarme Di Movimento
Duration (Durata): si riferisce all'intervallo di tempo tra rilevamenti di movimenti adiacenti. Ad esempio, se il tempo di durata viene impostato a 10 secondi, una volta che il sistema rileva un movimento, attiverà l'allarme senza rilevare altri movimenti (specifici della telecamera) per 10 secondi. Se durante tale periodo la telecamera rileva un altro movimento, lo interpreta come un proseguimento del movimento precedente, altrimenti come movimento isolato. 3- Trascinare l'immagine della telecamera per impostare l'area di movimento. Si può impostare più di un'area di movimento. Fare clic sul pulsante "All"... -
Page 41: Notifica Eventi Allarme
2- Abilitare o disabilitare "Snap" (Scatta istantanea), "Alarm-out" (Uscita allarme), "Preset" (Imp. pred.), "Buzzer" (Ronzatore), "Pop-up Video" (Video popup), "Pop-up Message Box" (Casella messaggi popup) e "E-mail" (E-mail). Le impostazioni offline IPC sono simili a quelle dell'allarme sensore (per maggiori dettagli vedere 9.1 Allarme sensore ). 3- Fare clic sul pulsante "Apply" (Applica) per salvare le impostazioni. -
Page 42: Allarme Manuale
9.5 Allarme manuale Fare clic sul pulsante sulla barra degli strumenti in fondo all'interfaccia di anteprima live per visualizzare una finestra. Fare clic sul pulsante "Trigger" (Attiva) per attivare l'allarme. Fare clic sul pulsante "Clear" (Cancella) per arrestare l'allarme. 9.6 Visualizzazione dello stato di allarme Fare clic su StartSettingsAlarmAlarm Status (Start/Impostazioni/Allarme/Stato allarme) o fare clic sul pulsante sulla barra degli strumenti in fondo all'interfaccia di anteprima per visualizzare lo stato di allarme. Fare clic sul pulsante "Clear" (Cancella) per arrestare il ronzatore quando si attiva il relativo allarme. Fare clic sul pulsante per visualizzare le informazioni dettagliate, come indicato di seguito. -
Page 43: Gestione Account E Autorizzazioni
10 Gestione account e autorizzazioni 10.1 Gestione account Fare clic su Start Settings Account and Authority Account Edit User (Start/Impostazioni/Account e autorità/Account/Modifica utente) per accedere all'interfaccia, come indicato di seguito. L'area 1 illustra le autorizzazioni utente. L'area 2 illustra l'elenco utenti. Fare clic sull'utente riportato nell'elenco per visualizzare le relative autorizzazioni utente nell'area 1. -
Page 44: Login E Logout Utente
• Modifica domanda di sicurezza È possibile impostare la protezione password solo per l'utente admin. Fare clic sul pulsante "Edit Security Question" (Modifica domanda di sicurezza" e quindi impostare le domande e le risposte nella finestra popup. Se la password viene dimenticata, fare riferimento a D4 Appendice A FAQ per maggiori dettagli. • Modifica password È possibile modificare solo la password dell'utente admin . Fare clic sul pulsante "Modify Password" (Modifica password) per visualizzare una finestra. Immettere la password corrente, quindi impostare la nuova password. Fare clic sul pulsante "OK" per salvare le impostazioni. -
Page 45: Modifica Gruppo Di Autorizzazioni
Fare clic sul pulsante per aggiungere il gruppo di autorizzazioni. Impostare il nome del gruppo, selezionare le autorizzazioni secondo quanto richiesto, quindi impostare le autorizzazioni "Local" (Locale) e "Remote" (Remoto). Fare clic sul pulsante "Add" (Aggiungi) per salvare le impostazioni. 10.3.2 Modifica gruppo di autorizzazioni Andare all'interfaccia "Edit Permission Group"(Modifica gruppo autorizzazioni), quindi fare clic sul pulsante nell'elenco gruppo per modificare il gruppo di autorizzazioni (le operazioni dell'interfaccia "Edit Permission Group" sono simili a quelle dell'interfaccia "Add Permission Group", per maggiori dettagli vedere 10.3.1. Aggiunta gruppo di autorizzazioni ). Fare clic sul pulsante per salvare il gruppo come un altro gruppo. -
Page 46: Gestione Dispositivi
11 Gestione dispositivi 11.1 Configurazione di rete 11.1.1 Configurazione TCP/IPv4 • Impostazioni dell'indirizzo IP Fare clic su StartSettingsNetworkTCP/IPv4 (Start/Impostazioni/Rete/TCP/IPv4) per passare all'interfaccia seguente. Selezionare "Obtain an IP address automatically" (Ottenere un indirizzo IP automaticamente) e "Obtain DNS automatically" (Ottenere DNS automaticamente) per ottenere l'indirizzo IP e DNS automaticamente, o immettere manualmente l'indirizzo IP, maschera di sottorete, gateway, DNS preferito e DNS alternativi. Fare clic sul pulsante "Apply" (Applica) per salvare le impostazioni. • Impostazioni PPPoE Nell'interfaccia di cui sopra, selezionare "Enable" (Abilita) in "PPPoE Settings" (Impostazioni PPPoE), quindi immettere il nome utente e la password ottenute dal rivenditore. Fare clic sul pulsante "Apply" (Applica) per salvare le impostazioni. 11.1.2 Configurazione porte Fare clic su StartSettingsNetworkPort (Start/Impostazioni/Rete/Porta) per passare all'interfaccia, come indicato di seguito. Immettere la porta HTTP, porta server e porta RTSP dell'NVR, quindi fare clic su "Apply" (Applica) per salvare le porte. -
Page 47: Configurazione Ddns
11.1.3 Configurazione DDNS Il DDNS viene utilizzato per controllare l'indirizzo IP dinamico mediante il nome di dominio. Si può accedere all'NVR facilmente se il DDNS è abilitato e configurato. Fare clic su StartSettingsNetworkDDNS (Start/Impostazioni/Rete/DDNS) per passare all'interfaccia, come indicato di seguito. Selezionare "Enable" (Abilita) e quindi selezionare il tipo di DDNS. Immettere l'indirizzo del server, il nome di dominio, il nome utente e la password secondo il tipo di DDNS selezionato. Fare clic sul pulsante "Test" (Prova) per verificare l'efficacia delle informazioni immesse. Fare clic sul pulsante "Apply" (Applica) per salvare le impostazioni. -
Page 48: Configurazione E-Mail
3- Generare il nome di dominio, quindi fare clic sul pulsante Request Domain (Richiedi dominio). 4- Quando la richiesta del nome di dominio sarà stata finalizzata, le informazioni sul nome di dominio saranno visualizzate nell'elenco. 5- Fare clic su StartSettingsNetworkDDNS (Start/Impostazioni/Rete/DDNS) per passare all'interfaccia delle impostazioni DDNS. Abilitare DDNS, quindi selezionare il tipo di DDNS www.dvrdydns.com . Immettere il nome utente, la password e il nome di dominio registrati, quindi fare clic sul pulsante "Apply" (Applica). -
Page 49: Configurazione Upnp
Fare clic sul pulsante "Edit Recipient" (Modifica destinatario) per passare all'interfaccia seguente. Fare clic sul pulsante "Add" (Aggiungi), quindi immettere l'indirizzo e-mail del destinatario nella finestra popup. Fare clic sul pulsante "Add" (Aggiungi) nella finestra per aggiungere il destinatario. Fare clic su per eliminare il destinatario dall'elenco. Fare clic sul pulsante "Apply" (Applica) per salvare le impostazioni. Fare clic sul pulsante "Edit Sender" (Modifica mittente) per passare all'interfaccia di configurazione e-mail del mittente. 11.1.5 Configurazione UPnP UPnP consente l'accesso all'NVR tramite il client Internet Explorer nel WAN, mediante il router e senza mappatura porte. 1- Fare clic su StartSettingsNetworkUPnP (Start/Impostazioni/Rete/UPnP) per passare all'interfaccia seguente. 2- Assicurarsi che il router supporti la funzione UPnP e che UPnP sia abilitato nel router. 3- Impostare l'indirizzo IP dell'NVR, la maschera di sottorete, il gateway, ecc. -
Page 50: Configurazione Di Base
11.2 Configurazione di base 11.2.1 Configurazione comune Fare clic su StartSettingsSystemBasicGeneral Settings (Start/Impostazioni/Sistema/Base/Impostazioni generali) per passare all'interfaccia seguente. Impostare il nome del dispositivo, il n. del dispositivo, la lingua, il formato video e la risoluzione. Abilitare o disabilitare il wizard, "Log In Automatically" (Esegui il login automatico) e "Log Out Automatically" (Esegui il logout automatico) (se selezionati, è possibile impostare il tempo di attesa). Fare clic sul pulsante "Apply" (Applica) per salvare le impostazioni. Device Name (Nome dispositivo): il nome del dispositivo. Può essere visualizzato sul lato client o CMS per aiutare l'utente a riconoscere il dispositivo in remoto. -
Page 51: Backup E Ripristino
3- Fare clic su StartSettingsSystemMaintenanceUpgrade (Start/Impostazioni/Sistema/Manutenzione/Upgrade) per passare all'interfaccia "Upgrade" (Aggiorna). Selezionare il dispositivo USB nell'opzione "Device Name" (Nome dispositivo) e andare al percorso in cui è presente il software di upgrade. Selezionare il software di upgrade, quindi fare clic su "Upgrade" (Aggiorna). Il sistema può riavviarsi automaticamente durante l'upgrade. Attendere qualche istante e non spegnere l'NVR durante l'upgrade. Nota: il file system del dispositivo USB utilizzato per l'upgrade, il backup e il ripristino deve essere in formato FAT32. 1.5 Backup e ripristino Il file di configurazione dell'NVR può essere esportato su dispositivi di archiviazione; è possibile ripristinare la configurazione su altri NVR dello stello modello importando il file di configurazione per risparmiare tempo. -
Page 52: Sorveglianza Remota
12 Sorveglianza remota 12.1 Sorveglianza Client Mobile 1- Attivare la funzione NAT nell'NVR. Fare riferimento al paragrafo 11.1.6 Configurazione NAT per maggiori dettagli. 2- Scaricare e installare il client mobile “SuperLive Plus” in un dispositivo mobile con sistema operativo Android o iOS. 3- Eseguire il client mobile, andare all'interfaccia "Add Device" (Aggiungi dispositivo), quindi fare clic su per scansionare il QRCode dell'NVR (Andare al percorso StartSettingsSystemInformationBasic (Start/Impostazioni/Sistema/Informazioni/Base) per visualizzare il QRCode dell'NVR). 4- Dopo aver scansionato il QRCode con successo, immettere la password di login nel client mobile. 12.2 Accesso alla rete LAN 1- Fare clic su StartSettingsNetworkTCP/IPv4 (Start/Impostazioni/Rete/TCP/IPv4) per accedere all'interfaccia “TCP/IPv4”. Impostare indirizzo IP, maschera di sottorete, DNS preferito e DNS alternativi dell'NVR. -
Page 53: Accesso Alla Rete Wan
A FAQ (Domande frequenti) per maggiori dettagli). Immettere il numero di serie (fare clic sul pulsante nella barra degli strumenti situata nella parte inferiore dell'interfaccia di anteprima live per visualizzare il numero di serie dell'NVR), nome utente (il nome utente predefinito dell'NVR è admin) e password (la password predefinita dell'NVR è 123456) dell'NVR, selezionare la lingua del display e fare clicl sul pulsante “LOGIN” per accedere all'interfaccia web del cliente. • Accesso PPPoE 1- Fare clic su StartSettingsNetworkTCP/IPv4 (Start/Impostazioni/Rete/TCP/IPv4) per accedere all'interfaccia “TCP/IPv4”. Selezionare “Enable” (Attiva) nella sezione “PPPoE settings” (Impostazioni PPPoE), quindi immettere il nome utente e la password ricevuti dal proprio ISP. Fare clic sul pulsante "Apply" (Applica) per salvare le impostazioni. - Page 54 • Avvia anteprima Selezionare una finestra nell'area di anteprima, quindi selezionare una telecamera online sul pannello di sinistra per visualizzare l'anteprima della telecamera nella finestra. È possibile fare clic sull'icona nella barra degli strumenti per visualizzare l'anteprima di tutte le telecamere. • Descrizione del pannello di sinistra Fare clic sul simbolo sul pannello di sinistra per nascondere il pannello e sul simbolo per mostrare il pannello. È possibile visualizzare tutte le telecamere e i gruppi aggiunti sul pannello di sinistra.
-
Page 55: Riproduzione Remota
Fare clic sulla finestra della telecamera nell'area di anteprima, quindi fare clic sul pulsante per impostare il flusso di anteprima live della telecamera e il flusso di registrazione su flusso principale in modalità di registrazione manuale; fare clic sul pulsante per impostare il flusso di anteprima live della telecamera e il flusso di registrazione su flusso secondario. Nella scheda del flusso secondario, impostare risoluzione, FPS e bitrate, quindi fare clic sul pulsante “Apply” (Applica) per salvare le impostazioni. Descrizione del pannello Operation (Funzionamento): Pulsante Significato Fare clic per scattare. Fare clic sul pulsante per avviare la registrazione e fare clic di nuovo per interromperla. Fare clic per ampliare l'immagine della telecamera, quindi trascinare il mouse sull'immagine della telecamera per visualizzare l'area nascosta. -
Page 56: Backup Remoto
2- Fare clic sul pulsante per cercare i dati registrati, quindi fare clic sul pulsante o direttamente sulla sequenza temporale per riprodurre la registrazione. Il funzionamento della sequenza temporale di riproduzione è simile a quello della sequenza temporale presente nel programma principale dell'NVR. Fare riferimento al paragrafo 8.2 Introduzione all’interfaccia di riproduzione per maggiori dettagli. -
Page 57: Appendice A Faq (Domande Frequenti)
Appendice A FAQ (Domande frequenti) D1. Perché non riesco a trovare l'HDD? Controllare il cavo di alimentazione e il cavo dati SATA dell'HDD per assicurarsi che siano collegati correttamente. La potenza dell’alimentatore deve essere sufficiente per alimentare il dispositivo. Utilizzare esclusivamente l’alimentatore fornito in dotazione con l'NVR. Assicurarsi che gli HDD siano compatibili con l'NVR: Vedere Appendice C Elenco dei dispositivi compatibili per maggiori dettagli. L'HDD potrebbe essersi danneggiato. - Page 58 D8. Non è possibile scaricare i controlli ActiveX. Come mi comporto? Il browser di Internet Explorer blocca i controlli ActiveX. Impostare i parametri come indicato di seguito. sull'icona 1. Aprire il browser di Internet Explorer. Fare clic Opzioni Internet. 2. Selezionare SicurezzaLivello personalizzato. Far riferimento alla Fig. 8-1. 3. Attivare tutte le opzioni secondarie in "Controlli ActiveX e plug-in". Far riferimento alla Fig. 8-2. 4. Quindi fare clic sul pulsante “OK” per completare l'impostazione. I controlli ActiveX sono bloccati da altri plug-in o antivirus. Disabilitarli o effettuare le impostazioni necessarie. Fig.
- Page 59 D9: Come si riproduce il file di backup? Registrazione con backup effettuato dall'NVR: inserire la chiavetta USB in cui sono stati salvati i file di backup della registrazione nell'interfaccia USB del PC e aprire il percorso della chiavetta USB. Il backup della registrazione può essere effettuato in formato proprietario e in formato AVI dall'NVR. • Se è selezionato il formato proprietario quando l'NVR effettua il backup della registrazione, verrà creato automaticamente un pacchetto di backup RPAS compresso nella chiavetta USB insieme ai dati della registrazione. Decomprimere il file “RPAS.zip” e fare clic su “RPAS.exe” per installare il lettore. Una volta che l'installazione è completata, aprire il lettore e fare clic sul pulsante “Open Folder” (Apri cartella) situato al centro dell'interfaccia per selezionare i dati di registrazione.
-
Page 60: Appendice B Calcolo Della Capacità Di Registrazione
Appendice B Calcolo della capacità di registrazione La capacità di registrazione dipende fondamentalmente dalla risoluzione della registrazione, dal flusso di registrazione e dal bitrate. Dai diversi parametri di qualità dell'immagine dipende l'occupazione dello spazio del disco a parità di tempi. Più sono alti la risoluzione della registrazione, il flusso di registrazione e il bitrate della registrazione, maggiore è lo spazio del disco occupato a parità di tempi. Il formato del calcolo della capacità di registrazione è mostrato in seguito. Capacità di registrazione (MB) = Bitrate (Kbps) ÷1024 ÷ 8 × 3600 × Ore di registrazione al giorno × Giorni di archiviazione della registrazione × numeri di canali 3600 significa registrazione di un'ora (1TB=1024GB, 1GB=1024MB, 1MB=1024KB, 1Byte=8bit). -
Page 61: Appendice C Elenco Dei Dispositivi Compatibili
Appendice C Elenco dei dispositivi compatibili Elenco HDD compatibili Marchio e serie Capacità Serie Barracuda 500 GB /1 TB /2 TB /3 TB Serie SV35 (raccomandata) 1 TB /2 TB /3 TB Seagate Serie Surveillance HDD (raccomandata) 1 TB /2 TB /3 TB /4 TB /6 TB Serie Blue 500 GB /1 TB Serie Green... - Page 62 Index Introduction ..........................................62 Summary ..........................................62 Features ..........................................62 Front Panel Descriptions ......................................63 Rear Panel Descriptions ......................................64 Connections .........................................65 Basic Operation Guide .......................................67 Startup & Shutdown ......................................67 2.1.1 Startup ........................................67 2.1.2 Shutdown ........................................67 Remote Controller ........................................67 Mouse Control ........................................67 2.4 Text-input Instruction ......................................67 Common Button Operation ....................................67 Wizard &...
- Page 63 Alarm Management ........................................97 Sensor Alarm ........................................97 Motion Alarm ........................................97 9.2.1 Motion Configuration ....................................97 9.2.2 Motion Alarm Handling Configuration ................................ 98 9.3 Exception Alarm ........................................98 9.3.1 Exception Handling Settings ..................................98 9.3.2 IPC Offline Settings ....................................98 9.4 Alarm Event Notification .......................................99 9.4.1 Alarm-out ........................................99 9.4.2 E-mail ......................................... 99 9.4.3 Display ........................................
- Page 64 1 Introduction 1.1 Summary Based on the most advanced SOC technology and embedded system in the field, this series of the NVR adopt the new designed human interface and support the smart management of the IP camera and the record search of slice. This series of the NVR which are powerful and easy to use are provided with excellent image quality and stable system. They are centralized monitoring management products with high performance and high quality specially designed for network video monitoring field.
- Page 65 NETWORK FUNCTIONS • Support TCP/IP and PPPoE, DHCP, DNS, DDNS, UPnP, NTP, SMTP protocol and so on • Support allow and block list function and the allow and block IP address/IP segment/MAC address can be set • Support multiple browsers including IE8/9/10/11, Firefox, Opera, Chrome (available only for the versions lower than 45) and Safari in MAC system • Support remote achievement, configuration, import and export of the NVR parameters and other system maintenance operations including remote upgrading and system restart • Support remote camera configuration of the NVR including video parameters, image quality and so on • Support remote searching, playback and backup of the NVR...
- Page 66 1.4 Rear Panel Descriptions Here we only take a part of real panels for example to introduce their interfaces and connections. The interfaces and locations of the interfaces are only for references. Please take the real object as the standard. Name Descriptions ALARM OUT Relay output; connect to external alarm Grounding AUDIO IN Audio input; connect to audio input device, like microphone, pickup, etc DC12V DC12V power input Network port ALARM IN Alarm inputs for connecting sensors HDMI Connect to high definition display device Connect USB storage device or USB mouse AUDIO OUT Audio output; connect to sound box...
- Page 67 1.5 Connections • Video Connections Video Output: Supports VGA/HDMI video output. You can connect to monitor through these video output interfaces simultaneously or independently. • Audio Connections Audio Input: Connect to microphone, pickup, etc. Audio Output: Connect to headphone, sound box or other audio output devices. • Alarm Connections Some models may support this function. Take 16 CH alarm inputs and 1 CH alarm output for example. Alarm Input: Alarm IN 1~16 are 16 CH alarm input interfaces.
-
Page 68: Note
2 Basic Operation Guide 2.1 Startup & Shutdown Please make sure all the connections are done properly before you power on the unit. Proper startup and shutdown are crucial to expending the life of your device. 2.1.1 Startup 1- Connect the output display device to the VGA/HDMI interface of the NVR. 2- Connect with the mouse and power. The device will boot and the power LED would turn blue. 3- A WIZARD window will pop up (you should select the display language the first time you use the NVR). Refer to 3.1 Startup Wizard for details. -
Page 69: Mouse Control
Button Function Record manually Search To enter search mode MEUN To enter menu Exit To exit the current interface ENTER To confirm the choice or setup Direction button To move cursor in setup ZOOM To zoom in No function temporarily To control playback. Play(Pause)/Next Frame/Speed Up/Stop/Previous Frame/Speed Down Multi To choose multi screen display mode Next To switch the live image To go to sequence view mode INFO... - Page 70 3 Wizard & Main Interface 3.1 Startup Wizard The disk icons will be shown on the top of the startup interface. You can view the number and status of each disk quickly and conveniently through these icons : no disk; : unavailable disk;...
- Page 71 4- QRCode. You can scan the QRCode through mobile client which is installed in the mobile phone or PAD to log in the mobile client instantly. Please refer to 12.1 Mobile Client Surveillance for details. 5- Add Camera. Click “Refresh” to refresh the list of online IP cameras which are in the same local network with NVR and then click to add the searched camera. Click “Add All” to add all the cameras in the list. Click to delete the added camera. Click “Delete All” to delete all the added cameras.
- Page 72 7- Record Settings. Two record modes are available: auto and manual. Auto: Select one auto mode in the interface as shown below and then click “OK” button to save the settings. See 7.1.1 Mode Configuration for details. Manual: Set the “Sensor Record”, “Motion Record” and “Schedule Record” of each camera. Click “OK” to save the settings. See 7.1.1 Mode Configuration for details. 3.2 Main Interface 3.2.1 Main Interface Introduction The buttons in area 1 are introduced in the table below. Button Meaning Start button. Click it to pop up area 3. Full screen button. Click it to show full screen; click it again to exit the full screen.
- Page 73 Button Meaning Dwell button (see 5.2.2 Quick Sequence View and 5.2.4 Scheme View In Sequence for details). Click it to enable OSD; click to disable OSD. Click to set the default playback time before starting instant playback (8.1 Instant Playback) or going to the playback interface for playback operations (8.2 Playback Interface Introduction);...
- Page 74 There are some function items on the left side of the camera management interface. Click each item to go to corresponding interface or window. For instance, click “Add Camera” to pop up the window as shown below. Click the main menus on the top of the camera management interface to go to corresponding interfaces. Refer to the picture below. For instance, you can go to system setup interface by clicking “System” tag.
-
Page 75: Camera Management
4 Camera Management 4.1 Add/Edit Camera 4.1.1 Add Camera The network of the NVR should be set before adding IP camera (see 11.1.1 TCP/IPv4 Configuration for details). Refer to the pictures below. Click Add Camera in the setup panel or in the top right corner of the preview window to pop up the “Add Camera” window as shown below. You can quickly add or add the IP camera manually. • Quickly Add Check the cameras and then click “Add” to add cameras. Click to edit the camera’s IP address, username and password and so on. Click “Default Password” to set the default username and password of each camera. - Page 76 4.2 Add/Edit Camera Group 4.2.1 Add Camera Group Click “Edit Camera Group” in the above interface to go to the interface as shown below. Click to pop up the window as shown below. Set the group name and dwell time (the dwell time of the camera group sequence view) in the window. Check the cameras and then click “Add” to add group. Click to view the cameras in the group after adding group. 4.2.2 Edit Camera Group Click to modify the group information such as group name and dwell time.
- Page 77 5 Live Preview Introduction 5.1 Preview Interface Introduction You should add camera first after logging on to the system (see 4.1.1 Add Camera for details). Refer to the interface as shown below, drag one camera in the preview window to another window for camera window exchanging. Click the preview window to show the tool bar as shown in area 1; right click the preview window to show the menu list. The tool bar and menu list are introduced in the table below.
- Page 78 • Add Display Mode Method One: 1- Click “Customize Display Modes” in the above interface and then set the screen mode. 2- Add the cameras and adjust the cameras’ display sequence as required. 3- Click “Save” button under the display mode list and then enter the display mode name in the popup window, click “OK” button to save the current display mode. Method Two: 1- Click StartSettingsSystemBasicOutput Settings to go to the interface and then set the screen mode. 2- Double click the camera or camera group in the list to add them to the selected window. 3- Click to save the current display mode (refer to 5.2.4 Scheme View In Sequence for detail configurations). The display mode will be saved and displayed in the display mode list in the live preview interface.
- Page 79 2- Double click one camera group on the right side of the interface. The cameras in the group will start camera group view one by one in the selected camera window. You can also drag the group directly to any preview window. Right click on the group view window and then click “Close Dwell” button to stop the view. 5.2.4 Scheme View In Sequence Click StartSettingsSystemBasicOutput Settings to go to the interface as shown below. Area 1 displays all the dwell schemes; area 2 shows the detailed information of the scheme;...
- Page 80 5.3 Preview Image Configuration 5.3.1 OSD Settings Click StartSettingsCameraImageOSD Settings to go to the interface as shown below. Select the camera, input the camera name (or double click the camera name in the camera list to change the camera name), enable or disable the name and time OSDs (if enabled, drag the red name and time OSDs directly in the image view area to change the OSDs’ display position) and select the date and time formats. Click “Apply” to save the settings.
- Page 81 5.3.4 Image Adjustment Go to live preview interface and then click button on the tool bar under the camera window to go to the image adjustment interface. • Image Adjustment Select the camera and then click “Image Adjustment” to go to image adjustment tab. Refer to the above picture. Drag the slider to set the camera’s brightness, contrast, saturation and hue value. Check sharpen, wide dynamic and denoise and then drag the slider to set the value. Click “Default” button to set these parameters to default values.
- Page 82 The introductions of these parameters and buttons are as follows: Button/Parameter Meaning Click to zoom in/out the image. If manual mode is selected, focus button & “One Key Focus” & “Day/night mode switch autofocus” will be available; if auto Focus Mode mode is selected, the time interval setup will be available. Click to increase/decrease the focal length. Click it to focus instantly. Day/night mode If checked, the lens will focus automatically when the camera is switching day/night mode.
- Page 83 6 PTZ 6.1 PTZ Control Interface Introduction You can control the IP dome or PTZ which connects to the IP camera for PTZ control. Click on the tool bar at the bottom of the live preview window to go to the PTZ control interface as shown below. You can select another IP dome or PTZ which connects to the IP camera on the top right of the interface for PTZ control.
- Page 84 Refer to the picture as shown below. Drag the mouse from C to D to get a green rectangle and the rectangle area will be zoomed out. • Advanced 3D Control Double click the left button of the mouse on any area of the camera image and then the image size will be doubled and centered on the clicked point. Press and hold the left button of the mouse on any area of the camera image to zoom in the image;...
-
Page 85: Preset Setting
1 Input the cruise name in the “Add Cruise” window and then click “Add preset” to pop up the “Add Preset” window (Before adding preset to the cruise, please add preset of the dome first). 2 In the “Add Preset” window, select the preset name, preset time and preset speed and then click “OK” button. 3 In the “Add Cruise” window, you can click to reselect the preset, then change the preset time and speed. Click to delete the preset. Click “Add” button to save the cruise. Click to start the cruise and click to stop the cruise in the cruise list of the cruise operation tab; click “Delete” button to delete the selected cruise. You can also go to cruise setting interface for cruise setting, see 6.3 Cruise Setting for details. 6.2 Preset Setting Click StartSettingsCameraPTZPreset to go to the interface as shown below. - Page 86 • Add Cruise Click in the camera list on the right side of the interface to display the cruise information of the dome and then click to add cruise. The operations of the “Add Cruise” window are similar to that of the PTZ control interface; please see 6.1 PTZ Control Interface Introduction for details. •...
-
Page 87: Record Configuration
7 Record & Disk Management 7.1 Record Configuration 7.1.1 Mode Configuration Please format the HDDs before recording (refer to 7.5 Disk Management for details). Click StartSettingsRecordMode Settings to go to the mode settings interface. You can set the record time under the “Manual Record Settings” and then click “Apply” button to save the settings. There are two record modes: auto mode and manual mode. • Auto Mode Motion Record: Motion alarm record will be enabled when motion alarm happens. - Page 88 7.1.2 Advanced Configuration Click StartSettingsRecordAdvanced to go to the following interface. Enable or disable cycle record (cycle record: the earliest record data will be replaced by the latest when the disks are full). Set the pre-alarm record time, post-alarm record time and expiration time of each camera and then click “Apply” to save the settings. Pre-alarm Record Time: set the time to record before the actual recording begins. Post-alarm Record Time: set the time to record after the actual recording is finished.
-
Page 89: Schedule Setting
7.3 Schedule Setting 7.3.1 Add Schedule Click StartSettingsRecordRecord ScheduleEdit Schedules to go to the interface as shown below. “24x7”, “24x5” and “24x2” are the default schedules; you cannot edit or delete “24x7” while “24x5” and “24x2” can be edited and deleted. Click the schedule name to display the detailed schedule information on the left side of the interface. The seven rows stand for the seven days in a week and each row stands for 24 hours in a day. Blue stands for the selected time and gray stands for unselected time. - Page 90 • Set Day Schedule Click and then drag the cursor on the time scale to set record time; click and then drag the cursor on the time scale to delete the selected area. You can manually set the record start time and end time. Click and then click “Manual” on each day to pop up a window as shown below. Set the start and end time in the window and then click “OK” to save the settings.
- Page 91 7.4 Record Mode 7.4.1 Manual Recording Method One: Click on the tool bar at the bottom of the live preview interface to enable recording of the camera. Method Two: Go to live preview interface and then click the right-click menu “Manually Record On” in the camera window or click on the tool bar under the camera window to start recording. Note: Click Start ...
- Page 92 7.5.2 View Disk and S.M.A.R.T. Information Click StartSettingsDiskView Disk Information to view the HDD information; click “S.M.A.R.T. Information” to view the working status of the HDD. Refer to the picture below.
-
Page 93: Instant Playback
8 Playback & Backup 8.1 Instant Playback Click on the tool bar at the bottom of the preview camera window to play back the record. Refer to the picture below. Drag the playback progress bar to change the playback time. You can also click the right-click menu “Instant Playback” in the camera window and then set the instant playback time to play back the record. 8.2 Playback Interface Introduction Click on the tool bar at the bottom of the live preview interface or click StartPlayback to go to the playback interface as shown below. - Page 94 Button Meaning Click to step backward 30s and click to step forward 30s. Event list/tag button. Click it to view the event record of manual/schedule/sensor/ motion and the tag information. Backup button. Drag the mouse on the time scale to select the time periods and cameras, and then click the button to back up the record.
- Page 95 8.3 Record Search & Playback 8.3.1 Search & Playback by Time-sliced Image 1- Click StartSearchBy Time-sliced Image to go to “By Time-sliced Image” tab. There are two view modes: by time and by camera. In the time view mode, a maximum of 64 camera thumbnails can be showed. If the camera thumbnail number is more than 64, the cameras will be listed directly by their camera name, not the thumbnail. A maximum of 196 camera names can be listed. If the camera name number is more than 196, the time view mode will be disabled and the camera view mode will be available only. 2- Select one camera in the interface and then click “Open” button. 3- Click the image box to play the record in the small playback box on the left side of the interface (the box which has image inside indicates that the record data exist). 4- Refer to the picture below. Drag the color blocks on the time scale to select the record data and then click “Backup” button to pop up a window; select the device, backup path and backup format in the window and then click “Backup” button to start the backup. 5- Click “Playback” button to play the record in the playback interface (refer to 8.2 Playback Interface Introduction for details). Click “Close” to close the interface. Time Slice Mode Selecting: Method One: Click “Year”, “Month” or “Day” button under the record time scale to select the time slice mode. In “Day” mode, click on the left/right side of the time scale to view the record of the last/next day; click “Minute” in the “Picture” option under the time scale to select “Minute” mode (in “Minute”...
- Page 96 8.3.2 Search & Playback by Time 1- Click StartSearchBy Time to go to “By Time” tab as shown below. 2- Click on the bottom of the interface to add playback camera. A maximum of 16 cameras can be added for playback. Click “Modify” on the top right corner of the camera window to change the camera and click “Clear” to remove the camera. 3- Click the camera window to play the record in the small playback box on the left side of the interface. You can set the date on the top left of the interface, check the event type as required and click the time scale or click under the time scale to set the time. The camera window will play the record according to the time and event type you set.
- Page 97 8.3.4 Search & Playback by Tag Only if you add the tags can you play the record by tag search. Click StartPlayback to go to the playback interface and then click on the bottom of the camera window to add tag when you want to mark the playback time point of the selected camera. Click StartSearchTag Management to go to “Tag Management” tab.
- Page 98 8.4.2 Backup by Event 1- Click StartBackupBy Event to go to “By Event” tab. 2- Click to set the start time and end time on the left top of the interface. 3- Check the event types and cameras. 4- Click to search the record. The searched record data will be displayed in the list. Click in the list to play the record in the small popup playback window.
-
Page 99: Alarm Management
9 Alarm Management 9.1 Sensor Alarm To complete the entire sensor alarm settings, you should enable the sensor alarm of each camera and then set up the alarm handling of each camera. 1- Click StartSettingsAlarmSensor Alarm to go to the following interface. 2- Select the alarm type (NO or NC) according to trigger type of the sensor. -
Page 100: Exception Alarm
3- Drag the camera image to set the motion area. You can set more than one motion area. Click “All” to set the whole camera image as the motion area. Click “Reverse” to swap the motion area and the non-motion area. Click “Clear” to clear all the motion areas. 4- Click “Apply” to save the settings. Click “Processing Mode” to go to the alarm handling configuration interface of the motion alarm. 9.2.2 Motion Alarm Handling Configuration Click StartSettingsAlarmMotion Alarm to go to the following interface. 2- Enable or disable “Snap”, “Alarm-out”, “Preset”, “Buzzer”, “Pop-up Video” and “E-mail”. The alarm handling setting of motion alarm is similar to that of the sensor alarm (see 9.1 Sensor Alarm for details). 3- Click “Apply” to save the settings. You can click “Motion Settings” to go to the motion configuration interface. 9.3 Exception Alarm 9.3.1 Exception Handling Settings Click StartSettingsAlarmExceptionException Handling Settings to go to the interface as shown below. 2- Enable or disable “Alarm-out”, “Buzzer”, “Pop-up Message Box” and “E-mail”. The exception handling settings are similar to that of the sensor alarm (see 9.1 Sensor Alarm for details). - Page 101 9.4 Alarm Event Notification 9.4.1 Alarm-out 1- Click StartSettingsAlarmEvent Notification to go to the following interface. 2- Set the delay time and the schedule of each alarm-out. You can click “Edit Schedules” to edit the schedules (see 7.3.1 Add Schedule for details). 3- Click “Apply” to save the settings. You can click “Test” to test the alarm output. 9.4.2 E-mail Click StartSettingsAlarmEvent NotificationE-mail to go to the e-mail configuration interface. Set the e-mail address of the recipients. See 11.1.4 E-mail Configuration for details. 9.4.3 Display Click StartSettingsAlarmEvent NotificationDisplay to go to the display configuration interface. Set the duration time of the pop-up video and the pop- up message box. Click “Apply” to save the settings. 9.4.4 Buzzer Click StartSettingsAlarmEvent NotificationBuzzer to go to the buzzer configuration interface. Set the delay time of the buzzer and then click “Apply” to save the setting. You can click “Test” to test the buzzer. 9.5 Manual Alarm Click on the tool bar at the bottom of the live preview interface to pop up a window. Click “Trigger” to start alarm. Click “Clear” to stop alarm.
- Page 102 9.6 View Alarm Status Click StartSettingsAlarmAlarm Status or click on the tool bar at the bottom of the live preview interface to view the alarm status. Click “Clear” button to stop the buzzer when the buzzer alarm happens. Click to view the detail information as shown below. If the exception information is more than one page, you can input the number in the box and then click to jump to the specified page. Click to view the exception alarm information in the previous/next page. Click to play the alarm record.
- Page 103 10 Account & Permission Management 10.1 Account Management Click StartSettingsAccount and AuthorityAccountEdit User to go to the interface as shown below. Area 1 displays the user permissions. Area 2 displays the user list. Click the user in the list to display its user permissions in area 1. There are three default permission groups (“Administrator”, “Advanced” and “Ordinary”) available when adding accounts. You can manually add new permission group (see 10.3.1 Add Permission Group for details).
- Page 104 • Recover Password Click “Recover Password” to reset the password to 123456. • Edit User Click “Edit User” to pop up the window as shown below. The admin is enabled, its permission control is closed and permission group cannot be changed by default. You can enable or disable other users (if disabled, the user will be invalid), open or close their permission control (if closed, the user will get all the permissions which the administrator permission group has) and set their permission groups. Click “OK” to save the settings.
- Page 105 Click to add permission group. Set the group name, check the permissions as required and then set the “Local” and “Remote” permissions. Click “Add” to save the settings. 10.3.2 Edit Permission Group Go to “Edit Permission Group” interface and then click in the group list to edit the permission group (the operations of the “Edit Permission Group” are similar to that of the “Add Permission Group”, please see 10.3.1 Add Permission Group for details). Click to save the group as another group. Click to delete the permission group. The three default permission groups (“Administrator”, “Advanced” and “Ordinary”) cannot be deleted. 10.4 Black and White List 1- Click StartSettingsAccount and AuthoritySecurity to go to the following interface. 2- Check “Enable” and then choose “Enable Allow List” or “Enable Block List” (the PC client of which the IP address is in the allow list can access NVR remotely while the PC client in the block list cannot).
-
Page 106: Device Management
11 Device Management 11.1 Network Configuration 11.1.1 TCP/IPv4 Configuration • IP Address Settings Click StartSettingsNetworkTCP/IPv4 to go to the following interface. Check “Obtain an IP address automatically” and “Obtain DNS automatically” to get the IP address and DNS automatically, or manually input IP address, subnet mask, gateway, preferred DNS and alternate DNS. Click “Apply” to save the settings. • PPPoE Settings In the above interface, check “Enable” in “PPPoE Settings” and then input the username and password obtained from the dealer. Click “Apply” to save the settings. 11.1.2 Port Configuration Click StartSettingsNetworkPort to go to the interface as shown below. Input the HTTP port, server port and RTSP port of the NVR and then click “Apply” to save the ports. HTTP Port: the default HTTP port of the NVR is 80. The port number can be changed to others like 81. The port is mainly used to IE remote access. If you want to access the NVR through IE, you should input IP address plus HTTP port in the IE address bar like http://192.168.11.61:81. - Page 107 11.1.3 DDNS Configuration The DDNS is used to control the dynamic IP address through domain name. You can access to the NVR easily if the DDNS is enabled and configured. Click StartSettingsNetworkDDNS to go to the interface as shown below. Check “Enable” and then select the DDNS type. Input the server address, domain name, username and password according to the selected DDNS type. Click “Test” to test the effectiveness of the input information. Click “Apply” to save the settings. You will have to input the server address and domain name if some DDNS types are selected. Go to the relative DNS website to register domain name and then input the registered domain information here).
- Page 108 Create domain name and then click Request Domain. 4- After you successfully request your domain name, you will see your domain name information in the list. 5- Click StartSettingsNetworkDDNS to go to DDNS setting interface. Enable DDNS and then select the www.dvrdydns.com DDNS type. Input the registered username, password and domain name and then click “Apply”.
- Page 109 Click “Edit Recipient” to go to the following interface. Click “Add” and then input the recipient’s e-mail address in the popup window. Click “Add” in the window to add the recipient. Click to delete the recipient in the list. Click “Apply” to save the settings. Click “Edit Sender” to go to the e-mail configuration interface of the sender. 11.1.5 UPnP Configuration By UPnP you can access the NVR through IE client which is in WAN via router without port mapping. 1- Click StartSettingsNetworkUPnP to go to the following interface. 2- Make sure the router supports UPnP function and the UPnP is enabled in the router. 3- Set the NVR’s IP address, subnet mask and gateway and so on corresponding to the router.
- Page 110 11.2 Basic Configuration 11.2.1 Common Configuration Click StartSettingsSystemBasicGeneral Settings to go to the following interface. Set the device name, device No., language, video format and resolution. Enable or disable wizard, “Log In Automatically” and “Log Out Automatically” (if checked, you can set the wait time). Click “Apply” to save the settings. Device Name: The name of the device. It may display on the client end or CMS that help user to recognize the device remotely. Video Format: Two modes: PAL and NTSC.
- Page 111 11.5 Backup and Restore You can back up the configuration file of the NVR by exporting the file to other storage devices; you can recover the configuration to other NVRs which are of the same model with the NVR by importing the configuration file to other NVRs for time saving. Insert the USB storage device into the USB interface of the NVR and then click StartSettingsSystemMaintenanceBackup and Restore to go to the interface. • Backup Select the USB device in “Device Name” option; go to the path where you want to store the configuration backup file and then click “Backup” button; finally click “OK” button in the popup window. • Recover Select the USB device in “Device Name” option; find the configuration backup file and then click “Recover” button; finally click “OK” button in the popup window. 11.6 View Log Click StartSettingsSystemMaintenanceView Log to go to the log view interface.
-
Page 112: Remote Surveillance
12 Remote Surveillance 12.1 Mobile Client Surveillance 1- Enable NAT in the NVR. Refer to 11.1.6 NAT Configuration for details. 2- Download and install the mobile client “SuperLive Plus” into the mobile device with the Android or iOS system. 3- Run the mobile client, go to the “Add Device” interface and then click to scan the QRCode of the NVR (Go to StartSettingsSystemInformationBasic to view the QRCode of the NVR). 4- After scanning the QRCode successfully, input the login password to log in mobile client. 12.2 Web LAN Access 1- Click StartSettingsNetworkTCP/IPv4 to go to the “TCP/IPv4” interface. Set the IP address, subnet mask, gateway, preferred DNS and alternate DNS of the NVR. - Page 113 3- Open IE browser on a computer, input the NAT server address http://www.autonat.com/n9000 in the IE address bar and then press enter to go to the interface as shown below (the relative components will be downloaded automatically if you access the NVR through NAT for the first time; you can refer to Q8 in Appendix A FAQ for details if the components cannot be downloaded automatically). Input the serial number (click on the tool bar at the bottom of the live preview interface to see the serial number of the NVR), user name (the user name of the NVR, admin by default) and password (the password of the NVR, 123456 by default) of the NVR, select the display language and then click “LOGIN”...
- Page 114 • Start Preview Select a window in the preview area and then click one online camera on the left panel to preview the camera in the window. You can click in the tool bar to preview all the cameras. • Left Panel Introduction Click on the left panel to hide the panel and click to show the panel.
- Page 115 Click one camera window in the preview area and then click to set the camera’s live preview stream and record stream to main stream in manual record mode; click to set the camera’s live preview stream and record stream to sub stream. In sub stream tab, set the resolution, FPS and bitrate and then click “Apply” to save the settings.
- Page 116 The operation of the playback time scale is similar to that of the time scale in the main program of the NVR. Please refer to 8.2 Playback Interface Introduction for details. Introduction of playback control buttons: Button Meaning Stop button. Rewind button.
-
Page 117: Appendix A Faq
Appendix A Q1. Why can’t I find the HDD? Please check the power and SATA data cables of the HDD to make sure they are well connected. For some NVRs with the 1U or small 1U case, the power of the adapter may be not enough for operating them. Please use the power adaptor supplied along with the NVR. - Page 118 Q8. ActiveX control cannot be downloaded. How can I do? IE browser blocks ActiveX control. Please do setup as per the steps mentioned below. 1- Open IE browser. Click Internet Options. 2- Select SecurityCustom Level. Refer to Fig 8-1. 3- Enable all the sub options under “ActiveX controls and plug-ins”. Refer to Fig 8-2. 4- Then click “OK” to finish setup.
- Page 119 Q9. How to play the backup file? Record backed up by NVR: insert the USB device in which the record backup files is saved to the USB interface of the PC and then open the USB device path. The record can be backed up in the private format and AVI format by NVR. • If you select the private format when backing up record by NVR, a RPAS compression package will be backed up to the USB device automatically along with the record data. Uncompress the “RPAS.zip” and then click “RPAS.exe” to set up RPAS. After the setup is completed, open RPAS player and then click “Open Folder” button in the middle of the interface to select the record data. Refer to the above picture.
-
Page 120: Appendix B Calculate Recording Capacity
Appendix B Calculate Recording Capacity The recording capacity is mainly up to the record resolution, record stream and bitrate. Different image quality parameters decide different disk capacity occupation in equal times. The bigger the record resolution, record stream and record bitrate is, the more disk capacity is taken up in equal times. The calculation format of recording capacity is shown as below. - Page 121 Appendix C Compatible Device List Compatible HDD list Brand and Series Capacity Barracuda Series 500GB /1TB /2TB /3TB SV35 Series (recommended) 1TB /2TB /3TB Seagate Surveillance HDD Series (recommended) 1TB /2TB /3TB /4TB /6TB Blue Series 500GB /1TB Green Series 2TB /3TB /4TB Western Digital Purple Series (recommended)
- Page 124 Vimar SpA: Viale Vicenza, 14 36063 Marostica VI - Italy Tel. +39 0424 488 600 - Fax (Italia) 0424 488 188 49400989A0 00 16 03 Fax (Export) 0424 488 709 VIMAR - Marostica - Italy www.vimar.com...
Need help?
Do you have a question about the 46241.F16H and is the answer not in the manual?
Questions and answers