Bosch WAN series Instruction Manual And Installation Instructions
Hide thumbs
Also See for WAN series:
Table of Contents
Advertisement
Advertisement
Table of Contents

Related Manuals for Bosch WAN series


Summary of Contents for Bosch WAN series
- Page 1 Washing machine WAN... en Instruction Manual and Installation Instructions...
-
Page 2: Your New Washing Machine
Your new washing machine Display rules : Warning! You have chosen a Bosch washing machine. This combination of symbol and signal word indicates a possibly dangerous Please take a few minutes to read and situation. Not heeding the warning can become familiar with the advantages of cause death or injuries. -
Page 3: Table Of Contents
Contents e n I n s t r u c t i o n M a n u a l a n d I n s t a l l a t i o n I n s t r u c t i o n s Intended use. -
Page 4: Intended Use
Intended use Faults and what to do about them Intended use Emergency release ... . . 33 This appliance is intended for private ■ I n t e n d e d u s e Information on the display panel . -
Page 5: Safety Instructions
Safety instructions Warning Safety instructions Risk of death! Children may lock themselves inside The following safety information and appliances and find themselves in a life- S a f e t y i n s t r u c t i o n s warnings are provided to protect you threatening situation. -
Page 6: Installation
Safety instructions Installation Warning Risk of fire/material damage/damage Warning to the appliance! The use of extension cords or power Risk of electric shock/fire/material strips may result in fire due to damage/damage to the appliance! overheating or short circuiting. If the appliance is not installed properly, Connect the appliance directly to an this may lead to a dangerous situation. -
Page 7: Operation
Safety instructions e.g. stain remover/cleaning solvent, Caution! may cause an explosion in the drum. Material damage/damage to the Rinse the laundry thoroughly with water appliance before washing it in the machine. If the water pressure is too high or ■ too low, the appliance may not be Warning able to operate properly, and it may... -
Page 8: Cleaning/Maintenance
Safety instructions Repairs and any other work on the Caution! ■ appliance must only be conducted Material damage/damage to the by our customer service or by an appliance electrician. The same applies for If the amount of laundry in the ■... -
Page 9: Environmental Protection
Environmental protection If the laundry is subsequently dried ■ Environmental in a tumble dryer, select the spin speed according to the tumble dryer protection manufacturer's instructions. Packaging/used appliance E n v i r o n m e n t a l p r o t e c t i o n Dispose of packaging in an environmentally-responsible manner. -
Page 10: Positioning And Connecting
Positioning and connecting In addition, a hose clamp (24 - 40 mm Positioning and diameter, available from specialist dealers) is required to connect the connecting water drain hose to a siphon. Included with the appliance Useful tools P o s i t i o n i n g a n d c o n n e c t i n g Spirit level for aligning ■... -
Page 11: Installation Surface
Positioning and connecting Installation surface Removing the transport bolts The washing machine must be Note: Caution! aligned in a stable manner so that it Damage to the appliance does not move around. The machine is secured for ■ The installation surface must be firm transportation using transport bolts. -
Page 12: Hose And Cable Lengths
Positioning and connecting A longer supply hose. ■ Water inlet Warning Risk of death! There is a risk of electric shock if you touch live components. Notes To prevent leakage or water ■ damage, follow the instructions in this section! Only operate the washing machine ■... -
Page 13: Water Outlet
Positioning and connecting Connect the water supply hose to the Caution! water tap (¾" = 26.4 mm) and to the Damage to the appliance/fabrics appliance: If the end of the drain hose is immersed in the drained water, water may be sucked back into the appliance and may damage the appliance/fabrics. -
Page 14: Levelling
Positioning and connecting Levelling Notes The mains voltage and voltage ■ Level the appliance using a spirit level. indicated on the washing machine (rating plate) are the same. Incorrect levelling may result in intense The connected load and fuse noise, vibrations and "wandering". required are specified on the rating Loosen the lock nuts using a plate. -
Page 15: Before Washing For The First Time
Positioning and connecting Before washing for the first Transportation time e.g. when moving home The washing machine was thoroughly Preparatory work: tested before leaving the factory. To Turn off the water tap. remove any residues from the Reduce the water pressure in the production and to remove water that supply hose. -
Page 16: Getting To Know The Appliance
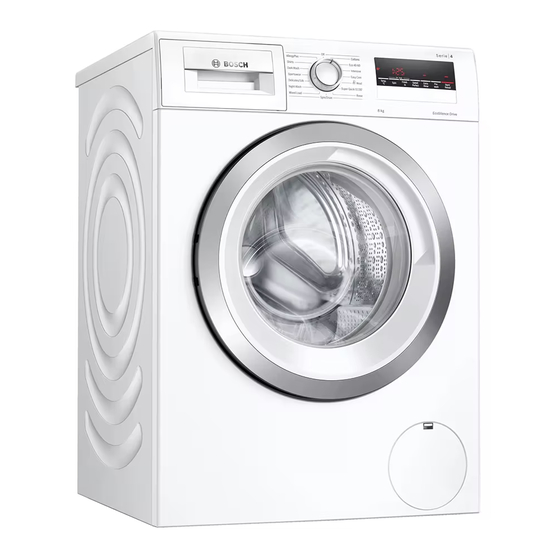
Getting to know the appliance Getting to know the appliance Washing machine G e t t i n g t o k n o w t h e a p p l i a n c e Detergent drawer Operating/display panel Loading door with door handle Service flap... -
Page 17: Control Panel
Getting to know the appliance Control panel Control panel differs depending on the model 0 Programme selector ( Programmes ~ Supplementary 8 Display panel for settings and sheet for the operating and information installation instructions. Display panel The tables show possible setting Note: Button Display in- Description... - Page 18 Getting to know the appliance Button Display in- Description Display in- Description dicator dicator Speed Eco Childproof lock Easy Iron * ~ "Childproof lock" on page 27 Rinse Plus * ~ "Faults and what to do Button for starting a pro- about them"...
-
Page 19: Laundry
Laundry Laundry may discolour. Wash Note: Laundry white and coloured items separately. Wash new coloured items separately P reparing the laundry the first time you wash them. L a u n d r y Soiling ■ Caution! Wash laundry with the same level of Damage to the appliance/fabrics soiling together. -
Page 20: Soaking
Detergent Soaking Detergent Pour soaking agent/detergent into C orrect selection of detergent compartment II in accordance with D e t e r g e n t the manufacturer's instructions. The care label is crucial to ensure Select the desired programme. correct detergent selection, temperature Press the A button to start the and laundry treatment. -
Page 21: Saving Energy And Detergent
Programme default settings Saving energy and detergent Programme default For light and normal soiling, you can settings save energy (lower washing temperature) and detergent. The programme default settings for all P r o g r a m m e d e f a u l t s e t t i n g s programmes are preset at the factory Saving Soiling/note... -
Page 22: Finished In Ñ
Programme default settings Setting 0: The rinsing water is drained Use the Finished in ñ button to but there is no final spin. The laundry change the number of hours. stays wet inside the drum, e.g. for items Press the A button. that should not be spun. -
Page 23: Additional Programme Settings23
Additional programme settings Easy Iron Additional programme Setting depending on the model settings Reduces creasing thanks to a special spin sequence followed by fluffing and The available settings vary depending A d d i t i o n a l p r o g r a m m e s e t t i n g s on the model. -
Page 24: Operating The Appliance
Operating the appliance The maximum load and the duration ■ Operating the of the programme (alternately) appliance The maximum load appears only Note: when the door is opened. Preparing the washing O p e r a t i n g t h e a p p l i a n c e machine Change the programme default settings... -
Page 25: Placing Laundry Into The Drum
Operating the appliance Placing laundry into the drum Measure and add detergent and care products Warning Risk of death! Caution! Items of laundry pretreated with Damage to the appliance cleaning agents that contain solvents, Cleaning agents and agents for pre- e.g. -
Page 26: Starting The Programme
Operating the appliance for programmes with prewash or when the “Ready in” time is selected. For models without a measuring aid, pour the liquid detergent into the appropriate dispenser and place it in the drum. Measuring aid A* For liquid detergent Starting the programme Compartment II Detergent for the... -
Page 27: Childproof Lock
Operating the appliance Childproof lock Notes – Do not leave the door open for ( E 3 sec.) too long when adding/removing laundry as water from the laundry You can lock the washing machine to may leak out. prevent the functions you have set from –... -
Page 28: Programme End During Rinse Stop
Operating the appliance Programme end during Rinse Removing laundry/switching Stop off the appliance - - - appears in the display panel and Turn the program selector to off the indicator lamp of the A button position. The appliance is switched flashes. -
Page 29: Appliance Settings
Appliance settings ‹ = off, ‚ = quiet, Appliance settings ƒ = medium, „ = loud, … = very loud You can change the following settings: A p p l i a n c e s e t t i n g s The volume of the information ■... -
Page 30: Cleaning And Maintenance
Cleaning and maintenance Machine housing/control Cleaning and panel maintenance Wipe the housing and the control ■ Warning panel with a soft, damp cloth. C l e a n i n g a n d m a i n t e n a n c e Remove the detergent residue Risk of death! ■... -
Page 31: Cleaning The Measuring Aid For Liquid Detergent
Cleaning and maintenance Clean the detergent dispenser tray Detergent solution pump and insert with water and a brush, blocked and dry it. Clean the inside of the housing as well. Turn the tap off to prevent more Note: Fit the insert and lock it in place water from flowing in and to ensure that (push the cylinder onto the guide it is drained via the pump. -
Page 32: The Drain Hose At The Siphon Is Blocked
Cleaning and maintenance To prevent unused detergent Filter in the water supply is Note: from flowing into the outlet during the blocked next wash: Pour 1 litre of water into dispenser II and start the Spin First, reduce the water pressure in the programme. -
Page 33: Emergency Release
Faults and what to do about them Faults and what to do about them Emergency release F a u l t s a n d w h a t t o d o a b o u t t h e m e.g. -
Page 34: Faults And What To Do About Them
Faults and what to do about them Information on the display panel Display Cause/remedy è lights up The temperature is too high. Wait until the temperature drops. ■ The water level is too high. It is not possible to add laundry. Run the Spin pro- ■... - Page 35 Faults and what to do about them Faults and what to do about them Faults Cause/Remedy Water is leaking from the Attach the drain hose correctly or replace it. ■ appliance. Tighten the screw connection of the supply hose. ■ The machine is not filling Have you pressed the A button? ■...
- Page 36 After-sales service Faults Cause/Remedy The Å* symbol lights Have you used too much detergent? up in the display panel. Mix one tablespoon of fabric softener with 1/2 litre of water and pour it into Foam may also be leaking compartment II (not suitable for outdoor clothing, sportswear or items stuffed from the detergent with down).
- Page 37 Beratung und Reparaturauftrag bei Störungen 089 69 339 339 0810 550 511 0848 840 040 Die Kontaktdaten aller Länder finden Sie im beiliegenden Kundendienst- Verzeichnis. Robert Bosch Hausgeräte GmbH Carl-Wery-Straße 34 81739 München, GERMANY *9001179874* 9001179874 (9607)
Need help?
Do you have a question about the WAN series and is the answer not in the manual?
Questions and answers