Table of Contents
Advertisement
Quick Links
Advertisement
Table of Contents

Related Manuals for Ikelite 6870.80


Summary of Contents for Ikelite 6870.80
-
Page 1: Product Registration
Underwater Housing for Canon 80D Product Number 6870.80 Product Registration Please register your product at ikelite.com within 15 days of purchase. Our product registration database is the best way for us to contact you in the event of a product update or recall. -
Page 2: About This Product
About this Product Thank you for your purchase of Ikelite equipment. Please read this instruction manual completely before attempting to operate or dive with this product. Please visit ikelite.com to register your product to receive information on any updates, notices, or recalls pertaining to your equipment. -
Page 3: Important Notices
Important Notices Never leave a housing in a rinse tank, even if it is the only » system in the tank. The vast majority of catastrophic floods happen when the user walks away from a housing while it is in the rinse tank. -
Page 4: Table Of Contents
Contents Product Registration About this Product Included in the Box Important Notices Getting to Know Your Housing Getting to Know Your Housing - cont. Setting Up Your Camera Pre-Installation Checklist Setting Up Your Housing Opening the Housing Inserting the Camera Attaching the Hotshoe Closing the Housing Installing Zoom Clamp and Gear Sleeve... - Page 5 Housing and O-ring Storage Lubricant Housing Maintenance Control Maintenance Photo Tips Limited Warranty Service and Repairs Contact Us...
-
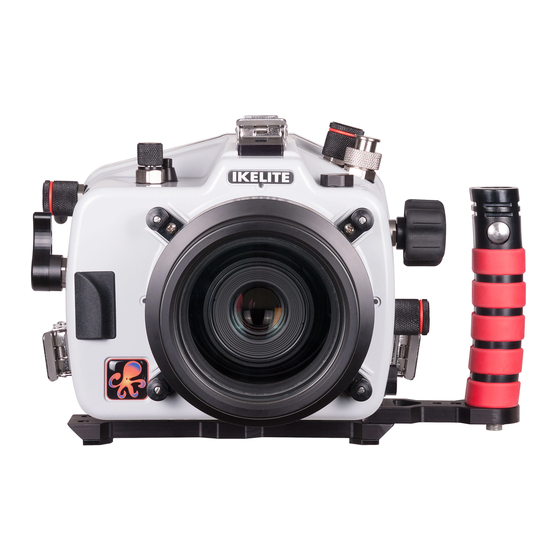
Page 6: Getting To Know Your Housing
Getting to Know Your Housing Shutter Button AF-ON AF Start Button Mode Dial Main Dial ISO Speed TTL Bulkhead and Cap Lid Snap Quick-release Button IKELITE Port Snap Tray Mount Tray Tray Extension and Quick Release Handle... -
Page 7: Getting To Know Your Housing - Cont
Getting to Know Your Housing - cont. Live View / Movie Shooting Switch Power Switch Zoom Control START/ STOP MENU INFO. Lens Release Button AE/FE Lock Button Start/Stop Button START/ AF Point STOP Selection MENU INFO. Quick Control Button Quick Control Dial Playback Button Up Cursor... -
Page 8: Setting Up Your Camera
Setting Up Your Camera Pre-Installation Checklist 1. Insert a fully charged camera battery. 2. Insert a properly formatted memory card. 3. Set Touch Control to “Disable.” 4. Set Red-eye reduc. to “Disable.” 5. Set Flash sync. speed in Av mode to “1/250-1/60sec. A.” NOTE: When using a non-Canon Manual Flash, set Silent LV Shooting to “Disable.”... -
Page 9: Inserting The Camera
3. Repeat with remaining lid snaps. 4. Remove the housing back. Inserting the Camera 1. Remove any lanyard or neck strap which may be attached to the camera. 2. Check to see whether the camera’s lens will fit through the port opening of the housing. -
Page 10: Attaching The Hotshoe
Attaching the Hotshoe 1. Slide hotshoe into camera hotshoe mount until it stops. NOTE: Hotshoe must be all the way forward in the camera mount to ensure a good electrical connection. Hotshoe Camera Hotshoe Mount Closing the Housing 1. Make sure the o-ring is clean and in its proper location on the back of the housing. -
Page 11: Installing Zoom Clamp And Gear Sleeve
6. Check the o-ring seal and control functions. The o-ring should form a uniform, solid line around the back of the housing. There will be a small, even gap around the housing between the housing back and the housing front. Installing Zoom Clamp and Gear Sleeve If you are using zoom, determine if you have a Type 1 or Type 2 lens and attach zoom clamp and sleeve as shown. -
Page 12: Attaching The Lens Port
Attaching the Lens Port 1. Lightly lubricate the o-ring on the port extension base. When properly lubricated, the o-ring should have an even, slightly shiny appearance. Wipe off any excess lubricant. 2. Slide the port over the lens and secure to the front of the housing using the four installed Port Locks. -
Page 13: Manual Focusing
Manual Focusing Ikelite DSLR housings are designed for auto-focus DSLR cameras and lenses. Manual focusing is not recommended. In some cases, if you desire to manually focus a lens, the Zoom Clamp can be moved onto the lens’s Manual Focus Ring. -
Page 14: Setting Up An External Strobe
Ikelite DS strobes. All other strobes will operate as manual flash only, regardless of the switch position. When the switch is set to TTL using Ikelite DS strobes, you are in TTL flash mode and there will be a preflash. When the switch is set to manual with DS strobes, the preflash is disabled and you can set the strobe power manually. -
Page 15: About Sync Cords
When a compatible Ikelite DS strobe is attached via sync cord, circuitry built into the housing allows the strobe to communicate directly with the camera. The circuitry will adjust the strobe’s power for perfect exposure. -
Page 16: Maintenance
5. Attach the other end of the sync cord to the bulkhead on your strobe. 6. If using an Ikelite strobe, set the strobe to TTL. If using a non-Ikelite strobe, set the strobe to manual flash and select a manual power setting. -
Page 17: Travel And Storage
2. NEVER leave your housing in a fresh water rinse tank. Collisions with other equipment can cause scratches or damage to your equipment. 3. Stow the housing in a shaded place where it is protected from impact or overheating. If no shade is available, we recommend covering the housing with a towel or cloth. - Page 18 • Take the housing underwater without a camera installed to ensure that the leaking has been corrected. Photos are over-exposed (too light) • Adjust aperture (smaller), shutter speed (faster), or ISO (lower) setting. • Move light(s) farther away from your subject. •...
-
Page 19: Spare Parts
Button(s) or control(s) do not line up • Ensure that nothing is preventing the camera from going into the housing. • Push the camera mounting plate forward until it is flush with the housing base plate. • Tighten camera mounting bolt. Camera is not functioning normally underwater •... -
Page 20: Maintenance
Ikelite provides silicone lubricant with the housing to lightly lubricate controls and o-rings. We recommend you use ONLY Ikelite lubricant on Ikelite products. Other brands may cause Ikelite o-rings to swell and not seal properly. Lubricant is not a sealant; it is used to reduce friction. -
Page 21: Housing Maintenance
Housing Maintenance Your Ikelite Digital Housing should be given the same care and attention as your other photographic equipment. In addition to normal maintenance, we recommend that the housing be returned to Ikelite periodically to be checked and pressure tested. - Page 22 After a few minutes, operate the push button. If this does not correct the problem, return the housing to Ikelite for maintenance. If you are on a trip and unable to return the housing immediately, a push button may be lubricated by pressing and holding the push button all the way in.
- Page 23 In the unlikely event one of the control shafts sticks or becomes difficult to operate, you can remove the control from the housing and lubricate it, or return the housing to Ikelite for maintenance. Your housing may feature both round and hex style control glands. To remove a control in a round style gland, loosen the set screw in the knob (hex head wrench required);...
- Page 24 To lubricate the control, gently pull on the knob until the stainless steel shaft is exposed. Lightly lubricate the shaft, then move the shaft in and out several times. This will lubricate the x-ring in the Ikelite control gland. This should be done before using the housing after a prolonged storage period, or once a week when the housing is in constant use.
-
Page 25: Photo Tips
If there is salt or dirt build-up on the exposed control shaft, clean the shaft. Open the housing and gently slide the control shaft out of the control gland. Clean and lightly lubricate the shaft, including the end of the shaft. Slide the shaft back into the control gland and gently slide the shaft back and forth a few times without fully removing the shaft from the gland. - Page 26 Do not shoot down on subjects as they will quite often blend into the background and be difficult to see in the photograph. Shoot subjects straight on or shoot up at a slight angle using the blue water as a contrasting background.
-
Page 27: Limited Warranty
Except as mentioned above, no other warranty expressed or implied applies to this Ikelite product. Service and Repairs Ikelite is most interested in performing any service to ensure that all products perform as intended. Evidence of purchase date must be provided to obtain warranty service. -
Page 28: Contact Us
If you have any questions about your product or need advice on getting the images you want, please get in touch with us and we’ll do everything we can to help you capture your unique perspective. Ikelite Underwater Systems 50 W 33rd St Indianapolis, IN 46208 USA (317) 923-4523 ikelite@ikelite.com...
Need help?
Do you have a question about the 6870.80 and is the answer not in the manual?
Questions and answers