Table of Contents
Advertisement
Available languages
Available languages
Secadora a
gas o eléctrica
Manual de uso
y cuidado
Este manual contiene información útil,
por favor léalo antes de operar su secadora.
SEGURIDAD DE LA SECADORA .............................................. 2
ESPECIFICACIONES TÉCNICAS .............................................. 4
TENGA UN BUEN FLUJO DE AIRE .......................................... 5
AHORRO DE ENERGÍA ............................................................. 5
PANEL DE CONTROL Y CARACTERÍSTICAS ......................... 6
GUÍA DE CICLOS ....................................................................... 7
USO DE SU SECADORA ........................................................... 8
MANTENIMIENTO DE LA SECADORA ................................... 10
SOLUCIÓN DE PROBLEMAS .................................................. 12
z
PÓLI A DE GARANTÍA ............................................................. 26
AYUDA O SERVICIO TÉCNICO ...................CONTRAPORTADA
W10791286 A
Índice
Electric or Gas Dryer
Use and Care Guide
This Use and Care Guide contains important information,
please read it before operating your Dryer.
Table of Contents
DRYER SAFETY ....................................................................... 14
TECHNICAL SPECIFICATIONS ............................................... 16
FOR GOOD AIR FLOW ............................................................ 17
BETTER FABRIC CARE AND ENERGY SAVINGS.................. 17
CONTROL PANEL AND FEATURES ....................................... 18
CYCLE GUIDE .......................................................................... 19
USING YOUR DRYER .............................................................. 20
DRYER MAINTENANCE .......................................................... 22
TROUBLESHOOTING .............................................................. 24
WARRANTY POLICY ................................................................ 26
ASSISTANCE OR SERVICE ..................................BACK COVER
Advertisement
Table of Contents

Related Manuals for Whirlpool 7MWGD1750EQ


Summary of Contents for Whirlpool 7MWGD1750EQ
-
Page 1: Table Of Contents
Secadora a Electric or Gas Dryer gas o eléctrica Use and Care Guide Manual de uso y cuidado Este manual contiene información útil, This Use and Care Guide contains important information, por favor léalo antes de operar su secadora. please read it before operating your Dryer. Índice Table of Contents SEGURIDAD DE LA SECADORA .......... -
Page 2: Seguridad De La Secadora
Seguridad de la secadora... - Page 3 Si el cordón de alimentación es dañado, éste debe ser reemplazado por el fabricante o su agente de servicio o por personal calificado; Si su secadora no cuenta con córdon de alimentación se deben incorporar medios de desconección a la instalación fija de acuerdo con las reglas de instalación.
-
Page 4: Especificaciones Técnicas
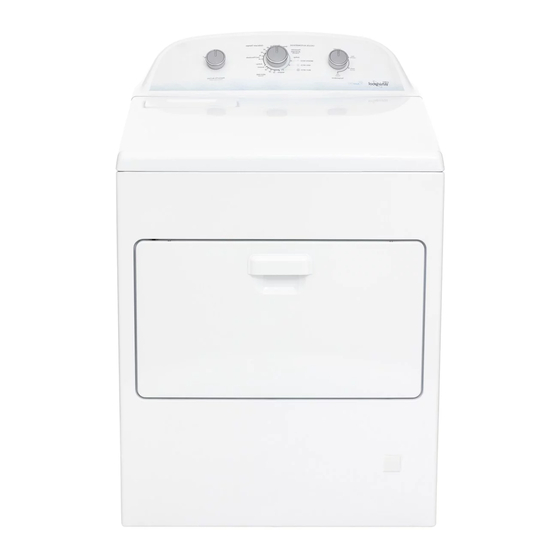
Especificaciones Técnicas Secadoras Whirlpool Modelos a Gas Modelos 7MWGD1750 7MWGD2150 7MWGD183 0 7MWGD1850 7MWGD1950 Frecuencia de operación 60 Hz 120 V~ Tensión de alimentación Altura 112 cm Ancho 74 cm Profundidad 72 cm Capacidad Máxima Capacidad Consumo de Corriente (ropa húmeda) -
Page 5: Revise Que El Sistema De Ventilacióntenga Un Buen Flujo De Aire
Buen flujo de aire Además del calor, las secadoras también necesitan un buen flujo de aire para secar las prendas eficazmente. La ventilación adecuada reducirá la duración del secado y mejorará su ahorro de energía. Consulte las Instrucciones de instalación. El sistema de ventilación sujeto a la secadora juega un papel muy importante para el flujo de aire adecuado. -
Page 6: Panel De Control Y Características
Panel de control y características No todas las opciones están disponibles para todos los modelos. La apariencia puede variar. TEMPERATURA Gire la perilla de la ALARMA FIN DE CICLO para Seleccione una temperatura de secado según las telas de seleccionar el ajuste deseado (Encendido – Si o Apagado su carga. -
Page 7: Guía De Ciclos
Guía de ciclos automáticos No todos los ciclos y ajustes están disponibles en todos los modelos. SENSOR DRY XPERT - Detecta la humedad en la carga o la temperatura del aire y se apaga cuando la carga alcanza el nivel de sequedad seleccionado. Artículos Ciclo: Opciones... -
Page 8: Uso De Su Secadora
Uso de su secadora ADVERTENCIA: A fin de reducir el riesgo de incendio, choque eléctrico o daños personales, lea las “Instrucciones Importantes Para Seguridad” antes de operar esta secadora. Antes de usar la secadora, limpie el tambor de la misma con un paño húmedo para quitar el polvo que se acumuló... - Page 9 Seleccione el ciclo deseado Seleccione la Alarma Fin de Ciclo Gire la perilla de la ALARMA FIN DE CICLO para seleccionar el ajuste deseado (Encendido – Si o Apagado - No). La señal Apagado de fin de ciclo emite un sonido audible una vez que el ciclo de secado ha terminado.
-
Page 10: Mantenimiento De La Secadora
Mantenimiento de la secadora Limpieza del filtro de pelusa Limpieza del lugar donde está la secadora Limpieza de cada carga El filtro de pelusa está ubicado dentro de la secadora. Un Mantenga el área donde está la secadora despejada y filtro obstruido con pelusa puede aumentar el tiempo de libre de artículos que pudieran obstruir el flujo de aire para secado. -
Page 11: Cambio De La Luz Del Tambor
Para las secadoras a gas: Cuidado para las vacaciones, el 1. Desenchufe la secadora o desconecte el suministro almacenaje o en caso de mudanza de energía. Cuidado durante la falta de uso o el 2. Cierre la válvula de cierre en la línea de suministro almacenamiento de gas. -
Page 12: Solución De Problemas
Solución de problemas Pruebe primero las soluciones sugeridas aquí o consulte la hoja de garantia incluida en la secadora para obtener asistencia y posiblemente evitar una visita de servicio. Si usted experimenta Causas posibles Solución lo siguiente Las prendas no se secan Filtro de pelusa obstruido con pelusa. - Page 13 Solución de problemas Pruebe primero las soluciones sugeridas aquí o consulte la hoja de garantia incluida en la secadora, para obtener asistencia y posiblemente evitar una visita de servicio. Si usted experimenta Causas posibles Solución lo siguiente Sin calor Hay un fusible de la casa fundido o El tambor quizás rote pero sin calor.
-
Page 14: Dryer Safety
Dryer Safety... -
Page 16: Technical Specifications
Technical Specifications Whirlpool Dryers Gas Models Models 7MWGD1750 7MWGD2150 7MWGD183 0 7MWGD1850 7MWGD1950 Frequency 60 Hz 120 V~ Power Height 112 cm Width 74 cm Depth 72 cm Capacity Current Input Max Capacity (wet clothes) 7MWGD1750 17 kg 18 kg... -
Page 17: Check Your Vent System For Good Air Flow
Good air flow Along with heat, dryers require good air flow to efficiently dry laundry. Proper venting will reduce your drying times and improve your energy savings. See “Installation Instructions.” The venting system attached to the dryer plays a big role in good air flow. -
Page 18: Control Panel And Features
Control Panel & Features Not all features and options are available on all models. Appearance may vary. TEMPERATURE (TEMPERATURA) Turn the Cycle Signal knob to select the desired setting Select a drying temperature based on the fabrics in your (Yes or No). Press the Cycle Signal knob to start the dryer. load. -
Page 19: Cycle Guide
Cycle Guide— Automatic Cycles (Ciclos Automáticos) Not all cycles and settings are available on all models. SENSOR DRY XPERT - Senses moisture in the load or air temperature and shuts off when the load reaches the selected dryness level. Items to dry: Cycle: Temperature: Available... -
Page 20: Using Your Dryer
Using Your Dryer WARNING: To reduce the risk of fire, electric shock, or injury to persons, read the IMPORTANT SAFETY INSTRUCTIONS before operating this dryer. Before using your dryer, wipe the dryer drum with a damp cloth to remove dust from storing and shipping. Clean the lint screen Load the dryer Clean the lint screen before each load. - Page 21 Select the desired cycle Select Cycle Signal (Alarma Fin de Ciclo) if desired Turn the Cycle Signal knob to select the desired setting (Yes or No). The Cycle Signal alarm produces an audible sound when the Select the desired cycle for your load. See the "Cycle Guide" for drying cycle is fnished.
-
Page 22: Dryer Maintenance
Dryer Maintenance Cleaning the lint screen Cleaning the dryer location Every load cleaning Keep dryer area clear and free from items that would block the air flow for proper dryer operation. This includes The lint screen is located in the dryer. A screen blocked by clearing piles of laundry in front of the dryer. -
Page 23: Changing The Drum Light
Vacation, storage, and moving care Changing the drum light (on some models) Non-Use or Storage Care 1. Unplug dryer or disconnect power. Operate your dryer only when you are at home. If you will 2. Open the dryer door. Locate the light bulb cover on the be on vacation or not using your dryer for an extended back wall of the dryer. -
Page 24: Troubleshooting
Troubleshooting First try the solutions suggested here or consult the warranty sheet in the dryer for assistance and to possibly avoid a service call. If you experience Possible Causes Solution Lint screen clogged with lint. Lint screen should be cleaned before each load. Clothes are not drying satisfactorily, drying Has the Air Only (No Heat) - Page 25 Troubleshooting First try the solutions suggested here or consult the warranty sheet in the dryer for assistance and to possibly avoid a service call. If you experience Solution Possible Causes Cycle time too short Automatic cycle ending early. The load may not be contacting the sensor strips. Level the dryer.
-
Page 26: Póli A De Garantía
Procedimiento para hacer efectiva la garantía: Comunicarse al Centro de Contacto Whirlpool (En Monterrey 83.29.21.00 y desde el Resto de la República 01 (81) 83.29.21.00) para realizar un requerimiento de servicio. El tiempo de reparación será en un plazo no mayor a 30 días, a partir de la fecha de requerimiento. En la fecha de su servicio, presentar la Póliza de Garantía con los datos del Formato de Identificación del equipo, así... - Page 27 Para otros países de Latinoamérica, consulte nuestro Certificado de Garantía Latinoamérica y visite nuestra página web de Whirlpool Latinoamérica www.whirlpool-latam.com, seleccione su país y luego Menú Atención al Cliente. For other countries in Latin America, see our Warranty Card Latin America and visit our Whirlpool Latinoamerica website www.whirlpool-latam.com ®/™ ©2015 Whirlpool. Todos los derechos reservados.
Need help?
Do you have a question about the 7MWGD1750EQ and is the answer not in the manual?
Questions and answers